Table of Contents
Advertisement
Advertisement
Table of Contents

Subscribe to Our Youtube Channel
Related Manuals for Blue Clean AR390SS


Summary of Contents for Blue Clean AR390SS
- Page 1 Instruction Manual Model AR390SS Customer Help Line 1-866-235-5112 WARNING: To reduce the risk of injury, the user must read and understand the instructions before using this product. SAVE THESE INSTRUCTIONS FOR FUTURE REFERENCE www.arblueclean.com AR390SS-92733-DR...
-
Page 2: Quick Start
uick tart uide ackage ontent 1. Power washer unit 2. Manual 3. Nozzle cleaning wire (may be taped to the manual) 4. High pressure hose 5. Spray gun holder 6. Nozzle tray 7. Screws (1 for nozzle tray) 0° - Red 8. - Page 3 8. Connect lances to spray gun, insert lance into spray gun, push together and at the same time twist clockwise to lock in place. Removing push together and twist counterclockwise then pull apart. Trigger Lock Trigger Unlock 7. Press front button in to lock the trigger. Press back button to unlock trigger.
-
Page 4: Table Of Contents
Max Temp Volts Amps Weight (lbs) (lbs/sq/in) (gal/per/min) AR390SS 2,000 122° F imited arranty This product is under warranty to the original retail consumer against defects in material and workmanship for a period of 1 (one) year and is a complete “bumper to bumper” warranty including the spray gun, the high pressure hose and all accessories from the date of purchase. -
Page 5: Introduction
Congratulations on the purchase of your BLUE CLEAN POWER WASHER! Your BLUE CLEAN POWER WASHER is a power tool in every sense of the word that may be used outside your house and in. It is one of the finest most powerful home-use power washers in the marketplace today. - Page 6 • When you press the power switch to turn off • Never disconnect the high pressure hose the power washer, water pressure may remain from the power washer while the system is in the system. To discharge the pressure, pressurized. point the spray gun in a safe direction and •...
-
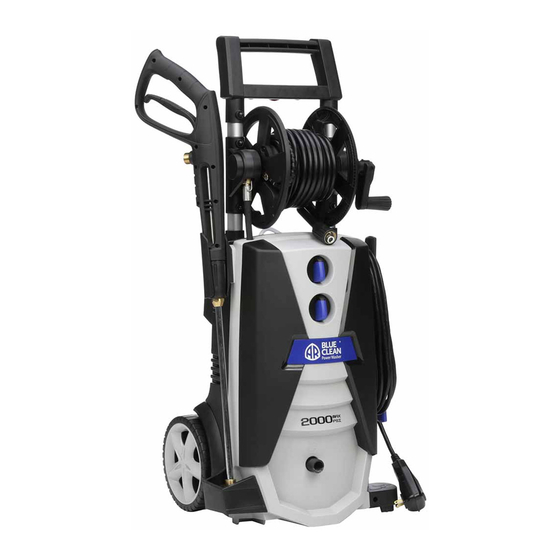
Page 7: Package Content
ackage ontent 1. Power washer unit 2. Manual 3. Nozzle cleaning wire (may be taped to the manual) 4. High pressure hose 5. Spray gun holder 6. Nozzle tray 7. Screws (1 for nozzle tray) 8. Rotary nozzle 9. Quick connect nozzles (0°, 25°, Soap) 10. -
Page 8: Unpacking & Assembly
& a nPacking SSembLy • After unpacking the BLUE CLEAN POWER WASHER, lay out parts and accessories. Familiarize yourself with the parts in the package by comparing them to those listed on the “PACKAGE CONTENTS” page. • The BLUE CLEAN POWER WASHER requires some minor assembly. You’ll need a Phillips screwdriver to install the high pressure hose hook and the nozzle tray. - Page 9 High Pressure Hose • Screw the high pressure hose (clockwise) on the back of the unit at the bottom (Fig. 4). Pull back the collar and insert o-ring post into the water outlet far enough so the collar can thread onto the outlet threads until hand tight.
- Page 10 Spray Gun • To lock the trigger of the spray gun pointing the gun away from you and push the lock button front to lock, (Fig. 7), after doing so, squeeze or pull the trigger to make sure it is locked and will not move.
- Page 11 Always test a small area to avoid chance of damaging the surface. (Fig. 11) Fig. 11 IMPORTANT NOTE: When applying detergent use the soap nozzle. When using the detergent, fill it with a properly formulated detergent or cleaner with water ratio •...
- Page 12 Replace the washer filter and attach garden hose to the blue collar. (Fig. 16 & 17) • Fig. 17 Fig. 16 • You have now completed the assembly of your BLUE CLEAN POWER WASHER and are now ready to begin using your electric power washer. Read and observe all safety instructions.
-
Page 13: Operating Instructions
Perating nStrUctionS *!Turn on the water supply at the faucet.!* (Fig. 18) OFF/0 OFF/0 ON/I ON/I Fig. 18 Fig. 19 Powering Up • Make sure the “ON/OFF” switch is in the “OFF” position. The power switch has international symbols for ‘on’ and ‘off’: On (|) Off (O), (Fig. 19). •... -
Page 14: How To Clean
Lean Cleaning nozzles A clogged or partially clogged nozzle can cause significant reduction of water pressure coming out • of the nozzle and/or cause the unit to pulsate while spraying. • Turn off the unit • Turn off the water supply to the unit •... - Page 15 • Never use a narrow high pressure stream of water or the turbo lance on soft surfaces susceptible to damage. • Use the 25° angle quick connect nozzle when cleaning windows. Be sure to place the nozzle approximately four to five feet away from the window with the nozzle at forty five degree angle. Squeeze the trigger and vary the spray pattern and angle until optimum cleaning efficiency is achieved.
-
Page 16: Storage
torage • Remove lance from the gun and place in the accessory holder. Place the gun in the accessory holder one the side. Lances are placed into any of the slots in the back of the unit. Make sure to discard any remaining detergent from the tank. -
Page 17: Pump Saver
Pump Saver is a product that protects and prolongs the life of the pump. This will keep the internal parts of the pump lubricated and protected from freezing while being stored in ALL climates. It also assists with protection from internal corrosion. The Blue Clean part # is: PW64511 (16oz. bottle). Order online at www.arblueclean.com Pump Saver Instructions Follow the previous storage instructions for your power washer. -
Page 18: Replacement Parts
ePLacement artS 0° - Red 25° - Green Soap - Black Pos. Description Part Number Qty. Detergent Tank PW3440710 Hose (QC) PW4220660 Spray Gun PW4100781 Rotary Nozzle PW4220680 Quick Connect Nozzle 0° - Red PW4220700 Quick Connect Nozzle 25° - Green PW4220710 Quick Connect Nozzle Soap - Black PW4220690... -
Page 19: Troubleshooting And Faq
roUbLeSHooting and Unit will not turn on. Make sure the power washer is in the “OFF” position. Plug in the electrical cord to a grounded 120 volt outlet (no electrical extension cord should be used). If the electrical cord will not plug into your outlet, your electrical outlet is not properly grounded and should not be used. - Page 20 Model AR390SS Cleaning and troubleshooting tips, manuals and other helpful information are available on our website. For parts and accessories for your Blue Clean Washer, visit www.arblueclean.com. Ordering is easy and all major credit cards are accepted. A.R. NORTH AMERICA, INC.
Need help?
Do you have a question about the AR390SS and is the answer not in the manual?
Questions and answers