Advertisement

Installation & Operator's
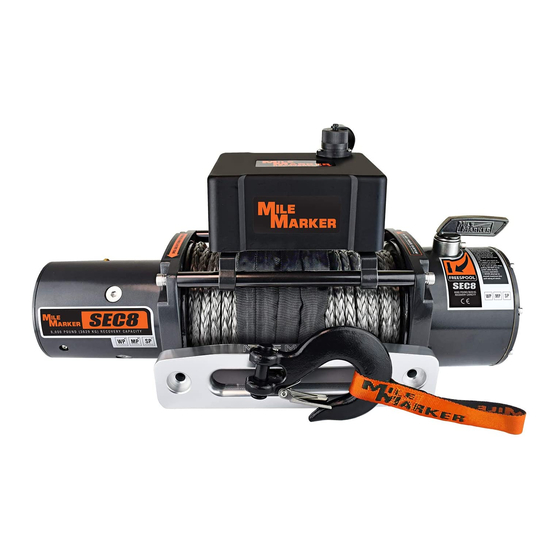
SEC8
8,000 lbs.
SEC95
9,5000 lbs.
SEC12
12,000 lbs.
SEC15
15,000 lbs.
SEC4500
4,500 lbs.
2121 BLOUNT ROAD
POMPANO BEACH, FL 33069 USA
MILEMARKER.COM
INFO@MILEMARKER.COM
800.886.8647
TOLL FREE
Manual
77-53141W
(SYNTHETIC ROPE)
77-50141W
(STEEL CABLE)
76-53246BW
(SYNTHETIC ROPE)
76-50246BW
(STEEL CABLE)
76-53251BW
(SYNTHETIC ROPE)
76-50251BW
(STEEL CABLE)
76-53260W
(SYNTHETIC ROPE)
76-50260W
(STEEL CABLE)
76-50115BW
(STEEL CABLE)

Advertisement

Table of Contents
loading

Summary of Contents for Mile Marker SEC8

  • Page 1 Installation & Operator’s Manual SEC8 77-53141W (SYNTHETIC ROPE) 77-50141W 8,000 lbs. (STEEL CABLE) SEC95 76-53246BW (SYNTHETIC ROPE) 76-50246BW 9,5000 lbs. (STEEL CABLE) SEC12 76-53251BW (SYNTHETIC ROPE) 76-50251BW 12,000 lbs. (STEEL CABLE) SEC15 76-53260W (SYNTHETIC ROPE) 76-50260W 15,000 lbs. (STEEL CABLE)
  • Page 2: Table Of Contents

    TABLE OF CONTENTS Safety Warnings ........2 Precautions .......... 3 Getting Started: Unpacking Your Winch ....4 Winch Mounting ......4 Clocking Instructions ......5 Control Box Installation ......6 Wiring Instructions ......8 Winch Operation ........9 Winching Tips & Techniques ....10 Winch Maintenance ......
  • Page 3: Safety Warnings

    Any substitute must be IDENTICAL in strength, quality, lay and stranding to the Mile Marker cable originally supplied. 4. WORKING AREA CONDITIONS: Keep the working area well lit. Do not use this winch in the presence of flammable gases or liquids.
  • Page 4: Precautions

    PRECAUTIONS 1. Keeps hands and body away from Fairlead (cable intake slot) when operating. 2. Secure vehicle in position before using winch. 3. Do not exceed winch load weight capacity (see Winch Specifications). 4. Be certain winch is properly bolted to a structure (or vehicle) that can hold the winch load. 5.
  • Page 5: Getting Started

    Unpacking Your Winch Unpack your new Mile Marker winch and ensure that all the parts are included by referring to parts list and exploded view drawings provided in this manual. NOTE: If you find any missing or broken parts, please call Mile Marker as soon as possible at the number present on the front page of this manual.
  • Page 6: Clocking Instructions

    CLOCKING INSTRUCTIONS Winch gear housing can be clocked in 8 positions enabling the user to position the clutch lever at 8 equidistant locations (0°, 45°, 90°….360°). 1. Remove Gear Housing from Tie Bars (Fig. 1-2). 2. Remove the 8 bolts in the Gear Housing Leg (Fig. 1-3). 3.
  • Page 7: Control Box Installation

    CONTROL BOX INSTALLATION NOTE: Your Mile Marker Control Box can either be mounted to the winch or in a remote location. However, Mile Marker recommends you to mount it to the winch following the instructions below. If you choose to mount it in a remote location, please ensure that: (a) the location does not interfere with any vehicle’s moving/functioning parts, and (b) you use electrical cables with similar or better specifications...
  • Page 8 Mounting Control Box on Tiebars 1. Mount the control box to mounting brackets using 10 mm wrench (Fig 2-8). 2. Mount control box on the tie bars by attaching front end first and pushing down to snap in the back end (Fig. 2-9). 3.
  • Page 9: Wiring Instructions

    DO NOT CONNECT POWER CABLES TO BATTERY UNTIL FINAL STEP OF INSTALLATION! 2-12: Complete Wiring Schematic: SEC8 2-13: Black Cables (ground): Remove bolt, Attach both large and small cables, and return bolt to motor. 2-14: Complete Wiring to Battery...
  • Page 10: Winch Operation

    CAUTION: Before you start using your new Mile Marker winch, you will have to re-wind the entire cable on the drum under a load of at least 500 lbs (227 Kg) starting with at least 5 wraps on the initial layer. Failure to do so will result in the outer wraps pressing against the inner wraps resulting in the damage of the cable.
  • Page 11: Winching Tips & Techniques

    Safety Tips • NEVER DISENGAGE CLUTCH LEVER WHEN THERE IS A LOAD ON THE WINCH. Mile Marker electric winches utilize an automatic load holding brake, therefore no adjustment to clutch is needed to maintain load.
  • Page 12 The cable should be replaced immediately if any sign of burrs or broken strands are evident. A frayed cable with broken strands should be replaced immediately. Always replace the cable with a Mile Marker recommended replacement part. Any substitution must be IDENTICAL in strength, quality, lay and stranding.
  • Page 13: Winch Maintenance

    •After every use of the winch, inspect the cable for damages such as kinks, broken strands etc. When damaged, replace the cable immediately! CAUTION: It is recommended that you replace the cable with superior Mile Marker cables. If replacing from other sources, carefully compare for the maximum load capacity of the cable with that mentioned in the Specifications Section of this manual.
  • Page 14: Winch Features And Specs

    WINCH FEATURES & SPECS FEATURES : SPECIFICATIONS (8K): PERFORMANCE (8K): •4.8 HP Series Wound Motor Rated line pull 8000 lbs (3629 Kg) Line Pull Line Speed Motor Current •Rugged Planetary Gear Sets •Clockable Gear Housing amps @ 12 V Gear Train 3 Stage planetary •Fast Line Speeds Gear Ratio...
  • Page 15 WINCH FEATURES & SPECS FEATURES: SPECIFICATIONS (9.5K): SPECIFICATIONS (12K): •Powerful Series Wound Motor Gear Train 3 Stage planetary Gear Train 3 Stage planetary •Rugged Planetary Gear Sets Gear Ratio 296:1 Gear Ratio 296:1 •Clockable Gear Housing Series wound, 4.8 hp (3.6 kw), 12 Volt, Series wound, 4.8 hp (3.6 kw), 12 Volt, Motor Motor...
  • Page 16 WINCH FEATURES & SPECS FEATURES: SPECIFICATIONS (15K): FEATURES: SPECIFICATIONS (4.5K): •6.8 HP Series Wound Motor •Low Amperage Draw Rated line pull 15000 lbs (6810 kgs), Single line Rated line pull 4500 lbs (2043 kg) •Rugged Planetary Gear Sets •Rugged Planetary Gear Sets (single line) Gear Train 3 Stage planetary...
  • Page 17: Parts List

    PARTS BREAKDOWN & ASSEMBLY ITEM PART# DESCRIPTION ITEM PART# DESCRIPTION 77-50141W-01 Dry Bearing 77-50141W-27 Cable 77-50141W-02 Screw M4 x 12 77-50141W-28 Brake/Shaft Assy 77-50141W-03 Spring Washer M4 77-50141W-29 Tie Bar 77-50141W-04 End Bearing 77-50141W-30 Motor End 77-50141W-05 Spring Washer M8 77-50141W-31 Solenoid Assy 77-50141W-06...
  • Page 18 PARTS BREAKDOWN & ASSEMBLY with Synthetic Rope ITEM PART# DESCRIPTION ITEM PART# DESCRIPTION 77-50141W-01 Dry Bearing 77-50141W-26 Screw 77-50141W-02 Screw M4 x 12 19-52132-96 Synthetic Rope 77-50141W-28 Brake/Shaft Assy 77-50141W-03 Spring Washer M4 77-50141W-04 End Bearing 77-50141W-29 Tie Bar 77-50141W-05 Spring Washer M8 77-50141W-30 Motor End...
  • Page 19 PARTS BREAKDOWN & ASSEMBLY ITEM PART# DESCRIPTION ITEM PART# DESCRIPTION 77-50141W-01 Dry Bearing 76-50256BW-27 Cable 77-50141W-02 Screw M4 x 12 77-50141W-28 Brake/Shaft Assy 77-50141W-03 Spring Washer M4 77-50141W-29 Tie Bar 77-50141W-04 End Bearing 77-50141W-30 Motor End 77-50141W-05 Spring Washer M8 77-50141W-31 Solenoid Assy 77-50141W-06...
  • Page 20 PARTS BREAKDOWN & ASSEMBLY ITEM PART# DESCRIPTION ITEM PART# DESCRIPTION 77-50141W-01 Dry Bearing 76-50256BW-27 Cable 77-50141W-02 Screw M4 x 12 77-50141W-28 Brake/Shaft Assy 77-50141W-29 Tie Bar 77-50141W-03 Spring Washer M4 77-50141W-04 End Bearing 77-50141W-30 Motor End 77-50141W-05 Spring Washer M8 77-50141W-31 Solenoid Assy 77-50141W-06...
  • Page 21 PARTS BREAKDOWN & ASSEMBLY ITEM PART# DESCRIPTION ITEM PART# DESCRIPTION 77-50141W-01 Dry Bearing 76-50256BW-27 Cable 77-50141W-02 Screw M4 x 12 77-50141W-28 Brake/Shaft Assy 77-50141W-03 Spring Washer M4 77-50141W-29 Tie Bar 77-50141W-04 End Bearing 77-50141W-30 Motor End 77-50141W-05 Spring Washer M8 77-50141W-31 Solenoid Assy 77-50141W-06...
  • Page 22 PARTS BREAKDOWN & ASSEMBLY ITEM PART# DESCRIPTION ITEM PART# DESCRIPTION 77-50141W-01 Dry Bearing 76-50115BW-29 Tie Bar 77-50141W-30 Motor End 77-50141W-02 Screw M4 x 12 77-50141W-31 Solenoid Assy 77-50141W-03 Spring Washer M4 77-50141W-04 End Bearing 77-50141W-32 Solenoid Bracket 1 77-50141W-05 Spring Washer M8 77-50141W-33 Solenoid Bracket 2 77-50141W-06...
  • Page 23: Warranty

    After receiving the Returns Good Authorization (RGA) Number: Attach the RGA Number, your name, address, phone number and a detailed description of problem relating to malfunc- tion and a copy of a bill of sale. To obtain any warranty coverage, it is absolutely necessary that you present proof of purchase acceptable to Mile Marker, such as a purchase receipt.
  • Page 24 2121 BLOUNT ROAD POMPANO BEACH, FL 33069 USA 800.886.8647 MILEMARKER.COM INFO@MILEMARKER.COM...

Table of Contents