
Related Manuals for Belden GRASS VALLEY ADX-1901


Summary of Contents for Belden GRASS VALLEY ADX-1901
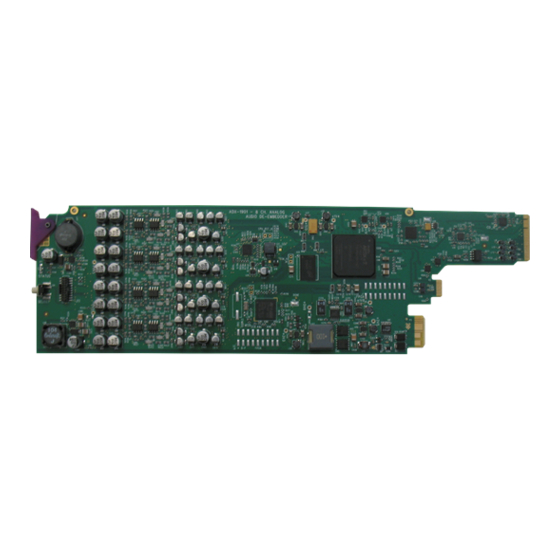
- Page 1 ADX-1901 3G/HD/SD 8 Channel Analog Audio De-Embedder Guide to Installation and Operation M3005-9900-101 2015-04-29...
- Page 2 GUIDE TO INSTALLATION AND OPERATION Electromagnetic Compatibility This equipment has been tested for verification of compliance with FCC Part 15, Subpart B requirements for Class A digital devices. NOTE: This equipment has been tested and found to comply with the limits for a Class A digital device, pursuant to part 15 of the FCC Rules.
-
Page 3: Table Of Contents
GUIDE TO INSTALLATION AND OPERATION Table of Contents ADX-1901 3G/HD/SD 8 Channel Analog Audio De- Embedder ..........1 Introduction ............................1 Features .............................. 1 Functional Block Diagram ........................2 Front Card-edge Interface ........................2 Installation ..........................3 Installation of Rear Connector Panels ....................3 ADX-1901 Card Installation ........................ - Page 4 GUIDE TO INSTALLATION AND OPERATION 5.10.2 Meter Ballistics Config tab ....................29 5.11 Test panel ............................30 5.12 Factory/Presets panel ........................31 5.13 Alarm Config panel ..........................33 5.14 Info panel ............................36 Specifications ........................38 Grass Valley Technical Support ................... 40 ANNEX 1 –...
-
Page 5: Adx-1901 3G/Hd/Sd 8 Channel Analog Audio De- Embedder
GUIDE TO INSTALLATION AND OPERATION 1 ADX-1901 3G/HD/SD 8 Channel Analog Audio De- Embedder 1.1 Introduction The ADX-1901 is an advanced, high quality 24-bit 48 KHz analog audio de-embedder designed to extract eight analog audio signals from a 3G/HD/SD video signal. The ADX-1901 can process the 8 audio de-embedded channels with functions including level, channel shuffling and mixing. -
Page 6: Functional Block Diagram
GUIDE TO INSTALLATION AND OPERATION 1.3 Functional Block Diagram Figure 1.1 ADX-1901 Functional Block Diagram 1.4 Front Card-edge Interface The front card-edge of the ADX-1901 incorporates two elements: • Status LED (see section 3.2) • Select Button (see section 4) ADX-1901 Select Button Status LED... -
Page 7: Installation
GUIDE TO INSTALLATION AND OPERATION 2 Installation 2.1 Installation of Rear Connector Panels Grass Valley Densité-series cards are each associated with a rear connector panel, which must be installed in the Densité frame before the card can be inserted. The ADX-1901 card is designed to fit into Grass Valley’s Densité-2 frame. Two different rear connector panels are available for this configuration. -
Page 8: Adx-1901 Card Installation
GUIDE TO INSTALLATION AND OPERATION To install the connector panel: Note – the procedure is the same for both Densité-2 and Densité-3 frames. 1. If a card is installed in the slot whose rear panel is being changed, remove it as described above. 2. -
Page 9: Rear Panels And Connectors
GUIDE TO INSTALLATION AND OPERATION 2.4 Rear Panels and Connectors 2.4.1 Images of Rear Panel Connectors The four available rear panels are shown in the figure. Details of the inputs and outputs are described below. 2.4.2 Summary of rear panel connections ADX-1901-3SRP ADX-1901-3SRP-F ADX-1901-DRP... -
Page 10: Details Of Rear Panel Connections
GUIDE TO INSTALLATION AND OPERATION 2.4.3 Details of rear panel connections 3G/HD/SD IN – Serial digital 3G/HD/SD input Connect a serial digital video signal, conforming to the SMPTE 425M standard for 3G input signals, SMPTE 292M standard for HD input signals or SMPTE 259M standard for SD input signals, to the connector labeled 3G/HD/SD IN. The ADX-1901 will automatically switch to the detected line/frame rate format. - Page 11 GUIDE TO INSTALLATION AND OPERATION ANNEX 2 for instructions on installing and removing the SFP interface module, and for plugging and unplugging the LC-terminated fibers. The SFP modules supported by the ADX-1901 are: SFP Modules Description SFP-T-S13-LC Single fiber Tx (output) module at 1310 nm with LC/PC connector SFP-TT-S13S13-LC Dual fiber Tx (output) module at 1310 nm with LC/PC connector SFP-RT-S13-LC...
-
Page 12: User Interface
GUIDE TO INSTALLATION AND OPERATION 3 User Interface 3.1 Control options The ADX-1901 can be controlled in three different ways: • The local control panel and its push-buttons can be used to move through a menu of parameters and to adjust parameter values (see section •... -
Page 13: Local Control Using The Densité Frame Control Panel
GUIDE TO INSTALLATION AND OPERATION Audio – Silence Detection CH1 Audio – Silence Detection CH8 Audio – min loudness PGM1 Audio – min loudness PGM8 Audio – max loudness PGM1 Audio – max loudness PGM8 ... -
Page 14: Menu For Local Control
GUIDE TO INSTALLATION AND OPERATION [+] [–] Used for menu navigation and value modification [SELECT] Gives access to the next menu level. When a parameter value is shown, pushing this button once enables modification of the value using the [+] and [–] buttons; a second push confirms the new value. [ESC] Cancels the effect of parameter value changes that have not been confirmed;... -
Page 15: Remote Control Using Icontrol
GUIDE TO INSTALLATION AND OPERATION 5 Remote control using iControl The operation of the ADX-1901 may be controlled using Grass Valley’s iControl system. • This manual describes the control panels associated with the ADX-1901 and their use. • Please consult the iControl User’s Guide for information about setting up and operating iControl. In iControl Navigator or iControl Websites, double-click on the ADX-1901 icon to open the control panel. - Page 16 GUIDE TO INSTALLATION AND OPERATION If there is an error, the error status message appears in the message area without mouse-over. • If there are multiple errors, the error messages cycle so all can be seen • The icon whose status or error message is shown is highlighted with a mauve background The table below describes the various status icons that can appear, and how they are to be interpreted.
-
Page 17: Video Input/Output Panel
GUIDE TO INSTALLATION AND OPERATION Icon #4 – Analog Audio Input / Output Status Audio OK (green) Yellow alarm condition detected on 1 or more channels or programs. (yellow) Red alarm condition detected on 1 or more channels or programs. (red) Icon #5 –... -
Page 18: Video Input/Output Panel (No Fiber Support)
GUIDE TO INSTALLATION AND OPERATION 5.2.1 Video Input/Output panel (no fiber support) When the ADX-1901 is installed with a rear panel that has no fiber connectivity, the electrical input (BNC) is automatically selected, and this panel has no active functions. The current input format, or the last valid input format, is displayed in the Output Status area. -
Page 19: Metadata Panel
GUIDE TO INSTALLATION AND OPERATION Additionally, some parameters are measured and their values displayed here: • Temperature • Voltage (V) • Optical Power (dBm) • Wavelength (nm) 5.3 Metadata panel This panel contains two tabs that give access to metadata processing on the ADX-1901 card: •... -
Page 20: Audio Tab
GUIDE TO INSTALLATION AND OPERATION GPI Status: The GPI Content icon shows the presence of GPI information in the embedded timecode at the SDI input The two GPI status icons show the status of the two GPI outputs on the rear-panel RJ45 connector. GPI De-embedding: Set up the de-embedding of GPI data from the input data streams. -
Page 21: Audio Inputs Panel
GUIDE TO INSTALLATION AND OPERATION SDID Associated channel pair No association, or only one audio program (default value) Channel pair 1&2 Channel pair 3&4 Channel pair 5&6 Channel pair 7&8 Channel pair 9&10 Channel pair 11&12 Channel pair 13&14 Channel pair 15&16 5.4 Audio Inputs panel The icons across the top of the panel indicate: Group Detected –... -
Page 22: The Status Tab
GUIDE TO INSTALLATION AND OPERATION 5.4.2 The Status tab: Audio Type Status – the format of audio signals in each of the 16 audio channels is indicated by the text inside each icon. Figure 5-7 Audio Input panel - Status 5.5 Audio Output panel The ADX-1901 provides eight analog audio outputs, selected from amongst the 16 channels extracted from the SDI input. -
Page 23: Config Tab
GUIDE TO INSTALLATION AND OPERATION • If you select this option, the SUM (A+B) Level pull-down is activated, allowing you to reduce the level of the summed output (0dB, -3dB or -6dB). Mix: The output channel is a mono mix of source channels selected in sub-menus SOURCE A and SOURCE B. Mute: Mute the audio channel by checking this box. -
Page 24: Audio Programs Panel
GUIDE TO INSTALLATION AND OPERATION 5.6 Audio Programs panel The Audio Programs panel provides resources to define eight audio programs, and to specify the inputs for each program. Coding Mode: Use the eight pull-downs to specify the coding of the programs that you want to appear on the 8 analog audio outputs. -
Page 25: Downmix Panel
GUIDE TO INSTALLATION AND OPERATION Each of these has predetermined values for Target, Short Term Time Window and Relative Gating, as shown in the table, and which are displayed in gray in their (inactive) pull-downs in the panel. If you select Custom in the Meter Mode pull-down, these parameters can all be selected in order to define a custom mode. -
Page 26: Loudness Panel
GUIDE TO INSTALLATION AND OPERATION Dialnorm: this pulldown selects the dialog normalization level. Select OFF to prevent the downmix from applying the dialnorm. [OFF, -12 dBFS, -13 dBFS, -14 dBFS, ………, -31 dBFS] Center Mix Level – sets the center channel downmix level to the selected value [+3 dB, +1.5dB, 0 dB, -1.5 dB, -3 dB, -4.5 dB, -6 dB, Mute] Surround Mix Level –... -
Page 27: Loudness | Pgm Panel
GUIDE TO INSTALLATION AND OPERATION Enable Loudness Monitoring turns all loudness monitoring functions ON or OFF RESET resets the measurements, and places a segment marker in the log file (but only if User Event is selected in the Segment Marker area). RUNNING / PAUSE shows the current status of the loudness monitoring. -
Page 28: Alarms Panel
GUIDE TO INSTALLATION AND OPERATION Program Channels Coding Mode Left Right Center 3/0L 2/1L 3/1L 2/2L 3/2L Measurements The Measurements area displays results from the loudness measurements performed on the selected program according to the settings made in the Loudness | Config tab and the Audio Programs panel. The three data boxes show these values: •... -
Page 29: Alarms - Metadata Panel
GUIDE TO INSTALLATION AND OPERATION Video Black Detection This alarm detects the presence of a continuous black signal on the input for a period of time; the condition is flagged only when the time duration criterion has been satisfied. Enable the alarm by selecting the checkbox. The user sets the detection parameters for this error using three sliders: •... -
Page 30: Alarms - Audio Panel
GUIDE TO INSTALLATION AND OPERATION Use the LED Color pull-down to choose the color that will be displayed by the status LED on the card edge when a SMPTE-2020 alarm is set. Choices are: • Green, Yellow, Red, Flashing Red DVITC/ATC This alarm checks the presence of a DVITC or an ATC Time Code inserted in the input video signal. - Page 31 GUIDE TO INSTALLATION AND OPERATION displayed by the status LED on the card edge when an Overload alarm is set. Choices are: • Green, Yellow, Red, Flashing Red Max Level This parameter is measured for the eight programs defined in the Audio Programs panel, and uses the Momentary Loudness values.
- Page 32 GUIDE TO INSTALLATION AND OPERATION Use the LED Color pulldown to choose the color that will be displayed by the status LED on the card edge when a Min Level alarm is set. Choices are: • Green, Yellow, Red, Flashing Red Silence •...
-
Page 33: Monitoring Panel
GUIDE TO INSTALLATION AND OPERATION 5.10 Monitoring panel The Remote Audio Level Meter (RALM) panel displays audio output level meters for the 8 analog outputs. Channels are displayed in pairs, so up to four meters will be present in the meter display window. -
Page 34: Test Panel
GUIDE TO INSTALLATION AND OPERATION The Phasemeter (located at the bottom of the RALM meter display) is a small meter that represents the phase correlation factor between the two channels of a pair. 180° 90° Figure 5-25 RALM meter display 5.11 Test panel Use the checkboxes to select whether each output pair has an EBU tone forced onto the outputs. -
Page 35: Factory/Presets Panel
GUIDE TO INSTALLATION AND OPERATION 5.12 Factory/Presets panel Factory Section Load Factory: Clicking this button will restore the card to a factory default state. Two checkboxes enable the user to choose whether to include Parameters and/or Alarms in the restoration process •... - Page 36 GUIDE TO INSTALLATION AND OPERATION Copy profile from This line shows this ADX-1901 card, and identifies it by App server, Densité frame and slot number, card type and firmware version. The Profile column has a pulldown that allows you to select which profiles you will work with, and gives these choices: •...
-
Page 37: Alarm Config Panel
GUIDE TO INSTALLATION AND OPERATION The Profile column shows the same information as is shown for the current card in the Copy profile from line, i.e. one of the following: • Current, User1, User2, User3, User4, User5, All The Select column includes a checkbox to identify the ADX-1901 cards onto which you will copy profiles from the current card. - Page 38 GUIDE TO INSTALLATION AND OPERATION Overall Alarm This column allows configuration of the contribution of each individual alarm to the Overall Alarm associated with this card. The Overall Alarm is shown in the upper left corner of the iControl panel, and also appears at the bottom of the Status/Name column.
- Page 39 GUIDE TO INSTALLATION AND OPERATION Copy to other cards Click this button to open a panel that allows the alarm configuration set for this card to be copied into another ADX- 1901 card. • Select one or more destination cards from the list in the window by clicking in the checkboxes, or all of them by clicking in the All checkbox •...
-
Page 40: Info Panel
GUIDE TO INSTALLATION AND OPERATION 5.14 Info panel When the ADX-1901 is included in an iControl environment, certain information about the card should be available to the iControl system. The user can enter labels and comments that will make this card easy to identify in a complex setup. This information is entered into data boxes in the Info control panel. - Page 41 GUIDE TO INSTALLATION AND OPERATION • Remote System Administration – opens the Joining Locators window, which lists remote lookup services to which this ADX-1901 is registered Add: Force the iControl service for this ADX-1901 to register itself on a user-specified Jini lookup service, using the following syntax in the data box: jini://<ip_address>...
-
Page 42: Specifications
SMPTE RP188 Embedded ANC: SMPTE 291M Cable length: SD: 400 m (1,312 ft.) Belden 1694A at 270 Mb/s HD: 200 m (656 ft.) Belden 1694A at 1.485 Gb/s 100 m (328 ft.) Belden 1694A at 2.970 Gb/s 75 Ω Input impedance: Return Loss: >15 dB up to 1.5 GHz... - Page 43 GUIDE TO INSTALLATION AND OPERATION OPTICAL VIDEO INPUT (0 or 1) Refer to SFP module specifications: SFP-R-LC, SFP-RT-S13-LC, SFP-RT-W13-LC. SFP-RT-W15-LC Optical Video Output (0, 1 or 2) Refer to SFP module specifications: SFP-T-S13-LC, SFP-TT-S13-LC, SFP-RT-W13-LC, SFP-RT-W15-LC LTC Output (1) Signal: SMPTE12M Connector: RJ45...
-
Page 44: Grass Valley Technical Support
GUIDE TO INSTALLATION AND OPERATION 7 Grass Valley Technical Support For technical assistance, please contact the Grass Valley Technical Support Center nearest you: Americas Asia Office hours: 9:00 a.m. – 9:00 p.m. (EST) Office hours: 9:30 a.m. – 6:00 p.m. (GMT+8) Telephone: 1-800-547-8949 Telephone:... -
Page 45: Annex 1 - Adx-1901 Local User Interface
GUIDE TO INSTALLATION AND OPERATION ANNEX 1 – ADX-1901 Local User Interface LEV1 LEV2 LEV3 LEV4 VALUES Conditions STATUS GENERAL STATUS REAR TYPE / OPTIC TYPE or HARDWARE ERROR VIDEO STATUS NO CARRIER or “FORMAT” / TRS ERROR AUDIO STATUS GROUP N# “1 to 4”... -
Page 46: Annex 2 - Installing The Optical Interface
GUIDE TO INSTALLATION AND OPERATION ANNEX 2 – Installing the Optical Interface Installing and removing the Fiber I/O interface cartridge requires special care. This annex describes the process. Some rear panels used with the ADX-1901 incorporate a fiber optic interface. The interface consists of two parts: •... - Page 47 GUIDE TO INSTALLATION AND OPERATION 3. Slide the module straight into the socket, and push gently until it clicks into position. Connecting the fiber optic cables 1. Remove the dust plug from the SFP module if present 2. Verify that the exposed end of the optical fiber in the LC connector is clean •...
-
Page 48: Annex 3 - Loudness Logging And The Miranda Audio Loudness Analyzer
GUIDE TO INSTALLATION AND OPERATION ANNEX 3 - Loudness Logging and the Miranda Audio Loudness Analyzer Activating and Managing Loudness Logging Use iControl or iControl Solo to activate the loudness logging feature of the ADX-1901, and specify the location where the log files will be saved for future analysis. - Page 49 GUIDE TO INSTALLATION AND OPERATION Starting the Audio Loudness Analyzer from iControl The Audio Loudness Analyzer processes the log files saved from the ADX-1901, as described above. 1. From your iControl Application (iControl Solo or iControl Navigator), double-click Loudness Analyzer. The complete user manual for the Audio Loudness Analyser is available from its Help menu.
Need help?
Do you have a question about the GRASS VALLEY ADX-1901 and is the answer not in the manual?
Questions and answers