In-situ Aqua TROLL 600 Operator's Manual
Hide thumbs
Also See for Aqua TROLL 600:
- Operator's manual (125 pages) ,
- Quick start manual (4 pages) ,
- Instruction sheet (3 pages)
Table of Contents
Advertisement
Quick Links
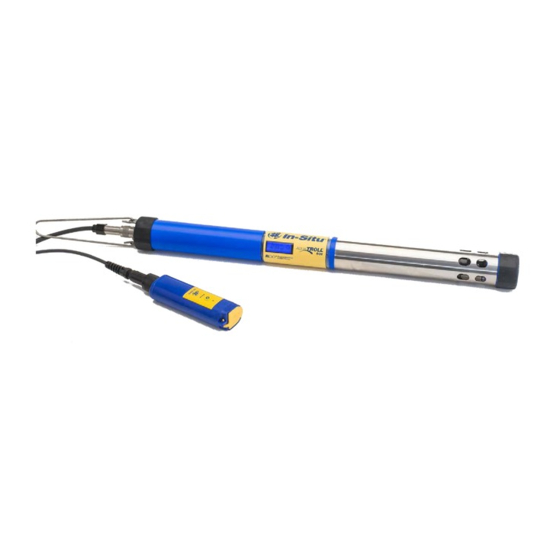
Aqua TROLL 600
Operator's Manual
Information subject to change without notice. In-Situ, In-Situ logo, Baro Merge, BaroTROLL, HERMIT, HydroVu™, iSitu,
Pocket-Situ, RDO, RuggedCable, RuggedReader, SmarTROLL™, TROLL, VuSitu, and Win-Situ are trademarks or registered
trademarks of In-Situ Inc.
2016. All rights reserved. This product may be covered by patents identified at www.in-situ.com/
©
patents
2020-08-25 | 0096402
Advertisement
Table of Contents

Related Manuals for In-situ Aqua TROLL 600


Summary of Contents for In-situ Aqua TROLL 600
- Page 1 Aqua TROLL 600 Operator’s Manual Information subject to change without notice. In-Situ, In-Situ logo, Baro Merge, BaroTROLL, HERMIT, HydroVu™, iSitu, Pocket-Situ, RDO, RuggedCable, RuggedReader, SmarTROLL™, TROLL, VuSitu, and Win-Situ are trademarks or registered trademarks of In-Situ Inc. 2016. All rights reserved. This product may be covered by patents identified at www.in-situ.com/ ©...
-
Page 2: Table Of Contents
Box Contents ����������������������������������������������������������������������������������������������������������������������������������������������������������������������������������29 Install the Batteries ����������������������������������������������������������������������������������������������������������������������������������������������������������������������30 Desiccant �����������������������������������������������������������������������������������������������������������������������������������������������������������������������������������������30 Replace the Desiccant ����������������������������������������������������������������������������������������������������������������������������������������������������������������31 Install the Wiper Motor and Sensors �������������������������������������������������������������������������������������������������������������������������������������31 Handling pH and Ion-Selective Electrode Sensors (ISEs) �������������������������������������������������������������������������� 34 Using the RDO Sensor and RDO Fast Cap ��������������������������������������������������������������������������������������������������� 34 1-970-498-1500 www.in-situ.com... - Page 3 RDO 100% Saturation Calibration ������������������������������������������������������������������������������������������������������������������������������������������51 Option 1 – Water Saturated Air �����������������������������������������������������������������������������������������������������������������������������������������������51 Option 2 – Saturation Bubbler ������������������������������������������������������������������������������������������������������������������������������������������������52 Verification of Calibration Accuracy ��������������������������������������������������������������������������������������������������������������������������������������52 Calibration Frequency Recommendations �������������������������������������������������������������������������������������������������������������������������53 Factory Calibration ����������������������������������������������������������������������������������������������������������������������������������������������������������������������54 Zeroing the Depth Sensor ��������������������������������������������������������������������������������������������������������������������������������������������������������55 Software �������������������������������������������������������������������������������������������������������������������������������������������������������� 57 VuSitu Mobile App �����������������������������������������������������������������������������������������������������������������������������������������������������������������������57 1-970-498-1500 www.in-situ.com...
- Page 4 Calibrating Using Concentration ��������������������������������������������������������������������������������������������������������������������������������������������70 Calibrate the Rugged Dissolved Oxygen Sensor (2-Point) ��������������������������������������������������������������������������������������������70 100% Water-saturated Air Calibration ����������������������������������������������������������������������������������������������������������������������������������70 Option 1 – Water Saturated Air �����������������������������������������������������������������������������������������������������������������������������������������������70 Option 2 - Bubbler �����������������������������������������������������������������������������������������������������������������������������������������������������������������������71 0-point Calibration ����������������������������������������������������������������������������������������������������������������������������������������������������������������������71 Calibrating the Rugged Dissolved Oxygen Sensor Using Concentration ���������������������������������������������������������������72 1-970-498-1500 www.in-situ.com...
- Page 5 Alarm Setup �����������������������������������������������������������������������������������������������������������������������������������������������������������������������������������96 Modbus Setup �������������������������������������������������������������������������������������������������������������������������������������������������������������������������������96 Win-Situ 5 Logging and Viewing Data ����������������������������������������������������������������������������������������������������������������������������������96 About Sites �������������������������������������������������������������������������������������������������������������������������������������������������������������������������������������96 Logging Data—Overview ���������������������������������������������������������������������������������������������������������������������������������������������������������97 Logging Method Descriptions ������������������������������������������������������������������������������������������������������������������������������������������������97 Logging Methods for Long-Term Monitoring ��������������������������������������������������������������������������������������������������������������������97 Linear ������������������������������������������������������������������������������������������������������������������������������������������������������������������������������������������������97 Linear Average ������������������������������������������������������������������������������������������������������������������������������������������������������������������������������97 Event �������������������������������������������������������������������������������������������������������������������������������������������������������������������������������������������������98 Log Setup ����������������������������������������������������������������������������������������������������������������������������������������������������������������������������������������98 1-970-498-1500 www.in-situ.com...
- Page 6 Calibrating the Turbidity Sensor �������������������������������������������������������������������������������������������������������������������������������������������109 Calibrating the Ammonium Sensor �������������������������������������������������������������������������������������������������������������������������������������111 Calibrating the Chloride Sensor ��������������������������������������������������������������������������������������������������������������������������������������������112 Calibrating the Nitrate Sensor �����������������������������������������������������������������������������������������������������������������������������������������������112 Calibration Reports ��������������������������������������������������������������������������������������������������������������������������������������������������������������������113 BaroMerge ������������������������������������������������������������������������������������������������������������������������������������������������������������������������������������114 Using BaroMerge Software �����������������������������������������������������������������������������������������������������������������������������������������������������114 Baro Merge Input—Manual Entry ����������������������������������������������������������������������������������������������������������������������������������������114 Baro Merge Input—Fixed Correction ���������������������������������������������������������������������������������������������������������������������������������115 1-970-498-1500 www.in-situ.com...
- Page 7 O-rings �������������������������������������������������������������������������������������������������������������������������������������������������������������������������������������������125 pH/ORP Sensor Replacement ������������������������������������������������������������������������������������������������������������������������������������������������125 RDO Sensor Cap Replacement ����������������������������������������������������������������������������������������������������������������������������������������������125 Instrument Storage �������������������������������������������������������������������������������������������������������������������������������������������������������������������125 Short-Term Storage (less than 1 week) �������������������������������������������������������������������������������������������������������������������������������125 Long-Term Storage (more than 1 week) ����������������������������������������������������������������������������������������������������������������������������125 Cleaning the Sonde �������������������������������������������������������������������������������������������������������������������������������������������������������������������126 Cleaning and Storing the pH/ORP Sensor ������������������������������������������������������������������������������������������������������������������������126 1-970-498-1500 www.in-situ.com...
- Page 8 Replacing the Entire Brush �����������������������������������������������������������������������������������������������������������������������������������������������������130 Cleaning the Copper Antifouling Restrictor ���������������������������������������������������������������������������������������������������������������������130 Declaration of Conformity ������������������������������������������������������������������������������������������������������������������������� 131 Appendix ���������������������������������������������������������������������������������������������������������������������������������������������������� 132 Appendix A: Parameter Discovery ���������������������������������������������������������������������������������������������������������������������������������������132 Appendix B: Parameter Numbers and Locations ������������������������������������������������������������������������������������������������������������133 Appendix C: Unit IDs �����������������������������������������������������������������������������������������������������������������������������������������������������������������135 Appendix D: Register Data Formats ������������������������������������������������������������������������������������������������������������������������������������138 1-970-498-1500 www.in-situ.com...
-
Page 9: Introduction
RDO Sensor Cap are replaceable� It is optional to include a motorized sensor wiper on the instrument� The Aqua TROLL 600 can connect wirelessly via Bluetooth to the VuSitu Mobile App or can connect to Win- Situ 5 Software using cable or Bluetooth�... -
Page 10: Outside The U
ATTN: Repairs 221 East Lincoln Avenue Fort Collins, CO 80524 The warranty does not cover damage during transit� In-Situ recommends insurance for all shipments� Warranty repairs will be shipped back prepaid� Outside the U�S� Contact your international In-Situ distributor for repair and service information�... -
Page 11: Decontamination And Cleaning Form
• Ensure that the RDO Sensor Cap is pressed firmly over the sensor lens and is flush with the instrument before submerging in liquid� • Replace the cable if insulation or connectors are damaged� • Make sure the probe and sensor O-rings are clean and free of damage� 1-970-498-1500 www.in-situ.com... -
Page 12: General Specifications
Measurement: 40 mA typical, 75 mA Max Win-Situ 5 Software, VuSitu Mobile App on select Interface mobile devices using Android 4.4 with Bluetooth 2.0 Cable Vented or non-vented polyurethane or vented Tefzel® Hex screw driver 0.050 in. (1.3 mm) 1-970-498-1500 www.in-situ.com... - Page 13 2 year - sonde, sensors (excluding pH/ORP); 1 year - pH/ORP sensor Warranty Other - see warranty policy at www.in-situ.com Specifications are subject to change without notice� Android is a trademark of Google, Inc� Bluetooth is a trademark of Bluetooth SIG, Inc�...
-
Page 14: Instrument Dimensions With Restrictor
60�2 cm (23�7 in) Diameter 47 mm (1�85 in) Instrument Dimensions with Restrictor Off Total length with wiper brush on 60�2 cm (23�7 in) Total length with wiper brush off 47 mm (1�85 in) Diameter 41�66 mm (1�64 in) 1-970-498-1500 www.in-situ.com... -
Page 15: Sensor Specifications
2 years or User calibration Rhodamine - 5 to 50° C greater only if needed * Shelf life is included in total life of sensor� ** Field life and calibration frequency dependent on site conditions� 1-970-498-1500 www.in-situ.com... -
Page 16: Potential Interferents
• Do not use in organic solvents (e�g�, acetone, chloroform, methylene chloride, etc�), which may destroy the sensing element Conductivity/Temperature Sensor Soaking the Conductivity/Temperature sensor in vinegar for longer than one hour can cause serious damage� Ammonium, Chloride, and Nitrate Interferent Concentrations 1-970-498-1500 www.in-situ.com... - Page 17 N03-� 100 ppm NH4+ 10 ppm NH4+ 1 ppm NH4+ Perchlorate (CIO 7 x 10⁻² 7 x 10⁻³ 7 x 10⁻⁴ Iodide (I 0�4 0�04 Chlorate (CIO 0�3 Cyanide (CN 0�2 Bromide (Br Nitrite (NO Hydrogen Sulfide (HS 1-970-498-1500 www.in-situ.com...
- Page 18 Total dissolved solids: ppt, ppm Resistivity: Ohms- Density: g/cm3 Methodology Std� Methods 2510, EPA 120�1 *Accuracy at calibration points� For greatest accuracy over instrument life, keep the conductivity cell submersed in water for 24-48 hours prior to calibration and deployment� 1-970-498-1500 www.in-situ.com...
- Page 19 Sensor Type Removable with replaceable RDO-X Cap Response Time RDO-X Cap: T63<15s, T90<45s, T95<60s Units of Measure mg/L, % saturation, ppm EPA-approved In-Situ Methods (under the Alternate Methodology Test Procedure process): 1002-8-2009, 1003-8-2009, 1004-8-2009 Level, Depth, Pressure Sensor Specifications Accuracy Typical ±0�1% full scale (FS)
- Page 20 Units of Measure pH units Methodology Std� Methods 4500-H+, EPA 150�2 *At thermal equilibrium� Temperature Sensor Specifications Accuracy ±0�1° C Range -5 to 50° C (23 to 122° F) Resolution 0�01° C Sensor Type Replaceable Response Time** T63<2s, T90<15s, T95<30s 1-970-498-1500 www.in-situ.com...
- Page 21 0 to 350 PSU Max Depth 0�1 PSU Range PSU, ppt Resolution Std� Methods 2520A Sensor Type Removable Response Time* T90 < 10sec, T95 < 30sec Units of Measure mg/L, ppm, mV Methodology Std� Methods 4500-NH3D, EPA 350�3 *Between calibration points� 1-970-498-1500 www.in-situ.com...
- Page 22 T90 < 10sec, T95 < 30sec Units of Measure mg/L, ppm, mV Methodology Std� Methods 4500-NO3D * Between calibration points� Chlorophyll a Sensor Specifications R2 > 0�999 for serial dilutions of 0-1000 µg/L Chl a in Linearity MeOH Max Depth 200 m 1-970-498-1500 www.in-situ.com...
- Page 23 BGA-PE Sensor Specifications R2 > 0�999 for serial dilutions of PE standards from Linearity 0-1000 µg/L PE Max Depth 200 m 0-100 RFU Range 0-1000 µg/L PE �001 RFU Resolution �01 µg/L PE Sensor Type Removable Response Time* T63<1s, T90<1s, T95<1s 1-970-498-1500 www.in-situ.com...
- Page 24 200 m 0-100 RFU Range 0-1000 µg/L �001 RFU Resolution �01 µg/ Sensor Type Removable Response Time* T63<1s, T90<1s, T95<1s Concentration: µg/L Units of Measure Fluorescence: RFU Excitation Wavelength (nominal) 530 nm Detection Wavelength 580 nm to 660 nm 1-970-498-1500 www.in-situ.com...
-
Page 25: Instrument Overview
The instrument’s outside diameter (OD) allows the instrument to conform to a 2-in�/5�08 cm diameter (or larger) well� The Aqua TROLL 600 is recommended for applications like ambient long-term water quality monitoring in fresh and marine environments;... -
Page 26: System Components
Cable Extender 0051490 Large Desiccant (titanium connector) 0051810 Large Desiccant (ABS connector) 0053550 Small Desiccant (3 pack) - storage desiccant 0052230 Desiccant Refill Kit for Large or Outboard Desiccant 0029140 Calibration and Maintenance RDO Classic Cap Replacement Kit 0079790 1-970-498-1500 www.in-situ.com... -
Page 27: Ruggedcable System
• Titanium twist-lock connectors for quick, reliable connections to the instrument, desiccant, and communication cable • Metal shield beneath the cable jacket to prevent electrical interferences • Kellems grip for secure instrument deployment • Small desiccant for vented systems (for storage only) 1-970-498-1500 www.in-situ.com... -
Page 28: Vented Or Non-Vented Cable
SDI-12, analog (4-20 mA), or Modbus communication protocol� RuggedCable System with female to female connectors Stripped-and-tinned RuggedCable System with female connector Stripped-and-tinned RuggedCable System with male connector (short length that converts a cable with a twist-lock connector to a stripped-and-tinned cable) 1-970-498-1500 www.in-situ.com... -
Page 29: Instrument Setup
Wiper motor and brush or wiper port plug Aqua TROLL® 600 sonde Water quality sensors (2 of 4) Water quality sensors (2 of 4) RDO sensor cap Accessory supplies* pH/ORP sensor maintenance supplies Extra sensors (0 of 2) D-cell alkaline batteries (2) Instrument tools 1-970-498-1500 www.in-situ.com... -
Page 30: Install The Batteries
It is filled with color- indicating silica that gradually changes from purple to pink as the desiccant’s effectiveness decreases� Replace the desiccant when the desiccant has turned pink� The desiccant is included in the Aqua TROLL 600 Maintenance Kit (0078940)�... -
Page 31: Replace The Desiccant
O-rings� Align the pins and push the motor (or plug) firmly into the center port� Notice the blue sensor interlock grooves on the wiper motor� You must install the sensors so that they slide into the grooves� 1-970-498-1500 www.in-situ.com... - Page 32 When installing an RDO sensor, install the RDO Cap before installing the sensor body on to the sonde� Do not touch or rub the cap face� Make sure the RDO cap is seated firmly and the tab is locked in place� 1-970-498-1500 www.in-situ.com...
- Page 33 3 Place the metal restrictor over the sensors and twist into place� Ensure that the vent holes are located at the base of the instrument to allow sufficient flow to the sensors� The restrictor can be inverted to act as a storage cup when the instrument is not in use� See “Instrument Storage� ” 1-970-498-1500 www.in-situ.com...
-
Page 34: Handling Ph And Ion-Selective Electrode Sensors (Ises)
The wiper can severely reduce the life of the RDO Fast Cap� Wear will vary by application� Verify sensor performance prior to use and replace the Fast Cap if damaged� Inspect foil prior to each use� If damaged, replace cap� RDO Fast Cap Wiper 1-970-498-1500 www.in-situ.com... -
Page 35: Ion-Selective Electrode Sensor (Ise) Requirements
ISE sensors require one or more additional sensors to function� See the details below and install the required sensors to use an ISE� Ammonium Sensor Requirements Conductivity/ Temperature Sensor Temperature Sensor To calculate ammonia��� Conductivity/ pH Sensor Temperature Sensor Chloride, Nitrate, and pH/ORP Sensor Requirements Conductivity/ Temperature Sensor Temperature Sensor 1-970-498-1500 www.in-situ.com... -
Page 36: Removing Sensors
2 Position the TROLL Com and cable flat edges so they will connect properly� Push and twist until you hear a click� Connecting with Bluetooth The Aqua TROLL® 600 can connect to a Bluetooth-enabled device for wireless communication with the VuSitu mobile app� 1-970-498-1500 www.in-situ.com... -
Page 37: Connecting To Vusitu
2 On the Bluetooth-enabled device, navigate to the Bluetooth menu and scan for available devices� 3 The Aqua TROLL 600 will be listed as “Serial Number - AT600”� For example: 424690 - AT600� Tap the device name to pair the Aqua TROLL 600 and the Bluetooth-enabled device�... -
Page 38: Sdi-12 3-Wire
SDI-12 3-Wire 1-970-498-1500 www.in-situ.com... -
Page 39: Modbus Master
Modbus Master 1-970-498-1500 www.in-situ.com... -
Page 40: Modbus Master With Rs232 (Converter Required)
Modbus Master with RS232 (Converter Required) 1-970-498-1500 www.in-situ.com... -
Page 41: Modbus Plc Interface
• Firmware version 1�71 or later must be installed on the sonde� For information about the full Modbus capabilities of your sonde, see the Aqua TROLL 500/600 Interface Specification at www�in-situ�com/support/type/documentation� Setting Up Instrument 1� Install the sensors and turn on the display by holding the instrument vertically�... - Page 42 Parameter Id: The ID of the parameter for this location. See: Full System Specification float Off line sentinel value: The value that’s returned on error or if the parameter isn’t available. The default sentinel is 0.0 1-970-498-1500 www.in-situ.com...
- Page 43 6� Set the type of register to: 32-bit float a� If asked by the PLC this is 2 registers 7� Set the byte order to: Big Endean (MSB) a� This should be the default and may not be configurable on all PLCs 1-970-498-1500 www.in-situ.com...
-
Page 44: Lcd Screen
Possible Port Statuses Sensors installed Port plugs installed Sensor/port error Possible Power Statuses Power level NOT within Power level within specs specs Possible Connected Statuses Connected via Bluetooth Connected via cable Error Messages Port(s) empty Cap expiration 1-970-498-1500 www.in-situ.com... - Page 45 1 Hold the sonde vertically so the sensor end faces up� The LCD screen will illuminate after a few seconds� 2 Wait until the LCD screen displays the status icons� 3 Hold the sonde horizontally and firmly tap the Aqua TROLL 600 Logo next to the LCD screen 3 times, pausing 1 second between taps�...
- Page 46 1 Access the Contrast menu� 2 Tilt the sonde left to decrease (lighten) the contrast, or right to increase (darken) the contrast� 3 Tap the Aqua TROLL 600 logo to set the selected contrast� Language Menu The Language Menu allows you to set the default display language of the LCD screen�...
-
Page 47: Micro Sd Card
Micro SD Card The Aqua TROLL 600 uses a micro SD card for data storage and updating sonde firmware� You can remove the SD card and replace it with another for data download, or use the same card� An SD card is not required to log data�... - Page 48 4 Scroll to Yes by tilting the instrument� Tap the Aqua TROLL 600 logo once� 5 The LCD screen will display icons while updating� Once the update is complete the Aqua TROLL 600 and LCD screen will restart�...
-
Page 49: Desiccant
It is filled with color- indicating silica that gradually changes from purple to pink as the desiccant’s effectiveness decreases� Replace the desiccant when the desiccant has turned pink� The desiccant is included in the Aqua TROLL 600 Maintenance Kit (0078940)�... -
Page 50: Solution Based Calibration Preparation, Procedure And Rinsing
Solution Based Calibration Preparation, Procedure and Rinsing Check the instrument storage requirements in the Aqua TROLL 600 manual prior to starting calibration� 1 Remove the rubber bumper and blue top cap from the restrictor� 2 Remove the restrictor and reattach in storage/calibration mode�... -
Page 51: Rdo 100% Saturation Calibration
Place the sponge in the bottom of the restrictor� Attach the end cap� Turn one full rotation, but do not fully seal to the bottom of the restrictor� Allow 5-10 minutes for 100% water saturation of the air within the calibration chamber prior to starting the calibration� 1-970-498-1500 www.in-situ.com... -
Page 52: Option 2 - Saturation Bubbler
7 Open the software and take a few readings to ensure the reading from the sensor is fully stabilized� Verify that the reading matches the expected value located on the outside of the calibration solution� If outside of sensor specifications, recalibrate� 1-970-498-1500 www.in-situ.com... -
Page 53: Calibration Frequency Recommendations
Calibration Frequency Recommendations In-Situ sensors are factory calibrated across the entire range of each sensor, and thus achieve a very high degree of accuracy and stability for extended periods of time without user calibration� In-Situ recommends inserting the instrument into a known calibration standard to check the accuracy of a sensor prior to performing any user calibration if you suspect drift, unless a user calibration is required by a standard operating procedure�... -
Page 54: Factory Calibration
Factory calibration includes a thorough cleaning, full functionality check and sensor adjustments to all applicable sensors over the entire calibrated temperature range� We recommend a factory calibration every 12 months or when the unit appears to drift significantly� 1-970-498-1500 www.in-situ.com... -
Page 55: Zeroing The Depth Sensor
Zeroing the Depth Sensor The Aqua TROLL 600 uses its pressure reading and specific gravity value to calculate depth. The pressure sensor is located at the center of the instrument, but depth is reported at the smart sensor faces. An embedded gyroscope compensates for the distance between these sensors and allows the sonde to be deployed in any orientation (vertical, horizontal, angled). - Page 56 Sensor Office (OL) and no longer Remove two sensors and reinstall in communicating with the instrument separate port� 3�) Call (800-446-7488) or contact In-Situ Technical Support (support@in-situ�com)� 1�) Inspect wiper to ensure surface is free of debris and the wiper is spinning correctly�...
-
Page 57: Software
2 On the Bluetooth-enabled device, navigate to the Bluetooth menu and scan for available devices� 3 The Aqua TROLL 600 will be listed as “Serial Number - AT600”� For example: 424690 - AT600� Tap the device name to pair the Aqua TROLL 600 and the Bluetooth-enabled device�... -
Page 58: Vusitu Menu Options
Press an item and Press any item in a item in a list of files� swipe left to reveal list and swipe right You can now select the delete and share to reveal the sharing multiple files� icons� icon� 1-970-498-1500 www.in-situ.com... -
Page 59: Live Readings In Vusitu
Live Readings Mode Take a single reading Take readings at two- and save to Snapshot second intervals� file� View Snapshot file from View file from Menu > Menu > Data Files� Data Files� Check Snapshot option� Check Live option� 1-970-498-1500 www.in-situ.com... -
Page 60: Exporting Data Files
Data view and export� file and choose how you Files screen� wish to share it� Viewing Data Files Open a VuSitu data file in any web browser� Click the button at the top left to generate a CSV� 1-970-498-1500 www.in-situ.com... -
Page 61: Vusitu Locations
9 To manually set a Location, tap and hold to drop a pin on a specific area of the map� This associates latitude and longitude with your Location� As an alternative, you can manually enter latitude and longitude values and tap Apply� 10 Tap Save� 1-970-498-1500 www.in-situ.com... -
Page 62: Select A Location
2 The active Location is marked with a green check mark� If no Location has been selected data will be associated with the Default Location� 3 Tap the desired location in the list� 4 The Live Readings screen appears with the site selected� 1-970-498-1500 www.in-situ.com... -
Page 63: Edit Or Delete A Location
3 Tap the Overflow Menu in the upper-right portion of the screen� 4 Select Edit Location to make changes, or Archive Location to remove it from the list� Archived Locations can be restored at any time by tapping the Location, accessing the Overflow Menu and tapping Restore Location� 1-970-498-1500 www.in-situ.com... -
Page 64: Vusitu Data
Google Drive� View your data in any web browser by double-clicking the file� You can then export a CSV file by clicking the Export a CSV link at the top of the page� 1-970-498-1500 www.in-situ.com... -
Page 65: Vusitu Calibration And Settings
Quick-Cal allows you to perform a one-point calibration on up to three sensors with one setup and stabilization process� 1 From the main menu, select Connected Instrument� 2 Select Calibrations� 3 From the Calibration Menu, select Quick-Cal (multi-sensor)� 1-970-498-1500 www.in-situ.com... - Page 66 4 All of the sensors available for the Quick-Cal calibration are selected by default� Tap the checked box if you want to exclude a sensor from the calibration� 5 Select Next� If one or more sensors is not installed, an error message will pop up� 6 Make sure the restrictor is in calibration mode� 1-970-498-1500 www.in-situ.com...
-
Page 67: Calibrate The Rugged Dissolved Oxygen Sensor (1-Point)
The optical Rugged Dissolved Oxygen sensor is very stable� The factory calibration should produce readings within 3%accuracy� If you require readings with greater accuracy we recommend that you perform a 1-point, 100% water-saturated air calibration as described below� 1-970-498-1500 www.in-situ.com... -
Page 68: 100% Water-Saturated Air Calibration
• Fill a 100% saturation bubbler half full with tap water� Turn on the bubbler� (note: it typically takes 5-10 minutes for the bubbler to reach 100% saturation)� • Install the restrictor in deployment mode, remove the blue end cap, and place the sonde in the bubbler� 1-970-498-1500 www.in-situ.com... -
Page 69: 0-Point Calibration
Rinse twice with calibration standard� Be sure to rinse away all calibration solution before moving on� Failing to do so may result in a contaminated calibration solution� 1-970-498-1500 www.in-situ.com... -
Page 70: Calibrating Using Concentration
6 Setup the instrument using one of the following methods: Option 1 – Water Saturated Air • Remove the restrictor and thoroughly dry the RDO sensing foil and the temperature sensor� • Make sure the restrictor is in calibration mode� 1-970-498-1500 www.in-situ.com... -
Page 71: Option 2 - Bubbler
8 With the sonde and sensors still inverted, fill the calibration cell with 40-50mL (to the bottom of the threads inside of the restrictor) of fresh calibration solution� Make sure that the calibration solution is approximately 1 inch above the surface of the sensor face� Check the sensors for bubbles� Gently tap on 1-970-498-1500 www.in-situ.com... -
Page 72: Calibrating The Rugged Dissolved Oxygen Sensor Using Concentration
The Aqua TROLL® 600 includes automatic salinity compensation� This feature requires a conductivity sensor and RDO sensor� With both sensors installed, the sonde will use salinity compensation by default� To change the compensation value, follow these steps: 1 From VuSitu’s main menu, select Connected Instrument� 1-970-498-1500 www.in-situ.com... -
Page 73: Calibrate The Conductivity Sensor
3 From the Instrument Settings menu, select Salinity Setting� 4 Enter your desired salinity compensation setting and press Save� Calibrate the Conductivity Sensor 1 From the main menu, select Connected Instrument� 2 Select Calibrations� 3 From the Calibration Menu, select Conductivity� 1-970-498-1500 www.in-situ.com... - Page 74 6 Move the solution in the calibration cell to ensure it has been in contact with the surface of the sensors and the inside of the calibration cell� If necessary, reinstall the blue top cap and gently shake� 7 Discard the rinse calibration solution� 1-970-498-1500 www.in-situ.com...
- Page 75 11 The app attempts to automatically detect the calibration solution and stabilize the measurements� 12 Check your bottle of calibration standard to determine the reference temperature� If necessary, tap the drop down list and select the appropriate reference temperature for the calibration� 1-970-498-1500 www.in-situ.com...
-
Page 76: Calibrate The Level Sensor
15 Rinse the sensors and restrictor with DI water� Calibrate the Level Sensor The factory calibration of the level sensor is very accurate� In-Situ does not recommend calibrating the Level sensor unless your SOP specifically requires you to do so�... - Page 77 Rinse the sensor face and inside of the restrictor with DI or tap water� 8 Take the calibration solution and pour 10-20 mL (1/2” above the sensor face) on top of the sensors to perform the first rinse� 1-970-498-1500 www.in-situ.com...
-
Page 78: Calibrate The Orp Sensor
Calibrate the ORP Sensor The ORP sensor can be calibrated using Zobell’s standard, Quick-Cal or a custom ORP solution� 1 From the main menu, select Connected Instrument� 2 Select Calibrations� 3 From the Calibrations menu select ORP� 1-970-498-1500 www.in-situ.com... - Page 79 Rinse the sensor face and inside of the restrictor with DI or tap water� 7 Take the calibration solution and pour 10-20 mL (1/2” above the sensor face) on top of the sensors to perform the first rinse� 1-970-498-1500 www.in-situ.com...
-
Page 80: Calibrate The Turbidity Sensor
Be sure to rinse away all calibration solution before moving on� Failing to do so may result in a contaminated calibration solution� Calibrate the Turbidity Sensor You can calibrate the Turbidity sensor with either a 1-point, 2-point, or 3-point process� 1 From the main menu, select Connected Instrument� 2 Select Calibrations� 1-970-498-1500 www.in-situ.com... - Page 81 3 From the Calibrations menu select Turbidity� 4 Select a 1- or 2-point calibration� 5 Make sure the restrictor is in calibration mode� 6 Hold the instrument upright so the sensors are facing up� 1-970-498-1500 www.in-situ.com...
- Page 82 Select Set User Defined to begin calibrating with the new value� If you are using an In-Situ standard and the app does not automatically detect it, perform the sensor cleaning and maintenance procedure, then select Retry Auto Detect�...
-
Page 83: Calibrate The Ammonium Sensor
Rinse the sensor face and inside of the restrictor with DI or tap water� 8 Take the calibration solution and pour 10-20 mL (1/2” above the sensor face) on top of the sensors to perform the first rinse� 1-970-498-1500 www.in-situ.com... - Page 84 Rinse twice with calibration standard� Be sure to rinse away all calibration solution before moving on� Failing to do so may result in a contaminated calibration solution� 1-970-498-1500 www.in-situ.com...
-
Page 85: Calibrate The Chloride Sensor
Rinse the sensor face and inside of the restrictor with DI or tap water� 8 Take the calibration solution and pour 10-20 mL (1/2” above the sensor face) on top of the sensors to perform the first rinse� 1-970-498-1500 www.in-situ.com... -
Page 86: Calibrate The Nitrate Sensor
140 mg/L nitrate as N standard or the highest standard to be used during calibration� For the best long term results, soak the sensor overnight� 1 From the main menu, select Connected Instrument� 2 Select Calibrations� 3 From the Calibrations menu select Nitrate� 4 Select a two point calibration� 1-970-498-1500 www.in-situ.com... - Page 87 Select Set User Defined to begin calibrating with the new value� If you are not using a custom standard and the app does not automatically detect the standard, perform the sensor cleaning and maintenance procedure, then select Retry Auto Detect� 1-970-498-1500 www.in-situ.com...
-
Page 88: Win-Situ 5
Verify the Win-Situ Software Version To avoid potential compatibility issues, it is important to use the most recent version of Win- Situ Software� Find version information and the most recent software download on the In-Situ website www�in-situ�com� Win-Situ 5 Screens and Buttons Data Tab When you open Win-Situ 5 Software, the Data tab appears�... - Page 89 The Device Setup tab allows access to instrument information and settings such as instrument name, serial number, firmware version, communication settings, diagnostics, and factory reset options� 1-970-498-1500 www.in-situ.com...
-
Page 90: Home Tab
The Device Battery gauge turns yellow as the battery is depleted� This example shows 80 percent of the battery remaining (green) and 20 percent used (yellow)� Note: Non-logging instruments do not have internal batteries, however, the gauge shows 100 percent green when power is applied� 1-970-498-1500 www.in-situ.com... - Page 91 The Snapshot button records one set of readings� The Record button logs data to a CSV file that can be opened in a spreadsheet program� This is not the same as recording data in a log on the instrument� 1-970-498-1500 www.in-situ.com...
-
Page 92: Logging Tab
For a Completed log, the size of the entire log file is shown� For a Running log, the current size of the log up to the last data point is shown� 1-970-498-1500 www.in-situ.com... -
Page 93: Log Status
Edit (or review) the log configuration for a Ready, Pending, or Invalid log� Delete the log� (Note that you must delete a log twice before it is permanently removed�) Download the log to a PC� 1-970-498-1500 www.in-situ.com... -
Page 94: Sensors Tab
When you configure the Level parameter using the Sensors tab, the settings are stored in the instrument and are available for use in Modbus, SDI-12, or analog communication (if available)� If desired, a different configuration can be selected when setting up a log� 1-970-498-1500 www.in-situ.com... -
Page 95: Device Setup Tab
Invalid state, as shown on the Logging tab� Downgrading the device to a lower firmware version is not recommended� Device Status This area of the Device Setup tab shows the details of instrument alarms and warnings indicated by the bell- shaped alarm icon� Status colors: Gray—No alarms or warnings Yellow—Warning Red—Alarm 1-970-498-1500 www.in-situ.com... -
Page 96: Factory Reset
About Sites All data logged by In-Situ instruments are tied to a specific site� A site represents the physical location where the instrument collects data� For example, you can create a site to represent a lake, gauging station, well, or nearby landmark�... -
Page 97: Logging Data-Overview
Each stored measurement is the average of several rapid measurements� This method is used for long-term studies, stream gauging, tidal and open-water studies where trends are more important than accuracy� Intervals are measured in days, hours, minutes, or seconds� 1-970-498-1500 www.in-situ.com... -
Page 98: Event
Logging screen with Ready in the Status column� A log with a scheduled start time is displayed with Pending in the Status column� Starting a Pending Log A Pending log automatically starts at the scheduled time without any user intervention� 1-970-498-1500 www.in-situ.com... -
Page 99: Starting A Manual Log
1 The Restart Log feature is only available for a running log� In the Logging screen select a running log� 2 Click the Restart Log button to restart the log from the beginning� To resume a suspended log, use the Start Log button, not the Restart Log button� 1-970-498-1500 www.in-situ.com... -
Page 100: Downloading Data To A
1 Download the log from the instrument to your PC� 2 Select the Data tab� 3 On the left side of the screen, select the log you intend to export� The content of the log is displayed on the right side of the screen� 1-970-498-1500 www.in-situ.com... -
Page 101: Exporting To Text
The graph control tools are described below� Each has a toolbar icon and a keyboard shortcut� Holding down the shortcut keys temporarily switches the graph control mode� When the shortcut is released, the graph returns to its previous control mode� 1-970-498-1500 www.in-situ.com... - Page 102 None You can expand or compress the graph by clicking and dragging anywhere in the X axis on the bottom of the graph� The real-time graph update is paused but the cache continues to update in the background� 1-970-498-1500 www.in-situ.com...
-
Page 103: Calibration
24-48 hours prior to calibration and deployment� 2 Connect the instrument to the computer� 3 Connect the instrument to the software� 4 Go to the Sensors tab and select the conductivity sensor� 1-970-498-1500 www.in-situ.com... - Page 104 6 Select either 20° C or 25° C as the reference temperature, as indicated by the reference calibration solution� 7 Select the appropriate calibration standard from the drop-down list� If you select “User Defined, ” enter the value of the solution� 8 Click the right arrow button� 9 Click OK to start the calibration� 1-970-498-1500 www.in-situ.com...
-
Page 105: Nominal Stability Vs� Full Stability
If the sensor reading is outside the specified accuracy of the pressure sensor, send the instrument to In-Situ for factory calibration� Do not calibrate an absolute pressure sensor because this removes barometric pressure (at a single point in time) and causes errors when you post correct the data using a BaroTROLL Instrument�... -
Page 106: Calibrating The Rdo Sensor
8 Click the check mark� The pressure reading is reset to zero� Calibrating the RDO Sensor You can perform a one-point 100% Oxygen Saturation calibration or a two-point calibration that also includes a 0% Oxygen calibration depending on your application needs� 1-970-498-1500 www.in-situ.com... -
Page 107: Calibrate 100% Oxygen Saturation
The criteria for Nominal Stability are designed to shorten the calibration time when an approximate calibration is acceptable� 11 When the screen indicated that the calibration has reached stability, click the check mark to complete the calibration, or click Cancel to return to the previous calibration� 1-970-498-1500 www.in-situ.com... -
Page 108: Calibrate 0% Oxygen Saturation
4 Go to the Sensors tab and select the pH/ORP sensor� 5 Click the Calibrate button� If you want to restore the factory calibration, select the option and click the right arrow button� 6 Select Calibrate pH or Calibrate ORP, and click the right arrow button� 1-970-498-1500 www.in-situ.com... -
Page 109: Nominal Stability Vs� Full Stability
2 Connect the instrument to the computer� 3 Connect the instrument to the software� 4 Go to the Sensors tab and select the Turbidity sensor� There should be no bubbles on the sensor face� Bubbles cause inaccurate calibrations� 1-970-498-1500 www.in-situ.com... - Page 110 Click Cancel to return to the previous calibration� 11 You can save or print the calibration report� 12 Click OK to finish the calibration� 13 Once calibration is complete, remove the instrument from the calibration cup and rinse both thoroughly with clean water� 1-970-498-1500 www.in-situ.com...
-
Page 111: Calibrating The Ammonium Sensor
Click Cancel to return to the previous calibration� 11 You can save or print the calibration report� 12 Click OK to finish the calibration� 13 Once calibration is complete, remove the instrument from the calibration cup and rinse both thoroughly with clean water� 1-970-498-1500 www.in-situ.com... -
Page 112: Calibrating The Chloride Sensor
Calibrating the Nitrate Sensor You can perform a one, two or three-point calibration of the nitrate sensor with Win-Situ� For best accuracy, we recommend a two-point calibration in standards closest to the conditions in your testing environment� 1-970-498-1500 www.in-situ.com... -
Page 113: Calibration Reports
Viewing Calibration Reports: You can view saved calibration reports on the Data tab or in your working directory� To find your working directory for Win-Situ 5, go to Preferences menu > Working Directory� 1-970-498-1500 www.in-situ.com... -
Page 114: Baromerge
When you select the Fixed Correction and Manual Entry options, it is important to know the barometric pressure for the general time period covered by the log or logs you want to correct� 1 From the Tools menu, select Win-Situ BaroMerge� 1-970-498-1500 www.in-situ.com... -
Page 115: Baro Merge Input-Fixed Correction
To use this correction method you need barometric pressure values from a reliable source� Choose a single value that represents the actual ambient barometric pressure during the time period the log was recorded� You also need to know the file names of the logs you want to correct� 1-970-498-1500 www.in-situ.com... -
Page 116: Baromerge Input-Barotroll File
To use this correction method, you need the name of the BaroTROLL log file and the name(s) of the absolute log file(s) you want to correct� 1-970-498-1500 www.in-situ.com... -
Page 117: Baromerge Output
Baro Merge Software� 1 Follow the steps to compensate the absolute data for barometric pressure� 2 When you reach this screen in the Wizard, you can select the check box to Post correct files for level� 1-970-498-1500 www.in-situ.com... -
Page 118: Managing Data From Multiple Sites
1 In the Data tab, select the Site Data folder� 2 Click the File menu > New > Site Group� 3 Enter a name for the site group� A site group name can have up to 100 characters� 1-970-498-1500 www.in-situ.com... -
Page 119: Site-Based Connections
Win-Situ� Files that have been corrected are stored in a subdirectory named “Post Corrected Files” and “PostLevelCorrection” is added to the file name� The original data file is not altered� 1-970-498-1500 www.in-situ.com... -
Page 120: Open Post Level Correction
In order to post correct the level reference in a data file, the original data must have been collected in level mode� 1 You can keep the original level reference type, or you can select one of the following reference types� • Pressure head (Depth) • Depth to water • Elevation or gauge height/stage 1-970-498-1500 www.in-situ.com... -
Page 121: Set The Level Correction
3 Enter the correction value in the Level reference field� 4 Click the right arrow button� 5 Select a value for specific gravity and click the right arrow button� This step is necessary only if the value for specific gravity was set incorrectly in the original file� 1-970-498-1500 www.in-situ.com... -
Page 122: View Post Level Corrected Data
Files” and “PostLevelCorrection” is added to the file name� The original data file was not altered� 4 You can view the data in Win-Situ 5 or export the data to Excel� Importing VuSitu Data to Win-Situ You can import data files from VuSitu into Win-Situ 5 from the File menu� 1-970-498-1500 www.in-situ.com... -
Page 123: Win-Situ 5 Troubleshooting
4 Open the Device Manager� 5 Click the arrow next to Ports (Com and LPT), and locate the USB Serial Port listing� The number listed next to this entry is your COM port address� Steps for Windows 7 systems� 1-970-498-1500 www.in-situ.com... -
Page 124: Steps For Windows Xp Systems
• Ensure you have selected the correct COM port in Win-Situ 5 Software� • Ensure you have clicked the connect button in the bottom right corner of the Win-Situ 5 screen� • Ensure the communication settings for Win-Situ 5 match the device� 1-970-498-1500 www.in-situ.com... -
Page 125: Care And Maintenance
RDO Sensor Cap Replacement The RDO Sensor Cap has a 2-year typical life� Follow the instructions included in the RDO Sensor Cap Replacement Kit� Replacement caps are available from In-Situ Inc� or your authorized In-Situ distributor� Instrument Storage Short-Term Storage (less than 1 week) The restrictor can be used as a storage cup�... -
Page 126: Cleaning The Sonde
7 Attach the reference junction cap to the sensor and tighten until it touches the sensor body� Turn the cap 90° more (one quarter of a turn)� Some filling solution will overflow� Wipe the excess off the sensor body� 8 Soak the sensor in tap water for at least 15 minutes� 9 Calibrate the sensor� 1-970-498-1500 www.in-situ.com... -
Page 127: Replacing The Junction
Up to 1 week: Soak the sponge included with the black storage cap with pH 4 buffer and install the cap on to the sensor� Use electrical tape to seal the cap onto the sensor to prevent leaks or the sponge drying out� 1-970-498-1500 www.in-situ.com... -
Page 128: Long-Term Storage
Do not wet the lens with any liquid� Storage Prior to installation, store the sensor body and cap in the factory supplied containers� Once installed on the sonde, the RDO sensor can be stored wet or dry depending on the sensor configuration of the sonde� 1-970-498-1500 www.in-situ.com... -
Page 129: Cleaning And Storing The Conductivity Sensor
Cleaning and Storing the Turbidity Sensor Routine Maintenance The optical windows should be clear of foreign material� To clear material gently rub the sensing windows using clean water and a soft cloth or swab� Do not use solvents on the sensor� 1-970-498-1500 www.in-situ.com... -
Page 130: Storage
Replacing Wiper Bristles Wiper bristles need to be replaced based on site conditions� In-Situ recommends replacing bristles at least every 12 months or when visibly bent, damaged, or fouled�... -
Page 131: Declaration Of Conformity
Declaration of Conformity 1-970-498-1500 www.in-situ.com... -
Page 132: Appendix
Appendix B for a description of parameter IDs� Parameter ID Map Register 13���2 6984 14���3 6985 30���19 6986 46���35 6987 62���51 6988 78���67 6989 94���83 6990 110���99 6991 126�115 6992 142���131 6993 158���147 6994 174���163 6995 190���179 6996 206���195 6997 219���211 1-970-498-1500 www.in-situ.com... -
Page 133: Appendix B: Parameter Numbers And Locations
Dissolved Oxygen 5590 177 = % Saturation % Saturation Chloride (Cl 5612 5611 117 = mg/L Turbidity 5619 5618 194 = NTU Oxygen Partial 5654 5653 26 = torr Pressure Total Suspended 5661 5660 117 = mg/L Solids 1-970-498-1500 www.in-situ.com... - Page 134 257 = RFU Intensity Blue Green Algae-Phycocyanin 5822 5821 118 = µg/L Concentration Blue Green Algae-Phycocyanin 5829 5828 257 = RFU Fluorescence Intensity Blue Green Algae- 5850 5849 118 = µg/L Phycocerythrin Concentration 5857 5856 257 = RFU 1-970-498-1500 www.in-situ.com...
-
Page 135: Appendix C: Unit Ids
Millimeters of Mercury (0 to C) inHg Inches of Mercury (4 to C) Centimeters of water (4 to C) Inches of water (4 to C) Torr Torr standard atmosphere Distance/Length (33-48) millimeters Centimeters Meters Kilometer Inches Feet Coordinates (49-64) Degrees Minutes Seconds 1-970-498-1500 www.in-situ.com... - Page 136 Density (129-144) g/cm3 Grams per cubic centimeter pH (145-160) Voltage (161-176) µV micro Volts milli Volts Volts Dissolved Oxygen (DO) % Saturation (177-192) % sat Percent saturation Turbidity (193-208) formazin nephelometric units nephelometric turbidity units formazin turbidity units 1-970-498-1500 www.in-situ.com...
- Page 137 Available (was Cubic meters per day) Liters per second ML/day Millions of liters per day mL/min milliliters per minute kL/day Thousands of liters per day Volume (225-240) Cubic feet Gallons Mgal Millions of gallons Cubic meters Liters acre-ft Acre feet 1-970-498-1500 www.in-situ.com...
-
Page 138: Appendix D: Register Data Formats
Appendix D: Register Data Formats The Modbus protocol specification requires any multiple-byte data type to be transmitted in Big Endean order, or most significant byte (MSB) first� In-Situ devices shall use the following register data formats� Register Data Type Table...
Need help?
Do you have a question about the Aqua TROLL 600 and is the answer not in the manual?
Questions and answers