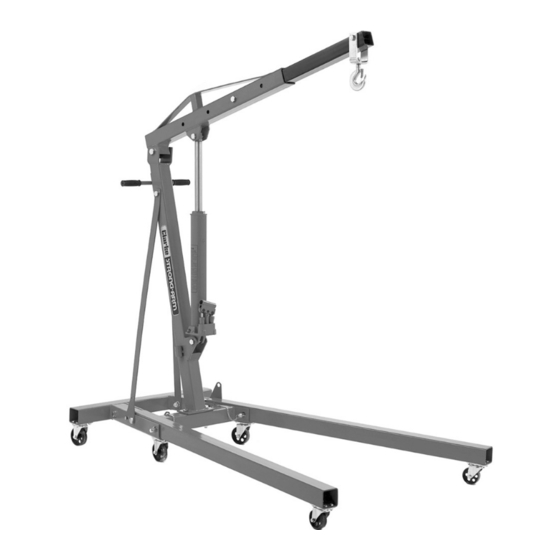
Summary of Contents for Clarke Strong-Arm CFC2000B
- Page 1 FOLDING CRANE MODEL NO: CFC2000B PART NO: 7611025 ASSEMBLY & USER INSTRUCTIONS ORIGINAL INSTRUCTIONS GC0318 ISS2...
-
Page 2: Technical Specifications
INTRODUCTION Thank you for purchasing this CLARKE Folding Crane. Before attempting to operate the product, it is essential that you read this manual thoroughly and carefully follow all instructions given. In doing so you will ensure the safety of yourself and that of others around you, and you can also look forward to the stand giving you long and satisfactory service. -
Page 3: Safety Precautions
SAFETY PRECAUTIONS 1. Always read instructions before setting up the equipment and before use. Failure to heed these warnings may result in damage to the equipment, or serious personal injury. WORKPLACE SAFETY 1. Always inspect the crane before use to ensure it is correctly assembled and in good condition and replace any damaged or worn parts. - Page 4 Do not substitute any other components or exceed the rated capacity of the crane. 6. If the load capacity decal becomes worn or illegible, contact Clarke Parts and service department, on 0208 988 7400 for replacement. Parts & Service: 020 8988 7400 / E-mail: Parts@clarkeinternational.com or Service@clarkeinternational.com...
-
Page 5: Unpacking And Assembly
6 x Castor Assemblies( 2 with brakes Visually inspect all components to ensure that no damage was suffered in transit. Any deficiencies should be reported to your CLARKE dealer immediately. Parts & Service: 020 8988 7400 / E-mail: Parts@clarkeinternational.com or Service@clarkeinternational.com... -
Page 6: Tools Required
ASSEMBLY TOOLS REQUIRED Various wrenches of 14, 22, 24 & 27 mm will be required or alternatively an adjustable wrench. 1. Fit the castors to the front arms using 4 x bolts, lock washers and nuts. Loosely fasten the rear 2 bolts &... - Page 7 5. Slide the right arm into the base frame as shown. Line up the holes and secure with a 130 mm bolt, washers and nut, securing the side bracket as you do so. 6. Repeat the procedure for the left arm.
- Page 8 10. Fix the ram to the main support post using 90 mm long bolt, washer and nut. 11. Attach the jib to the top of the main support post using the 90 mm bolt, washer and nut. 12. Connect the top of the ram to the jib as shown using 80 mm long bolt, washer and nut.
-
Page 9: Operation
15. Connect the handle to the rear of the main support post using the four remaining small bolts and lock washers. 16. Ensure that all weight is spread evenly across all sections, making sure that all castors are on level ground and that the assembly is sitting square and true. -
Page 10: Purging The Hydraulic System
LOWERING THE JIB 1. Use the end of the pump handle to turn the valve anticlockwise VERY SLOWLY. • The speed of lowering is controlled by how much you turn the valve. EXTENDING THE JIB 1. Lift the jib to a horizontal position. 2. -
Page 11: Maintenance
3. Do not attempt to adjust or tamper with the ram assembly, there are no user-serviceable parts. Contact your Clarke service department for any servicing. 4. Always visually inspect the crane before use, to ensure that all parts are correctly located and secure. -
Page 12: Hydraulic Oil
4. Top up the oil until it is level with the hole and replace the filler plug. NOTE: Top up using Clarke hydraulic oil (part number 3050830). • Do not mix different types of oil. Parts & Service: 020 8988 7400 / E-mail: Parts@clarkeinternational.com or Service@clarkeinternational.com... -
Page 13: Declaration Of Conformity
DECLARATION OF CONFORMITY Parts & Service: 020 8988 7400 / E-mail: Parts@clarkeinternational.com or Service@clarkeinternational.com... -
Page 14: Parts Diagram
PARTS DIAGRAM Parts & Service: 020 8988 7400 / E-mail: Parts@clarkeinternational.com or Service@clarkeinternational.com... -
Page 15: Parts List
Nut M16 Securing Ring GUARANTEE This CLARKE product is guaranteed against faulty manufacture for a period of 12 months from the date of purchase. Please keep your receipt as proof of purchase. This guarantee is invalid if the product is found to have been abused or tampered with in any way, or not used for the purpose for which it was intended.


Need help?
Do you have a question about the Strong-Arm CFC2000B and is the answer not in the manual?
Questions and answers