Advertisement
Quick Links
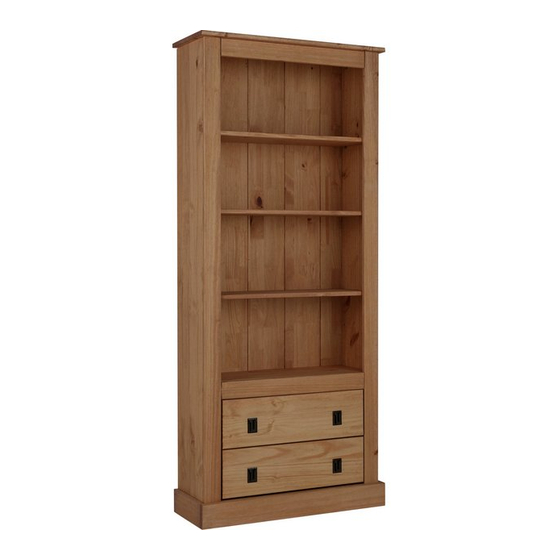
Tall Wide Bookcase With Drawers
Assembly Instructions
- Please keep for future reference
213/7816
Dimensions
Width - 78cm
Depth - 29cm
Height - 180cm
Important –
Please read these instructions fully before starting assembly
If you need help or have damaged or missing parts, call the
Customer Helpline: 08456 400 800
Issue 1 - 14/05/14
Advertisement

Related Manuals for Argos 213/7816


Summary of Contents for Argos 213/7816
- Page 1 Tall Wide Bookcase With Drawers Assembly Instructions - Please keep for future reference 213/7816 Dimensions Width - 78cm Depth - 29cm Height - 180cm Important – Please read these instructions fully before starting assembly If you need help or have damaged or missing parts, call the...
- Page 2 Safety and Care Advice Important – Please read these instructions fully before starting assembly This product has been produced We do not Check you have all the components and tools listed on from natural timber; you may recommend the pages 2 and 3. notice some variation in the grain use of power and colour of different component...
- Page 3 Components - Panels Please check you have all the panels listed below underside 1 Right side panel (178.2 x 26cm) 7 Top panel (78 x 29cm) underside 2 Left side panel (178.2 x 26cm) 8 Fixed shelf x 2 (70.4 x 23.6cm) 3 Right front frame (178.2 x 6.5cm) 9 Adjustable shelf x 2...
- Page 4 Components - Fittings If you have damaged or missing components, call the Customer Helpline: 08456 400 800 Please check you have all the fittings listed below Note: The quantities below are the correct amount to complete the assembly. In some cases more fittings may be supplied than are required.
- Page 5 Assembly Instructions Step 1 Fixing right front frame to the right side panel (Two people required for an easier assembly). Insert right side panel into right front frame through joints. Yes! Note: Before fixing the blocks into place it is important to ensure that the slot and groove of parts are fully pushed together...
- Page 6 Assembly Instructions Step 3 Fitting Metal dowels. Screw metal dowels into right side panel left side panel and top panel Note: Insert metal dowels as far as shown. Do not over tighten. Step 4 Insert shelf supports into the right side panel and left side panel...
- Page 7 Assembly Instructions Step 5 Insert dowels into the indicated parts. Step 6 Assembling the cabinet. Attention! Insert top front frames and bottom front frame into holes on right side panel , as shown. Fit cross rail to the right side panel then fix it using screw...
- Page 8 Assembly Instructions Step 7 Attention: Fixing shelves. With help, fit fixed shelves to right side panel Attention! Round edges on shelves must be facing front. Insert locking nuts into shelves where shown. Use a screwdriver to turn locking nuts clockwise to lock.
- Page 9 Assembly Instructions Step 9 Fixing top panel. With help, fit top panel to the cabinet. Insert 4 locking nuts into side panels where shown. Use a screwdriver to turn locking nuts clockwise to lock. Do not over tighten. Fix bottom front frame to the right and left side panels using screws as shown in the diagram.
- Page 10 Assembly Instructions Step 11 Fixing back panels. Important: Cabinet MUST ‘square’ when back panels are attached. Place back panels starting with a side back panel as shown in the diagram ( you can easily identify part as it has a straight cut on one of the edges) .
- Page 11 Assembly Instructions Step 12 Fixing back panels. Attach small back panel at the top first using nails Position profile onto back panel (just attach). Carefully slot the second back panel into the profile and fix it to the cabinet using nails Important! After fixing the back panels, with help,...
- Page 12 Assembly Instructions Step 14 Important: With help, carefully stand the product upright. Position adjustable shelves into place. Make sure round edge is facing front. Note: These shelves are adjustable. Step 15 Insert dowels into the drawer right side drawer left side...
- Page 13 Assembly Instructions Step 16 Drawer assembly. Attach drawer right side and drawer left side to the drawer front using screws Slide drawer bottom into slots on drawer sides and position drawer back in place. Holding the drawer back , press the drawer sides and fix them using screws Using bolts...
- Page 14 Assembly Instructions Step 17 Insert drawers into unit. With the back of the drawers past the front frames, use a hammer to tap dowels in flush to drawer sides. This is a safety catch to stop drawer falling out. Step 18 Note: Wall plugs not supplied.
-
Page 15: A Guide To - Wall Mounting & Fixings
A Guide to - Wall Mounting & Fixings Important: When drilling into walls always Important note: check that there are no hidden wires or pipes etc. If plastic wall plugs Make sure that the screws and wall plugs being used are supplied with your are suitable for supporting your unit.
Need help?
Do you have a question about the 213/7816 and is the answer not in the manual?
Questions and answers