Table of Contents
Advertisement
Quick Links
Advertisement
Table of Contents
Troubleshooting

Related Manuals for Danfoss H1T 045


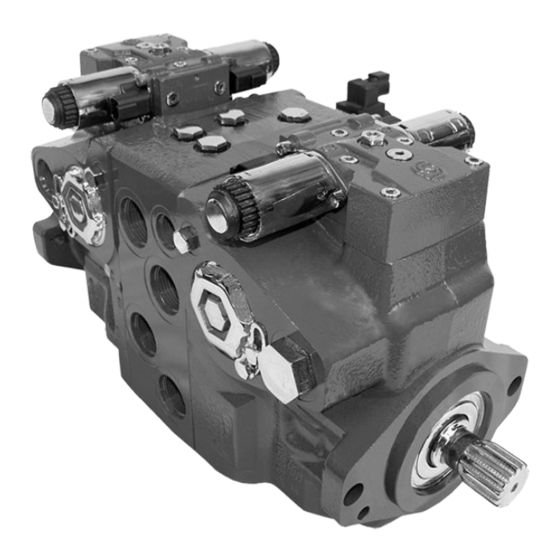
Summary of Contents for Danfoss H1T 045
- Page 1 Service Manual H1T 045/053, 060/068 Axial Piston Tandem Pumps www.danfoss.com...
- Page 2 Service Manual H1T 045/053, 060/068 Axial Piston Tandem Pumps Revision history Table of revisions Date Changed September 2020 Changed document number from 'AX00000103' to 'AX152886481761' and added 0405 important info about PL screens November 2018 Major layout update. 0401 June 2018 Angle sensor topics added.
-
Page 3: Table Of Contents
Service Manual H1T 045/053, 060/068 Axial Piston Tandem Pumps Contents Introduction Hydrostatics Servicing Overview..............................5 General Servicing Instructions..............................5 Safety Precautions....................................6 Independent Braking System..............................6 High Inlet Vacuum..................................6 Manufacturer’s Warranty................................6 Symbols used in Danfoss literature............................6 The Basic Closed Circuit................................. 8 Case Drain and Heat Exchanger..............................8... - Page 4 Service Manual H1T 045/053, 060/068 Axial Piston Tandem Pumps Contents Independent Braking System...............................35 Manufacturer’s Warranty............................... 35 Electrical Troubleshooting................................36 Integral Filter Bypass..................................36 Neutral Difficult or Impossible to Find........................... 36 Transmission Operates Normally in One Direction Only....................36 System Operating Hot..................................37 System Will Not Operate in Either Direction........................37 System Noise or Vibration................................38...
-
Page 5: Hydrostatics Servicing Overview
A worldwide network of Danfoss Global Service Partners is available for major repairs. Danfoss trains and certifies Global Service Partners on a regular basis. You can locate your nearest Global Service Partner using the distributor locator at http://www.danfoss.com. -
Page 6: Safety Precautions
Service Manual H1T 045/053, 060/068 Axial Piston Tandem Pumps Introduction Safety Precautions Always consider safety precautions before beginning a service procedure. Protect yourself and others from injury. Take the following general precautions whenever servicing a hydraulic system. Unintended Machine Movement Unintended movement of the machine or mechanism may cause injury to the technician or bystanders. - Page 7 Service Manual H1T 045/053, 060/068 Axial Piston Tandem Pumps Introduction Reusable part Apply grease / petroleum jelly Non-reusable part, use a new part Apply locking compound Non-removable item Inspect for wear or damage Option - either part may exist Clean area or part...
-
Page 8: The Basic Closed Circuit
Service Manual H1T 045/053, 060/068 Axial Piston Tandem Pumps Introduction The Basic Closed Circuit Hydraulic lines connect the main ports of the pump to the main ports of the motor. Fluid flows in either direction from the pump to the motor and back. Either of the hydraulic lines can be under high pressure. -
Page 9: Tandem Pumps Design
Introduction Tandem Pumps Design Danfoss H1 tandem closed circuit piston pumps convert input torque to hydraulic power. The tandem design powers two independent drive trains for dual-path propel applications. The two-piece input shaft transmits rotational force to the cylinder block. A splined coupling connects the front and rear shafts. -
Page 10: H1T Pumps Pictorial Diagram
Service Manual H1T 045/053, 060/068 Axial Piston Tandem Pumps Introduction H1T pumps pictorial diagram Charge Pressure Servo Pressure Suction/Case Drain/ System Return System Pressure Low Loop Pressure Bypass check Heat exchanger Suction Filter Screen Charge Pump Reservoir Control Cutoff Displacement Control... -
Page 11: H1T Tandem Pumps Schematics
Service Manual H1T 045/053, 060/068 Axial Piston Tandem Pumps Introduction H1T Tandem Pumps Schematics The schematics below show the function of an H1 tandem axial piston variable displacement pump with electric displacement control (EDC) and optional control cut-off valve. 045/053 Tandem... -
Page 12: System Schematic For Tandem Pumps
Service Manual H1T 045/053, 060/068 Axial Piston Tandem Pumps Introduction System Schematic for Tandem Pumps The schematic below shows the function of H1T axial piston variable displacement tandem pumps with electric displacement control (EDC). System schematic, tandem pumps F00B F00A... -
Page 13: Operation
An active pressure limiter destrokes a pump to near neutral when the load is in a stalled condition. The pump swash-plate moves in either direction necessary to regulate the system pressure, including into stroke (overrunning) or over-center (winch payout). The pressure limiter is optional on H1 pumps (except H1T 045/053 tandem pumps). Pressure Limiter Sectional View ©... -
Page 14: High Pressure Relief Valve (Hprv) And Charge Check Valve
Service Manual H1T 045/053, 060/068 Axial Piston Tandem Pumps Operation High Pressure Relief Valve (HPRV) and Charge Check Valve All H1 pumps have a combination high pressure relief and charge check valve. The high pressure relief function is a dissipative (heat generating) pressure control valve for the purpose of limiting excessive system pressures. - Page 15 Service Manual H1T 045/053, 060/068 Axial Piston Tandem Pumps Operation 1. Low pressure side of working loop 1. High pressure side of working loop 2. Charge check and HPRV 2. Charge check and HPRV © Danfoss | September 2020 AX152886481761en-000405 | 15...
-
Page 16: Charge Pressure Relief Valve (Cprv)
Service Manual H1T 045/053, 060/068 Axial Piston Tandem Pumps Operation Charge Pressure Relief Valve (CPRV) The charge pressure relief valve is a direct acting poppet valve that opens and discharges fluid to the pump case when pressure exceeds a designated level. The charge pressure relief valve maintains charge pressure at a designated level above case pressure. -
Page 17: Edc Operation
Service Manual H1T 045/053, 060/068 Axial Piston Tandem Pumps Operation Electrical Displacement Control EDC schematic, feedback from swash plate F00B F00A Feedback from Swash plate P003 478E P003 191 EDC Operation H1 EDC’s are current driven controls requiring a Pulse Width Modulated (PWM) signal. Pulse width modulation allows more precise control of current to the solenoids. -
Page 18: Manual Override (Mor)
Service Manual H1T 045/053, 060/068 Axial Piston Tandem Pumps Operation Manual Override (MOR) All controls are available with a manual override functionality, either as a standard or as an option for temporary actuation of the control to aid in diagnostics. -
Page 19: Mdc Operation
Service Manual H1T 045/053, 060/068 Axial Piston Tandem Pumps Operation Under some circumstances, such as contamination, the control spool could stick and cause the pump to stay at some displacement. For the MDC with CCO option the brake port (X7) provides charge pressure when the coil is energized to activate static function such as a brake release. -
Page 20: Mdc Torque
Service Manual H1T 045/053, 060/068 Axial Piston Tandem Pumps Operation MDC Torque Description Value Torque required to move handle to maximum displacement 1.4 N•m [12.39 lbf•in ] Torque required to hold handle at given displacement 0.6 N•m [5.31 lbf•in] Maximum allowable input torque 20 N•m [177 lbf•in]... - Page 21 Service Manual H1T 045/053, 060/068 Axial Piston Tandem Pumps Operation The 045/053 tandem also supplies charge pressure to the port X7 for auxiliary operation of devices such as spring applied/pressure released brakes. The control cut off valve also shunts pressure away from port The 060/068 tandem offers a separate brake release valve that operates independently of the CCO valve allowing the controls to be activated before activating any auxiliary functions.
- Page 22 Service Manual H1T 045/053, 060/068 Axial Piston Tandem Pumps Operation Solenoid data Description 12 V 24 V 18 V Minimum supply voltage 16 V 32 V Maximum supply voltage (continuous) IP 67 IP Rating IEC 60 529 IP 69K with mating connector...
-
Page 23: Operating Parameters
Service Manual H1T 045/053, 060/068 Axial Piston Tandem Pumps Operating Parameters Input Speed Minimum is the lowest input speed recommended during engine idle condition. Operating below speed minimum speed limits the pump’s ability to maintain adequate flow for lubrication and power transmission. - Page 24 Service Manual H1T 045/053, 060/068 Axial Piston Tandem Pumps Operating Parameters Maximum is the highest intermittent pressure allowed under any circumstances. Applications pressure with applied pressures between rated and maximum require factory approval with complete application, duty cycle, and life expectancy analysis.
-
Page 25: Servo Pressure
Service Manual H1T 045/053, 060/068 Axial Piston Tandem Pumps Operating Parameters Servo Pressure Servo pressure is the pressure in the servo system needed to position and hold the pump on stroke. It depends on system pressure and speed. At minimum servo pressure the pump will run at reduced stroke depending on speed and pressure. -
Page 26: External Shaft Seal Pressure
The minimum temperature relates to the physical properties of component materials. Size heat exchangers to keep the fluid within these limits. Danfoss recommends testing to verify that these temperature limits are not exceeded. Viscosity For maximum efficiency and bearing life, ensure the fluid viscosity remains in the recommended range. -
Page 27: Technical Specifications
Service Manual H1T 045/053, 060/068 Axial Piston Tandem Pumps Technical Specifications H1 Pumps General Specification Axial piston closed circuit variable displacement pumps of cradle swash-plate design with clockwise or counterclockwise direction of rotation. Pipe connections • Main pressure ports: ISO split flange boss •... -
Page 28: Operating Parameters For H1 Tandem Pumps
Service Manual H1T 045/053, 060/068 Axial Piston Tandem Pumps Technical Specifications Physical properties (continued) Description 045/053 060/068 Auxiliary mounting flange with Flange 82–2 outer dia: Flange 101–2 outer dia: metric fasteners, shaft outer diameter • • Ø16 mm - 4 (SAE A, 9 teeth) Ø22 mm - 4 (SAE B, 13 teeth) -
Page 29: Fluid Specification
Service Manual H1T 045/053, 060/068 Axial Piston Tandem Pumps Technical Specifications Fluid Specification Viscosity 5 mm /s [42 SUS] Intermittent 7 mm /s [49 SUS] Minimum 12 – 80 mm /s [66 – 370 SUS] Recommended range 1600 mm /s [7500 SUS] Maximum Intermittent = Short term t <... -
Page 30: Fluid And Filter Maintenance Recommendations
Caution Hydraulic fluid contains hazardous material. Avoid contact with hydraulic fluid. Always dispose of used hydraulic fluid according to state and federal environmental regulations. For further information see Danfoss publication Technical Information, Hydraulic Fluids and Lubricants, BC0000093. 30 | ©... -
Page 31: Pressure Measurements
Service Manual H1T 045/053, 060/068 Axial Piston Tandem Pumps Pressure Measurements Port locations and gauge installation - 045/053 The following table and drawings show the port locations and gauge sizes needed. When testing system pressures, calibrate pressure gauges frequently to ensure accuracy. Use snubbers to protect gauges. -
Page 32: Port Locations And Gauge Installation - 060/068
Service Manual H1T 045/053, 060/068 Axial Piston Tandem Pumps Pressure Measurements Port locations and gauge installation - 060/068 Port information Port identifier Port size Wrench size Reading Gauge size, bar [psi] L1, L2, L3 1 1/16-12 UNF 2B 9/16 internal hex... -
Page 33: Initial Startup Procedures
Service Manual H1T 045/053, 060/068 Axial Piston Tandem Pumps Initial Startup Procedures Start-Up Procedure Prior to installing the pump, inspect for damage that may have occurred during shipping. Follow this procedure when starting-up a new pump installation or when restarting an installation in which the pump has been removed and re-installed on a machine. - Page 34 Service Manual H1T 045/053, 060/068 Axial Piston Tandem Pumps Initial Startup Procedures 17. Start engine, checking to be certain pump remains in neutral. Run engine at normal operating speed and carefully check for forward and reverse control operation. 18. Continue to cycle between forward and reverse for at least five minutes to bleed all air and flush system contaminants out of the system loop.
-
Page 35: Troubleshooting
Service Manual H1T 045/053, 060/068 Axial Piston Tandem Pumps Troubleshooting This section provides troubleshooting steps to follow if you are having problems with your machine until you solve the problem. Some of the troubleshooting items are system specific. Always observe the safety precautions listed in the Introduction section and precautions related to your specific equipment. -
Page 36: Electrical Troubleshooting
Service Manual H1T 045/053, 060/068 Axial Piston Tandem Pumps Troubleshooting Electrical Troubleshooting Electrical troubleshooting Item Description Action • Control operates pump in Control coil failure Measure resistance at coil pins. Resistance should be one direction only. 14.20 Ω (24V) or 3.66 Ω (12V) at 20°C [70°F]. -
Page 37: System Operating Hot
Check for torn/missing servo seals. Replace and retest. Only decaying stroking the pump. a Danfoss Authorized Service Center may remove the servo piston without voiding the warranty. Bypass function open Open bypass will cause one or both directions to be Close bypass function. -
Page 38: System Noise Or Vibration
Service Manual H1T 045/053, 060/068 Axial Piston Tandem Pumps Troubleshooting Item Description Action Charge pump A malfunctioning charge pump will provide insufficient Repair or replace the charge pump. charge flow. System pressure Low system pressure does not provide enough power to Measure system pressure. -
Page 39: Adjustments
Service Manual H1T 045/053, 060/068 Axial Piston Tandem Pumps Adjustments This section offers instruction on inspection and adjustment of pump components. Read through the entire topic before beginning a service activity. Refer to Pressure Measurements on page 31 for location of gauge ports and suggested gauge size. -
Page 40: Charge Pressure Relief Valve Adjustment
Service Manual H1T 045/053, 060/068 Axial Piston Tandem Pumps Adjustments Charge Pressure Relief Valve Adjustment Operate the system with the pump in neutral (zero displacement) when measuring charge pressures. Old style New style Old style P109549 This procedure explains how to check and adjust the charge pressure relief valve. - Page 41 Service Manual H1T 045/053, 060/068 Axial Piston Tandem Pumps Adjustments Item Port description Wrench size Torque Gauge size Charge pressure gauge ¼ in 24 N•m [17 lb•ft] 0–50 bar [0–1000 psi] 9/16 in (045/053) 48.5 N•m [35.8 lb•ft] (045/053) 0–10 bar Case drain [0–100 psi]...
- Page 42 Service Manual H1T 045/053, 060/068 Axial Piston Tandem Pumps Adjustments Charge check / HPRV adjustment The charge check/HPRV combines the charge check and high pressure relief functions. Whenever you replace a charge check/HPRV, operate the vehicle/machine through its full range of functions to ensure proper pump operation.
-
Page 43: Pressure Limiter
Pumps with only HPRV valves no longer contain pressure limiter (PL) screens and retainer. To convert the pumps to use pressure limiter valves, please contact your Danfoss Service Partner. Pumps that have PL valves without PL screens and retainers are at high risk of contamination and product malfunction. - Page 44 Service Manual H1T 045/053, 060/068 Axial Piston Tandem Pumps Adjustments PL valve adjustment Clockwise PL valve adjustment Counterclockwise 060/068 060/068 Clockwise Counterclockwise rotation rotation P109552 P109553 Legend: Legend: Controls pressure ports: B = 1, A = 2, C = 3, D = 4 Controls pressure ports: A = 1, B = 2, D = 3, C = 4 Lock nut torque = 20 Nm [15 lb•ft]...
- Page 45 Service Manual H1T 045/053, 060/068 Axial Piston Tandem Pumps Adjustments 9. After adjustment, torque the locknut (L024) to 12 N•m [9 lbf•ft]. Caution Do not over torque. 10. Shut down the prime mover. 11. Remove gauges and replace plugs. ©...
-
Page 46: Charge Check / Hprv Adjustment
Service Manual H1T 045/053, 060/068 Axial Piston Tandem Pumps Adjustments Charge check / HPRV adjustment The charge check/HPRV combines the charge check and high pressure relief functions. Whenever you replace a charge check/HPRV, operate the vehicle/machine through its full range of functions to ensure proper pump operation. -
Page 47: Engaging The Bypass Function
Service Manual H1T 045/053, 060/068 Axial Piston Tandem Pumps Adjustments Engaging the Bypass Function It is possible to damage the drive motor(s) by operating in bypass mode without charge pressure. Move the vehicle/machine at a speed not more than 20% of maximum for a duration not exceeding 3 minutes. -
Page 48: Displacement Limiter Adjustment For Tandem Pumps
Service Manual H1T 045/053, 060/068 Axial Piston Tandem Pumps Adjustments Displacement Limiter Adjustment for Tandem Pumps An optional displacement limiter is located on each side of the pump housing. The maximum displacement can be limited in either direction. Displacement limiters are not pre-set by the factory but are installed to minimize the extension of the adjustment screw while not limiting the maximum displacement of the pump. - Page 49 Service Manual H1T 045/053, 060/068 Axial Piston Tandem Pumps Adjustments 1. Loosen the locknut (E550). Lock nut wrench size is 13 mm and torque is 23 N•m [17 lbf•ft] (for all tandem pumps). 2. Rotate the adjusting screw (E450). Adjusting screw wrench size is 4 mm. Rotating the adjusting screw clockwise decreases the maximum displacement of the pump while rotating the adjusting screw counterclockwise increases the maximum displacement.
-
Page 50: Control Neutral Adjustment
Service Manual H1T 045/053, 060/068 Axial Piston Tandem Pumps Adjustments Control Neutral Adjustment All functions of the Electric Displacement Control (EDC), are preset at the factory. If necessary, adjust the pump to neutral with the pump running on a test stand or on the vehicle/machine with the prime mover operating. - Page 51 Service Manual H1T 045/053, 060/068 Axial Piston Tandem Pumps Adjustments 6. Rotate the neutral adjusting screw clockwise until the pressure increases on the gauge. Note the angular position of the wrench. 7. Rotate the neutral adjusting screw counterclockwise until the pressure increases by an equal amount on the other gauge.
-
Page 52: Mechanical Neutral Adjustment
Service Manual H1T 045/053, 060/068 Axial Piston Tandem Pumps Adjustments Mechanical Neutral Adjustment Mechanical neutral is set with the pump running at 1800 min (rpm). To set neutral, you must stroke the pump in each direction. The procedure is the same for each side of each pump for both the front and rear sections. -
Page 53: Servo Adjustment For Tandem Pumps
Service Manual H1T 045/053, 060/068 Axial Piston Tandem Pumps Adjustments Servo Adjustment for Tandem Pumps Servo and system pressure gauge port locations (045/053) Control Cutoff (CCO) E300 E350 P109257 Legend: Ports per ISO 11926–1 A, B, C, D System port: 1 –12... - Page 54 Service Manual H1T 045/053, 060/068 Axial Piston Tandem Pumps Adjustments Servo and system pressure gauge port locations (060/068) P109555 Legend: Ports per ISO 11926–1 A, B, C, D System port: Split flange M12 x 1.5 MA, MB, MC, MD System gauge port: –18...
- Page 55 Service Manual H1T 045/053, 060/068 Axial Piston Tandem Pumps Adjustments 6. Maintain servo pressure differential between 1-2 bar [14-29 psi] during this step. Slowly thread the servo cylinder on the M5 side in until the system pressure differential starts to decrease. Continue turning the servo cylinder in until the system delta pressure results in no machine movement.
-
Page 56: Minor Repair
Service Manual H1T 045/053, 060/068 Axial Piston Tandem Pumps Minor repair Standard Procedures at Removing Pump Before working on the pump, thoroughly clean the outside. If the pump has an auxiliary pump attached, remove both pumps as a single unit. -
Page 57: Edc Control Installation
Service Manual H1T 045/053, 060/068 Axial Piston Tandem Pumps Minor repair 1. Using a 5 mm internal hex wrench, remove the six cap screws (D250) 2. Remove the control module and gasket (D150) and discard the gasket. 3. If necessary, remove orifices (F100) using a 3 mm internal hex wrench. -
Page 58: Control Solenoids Repair
Service Manual H1T 045/053, 060/068 Axial Piston Tandem Pumps Minor repair Control Solenoids Repair 1. Disconnect electrical connection and remove the three cap screws (D050) using a 4 mm internal hex wrench. 2. Remove the solenoid (D025) and O-ring (D025A). Discard the O-ring. -
Page 59: Mdc Control Repair
Service Manual H1T 045/053, 060/068 Axial Piston Tandem Pumps Minor repair MDC Control Repair D025 D050 (3X) 4 mm D025A D025A D050 (3X) 4 mm MDC Repair Legend: D80 – Solenoid D81 – O-ring D098 – Retaining ring D750 – Neutral start switch D751 –... -
Page 60: Mdc Control Assembly
Service Manual H1T 045/053, 060/068 Axial Piston Tandem Pumps Minor repair MDC Control Assembly Ensure you install dowel pins (D300) in housing before installing control. The pump will lose control, causing a potentially hazardous situation. If a feedback pin comes off during operation, ensure the feedback pin is properly torqued before continuing with reassembly. -
Page 61: Angle Sensor On Edc Repair
Service Manual H1T 045/053, 060/068 Axial Piston Tandem Pumps Minor repair Angle sensor on EDC Repair D767 D770 1. Clean the exterior of the pump to remove debris. 2. Remove protection cover screws (D767) using a 4 mm internal hex wrench. -
Page 62: Edc With Angle Sensor Repair
Service Manual H1T 045/053, 060/068 Axial Piston Tandem Pumps Minor repair EDC with Angle Sensor Repair D250 D150 Feedback link Dowel pins (D300) must remain in the housing. 1. Clean pump externally with clean solvent to remove debris. 2. Using a 5 mm internal hex wrench, remove the six cap screws (D250) 3. - Page 63 Service Manual H1T 045/053, 060/068 Axial Piston Tandem Pumps Minor repair 7. Pull assembly fixture out before installing control screws. Solenoid shaft Control spool Adjusting screw (cam) Feedback pin Maximum adjustment less than 120° Remove plug (D065) and verify the swashplate feedback pin is properly positioned between control feedback arms.
-
Page 64: Shaft, Seal And Bearing Repair
Service Manual H1T 045/053, 060/068 Axial Piston Tandem Pumps Minor repair Shaft, Seal and Bearing Repair The input shaft, seal, and front bearing are serviceable without disassembling the entire pump. Orient the pump on the work surface so the shaft is pointing up. -
Page 65: Shaft, Seal And Bearing Installation
Service Manual H1T 045/053, 060/068 Axial Piston Tandem Pumps Minor repair Shaft, Seal and Bearing Installation 1. Inspect the shaft journals for wear, scratching, and pits. 2. Check the splines for fretting; replace if damaged. 3. Rotate the bearing, if it does not rotate smoothly, replace it. -
Page 66: Charge Pump Repair (045/053 Only)
Service Manual H1T 045/053, 060/068 Axial Piston Tandem Pumps Minor repair Charge Pump Repair (045/053 only) If an auxiliary pump is attached, remove auxiliary pump and coupling before servicing charge pump. Position pump with front shaft pointing downward. Attach securely to a proper work stand. -
Page 67: Charge Pump Installation
Service Manual H1T 045/053, 060/068 Axial Piston Tandem Pumps Minor repair 4. Using a 10 mm internal hex, remove screws (K400), and cover (K101). 5. Remove and discard seal (S300). 6. Remove geroter cover (S200). Note the position of the alignment pin (S500) in the housing. The alignment pin position is different for clockwise or counterclockwise rotation. -
Page 68: Charge Check And Hprv Repair (045/053)
Service Manual H1T 045/053, 060/068 Axial Piston Tandem Pumps Minor repair Charge Check and HPRV Repair (045/053) The high pressure relief and charge check valve assemblies may be removed for cleaning and replacement of the O-rings. These valves are factory set and are not field adjustable. Refer to the pump model code for the factory setting when ordering replacements. -
Page 69: Hprv Port Relationship
Service Manual H1T 045/053, 060/068 Axial Piston Tandem Pumps Minor repair HPRV Port Relationship The illustration below illustrates the relationship between the HPRVs and the ports controlled by those valves. HPRV port relationship HPRV valve Controls port B HPRV valve... -
Page 70: Hprv (60/68)
Pumps with only HPRV valves no longer contain pressure limiter (PL) screens and retainer. To convert the pumps to use pressure limiter valves, please contact your Danfoss Service Partner. Pumps that have PL valves without PL screens and retainers are at high risk of contamination and product malfunction. - Page 71 Service Manual H1T 045/053, 060/068 Axial Piston Tandem Pumps Minor repair 1. Mark the location of each valve prior to removal. 2. Using a 22 mm wrench remove the HPRVs. 3. Remove and discard the O-rings (L060) and backup rings (L068).
-
Page 72: Charge Pressure Relief Valve Repair
Service Manual H1T 045/053, 060/068 Axial Piston Tandem Pumps Minor repair Charge Pressure Relief Valve Repair Replace the charge pressure relief valve (V10-1 or V10-2) as a complete unit. Do not attempt to repair the internal components of the valve. -
Page 73: Control Cut-Off Valve / Brake Valve Repair
Service Manual H1T 045/053, 060/068 Axial Piston Tandem Pumps Minor repair Control Cut-off Valve / Brake Valve Repair Replace the control cut-off valve as a complete unit. Do not attempt to repair the internal components of the valve. Control cutoff valve (045/053) G10A 46 N•m... - Page 74 Service Manual H1T 045/053, 060/068 Axial Piston Tandem Pumps Minor repair Control cutoff valve (060/068) G10A G10A 1. Disconnect the coil from the vehicle/machine wire harness. 2. Using a 24 mm hex wrench, remove the control cut-off valve coil nut (G30).
-
Page 75: Torque Chart
Service Manual H1T 045/053, 060/068 Axial Piston Tandem Pumps Torque Chart Fasteners and Plugs D065 D250 G250 A Pad K350 G350 D015 B015 D060 D050 B020 B Pad G250 K350 E350 G350 K007 P109564 © Danfoss | September 2020 AX152886481761en-000405 | 75... -
Page 76: Fastener Size And Torque Chart
Service Manual H1T 045/053, 060/068 Axial Piston Tandem Pumps Torque Chart B015 G250 G250 B015 B015 B015 B020 B020 B020 B020 G250 G250 D065 D065 G250 G250 P109558 Fastener Size and Torque Chart Item Fastener Wrench size Torque D015 Neutral adjust screw... -
Page 77: Plug Size And Torque Chart
Service Manual H1T 045/053, 060/068 Axial Piston Tandem Pumps Torque Chart Item Fastener Wrench size Torque V020 Charge pressure adjusting screw 6 mm internal hex V022 Charge pressure locking nut 19 mm hex 40 N•m [30 lbf•ft] Plug Size and Torque Chart... - Page 78 Phone: +86 21 2080 6201 Danfoss can accept no responsibility for possible errors in catalogues, brochures and other printed material. Danfoss reserves the right to alter its products without notice. This also applies to products already on order provided that such alterations can be made without subsequent changes being necessary in specifications already agreed.
Need help?
Do you have a question about the H1T 045 and is the answer not in the manual?
Questions and answers