Advertisement
Quick Links
Advertisement

Subscribe to Our Youtube Channel
Related Manuals for Franklin Electric FPS SSI Series


Summary of Contents for Franklin Electric FPS SSI Series
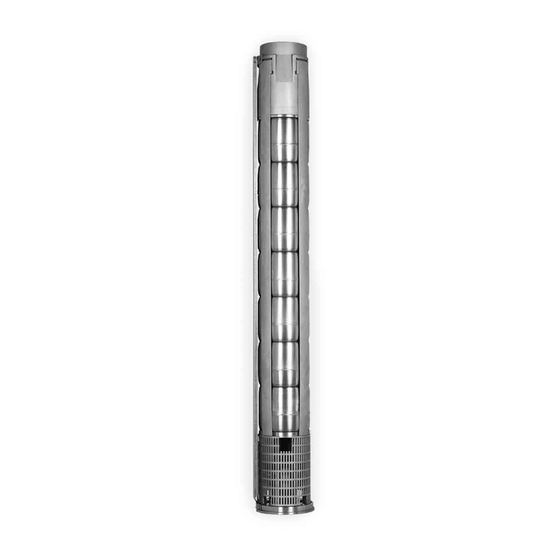
- Page 1 SUBMERSIBLES SSI SERIES Assembly Manual franklinwater.com...
- Page 2 Copyright © 2020, Franklin Electric, Co., Inc. All rights reserved.
-
Page 3: Table Of Contents
TABLE OF CONTENTS ASSEMBLY KIT FOR SUBMERSIBLES Special Tools Recommended Equipment Assembly Components Instructions for Assembly Dimensions for Recommended Equipment... -
Page 4: Special Tools
SPECIAL TOOLS MACHINERY AND TOOLS The minimum basic manual tools and the equipment needed to assemble submersible pumps are: A. Vernier Caliper type Height Gage, 0-150mm for verifying the height of the arrow B. Ratchet for 11/16” fastening screws C. Ratchet for 3/4” fastening tension screws D. -
Page 5: Recommended Equipment
RECOMMENDED EQUIPMENT RECOMMENDED EQUIPMENT FOR ASSEMBLY CENTER It is recommended that furnishings be adapted similarly to those shown below in order to facilitate assembly: Fitting Opening Assembly Table or Support Area with opening for Bench or Support Area for Final Adjustment of fitting from below Pump Assembly... -
Page 6: Assembly Components
SPECIAL TOOLS ASSEMBLY COMPONENTS Based on the pump model being assembled, a specific quantity of the following components is required: A. Motor Bracket with First Stage F. Motor Coupling and Key B. Discharge G. Strap Nuts and Washers C. Top Diffuser (no neoprene ring) H. -
Page 7: Instructions For Assembly
INSTRUCTIONS FOR ASSEMBLY Insert shaft into the coupling with the key in the keyway. Ensure shaft is seated completely into the coupling. Your support table set up may vary, but we recommend having access below the table to secure shaft to build fixture (step 4). Install the motor bracket to the build fixture by aligning bracket holes with four hubs on fixture. - Page 8 INSTRUCTIONS FOR ASSEMBLY Tighten the nut to the torque shown in table 1.0. Only on the first impeller, place the graphite disc on all models with the exception of 360SSI in the SSI 6" Series and models of the 10" SSI Series. Slide diffuser over the impeller and upthrust washer until it Flare Nut is seated completely down on the motor bracket.
- Page 9 INSTRUCTIONS FOR ASSEMBLY Install the upper diffuser (does not contain wear ring) and the discharge. Make sure to align the strap locations on the discharge with the holes in the motor bracket. Depending on the size of pump, the slot may have a Absence of different configuration and location on the discharge.
- Page 10 INSTRUCTIONS FOR ASSEMBLY Remove the pump from the build fixture by removing the fixture bolt from underneath the fixture and lifting off the shaft stub. Lay the pump horizontal on workbench or horizontal support. CAUTION: On pumps with higher stage counts, support center of pump when laying it horizontal to prevent the pump from bowing.
- Page 11 INSTRUCTIONS FOR ASSEMBLY Apply Loctite® 302-43 to the set screw from the motor coupling kit and reinstall the screw on the shaft coupling. Use 5 mm Allen wrench to tighten. Once secured, identify the cable guard included with the corresponding pump model. Cable Guard Assembly: For 6”...
- Page 12 INSTRUCTIONS FOR ASSEMBLY Use the small flat-head screwdriver to gently raise the strap on the opposite side of the cable guard. Gently tap the other tab under the strap. Remove the screwdriver after the cable guard tab has started under the strap. The cable guard should be centered between the two straps.
- Page 13 INSTRUCTIONS FOR ASSEMBLY Use the small flat-head screwdriver to gently guide the tab under the strap on the opposite side of the cable guard. Once the tab is started under the strap, remove the screwdriver. The cable guard should be centered between the two straps.
- Page 14 INSTRUCTIONS FOR ASSEMBLY Fill out nameplate data. For 6” pumps, install the nameplate by inserting drive rivets (supplied) into the two pre-drilled holes located on the motor bracket. For 8” and 10” pumps, attach nameplate to the suction screen with two #6 machine screws and lock nuts (supplied).
-
Page 15: Dimensions For Recommended Equipment
DIMENSIONS FOR RECOMMENDED EQUIPMENT ASSEMBLY TABLE We recommend preparing a table or similar area with an opening for adjustment from below. 35cm FINAL ADJUSTMENT BENCH Provides stability for elevated placement of the pump in horizontal position. 95cm 200cm 60 cm... - Page 16 franklinwater.com Mi9048 Rev 001 01-20...
Need help?
Do you have a question about the FPS SSI Series and is the answer not in the manual?
Questions and answers