Advertisement
Table of Contents
RESEARCH&DEVELOPMENT OF AMERICA, INC.
5420 DANIELS STREET STE A, CHINO CA., 91710 · (800) 634-9166 · (909) 628-4722 · FAX (909) 591-2198
www.yoshimura-rd.com
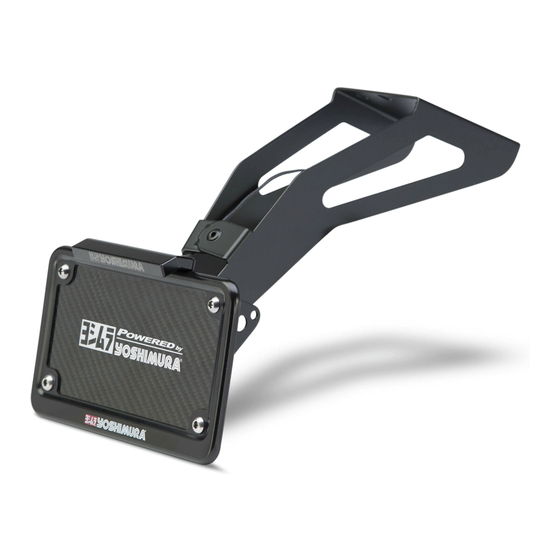
FENDER ELIMINATOR KIT
070BG123502
Honda CRF250L
THIS PRODUCT IS NOT DOT APPROVED.
Yoshimura R&D of America, Inc. is not liable or responsible for any resulting event caused by the
!
!
Installation of this product. Check with local laws and regulations for compliance prior to
installation and use. This product is not intended for use on public highways.
Advertisement
Table of Contents

Subscribe to Our Youtube Channel
Related Manuals for Yoshimura 070BG123502


Summary of Contents for Yoshimura 070BG123502
- Page 1 Honda CRF250L THIS PRODUCT IS NOT DOT APPROVED. Yoshimura R&D of America, Inc. is not liable or responsible for any resulting event caused by the installation of this product. Check with local laws and regulations for compliance prior to installation and use. This product is not intended for use on public highways.
- Page 2 Yoshimura LED Rear Turn Signal Kit w/ Relay 070BGUNVTBKT Universal Turn Signal Bracket Kit ** Not shown on diagram. *** The Yoshimura Universal Turn Signal Bracket Kit is to be used with aftermarket stud-mounted turn signals and is sold separately.
- Page 3 6. Using the BN-SSS-22-18, solder shrink connectors provided in the kit, connect the Yoshimura combination light wires to the stock tail/brake light wires as follows: Yellow Wire -to- Black (Positive) Black Wire -to- Green (Ground)
- Page 4 Scan for link to solder shrink connector instruction video. 7. Route combination light and turn signal wires to stock location. Re-connect brake light and turn signal connectors. 8. Re-install upper rear fender using the reverse steps of removal. 9. Re-install rider seat. 10.
Need help?
Do you have a question about the 070BG123502 and is the answer not in the manual?
Questions and answers