Table of Contents
Advertisement
Quick Links
5420 DANIELS STREET STE A, CHINO CA., 91710 · (800) 634-9166 · (909) 628-4722 · FAX (909) 591-2198
FOR CLOSED COURSE COMPETITION ONLY; NOT INTENDED FOR STREET USE
You must know how to remove and replace your stock exhaust in order to install this product
otherwise have it installed by a professional mechanic. Keep all stock parts from your existing
system as some components may be necessary to install your new Yoshimura exhaust depending
on the application. Read through all instructions before beginning installation. Exhaust system can
be extremely hot. Let motorcycle cool down before beginning installation. Always wear hand and
eye protection and take precautionary measures to avoid injury.
NOTE: IN THE STATE OF CALIFORNIA, IT IS ILLEGAL TO MODIFY THE EMISSION CONTROL SYSTEM, WHICH INCLUDES THE CARBURETORS OF ANY VEHICLE.
RESEARCH&DEVELOPMENT OF AMERICA, INC.
www.yoshimura-rd.com
RACE SERIES
Qualified Manufacturer Declared "Modified Part "
Suzuki
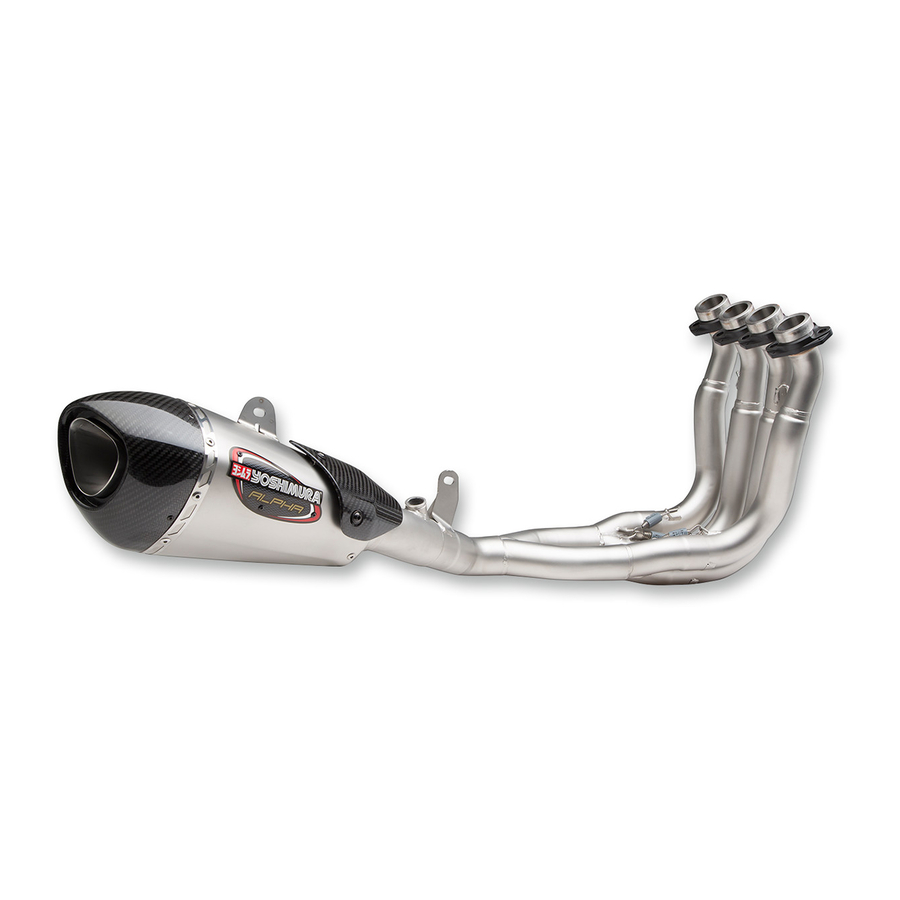
11211AP520 (SS/CF)
AT2 Full System
Race Series systems are:
• NOT CARB/EPA tail-pipe emissions compliant.
• NOT street legal.
• For "Closed Course Competition" use only.
2022
Hayabusa
Advertisement
Table of Contents

Related Manuals for Yoshimura RACE Series


Summary of Contents for Yoshimura RACE Series
- Page 1 Keep all stock parts from your existing system as some components may be necessary to install your new Yoshimura exhaust depending on the application. Read through all instructions before beginning installation. Exhaust system can be extremely hot.
- Page 2 Assembly Diagram Item Description Qty. 1118SMT Manifold 1118SDY-1 Flange 1121-404-1D-1 Header 11211-421D Tailpipe 11211AP520-RMA Muffler Assembly Z1031 Rubber Grommet Collar Z1030 Rubber Grommet Washer Z1031-SP Grommet Spacer Insert 8X38WSH 8mm x 38mm Washer M8X30H 8mm x 30mm Flanged Hex Head Bolt 11211-BRKT Header Chassis Mount Bracket 8MMNUT...
- Page 3 5. Assemble and secure header bracket to chassis Note: Exhaust port gaskets will not be used with mount bracket as shown. Torque bolt to 23 Nm, the Yoshimura full-system. Remove from 17 ft-lb (2.3 kg-m). cylinder head. 9. Remove the two bolts securing header chassis mount bracket to frame and remove bracket.
- Page 4 Clean using a soft cloth and soap. Do not use of removal. abrasive materials as it will scratch the surface. 14. Re-install stock O2 sensor into Yoshimura Surface reconditioning services are available to header. Torque to factory specifications. remove scratches and undesirable discoloration due to extreme heat.
- Page 5 Dear Yoshimura Customer, Congratulations and thank you for purchasing a Yoshimura Exhaust System. Over six decades of experience in research and development, state of the art machinery, materials and craftsmanship of the highest quality all come together in a product of exceptional quality and performance—in other words, this is the best thing you can put on your bike.
- Page 6 RE-PACKING TIPS To maintain maximum sound and engine performance the muffler packing will need to be replaced at some time during the muffler’s life. Yoshimura recommends repacking your muffler at least once a year. Failure to maintain the muffler packing may cause damage to the muffler and/or void the warranty. Regularly inspect the muffler body for discoloration, cracks, rattling, or other signs of wear caused by depleted muffler packing.
Need help?
Do you have a question about the RACE Series and is the answer not in the manual?
Questions and answers