Oracle StorageTek SL150 Manual
Modular tape library
Hide thumbs
Also See for StorageTek SL150:
- Reference manual (266 pages) ,
- Library manual (196 pages) ,
- User manual (130 pages)

Related Manuals for Oracle StorageTek SL150


Summary of Contents for Oracle StorageTek SL150
- Page 1 StorageTek SL150 Modular Tape Library Customer Replaceable Unit Guide E29812-08 April 2014...
- Page 2 Oracle Corporation and its affiliates disclaim any liability for any damages caused by use of this software or hardware in dangerous applications.
-
Page 3: Table Of Contents
Contents Preface ................................vii Documentation Accessibility ........................vii 1 Product Overview General Information ..........................1-1 Class 1 Laser Product Notice ........................1-3 Library Status Indicators......................... 1-3 Customer Replaceable Units ........................1-4 CRU Indicators and Controls ......................1-4 2 Preparations Electrostatic Discharge ..........................2-1 Electrostatic Discharge Prevention .................... - Page 4 Power-Down..........................3-11 To Perform a Controlled Power-Down from the GUI............3-11 To Perform an Orderly Shutdown from the Front Control Panel ........3-12 To Perform a Forced Power-Down ..................3-13 To Remove a Cartridge Magazine Manually............... 3-13 Front Control Panel......................... 3-14 To Remove the Front Control Panel .....................
- Page 5 List of Figures StorageTek SL150 Base and Expansion Modules ..............1-1 1–1 1–2 Remote Management Interface ....................1-2 1–3 Library Status Indicators (Front Control Panel) ..............1-3 2–1 SL150 Remote Management Log In Dialog................2-2 3–1 CRU Locations (Rear View of SL150 Base and Expansion Module) ........3-1 Set Library Offline........................
-
Page 7: Preface
Documentation Accessibility For information about Oracle's commitment to accessibility, visit the Oracle Accessibility Program website at http://www.oracle.com/pls/topic/lookup?ctx=acc&id=docacc. Access to Oracle Support Oracle customers have access to electronic support through My Oracle Support. For information, visit http://www.oracle.com/pls/topic/lookup?ctx=acc&id=info visit if you are hearing http://www.oracle.com/pls/topic/lookup?ctx=acc&id=trs... - Page 8 viii...
-
Page 9: Product Overview
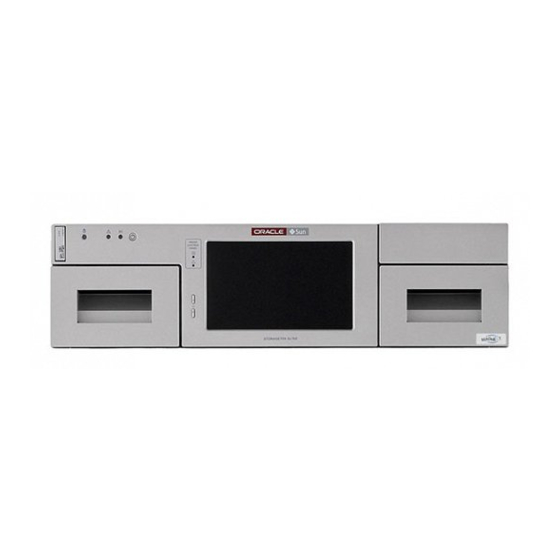
Product Overview Oracle’s StorageTek SL150 Modular Tape Library is a rack mounted automated tape library with a capacity of 30 to 300 Linear Tape Open (LTO) Ultrium tape cartridges (tapes) and one to 20 half-height LTO-5 or LTO-6 Fibre Channel (FC) or Serial Attached... - Page 10 Figure 1–1. The touch screen provides basic information about the library and is designed for use as an information point rather than a tool for maintenance (see Figure 3–34). 1-2 StorageTek SL150 Modular Tape Library Customer Replaceable Unit Guide...
-
Page 11: Class 1 Laser Product Notice
2.0 and above support up to eight partitions. Class 1 Laser Product Notice The StorageTek SL150 Modular Tape Library contains a class-1 laser as defined by IEC 60825-1 Ed. 2 (2007). Use of controls or adjustments or performance of... -
Page 12: Customer Replaceable Units
Fault: indicates a drive tray failure. OK: functioning properly. Port 1 activity (FC and SAS tape drives). Port 2 activity (LTO-5 and LTO-6 SAS tape drives and LTO-6 FC tape drive). 1-4 StorageTek SL150 Modular Tape Library Customer Replaceable Unit Guide... - Page 13 Customer Replaceable Units Encryption status: on when a key is present during drive operation. Encryption reset: a push button switch to reset the tape drive to a default IP address. Module Controller CRU Status Indicators (see Figure 3–18): ■ Fault: a fault anywhere in the module controller (KLE card) triggers the fault indicator and turns off the OK indicator for that specific controller (a library can have up to nine module controllers).
- Page 14 Customer Replaceable Units 1-6 StorageTek SL150 Modular Tape Library Customer Replaceable Unit Guide...
-
Page 15: Preparations
Preparations This chapter introduces general topics for your consideration before performing a CRU removal or replacement procedure. Electrostatic Discharge Be aware of the precautions needed when handling parts. A discharge of static electricity from a finger or other conductor might damage static-sensitive devices. This type of damage may reduce the life expectancy of the product. -
Page 16: Sl150 Remote Management Log In Dialog
2–1. A Help link is available in the upper right of the screen. Refer to the user’s guide (http://docs.oracle.com) or the Help system to gain familiarity before attempting any removal or replacement action. Figure 2–1 SL150 Remote Management Log In Dialog... -
Page 17: Removal And Replacement
This guide assumes that you have isolated the library problem and have the replacement part available. However, if you have not determined the problem; use the troubleshooting information in the user’s guide (http://docs.oracle.com) or the remote management interface Help (see Figure 2–1). -
Page 18: Common Procedures
Select Set Library Offline to place the library into maintenance mode. Click OK in the Set Library Offline dialog box (see Figure 3–3). Figure 3–2 Set Library Offline Illustration Legend: 1 - Library State Control Figure 3–3 Offline Confirmation 3-2 StorageTek SL150 Modular Tape Library Customer Replaceable Unit Guide... -
Page 19: To Set The Library Online
Common Procedures Illustration Legend: 1 - Confirmation Dialog Box (OK Button) To Set the Library Online Log in to the SL150 remote interface using your browser (see Figure 2–1). Click Library is Offline. Select Set Library Online (takes the library out of maintenance mode). Click OK in the dialog box. -
Page 20: To Remove A Tape Cartridge Magazine
Click the label of the magazine you want to remove (see Figure 3–6). Select Unlock. The Unlock Magazines dialog box appears with the specific magazine highlighted when the library is running code version 2.25. 3-4 StorageTek SL150 Modular Tape Library Customer Replaceable Unit Guide... -
Page 21: Magazine Actions
Common Procedures Click OK to unlock the magazine (see Figure 3–7). Figure 3–6 Magazine Actions Illustration Legend: 1 - Magazine Control (Unlock) Figure 3–7 Magazine Unlock Dialog Box (Code Version 2.25) Illustration Legend: 1 - Specific Magazine is Highlighted 2 - OK Button Task 2 Remove the Unlocked Magazine Although the magazine contains cartridge retention Caution:... -
Page 22: To Replace A Tape Cartridge Magazine
3–1). The drive tray has a series of indicators on the back panel (see Figure 3–8), an exposed circuit card near the right side thumbscrew, a tape drive, and a chassis (also referred to as a sled). 3-6 StorageTek SL150 Modular Tape Library Customer Replaceable Unit Guide... -
Page 23: Bridged Drive Considerations
Hot Swappable CRUs Figure 3–8 Tape Drive Tray CRU Illustration Legend: 1 - Drive Indicators 2 - Port Indicator (SAS and LTO-6 FC Drives have Two Ports) 3 - Encryption Indicator and IP Reset Switch 4 - Thumbscrew (Drive Tray has Two Thumbscrews) Bridged Drive Considerations The robot control is a SCSI Medium Changer device that appears as LUN 1 on the bridged tape drive. -
Page 24: Thumbscrews, Latch, And Lock
Figure 3–9 Thumbscrews, Latch, and Lock Illustration Legend: 1 - Robot Thumbscrews 2 - Drive Tray Thumbscrews 3 - Module Controller Latch 4 - Robot Lock (Improved Lock Design) 3-8 StorageTek SL150 Modular Tape Library Customer Replaceable Unit Guide... -
Page 25: To Replace The Drive Tray
Identify the tape drive firmware version and, if necessary, upgrade it. Refer to the StorageTek SL150 Modular Tape Library User’s Guide or the Help system for instructions if your library is running code version 2.0 or higher. -
Page 26: To Remove The Power Supply
Make sure the power supply is secured in the module slot. Connect the power cord to the power supply receptacle. Verify that the OK indicator is active on the power supply. 3-10 StorageTek SL150 Modular Tape Library Customer Replaceable Unit Guide... -
Page 27: Other Crus
Other CRUs Continue with "Power System Behavior" on page 3-35 if the Note: power supply indicator is not active. Other CRUs You must remove power from the library when working on the following CRUs: Robot ■ Module Controller ■ Front Control Panel ■... -
Page 28: To Perform An Orderly Shutdown From The Front Control Panel
Press the power button on the Front Control Panel. Tap the check box (Prepare the Robot for removal before the library powers down). Tap OK. Follow the on-screen prompts (for example, instructions to lock the robot). 3-12 StorageTek SL150 Modular Tape Library Customer Replaceable Unit Guide... -
Page 29: To Perform A Forced Power-Down
Other CRUs To Perform a Forced Power-Down Quiesce the host application to prevent disruption of active storage operations. (Optional) Enable the locate library indicator (see "To Enable the Locate Light" page 3-3). Find the rack containing the library you want to power down. Remove power from the library using one of the following methods: Use the forced (hard) shutdown method. -
Page 30: Front Control Panel
CRU during a single power-down cycle. Figure 3–14 Rear View of the Front Control Panel Illustration Legend: 1 - Tabs 2 - Jack 3 - Latches 3-14 StorageTek SL150 Modular Tape Library Customer Replaceable Unit Guide... -
Page 31: To Remove The Front Control Panel
Other CRUs To Remove the Front Control Panel Power down the library (see "To Perform a Controlled Power-Down from the GUI" on page 3-11). Remove both cartridge magazines from the base module (see "To Remove a Cartridge Magazine Manually" on page 3-13). Press the latch inside each magazine bay inner wall and pull the bottom edge of the panel away from the module until the panel is unlatched (see Figure... -
Page 32: To Replace The Front Control Panel
The module controller is located in the upper right corner of the expansion module as viewed from the rear of the library (see Figure 3–1). The module controller obtains power from the expansion cable connected to a Module Output port on the base module. 3-16 StorageTek SL150 Modular Tape Library Customer Replaceable Unit Guide... -
Page 33: To Remove The Module Controller
Other CRUs The module controller is shown in Figure 3–18 with items pertinent to its removal and replacement identified. To Remove the Module Controller Note: "Electrostatic Discharge" on page 2-1. Task 1 Preparation Enable the Locate indicator on the library with the failed module controller (see "To Enable the Locate Light"... -
Page 34: To Replace The Module Controller
Remove the top drive tray or drive filler from the base module. Look through the drive slot and locate the position of the robot. Verify the robot is fully seated against the ceiling of the library. 3-18 StorageTek SL150 Modular Tape Library Customer Replaceable Unit Guide... -
Page 35: Robot Removal And Replacement
Other CRUs Repeat the parking procedure if necessary to make sure the robot is secured in the proper position. Set the robot lock to the locked position. If the robot lock is the type with a knob, grasp the knob and turn it counter-clockwise until the point is past the red, locked padlock icon. -
Page 36: To Manually Retract The Robot
Return to Step 5 of Task 1, "Park and Lock the Robot" and continue through the last step of Task 2, "Robot Removal". Figure 3–20 Bullwheel Gear and Robot Lock Illustration Legend: 3-20 StorageTek SL150 Modular Tape Library Customer Replaceable Unit Guide... -
Page 37: To Manually Disengage The Robot
Other CRUs 1 - Bullwheel Gear 2 - Robot Lock (Improved Design) To Manually Disengage the Robot Perform this procedure only if either the library power Caution: down (Step 1 of "Park and Lock the Robot") or "To Manually Retract the Robot" does not work. -
Page 38: To Replace The Robot
Plug the expansion cable for each module into a base module connector (it is permissible to connect a cable to any available connector). Plug the Ethernet cables into the appropriate Net Mgt ports. Continue with "Power System Behavior" on page 3-35. 3-22 StorageTek SL150 Modular Tape Library Customer Replaceable Unit Guide... -
Page 39: Expansion Module Chassis
Other CRUs Expansion Module Chassis The expansion module CRU is shown in Figure 3–22. You must transfer cartridge magazines, tape drives, tape drive fillers, power supplies, power supply fillers, and the module controller from the failed module to the CRU, as applicable. To replace a defective module, you might need to deinstall several operational modules to access the defective one. -
Page 40: Library Floor Panel
"Drive Tray Assembly" on page 3-6 and "Power Supply" on page 3-9, as necessary. Remove the Phillips screws securing the expansion module to the front of the rack. 3-24 StorageTek SL150 Modular Tape Library Customer Replaceable Unit Guide... -
Page 41: To Remove The Drive Filler
Other CRUs Grasp the module, pull the module forward until the break in the flange is visible, lower the front of the module, pull the module free from the one above it, and away from the rack. Set the module down and away from the front of the rack. Remove the Phillips screws and rear rails from the module. -
Page 42: To Remove The Power Supply Filler
Hook your finger in the hole of the power supply filler (see Figure 3–26). Pull the filler from the power supply slot and set it aside. Continue with "To Prepare the Expansion CRU for Replacement". 3-26 StorageTek SL150 Modular Tape Library Customer Replaceable Unit Guide... -
Page 43: To Prepare The Expansion Cru For Replacement
Other CRUs Figure 3–26 Power Supply Filler Illustration Legend: 1 - Power Supply Filler To Prepare the Expansion CRU for Replacement Grasp the expansion module chassis by the sides and remove it from the shipping carton. Determine if the CRU is the bottom library module. If it is not the bottom module, continue with "To Replace the Expansion CRU Chassis"... -
Page 44: Floor Tab
Other CRUs Figure 3–27 Floor Tab Illustration Legend: 1 - Floor Slot 2 - Floor Tab Figure 3–28 Floor Latching Tab Illustration Legend: 1 - Floor Clip 2 - Floor 3-28 StorageTek SL150 Modular Tape Library Customer Replaceable Unit Guide... -
Page 45: To Replace The Expansion Cru Chassis
Other CRUs To Replace the Expansion CRU Chassis Task 1 Installation Lift the expansion module by the sides. Align the flanges at the rear of the expansion module with the grooves in the lower front edges of the library module. Push the expansion module a few inches into the library. -
Page 46: Module Alignment
Locate the next expansion module for installation (refer to the module number label on the back of the module). Install the floor if this is the bottom library module (see "To Install the Floor" page 3-27). 3-30 StorageTek SL150 Modular Tape Library Customer Replaceable Unit Guide... -
Page 47: To Install The Drive Filler
Other CRUs Repeat "Installation" on page 3-29 through "Install the CRUs, Fillers, and Magazines in the Replaced Module" until all expansion modules and CRUs are installed. Task 5 Finishing Touches Secure the hook and loop strap to the replaced expansion module (close the plunger of the rivet). -
Page 48: To Remove The Base Module Chassis
CRU. A best practice is to use two persons to lift the unit. Remove the screws securing the base module to the front of the rack. Extract the module from the rack. 3-32 StorageTek SL150 Modular Tape Library Customer Replaceable Unit Guide... -
Page 49: To Prepare The Base Module Cru For Replacement
Other CRUs To Prepare the Base Module CRU for Replacement Grasp the base module chassis by the sides and remove it from the shipping carton. Determine if the CRU is the bottom library module. If it is the bottom module, install the floor (see "To Install the Floor"... -
Page 50: Cable Attachment
"To Replace a Tape Cartridge Magazine" page 3-6) in all modules. Task 4 Finishing Touches Align and dress the cables. Secure the cables in the hook and loop straps, if applicable. Figure 3–33 Cable Attachment 3-34 StorageTek SL150 Modular Tape Library Customer Replaceable Unit Guide... -
Page 51: Power System Behavior
Power System Behavior Illustration Legend: 1 - Tape Drive With Fibre Channel Cable 2 - Expansion Module Cable 3 - Ethernet Cable 4 - Power Supply Cord 5 - Tape Drive With SAS Cable Connect the power cord to each installed power supply. Continue with Power System Behavior. -
Page 52: To Validate Library Operation
Run the offline self tests from the SL150 remote interface (refer to the StorageTek SL150 Modular Tape Library User’s Guide or the Help system for instructions). Set the SL150 library to the online state and log out of the SL150 remote interface. 3-36 StorageTek SL150 Modular Tape Library Customer Replaceable Unit Guide... -
Page 53: Cru Return
CRU Return Return the robot and tape drive tray CRUs to Oracle. Instructions should have been provided regarding the process to return the specific CRU. Dispose of all other CRUs or recycle them, as appropriate. - Page 54 CRU Return 3-38 StorageTek SL150 Modular Tape Library Customer Replaceable Unit Guide...
- Page 55 Startup The SL150 library is typically started up when power is applied (the power cord is plugged in or the external power is switched on). If the library was manually powered down (from the front panel power switch or the shutdown function of the remote management interface), pressing the front panel power switch starts the library.
- Page 56 A-2 StorageTek SL150 Modular Tape Library Customer Replaceable Unit Guide...
- Page 57 Glossary This glossary defines terms and abbreviations in this publication. Some of the definitions are taken from other glossaries. The letters in the parentheses that follow some definitions indicate the source of the definition: (A) The American National Standard Dictionary for Information Systems, ANSI X3.172-1990, copyright 1990 by the American National Standards Institute (ANSI).
- Page 58 cell identification number. Also called tape, tape cartridge, or tape volume. cell See slot. cleaning cartridge A tape cartridge that contains special material to clean the tape path in a transport or drive. LTO Ultrium cleaning cartridge labels have a CLN prefix and a CU media identifier.
- Page 59 gripper expanded mailsot An optional library configuration to increase the capacity of the Mailslot from four to 19 cartridges. A logical entity containing four slots in the Standard Mailslot plus 15 slots in the Base Module right magazine (the Mailslot Expansion). expansion cable A cable used to connect modules 2–10 to the base module (Module 1).
- Page 60 Graphical user interface. Software that allows the user to control the device through visual screens. hand The robotic mechanism that grabs tape cartridges and moves them between slots and the drive. It is a component of the arm. The hand has a reach mechanism that gets tape cartridges from slots or drives and puts them into slots or drives.
- Page 61 Module 1 Light emitting diode. An electronic device that lights up when electricity is passed through it. left magazine A plastic assembly containing 15 tape slots that can be inserted into the left side (as viewed from the front) of Modules 1–10. Left magazines and right magazines are not interchangeable.
- Page 62 module controller module controller A card inserted into the back of Modules 2–10 that controls the operation of the module. It is connected to the robot by an expansion cable. Module X (2 through 10) expansion module. mount To place a tape in a drive and make it accessible to the host system. multimode fiber An optical fiber designed to carry multiple signals, distinguished by frequency or phase, at the same time.
- Page 63 tape drive release A distribution of a new product or new function and fixes for an existing product. (IBM) right magazine A plastic assembly containing 15 tape slots that can be inserted into the right side (as viewed from the front) of Modules 1–10. Right magazines and left magazines are not interchangeable.
- Page 64 tape drive filler tape drive filler A metal frame that slides into a tape drive slot when a tape drive will not be used in that slot. Terabyte A unit of storage, abbreviated T or TB, equal to 1,024 Gigabytes. A measure of chassis height.
- Page 65 Index front control panel description, 3-14 base module chassis removal, 3-15 removal, 3-32 replacement, 3-16 replacement, 3-33 boot up, A-1 indicator CRU description, 1-4 cartridge magazine library system, 1-3 description, 1-1, 3-3 tape drive service action, 1-4 manual removal interface, SL150 remote management, 2-1 note about, 3-35 procedure, 3-13 removal, 3-4...
- Page 66 description, 3-9 filler removal, 3-26 replacement, 3-31 removal, 3-10 replacement, 3-10 power system behavior, 3-35 product description, 1-1 removal cartridge magazine, 3-4 cartridge magazine, manual, 3-13 chassis base module, 3-32 expansion module, 3-23 drive tray, 3-7 filler drive, 3-25 power supply, 3-26 front control panel, 3-15 module controller, 3-17 power supply, 3-10...
Need help?
Do you have a question about the StorageTek SL150 and is the answer not in the manual?
Questions and answers