Oracle StorageTek SL150 Installation Manual
Modular tape library
Hide thumbs
Also See for StorageTek SL150:
- Reference manual (266 pages) ,
- Library manual (196 pages) ,
- User manual (130 pages)

Related Manuals for Oracle StorageTek SL150


Summary of Contents for Oracle StorageTek SL150
- Page 1 S torageTek SL150 Modular Tape Library [ 1 ] Installation Manual E28647-14 July 2017...
- Page 2 Oracle Corporation and its affiliates disclaim any liability for any damages caused by use of this software or hardware in dangerous applications.
-
Page 3: Table Of Contents
Contents Preface ................................ix Documentation Accessibility ........................1 Product Overview Configuration Overview......................... 1-2 Library Indicators............................. 1-3 Human Interfaces ............................. 1-3 Initialization Wizard Keyboard Screens ..................1-5 Specifications ............................1-7 Installation Overview..........................1-7 2 Planning and Preparation Rack Preparation ............................2-1 Tape Device Driver .......................... - Page 4 Tool Requirement..........................3-13 Unpack and Acclimate the Expansion Module ................3-14 Expansion Module Attachment Kit ....................3-14 Gather the Expansion Module Attachment Hardware ............. 3-15 Power Down the Library........................ 3-15 Remove the Library Floor ......................3-16 Install Clip Nuts for the Expansion Module ................3-17 Prepare the Expansion Module for Installation................
- Page 5 5 Checkout and Host Connection Self-Test Overview ..........................5-1 Set the Library Offline ..........................5-1 Run the Self-Test ............................5-2 Incomplete Test ..........................5-5 Host Connection ............................5-5 Automated Cartridge System Library Software................. 5-5 6 Adding Power Supplies and Tape Drives Power Supply ............................
- Page 6 Activity and Processes .......................... B-10 C Robot Locking for Reshipment Glossary Index...
- Page 7 List of Figures StorageTek SL150 Base Module and Expansion Modules ............ 1-1 1–1 1–2 Rear View Base Module and Expansion Module..............1-2 1–3 Library Indicators ........................1-3 1–4 Front Control Panel Home Screen.................... 1-4 1–5 SL150 Library Remote Interface (Library Menu) ..............1-4 Letters Screen..........................
- Page 8 5–4 Self Test Complete ........................5-4 6–1 SL150 Library Rear View ......................6-1 6–2 Power Supply ..........................6-2 Tape Drive Tray .......................... 6-3 6–3 Library Power Down Function ....................C-1 C–1 C–2 Hand Position After Power Down ..................C-2 C–3 Shipping Clip Installation......................
-
Page 9: Preface
For information about Oracle's commitment to accessibility, visit the Oracle Accessibility Program website at http://www.oracle.com/pls/topic/lookup?ctx=acc&id=docacc. Access to Oracle Support Oracle customers that have purchased support have access to electronic support through My Oracle Support. For information, visit or visit http://www.oracle.com/pls/topic/lookup?ctx=acc&id=info if you are hearing http://www.oracle.com/pls/topic/lookup?ctx=acc&id=trs... -
Page 11: Product Overview
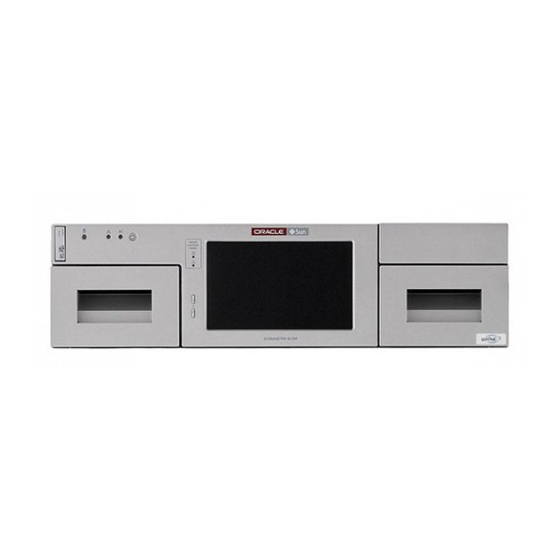
Product Overview Oracle's StorageTek SL150 Modular Tape Library is a rack-mounted, modular automated tape library (see Figure 1–1). Each module stores up to 30 Linear Tape Open (LTO) Ultrium cartridges in two removable 15-cartridge magazines. A module has a maximum of two half-height tape drives. The following tape drives are... -
Page 12: Configuration Overview
Hardware revisions levels up to 11 and software levels up to 2.6 support one to 10 ■ modules, one to 300 tape cartridges, and one to 20 tape drives. A 10 module library uses 21U (933.5 mm [36.75 inches]) of rack space. 1-2 StorageTek SL150 Modular Tape Library Installation Manual... -
Page 13: Library Indicators
Human Interfaces There is no kit to upgrade older hardware to level 12. You Note: must order a new library to have hardware level 12. The library supports partitions, and each partition must have a bridged drive. Code versions earlier than 2.0 support two partitions, and a maximum of two ■... -
Page 14: Front Control Panel Home Screen
The primary management interface for the SL150 library provides information for ■ the library, partitions, drives, tapes, various settings (configuration, firmware, SNMP, and users), and service (see Figure 1–5). Figure 1–5 SL150 Library Remote Interface (Library Menu) Illustration Legend: 1 - Menus 1-4 StorageTek SL150 Modular Tape Library Installation Manual... -
Page 15: Initialization Wizard Keyboard Screens
Human Interfaces 2 - User (admin in this Example) The interface navigation section varies depending on the user role. The interface recognizes four user roles: viewer, operator, service, and administrator. Users access the library remotely by entering the host name or IP address of the library into a web browser. -
Page 16: Letters Screen
4 - Enter Key Figure 1–8 Special Characters Screen Illustration Legend: 1 - Key to Access the Numbers Keyboard 2 - Key to Access the Letters Keyboard 3 - Done Key 4 - Enter Key 1-6 StorageTek SL150 Modular Tape Library Installation Manual... -
Page 17: Specifications
For volt-amp (VA) measurements, add 2 percent to the Watt value. For Btu/hr, multiply the total wattage number by 3.414. Refer to the power calculator at: http://www.oracle.com/us/products/servers-storage/sun-power-calculator s/calc/sl150-power-calculator-1954625.html A minimum SL150 library configuration has a total idle power of 44 W (150 Btu/hr) and a steady state maximum of 67.5 W (230 Btu/hr). - Page 18 Installation Overview Post-installation, the library can be upgraded with more expansion modules, tape drives and power supplies. Refer to: "Expansion Module Installation" ■ Chapter 6, "Adding Power Supplies and Tape Drives" ■ 1-8 StorageTek SL150 Modular Tape Library Installation Manual...
-
Page 19: Planning And Preparation
Planning and Preparation The installation instructions in this guide are based upon Note: the Sun Rack II which is the standard Oracle 19-inch rack. Rack Preparation It is suggested that you position the power distribution unit on the right side of ■... -
Page 20: Tape Device Driver
Make sure that the proper device driver is installed, if applicable. Use Windows Update to obtain the driver for an IBM tape drive. Download the driver from the HP website, if needed. For example, Oracle has qualified the HP LTO-5 drive with Windows driver 3.5.0.0. -
Page 21: Stage The Sl150 Library
Unpack and Acclimate the SL150 Library The HACS is configured so that large air handling equipment provides a designed introduction of positively pressurized cold air to the front of the equipment. The positive cold air is designed to work in conjunction with a corresponding amount of exhaust air out the back of the installed equipment. - Page 22 If the module is colder than the location and sufficient Note: humidity exists, condensation may occur. Task 3 Dispose of Shipping Materials Remove the pallet and any packaging materials from your work area. Continue with Chapter 3. 2-4 StorageTek SL150 Modular Tape Library Installation Manual...
-
Page 23: Hardware Installation
Hardware Installation The installation instructions in this manual address a two module SL150 and a rack with square holes. Overview The base module (Module 1) sits on rails secured to the rack with 8-32 screws and mounting blocks. The installation allows sufficient space to expand the library to the maximum number of modules. -
Page 24: Base Module Installation
Sun Rack II. If your rack is different (M5 or M6 holes), use the instructions as a basic guide but alter steps accordingly. Base Module Installation The following tasks are performed to install the base module: Prepare the rack (see "Rack Preparation"). 3-2 StorageTek SL150 Modular Tape Library Installation Manual... -
Page 25: Gather The Rail Parts
Base Module Installation Unpack and acclimate the base the module (see Chapter 2, "Planning and Preparation"). Gather the mounting hardware from the accessory package. Install the mounting rails (front and rear). Install clip nuts in a rack with square holes. Mount the base module in the rack. -
Page 26: Base Module Mounting Rail
Installation of the back rails involves three part types: back rail, mounting block, and an 8–32 screw. A back rail is installed on each side of the rack. Figure 3–4 shows the completed installation of the back rails. Figure 3–4 Back Rails Installed 3-4 StorageTek SL150 Modular Tape Library Installation Manual... -
Page 27: Tool Requirement
Base Module Mounting Rail The mounting block has two pins and a threaded hole. Note: These elements must reside within a single defined U boundary. Use the scribe marks, notches, or other comparable rack designations to identify the U boundary. Do not mount the block with the pins straddling a U boundary. -
Page 28: Front Rail
Task 1 Connect the Front Rail to the Back Rail Grasp the front rail and position it so the blade is facing into the rack with the rail tabs toward the outside of the rack. 3-6 StorageTek SL150 Modular Tape Library Installation Manual... -
Page 29: Front Rail Installation (Left Rail Shown)
Base Module Mounting Rail Align the back edge of the front rail with the back rail (see Figure 3–6). Slide the front rail toward the back rail to engage the tabs of the front rail. Push the front rail into the rack until the front edge of the rail is approximately 60 mm (2.4 inches) from the rack stile. -
Page 30: Mounting Block For Front Rail (Right Rail Shown)
Figure 3–8). Do not proceed unless the rails are parallel. Note: If your rack has threaded holes, proceed to "Mount the Base Module." Figure 3–8 Rails Installed - Front View 3-8 StorageTek SL150 Modular Tape Library Installation Manual... -
Page 31: Clip Nut Location
Base Module Mounting Rail Clip Nut Location Clip nuts are only used in racks with square holes. Note: Two screws secure the module to the rack. Racks with square holes use a clip nut and a 10–32 X 5/8 screw. The base module spans 3Us, and the clip nut is installed in the center hole of the lowest (third) rack unit (see Figure 3–9). -
Page 32: Mount The Base Module
Never lift the module by the front control panel or the tape drive. Always lift the module from the side. Guide the module into the rack and set the rear side-tabs on the rack rails (see Figure 3–10). 3-10 StorageTek SL150 Modular Tape Library Installation Manual... -
Page 33: Magazine Latch Release
Mount the Base Module If the module does not fit properly, remove it from the rack. Note: Adjust the rail spacing as necessary. Never bend the base module side tabs. Push the module into the rack to engage the bottom and center side tabs. If you cannot engage the rails properly, remove the module Note: and adjust the rails. -
Page 34: Cable Clip Removal
Front Control Panel. Do not put cartridges in the magazine slots. Continue with the section for the applicable task: "Expansion Module Installation" ■ "Final Hardware Actions" ■ 3-12 StorageTek SL150 Modular Tape Library Installation Manual... -
Page 35: Expansion Module Installation
Expansion Module Installation Expansion Module Installation You can add 2U modules to expand cartridge capacity and increase the number of available tape drive assemblies (see Figure 3–13). The expansion module is installed under the base module or the last 2U module (see Figure 3–1). -
Page 36: Unpack And Acclimate The Expansion Module
2 - Clip Nuts 3 - Screws (Assorted) 4 - Expansion Cable with USB Type A Connectors 5 - Module Labels 6 - Hook and Loop Strap 7 - Rivet 8 - Hex Key 3-14 StorageTek SL150 Modular Tape Library Installation Manual... -
Page 37: Gather The Expansion Module Attachment Hardware
Expansion Module Installation Gather the Expansion Module Attachment Hardware Perform the following instructions to gather attachment hardware: Remove the contents from the accessory package. Inventory the items to make sure you have everything to install the module. Select the items appropriate for installation in your rack, and set the others aside. Always use the back rails, module labels, and the expansion Note: cable. -
Page 38: Remove The Library Floor
If the floor does not move, reach through the magazine Note: opening and push down on the floor behind the touch screen panel to unseat the floor locking tabs. Then pull the floor forward with your other hand. 3-16 StorageTek SL150 Modular Tape Library Installation Manual... -
Page 39: Install Clip Nuts For The Expansion Module
Expansion Module Installation Figure 3–17 Library Floor Removal from the Base Module Illustration Legend: 1 - Floor Finger Holds 2 - Floor Lock (Improved Floor Design) Install Clip Nuts for the Expansion Module Continue with "Prepare the Expansion Module for Note: Installation"... -
Page 40: Prepare The Expansion Module For Installation
Reach behind the front panel and lift the latch to release the magazine (see Figure 3–19). The expansion module is open at the top, and the latches are located behind the front face of the module. 3-18 StorageTek SL150 Modular Tape Library Installation Manual... -
Page 41: Magazine Latches
Expansion Module Installation You can also release the magazine with the hex tool. Tip: Remove the cartridge magazines from the module you are installing. Figure 3–19 Magazine Latches Illustration Legend: 1 - Module Flanges 2 - Unlatched Position 3 - Latched Position Task 2 Install the Floor in the Last Expansion Module Turn the expansion module over. -
Page 42: Install The Expansion Module
2 - Floor Install the Expansion Module Use two people to lift and install the expansion Warning: module. Grasp the module by the sides. Do not lift the module by the tape drive filler. 3-20 StorageTek SL150 Modular Tape Library Installation Manual... -
Page 43: Scratch Avoidance
Expansion Module Installation Use the following instructions to install an expansion module: Lift the module to the bottom of the installed module. Insert the rear edge of the module flange into the grooves on the bottom edge of the installed module and push the 2U expansion module in approximately 75 millimeters (3 inches). -
Page 44: Secure The Expansion Module
Repeat this task for the rail on the other side of the module. Figure 3–24 Expansion Module Back Rail and Clip Nut Illustration Legend: 1 - Clip Nut 2 - Rear Rail 3-22 StorageTek SL150 Modular Tape Library Installation Manual... -
Page 45: Replace The Cartridge Magazines
Expansion Module Installation Task 2 Secure the Rear Rails Push the back rail against the rack vertical rail. Secure the back rail to the rack vertical rail with a screw. Use a 10-32 screw when a rack has square holes (the screw Tip: mates with a clip nut). -
Page 46: Install The Hook And Loop Strap
2 - Hook and Loop Strap 3 - Rivet Pull the plunger back from the rivet face. Align the rivet with the hole beside the module controller. Push the rivet into the hole. 3-24 StorageTek SL150 Modular Tape Library Installation Manual... -
Page 47: Final Hardware Actions
Final Hardware Actions Push the plunger in to secure the rivet. Final Hardware Actions The SL150 hardware is now installed in the rack. If additional tape drives and power supplies were ordered for this library, install them now (see Chapter 6, "Adding Power Supplies and Tape Drives"). - Page 48 Module 11 connects to Module 6, Module 12 connects to Module Tip: 7, and so forth. Refer to the previous section for cabling guidelines. Remove the dust cover from the output port of the expansion module controller and connect the cable. 3-26 StorageTek SL150 Modular Tape Library Installation Manual...
-
Page 49: Initial Cabling
A list of power cord part numbers is available in the StorageTek SL150 Modular Tape Library Systems Assurance Guide. For each installed tape drive, connect the interface cable(s) to the tape drive interface port(s). -
Page 50: Unlock The Robot
Continue with the appropriate chapter: "Library Initialization" when this is a new library installation ■ "Checkout and Host Connection" for a library upgraded with an expansion ■ module 3-28 StorageTek SL150 Modular Tape Library Installation Manual... -
Page 51: Library Initialization
Library Initialization Basic library initialization is performed from the touch screen of the SL150 library front control panel (see Figure 4–1). No Accessibility settings exist for the touch screen panel, so a person with normal vision and manual dexterity should perform initialization of the library. -
Page 52: Log In As The Default Administrator
Note: The last entered character is shown (an * is present for the other characters). Tap either the Done button or the Enter key after entering the last character of the password. 4-2 StorageTek SL150 Modular Tape Library Installation Manual... -
Page 53: Step 1 Of 6 (Change The Default Administrator Password)
Step 1 of 6 (Change the Default Administrator Password) The final character remains readable while asterisks represent all other characters in the Password field. The Log in as the Default Administrator screen appears with several large dots in the Password field. Note: The dots are the standard display and do not represent the actual number of characters you entered for the password. -
Page 54: Change The Default Password
Figure 4–4 Configure the Network Port 1 After you enter a host name for the SL150 library, you can configure Network Port 1 to use an address in IPv4 format or both IPv4 and IPv6 format. 4-4 StorageTek SL150 Modular Tape Library Installation Manual... -
Page 55: Enter The Host Name
Step 2 of 6 (Configure the Network Port 1) Enter the Host Name Valid host names contain the following characters: A through Z, a through z, 0 through 9, and the hyphen (-). A hyphen cannot be the first or last character in the host name. Neither the space nor the underscore (_) is supported. -
Page 56: Configure The Network Port 1 With An Ipv6 Address
DHCPv6 option. If Static is selected, you must enter additional information. ■ Configure Network Port 1 with a Static IPv6 Address Perform the following tasks to configure and the network port. 4-6 StorageTek SL150 Modular Tape Library Installation Manual... -
Page 57: Step 3 Of 6 (Set The Library Date And Time)
Step 3 of 6 (Set the Library Date and Time) Task 1 Enter the IPv6 Address Tap the keyboard button. Tap the Clear button to remove any existing IPv6 Address value. Tap the screen keys to enter the IPv6 Address. Tap the Next button after you have entered the last address character. -
Page 58: Configure The Date And Time
Tap the Clear button to remove any existing date value. Tap the screen keys to enter the current date in the format MM/DD/YYYY. Tap the Next button after entering the last digit for the year. Figure 4–9 Library Date and Time 4-8 StorageTek SL150 Modular Tape Library Installation Manual... -
Page 59: Set The Time Manually
Step 4 of 6 (Set the Drive Element Addressing Mode) Set the Time Manually To set the time manually: Tap the Clear button to remove any existing time value. Tap the screen keys to enter the current time in the format HH:MM:SS where HH represents 24-hour format. -
Page 60: Step 5 Of 6 (Configure The Mailslot, Reserved Slots And Volume Label Format)
Expanded (19 slots) ■ Set the System Reserved Slots To set the system reserved slots: Use the System Reserved Slots list to select the desired number of slots. The list has the following options: 4-10 StorageTek SL150 Modular Tape Library Installation Manual... -
Page 61: Volume Label Format Overview
Passes the third through the eighth characters in the physical label. Trim first character Passes the second through the eighth characters in the physical label. Refer to Accommodating Non-Standard Label Formats in the StorageTek SL150 Modular Tape Library User’s Guide for additional information. Set the Volume Label Format To set the volume label format: Use the Volume Label Format list to select the desired number of slots. -
Page 62: Step 6 Of 6 (Review And Apply Initialization Settings)
Only perform a manual cartridge magazine removal when the library is operational and offline. After the restart completes, the Home screen appears on the touch screen (see Figure 4–13). 4-12 StorageTek SL150 Modular Tape Library Installation Manual... -
Page 63: Verify Network Settings
(Library is Online or Library is Offline). If Operational does not appear as the Health state, perform the troubleshooting procedures listed in the StorageTek SL150 Modular Tape Library User's Guide before proceeding. Verify Network Settings To verify the network settings: Tap the Settings button on the Home screen. -
Page 64: Final Configuration
Click the Log In button in the dialog box. The Log In dialog box for code release 2.60 includes a Set Note: Accessibility Settings button. The available accessibility settings are: screen reader, high contrast, and large fonts. 4-14 StorageTek SL150 Modular Tape Library Installation Manual... -
Page 65: Sl150 Remote Interface Log In Screen
Final Configuration If you are not able to log in to the remote interface because Note: the network setting is wrong or you have forgotten the password, you can reset the initialization values to the manufacturing default (see "Reset the Library with Manufacturing Default Values"). -
Page 66: Reset The Library With Manufacturing Default Values
Final Configuration Refer to the Oracle Key Manager documentation if you Note: intend to enable tape drive encryption for HP LTO drives. Reset the Library with Manufacturing Default Values To reset the library with manufacturing default values: Push and release one of the Locate buttons on the library to enable the Locate indicators. -
Page 67: Checkout And Host Connection
The DG volume label is included in the accessory kit. Follow the instructions in the Labeling Cartridges section of the StorageTek SL150 Modular Tape Library User’s Guide to label a diagnostic tape. The following are prerequisites for the self tests: Library is offline. -
Page 68: Run The Self-Test
If you do not insert the Mailslot smoothly, you might fail to Note: engage the latch and trigger multiple re-audits of the Mailslot. The library will not be able to access slot positions until the Mailslot is positively latched. 5-2 StorageTek SL150 Modular Tape Library Installation Manual... -
Page 69: Self Test Commands
Run the Self-Test Locate the Library control beside the Help (question mark) icon (see Figure 5–2) in the remote interface. Use the Library list to select Basic Self Test or Full Self Test (use the Full Self Test at initial installation). The self test dialog box appears. -
Page 70: Self Test Complete
Close the mailslot expansion first (if configured). Push the Mailslot using a single, smooth motion into the library until it latches into place with a noticeable click. Log out if you will not be performing other operations. 5-4 StorageTek SL150 Modular Tape Library Installation Manual... -
Page 71: Incomplete Test
SL150 library. Refer to the ACSLS documentation by following the Storage ACSLS Manager documentation link on the Oracle Help Center at the following URL: http://docs.oracle.com/en/storage/#tab5 ACSLS version 8.3 (second patch), or later, is required for library code version 2.25, or later, which supports new ASC/ASCQ reporting. - Page 72 LTO-7 requires the minimum of ACSLS version 8.4 with patch 1 – – LTO-5 and LTO-6 ACSLS version 8.4 or later SL150 firmware version 2.50 with LTO-5 or LTO-6 requires a minimum of ACSLS ■ version 8.3 patch 3. 5-6 StorageTek SL150 Modular Tape Library Installation Manual...
-
Page 73: Adding Power Supplies And Tape Drives
Adding Power Supplies and Tape Drives The tape drives and power supplies are located at the back of the library (see Figure 6–1). Each module in the library has space for two tape drives and two power supplies. You can add tape drives and power supplies as your needs grow. The power supply and tape drive can be added while the library is powered-on. -
Page 74: To Remove The Power Supply Filler
1) removal of the tape drive filler and 2) installation of the tape drive tray. No tools are required to perform these tasks. The SL150 library supports installation of Generation 5, 6, and Note: 7 tape drives simultaneously as bridged tape drives and data drives. 6-2 StorageTek SL150 Modular Tape Library Installation Manual... -
Page 75: Remove The Tape Drive Filler
Tape Drive Tray Figure 6–3 Tape Drive Tray Illustration Legend: 1 - Drive Indicators 2 - Port Indicators (HP drives only) 3 - Encryption Indicators 4 - Thumbscrew (One on Each Side of the Tray) Remove the Tape Drive Filler To remove the tape drive filler: Loosen the thumbscrews on both sides of the tape drive filler (see Figure... -
Page 76: Restart The Library
Verify the firmware level of the added drive is consistent with the level of previously installed drives. Refer to the StorageTek SL150 Modular Tape Library User’s Guide for information to download firmware files from the support website. Library firmware version 2.0, or later, provides the capability to load tape drive firmware. -
Page 77: Relocation
Relocation The following information is provided as an aid for relocating a library in the data center. Quiesce the host application to prevent disruption of active storage operations. Perform a controlled power-down of the library while invoking the option to prepare the robot for removal. - Page 78 7-2 StorageTek SL150 Modular Tape Library Installation Manual...
- Page 79 Startup The SL150 library is typically started up when power is applied (the power cord is plugged in or the external power is switched on). If the library was manually powered down (from the front panel power switch or the shutdown function of the remote management interface), pressing the front panel power switch starts the library.
- Page 80 A-2 StorageTek SL150 Modular Tape Library Installation Manual...
-
Page 81: B Controlling Contaminants
Severity level G1 per ANSI/ISA 71.04-1985. ■ Oracle currently requires the ISO 14644-1 standard approved in 1999, but will require any updated standards for ISO 14644-1 as they are approved by the ISO governing body. The ISO 14644-1 standard primarily focuses on the quantity and size of particulates and the proper measurement methodology, but does not address the overall mass of the particulates. -
Page 82: Contaminant Properties And Sources
Submicron particulates are much more dangerous to sensitive computer hardware, because they remain airborne for a much longer time, and they are more apt to bypass filters. B-2 StorageTek SL150 Modular Tape Library Installation Manual... -
Page 83: Operator Activity
Contaminant Properties and Sources Operator Activity Human movement within the computer space is probably the single greatest source of contamination in an otherwise clean computer room. Normal movement can dislodge tissue fragments, such as dander or hair, or fabric fibers from clothing. The opening and closing of drawers or hardware panels or any metal-on-metal activity can produce metal filings. -
Page 84: Contaminant Effects
Room Conditions Maintain a high level of cleanliness on all surfaces within the controlled zone of the data center. Trained professionals should clean all surfaces periodically, as outlined in B-4 StorageTek SL150 Modular Tape Library Installation Manual... - Page 85 Room Conditions "Cleaning Procedures and Equipment" section. Pay particular attention to the areas beneath the hardware, and the access floor grid. Contaminants near the air intakes of the hardware can more easily be transferred to areas where they can do damage. Particulate accumulations on the access floor grid can be forced airborne when floor tiles are lifted to gain access to the sub-floor.
-
Page 86: Exposure Points
Proper filtration can capture a great deal of particulates. The filters installed in the in-room, re-circulating air conditioners should have a minimum efficiency of 40% (Atmospheric Dust-Spot Efficiency, ASHRAE Standard 52.1). Install low-grade pre-filters to help prolong the life of the more expensive primary filters. B-6 StorageTek SL150 Modular Tape Library Installation Manual... -
Page 87: Positive Pressurization And Ventilation
Positive Pressurization and Ventilation Any air being introduced into the computer room controlled zone, for ventilation or positive pressurization, should first pass through high efficiency filtration. Ideally, filter air from sources outside the building using High Efficiency Particulate Air (HEPA) filtration rated at 99.97% efficiency (DOP Efficiency MILSTD-282) or greater. Protect the expensive high efficiency filters by multiple layers of pre-filters that are changed on a more frequent basis. -
Page 88: Cleaning Procedures And Equipment
Cleaning solutions used within the data center must not pose a threat to the hardware. Solutions that could potentially damage hardware include products that are: Ammoniated ■ Chlorine-based ■ Phosphate-based ■ B-8 StorageTek SL150 Modular Tape Library Installation Manual... -
Page 89: Quarterly Tasks
Cleaning Procedures and Equipment Bleach enriched ■ Petro-chemical based ■ Floor strippers or re-conditioners ■ It is also important that the recommended concentrations are used, as even an appropriate agent in an inappropriate concentration can be potentially damaging. The solution should be maintained in good condition throughout the project, and excessive applications should be avoided. -
Page 90: Activity And Processes
Paths to and from these areas should not necessitate traffic through the main data center areas. B-10 StorageTek SL150 Modular Tape Library Installation Manual... -
Page 91: Library Power Down Function
Robot Locking for Reshipment The following instructions define the process of locking the SL150 robot hand before reshipment after rack installation. Improper installation of the lock could cause catastrophic Caution: failure during shipment. Task 1 Power Down the Library Locate the power button on the front of the SL150 library. Press and release the power button. -
Page 92: Hand Position After Power Down
(see Figure C–4). The hand will be contained between the front wall and the clip. Guide the instruction tag out of the cartridge magazine slot. Figure C–3 Shipping Clip Installation Illustration Legend: C-2 StorageTek SL150 Modular Tape Library Installation Manual... -
Page 93: Final Clip Position
1 - Opened Shipping Clip 2 - Instruction Tag Figure C–4 Final Clip Position Task 4 Finishing Touches Route the string and instruction tag between the mailslot and right side of the front control panel and set it on top of the base module (see Figure C–5). - Page 94 C-4 StorageTek SL150 Modular Tape Library Installation Manual...
- Page 95 Glossary This glossary defines terms and abbreviations in this publication. Some of the definitions are taken from other glossaries. The letters in the parentheses that follow some definitions indicate the source of the definition: (A) The American National Standard Dictionary for Information Systems, ANSI X3.172-1990, copyright 1990 by the American National Standards Institute (ANSI).
- Page 96 cell cell See slot. cleaning cartridge A tape cartridge that contains special material to clean the tape path in a transport or drive. LTO Ultrium cleaning cartridge labels have a CLN prefix and a CU media identifier. configuration The manner in which the hardware and software of an information processing system is organized and interconnected.
- Page 97 expansion cable A cable used to connect modules 2–10 to Module 1. Each end of the cable has a USB A style connector. expansion chassis The sheet metal and plastic chassis that makes up the framework for Module 2–15. expansion module A module that can be added to the bottom of an existing library to increase its capacity for drives and tape cartridges (tapes).
- Page 98 hand hand The robotic mechanism that grabs tape cartridges and moves them between slots and the drive. It is a component of the arm. The hand has a reach mechanism that gets tape cartridges from slots or drives and puts them into slots or drives. The hand also has a wrist mechanism that rotates the hand to allow it to reach cartridges on either side or the drives at the back of the library.
- Page 99 Module X (2 through 15) left magazine A plastic assembly containing 15 tape slots that can be inserted into the left side (as viewed from the front) of Modules 1–15. Left magazines and right magazines are not interchangeable. library A robotic system that stores, moves, mounts, and dismounts tape cartridges that are used in data read or write operations.
- Page 100 mount mount To place a tape in a drive and make it accessible to the host system. multimode fiber An optical fiber designed to carry multiple signals, distinguished by frequency or phase, at the same time. net mask A 32-bit, or 4-byte number, in dotted decimal format (typically written as four numbers separated by periods, such as 255.255.0.0 or 255.255.255.0) that is applied to an IP address to identify the network and node address of a host or router interface.
- Page 101 Terabyte robot An assembly that incorporates the bulk of the Module 1 electronics and the robotic components. This assembly is a combination of mechanical components, electronics, and a sheet metal housing. It is located at the top of the base chassis and incorporates the arm, Z mechanism, a CPU board, plus the KLC/KLP and KLZ cards.
- Page 102 A measure of chassis height. 1U in rack measurement is 44.45 millimeters (1.75 inches). Universal Serial Bus. A serial bus standard used to interface devices. World Wide Name A unique identifier in a Fibre Channel or SAS storage network. The first three bytes are derived from an IEEE Organizationally Unique Identifier (OUI), which defines the manufacturer or vendor.
- Page 103 Index Numerics configuration settings, initial, 4-12 contaminants, controlling, B-1 450 cartridge capacity, 1-2 data center cleaning procedures, B-8 accessibility settings, 1-4 date and time accessory package set manually, 4-8 base module, 3-3 using network time protocol, 4-8 expansion module, 3-14 drive element addressing mode, 4-9 ACSLS support, 5-5 drive slot addressing, 4-9...
- Page 104 front rail installation, 3-6 module, label installation, 3-23 installation, 3-10 mounting rail, base module, 3-4 cable connection, 3-25 expansion module clip nut installation, 3-17 network port 1, configuration of, 4-4 installation, 3-20 network settings verification, 4-13 magazine removal, 3-18 rear rail installation, 3-22 front rail installation, 3-6 gather rail parts password...
- Page 105 weight base module, 1-7 expansion module, 1-7 Windows device driver, 2-2 Index-3...
- Page 106 Index-4...
Need help?
Do you have a question about the StorageTek SL150 and is the answer not in the manual?
Questions and answers