Oracle StorageTek SL150 Installation Manual
Modular tape library system
Hide thumbs
Also See for StorageTek SL150:
- Reference manual (266 pages) ,
- Library manual (196 pages) ,
- User manual (130 pages)

Related Manuals for Oracle StorageTek SL150


Summary of Contents for Oracle StorageTek SL150
- Page 1 StorageTek SL150 Modular Tape Library System Installation Manual Part Number: E28647-02 October 2012 Submit comments about this document to STP_FEEDBACK_US@ORACLE.COM.
- Page 2 Oracle Corporation and its affiliates disclaim any liability for any damages caused by use of this software or hardware in dangerous applications.
-
Page 3: Table Of Contents
Table of Contents List of Figures .......................... 7 Preface ............................9 Access to Oracle Support ......................9 What’s New ..........................11 Product Overview ......................... 13 Library System Indicators ......................14 Human Interfaces ........................15 Installation Wizard Keyboard Screens ................. 17 Specifications ........................... - Page 4 Expansion Module Installation Overview ................. 37 Tool Requirement ....................... 38 To Unpack and Acclimate the Expansion Module ..............38 Expansion Module Attachment Kit ..................38 Gather the Attachment Hardware ..................39 To Power Down the Library ....................40 To Remove the Library Floor ....................41 To Install Clip Nuts for the Expansion Module ..............
- Page 5 Startup ............................77 Drive Firmware ........................79 Determine the Current Drive Firmware Version ............... 79 Download Firmware from MyOracleSupport ................80 Controlling Contaminants ....................83 Environmental Contaminants ....................83 Required Air Quality Levels ..................... 83 Contaminant Properties and Sources ..................84 Operator Activity ........................
- Page 6 6 SL150 Installation Manual October 2012...
-
Page 7: List Of Figures
List of Figures FIGURE 1-1 StorageTek SL150 Base Module and Expansion Module ..........13 FIGURE 1-2 Rear View Base Module and Expansion Module ............14 Library System Indicators ................... 15 FIGURE 1-3 FIGURE 1-4 Front Control Panel Home Screen ................16 FIGURE 1-5 Remote Interface for SL150 Library (Library Menu) ............ - Page 8 FIGURE 4-8 Home Screen ......................61 FIGURE 4-9 Settings Screen Network Tab ..................62 FIGURE 4-10 SL150 Remote Interface Log In Screen ................ 63 FIGURE 5-1 Set Library Offline ...................... 66 FIGURE 5-2 Offline Confirmation ....................66 FIGURE 5-3 Self Test Commands ....................67 FIGURE 5-4 Self Test Confirmation ....................
-
Page 9: Preface
This guide is intended for anyone involved with planning and performing the installation of Oracle’s StorageTek SL150 Modular Tape Library System. Access to Oracle Support Oracle customers have access to electronic support through My Oracle Support. For information, visit http://www.oracle.com/support/contact.html... - Page 10 Access to Oracle Support 10 SL150 Installation Manual October 2012...
-
Page 11: What's New
Expansion module installation sequence modified to insert the floor in the bottom library module before inserting that module into the rack. Keyboard screen information moved to Chapter 1. Various format changes to facilitate a future migration to Oracle publishing tools. What’s New 11 October 2012... - Page 12 12 SL150 Installation Manual October 2012...
-
Page 13: Product Overview
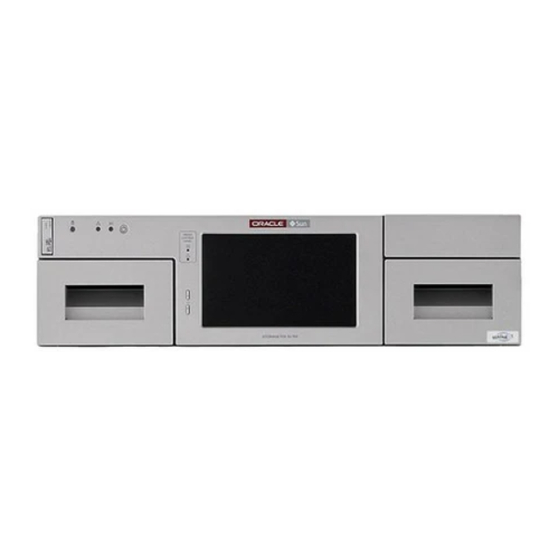
Product Overview Oracle’s StorageTek SL150 Modular Tape Library System is a 3U (5.25 inches) to 21U (36.75 inches) rack-mounted, modular automated tape library (see FIGURE 1-1). It offers storage capacity of 30 to 300 Linear Tape Open (LTO) cartridges, from 1 to 20 half-height LTO5 Fibre Channel (FC) or Serial Attached SCSI (SAS) tape drives, and a bridged drive FC or SAS control path. -
Page 14: Library System Indicators
Library System Indicators 5. Front control panel 6. Mailslot Up to nine 2U (3.5 inch) expansion modules (designated Module 2 through Module 10) can be added to provide additional tape slot capacity by two removable 15-slot magazines (see FIGURE 1-1 on page 13). -
Page 15: Human Interfaces
Human Interfaces • OK: indicates the library is functional (green), but the library might be in a degraded state (the Fault indicator is on concurrently with OK). FIGURE 1-3 Library System Indicators Human Interfaces Graphical user interfaces provide limited local access and full role-based remote access control of the library. - Page 16 Human Interfaces • Customer Replaceable Unit (CRU) indicators. Most CRUs have an OK indicator that shows it is operational (green). If any of those CRUs have a failure, a Fault indicator (yellow) is shown instead. The drive CRU has a blue indicator that is activated from the remote interface to indicate the CRU is safe to remove and aids in locating the specific drive needing replacement.
-
Page 17: Installation Wizard Keyboard Screens
Human Interfaces Installation Wizard Keyboard Screens In general, you enter installation wizard values from a keyboard screen and tap buttons to apply selections or navigate forward and backward through the various screens. The keyboard opens in a window with white borders. The keyboard consists of two sections (see FIGURE 1-6):... -
Page 18: Specifications
Specifications FIGURE 1-7 Numbers and Characters Screen Illustration Legend: 1. Key to Access the Special Characters Keyboard 2. Key to Access the Letters Keyboard 3. Done Key 4. Enter Key FIGURE 1-8 Special Characters Screen Illustration Legend: 1. Key to Access the Numbers Keyboard 2. -
Page 19: Installation Overview
Installation Overview • Width: 48.1 cm (18.9 inches) standard 19 inch rack system • Weight: Base module (Module 1): 27.2 kg (60 pounds) including left and right magazines, robot, two tape drives, and two power supplies Expansion module (Module 2 through Module 10): 14.1 kg (31 pounds) including left and right magazines, two tape drives, and two power supplies Power Supply: •... - Page 20 Installation Overview 20 SL150 Installation Manual October 2012...
-
Page 21: Planning And Preparation
Planning and Preparation Note – The installation instructions in this guide are based upon the Sun Rack II which is the standard Oracle 19-inch rack. Rack Preparation • It is suggested that you position the power distribution unit on the right side of... -
Page 22: Tape Device Driver
Tape Device Driver Make sure that the proper device driver is installed, if applicable. Download the driver from the HP web site, if needed. For example, Oracle has qualified the HP LTO-5 drive with Windows driver 3.5.0.0. Environmental Information Temperature: •... - Page 23 Environmental Information 2. Remove the front rails from the base module packing material and set them aside. Note – The rails will be used in a later instruction (see “Base Module Mounting Rail” on page 28). 3. Remove the foam pieces which cover the top of the library module. 4.
- Page 24 Environmental Information 24 SL150 Installation Manual October 2012...
-
Page 25: Hardware Installation
Hardware Installation The installation instructions in this manual address a two module SL150 and a rack with square holes. Overview The base module (Module 1) sits on rails which are secured to the rack with 8-32 screws and mounting blocks. The installation allows sufficient space to expand the library to include a maximum of ten modules. - Page 26 Overview 3. Screws 4. Module Flange 5. Clip Nut The module accessory package contains parts needed to complete the installation (such as the back rail pieces, screws, clip nuts, and mounting blocks). After securing the base module in the rack, you can add one or more modules to expand cartridge capacity and increase the number of tape drives.
-
Page 27: Base Module Installation
Base Module Installation Note – The installation instructions in this guide are based upon the Sun Rack II. If your rack is different (M5 or M6 holes), use the instructions as a basic guide but alter steps accordingly. Base Module Installation The following tasks are performed to install the base module: 1. -
Page 28: Base Module Mounting Rail
Base Module Mounting Rail • Hex key (used to manually open a magazine) • Mounting block FIGURE 3-3 Base Module Accessory Package Mounting Hardware Illustration Legend: 1. Back Rails 2. Clip Nuts 3. Screws (assorted types) 4. Hex Key 5. Mounting Block Base Module Mounting Rail The base module mounting rail consists of two parts (front rail and back rail). -
Page 29: To Install The Base Module Back Rails
Base Module Mounting Rail FIGURE 3-4 Back Rails Installed ▼ To Install the Base Module Back Rails Note – An operator in a seated position might need to access the library front control panel and mail slot. Mount the base module at a height that enables easy user access to the front control panel while providing sufficient space for library expansion below the base module (a 300 cartridge library spans 21 U but an additional... -
Page 30: Front Rail
Base Module Mounting Rail 8. Make sure the wide surface of the back rail is plumb with the inside edge of the rack stile while maintaining an equal gap between the rack stile and the top and bottom edges of the back rail. Note –... -
Page 31: To Install The Front Rail
Base Module Mounting Rail ▼ To Install the Front Rail Task 1: Connect the Front Rail to the Back Rail 1. Grasp the front rail and position it so the blade is facing into the rack with the rail tabs toward the outside of the rack. 2. - Page 32 Base Module Mounting Rail 5. Tighten the 8–32 screw with a Phillips screwdriver while making sure that the rail is plumb with the inside edge of the rack stile. Note – The front rail should not tilt in or tilt out. 6.
-
Page 33: Clip Nut Location
Base Module Mounting Rail FIGURE 3-8 Rails Installed - Front View Clip Nut Location Note – Clip nuts are only used in racks with square holes. Two screws secure the module to the rack. Racks with square holes use a clip nut and a 10–32 X 5/8 screw. -
Page 34: To Install The Clip Nut
Base Module Mounting Rail ▼ To Install the Clip Nut Note – Clip nuts are only used in racks with square holes. 1. Open the package containing clip nuts. 2. Locate the hole immediately below the front rail (second hole in the third U). 3. -
Page 35: Mount The Base Module
Mount the Base Module Mount the Base Module Installation of the base module involves engaging the tabs on the side of the module with the rack rails (see FIGURE 3-10), removing the cartridge magazines, securing the module to the rack with screws, reinstalling the cartridge magazines, releasing the robot lock (see FIGURE 3-2 on page 26), and connecting cables. - Page 36 Mount the Base Module 4. Push the module into the rack until the front side-tabs approach the front of the rack rails. 5. Lift the module up slightly, push it into the rack, and set the front tabs down on the rack rail.
-
Page 37: Expansion Module Installation Overview
Expansion Module Installation Overview 4. Replace the cartridge magazines if you are not installing expansion modules. Note – Left and right magazines are unique. Orient the magazine so the cartridge openings face the Front Control Panel. Note – Do not put cartridges in the magazine slots. 5. -
Page 38: Tool Requirement
Expansion Module Installation Overview 6. Replace the library floor in the last expansion module before you install the module. 7. Install the module to the existing library which includes mating the expansion module with the installed module, seating the alignment tab in the left magazine slot, installing the back rails, and securing the module to the rack with screws. -
Page 39: Gather The Attachment Hardware
Expansion Module Installation Overview FIGURE 3-13 Expansion Module Accessory Package Hardware Illustration Legend: 1. Back Rails 2. Clip Nuts 3. Screws (assorted) 4. Expansion Cable with USB Type A Connectors 5. Module Labels 6. Hook and Loop Strap 7. Rivet 8. -
Page 40: To Power Down The Library
Expansion Module Installation Overview ▼ To Power Down the Library Note – If you are installing the expansion module during the initial library installation, continue with “To Remove the Library Floor” on page Task 1: Power Down the Library 1. Quiesce the host application to prevent disruption of active storage operations. 2. -
Page 41: To Remove The Library Floor
Expansion Module Installation Overview FIGURE 3-15 Prepare Robot for Removal Illustration Legend: 1. Prepare Robot for Removal Checkbox 2. OK Button Task 2: Lock the Robot 1. Locate the robot lock on the base module (see FIGURE 3-2 on page 26). -
Page 42: To Install Clip Nuts For The Expansion Module
Expansion Module Installation Overview FIGURE 3-16 Library Floor Removal from the Base Module Illustration Legend: 1. Floor Finger Holds ▼ To Install Clip Nuts for the Expansion Module Note – The instructions in this section assume a rack with square holes. -
Page 43: To Prepare The Expansion Module For Installation
Expansion Module Installation Overview FIGURE 3-17 Expansion Module Installation Illustration Legend: 1. First U 2. Second U 3. Module Flange 4. Module Engagement 5. Clip Nut Location (second hole of second U) Task 2: Install Clip Nuts at the Back of the Rack 1. - Page 44 Expansion Module Installation Overview The expansion module is open at the top, and the latches are located behind the front face of the module. TIP: You can also release the magazine with the hex tool. 2. Remove the cartridge magazines from the module you are installing. FIGURE 3-18 Magazine Latches Illustration Legend: 1.
- Page 45 Expansion Module Installation Overview FIGURE 3-19 Library Floor Illustration Legend: 1. Floor Slot 2. Floor Tab FIGURE 3-20 Floor Secured Illustration Legend: 1. Floor Clip 2. Floor Hardware Installation 45 October 2012...
-
Page 46: To Install The Expansion Module
Expansion Module Installation Overview ▼ To Install the Expansion Module Warning – Use two people to lift and install the expansion module. Grasp the module by the sides. Do not lift the module by the tape drive filler. 1. Lift the module to the bottom of the installed module. 2. -
Page 47: To Secure The Expansion Module
Expansion Module Installation Overview FIGURE 3-22 Alignment Tab Seated Illustration Legend: 1. Tab Seated in Slot 2. Slot in Magazine Bay ▼ To Secure the Expansion Module Task 1: Install the Rear Rails 1. Slide the back rail blade under the expansion module tabs (see FIGURE 3-23). -
Page 48: To Replace The Cartridge Magazines
Expansion Module Installation Overview 1. Clip Nut 2. Rear Rail Task 2: Secure the Rear Rails 1. Push the back rail against the rack vertical rail. 2. Secure the back rail to the rack vertical rail with a screw. TIP: Use a 10-32 screw when a rack has square holes (screw mates with a clip nut). 3. -
Page 49: To Label The Module
Expansion Module Installation Overview ▼ To Label the Module 1. Locate the scribe lines in the upper left corner of the expansion module (as viewed from the back of the rack). 2. Obtain the module label sheet from the accessory kit. 3. -
Page 50: To Install The Hook And Loop Strap
Final Hardware Actions ▼ To Install the Hook and Loop Strap 1. Insert the rivet into a hole in the hook and loop strap (see FIGURE 3-25). 2. Pull the plunger back from the rivet face. 3. Align the rivet with the hole adjacent to the module controller. 4. -
Page 51: To Perform Basic Cabling
Final Hardware Actions Note – The unlocked padlock icon is visible. 4. Tighten the thumbscrew. FIGURE 3-26 Robot Lock (Unlock) ▼ To Perform Basic Cabling Task 1: Connect the Expansion Module to the Base Module 1. Connect an expansion interconnect cable from any Module Output port in the base module to the module controller of each expansion module (see FIGURE 3-27). -
Page 52: To Apply Power
Final Hardware Actions 4. Power Supply Power Cord 5. Tape Drive Serial Attached SCSI (SAS) Cable Task 2: Connect Cables to the Tape Drive Assembly and Power Supply 1. For each installed power supply, connect the power cord to the AC receptacle on the power supply and connect the power cord to the power distribution unit in the rack. -
Page 53: Library Initialization
Library Initialization Basic library initialization is performed from the touch screen of the front control panel (see FIGURE 4-1). FIGURE 4-1 Library Initialization Overview Initialization Overview Library initialization is comprised of the following tasks: 1. Change the default administrator password (the default user ID is admin) 2. -
Page 54: To Start Library Initialization
Initialization Overview ▼ To Start Library Initialization • Tap the Start button on the initialization screen (see FIGURE 4-1 on page 53). The Log in as the Default Administrator screen appears (see FIGURE 4-2). FIGURE 4-2 Default Administrator Login Illustration Legend: 1. -
Page 55: Step 1 Of 4 (Change The Default Administrator Password)
Initialization Overview The Log in as the Default Administrator screen appears with several large dots in the Password field. Note – The dots are the standard display and do not represent the actual number of characters you entered for the password. 6. -
Page 56: Step 2 Of 4 (Set The Library Date And Time)
Initialization Overview Note – The password must be at least eight characters long and contain one or more numeric or special characters. The value passw0rd is considered invalid. 3. Tap the Next button after entering the final character of the password. 4. -
Page 57: To Set The Date And Time
Initialization Overview 2. Keyboard Button 3. Time Field 4. Next Screen Button 5. Previous Screen Button ▼ To Set the Date and Time Task 1: Enter the Date 1. Tap the Edit button to access the keyboard screen. The Letters screen appears with the parameter field showing Date. 2. - Page 58 Initialization Overview FIGURE 4-5 Configure Network Port 1 Illustration Legend: 1. DHCP Choice 2. Static IP Address Choice 3. Keyboard Button 4. Host Name, IP Address, Netmask, and Default Gateway Fields 5. Next Screen Button 6. Previous Screen Button Task 2: Enter the Static IP Address 1.
-
Page 59: To Configure The Network Using Dhcp
Initialization Overview 2. Tap the screen keys to enter the Default Gateway value in the format XXX.XXX.XXX.XXX. 3. Tap the Done button after you have entered the last character of the gateway. The Configure the Library Network Port 1 screen appears showing your entered values. -
Page 60: Step 4 Of 4 (Review And Apply Initialization Settings)
Initialization Overview Step 4 of 4 (Review and Apply Initialization Settings) The fourth step of library initialization is to review and apply the initialization settings (see FIGURE 4-7). FIGURE 4-7 Review and Apply Changes Illustration Legend: 1. Previous Screen Button 2. -
Page 61: To Verify Network Settings
Initialization Overview Note – The top portion of the Home screen provides information on the library Health and the online/offline state. Make sure the library is online before using the SL150 remote interface. FIGURE 4-8 Home Screen Illustration Legend: 1. Library Health ▼... -
Page 62: Final Configuration
Final Configuration FIGURE 4-9 Settings Screen Network Tab Illustration Legend: 1. Network Settings Tab 2. IP Address Final Configuration Additional configuration tasks are performed through the SL150 remote interface. The Log In screen is shown in FIGURE 4-10 on page 63. - Page 63 3. Go to Chapter 5, “Checkout” when the applicable items above are complete. Note – Refer to the Oracle Key Manager documentation if you intend to enable tape drive encryption. FIGURE 4-10 SL150 Remote Interface Log In Screen Illustration Legend: 1.
- Page 64 Final Configuration 64 SL150 Installation Manual October 2012...
-
Page 65: Checkout
Checkout The self-tests in the SL150 remote interface are used to checkout the library. Self-Test Overview The self-test moves a diagnostic cartridge from an origination point to a destination point in an offline library. The point can be a reserved slot, a storage slot, a tape drive, or a mailslot. -
Page 66: To Run The Self-Test
Self-Test Overview FIGURE 5-1 Set Library Offline Illustration Legend: 1. Set Library Offline FIGURE 5-2 Offline Confirmation Illustration Legend: 1. Offline Dialog Box (OK button) ▼ To Run the Self-Test Task 1: Invoke the Self Test 1. Insert a diagnostic tape in the mailslot if the library does not have a reserved slot containing a diagnostic tape. - Page 67 Self-Test Overview 4. Click OK to begin the test or Cancel to exit. FIGURE 5-3 Self Test Commands Illustration Legend: 1. Basic Self Test Command 2. Diagnostic Cartridge (in Mailslot) FIGURE 5-4 Self Test Confirmation Illustration Legend: 1. Confirm Basic Self Test Dialog Task 2: Monitor Test Progress 1.
- Page 68 Self-Test Overview FIGURE 5-5 Self Test Progress Illustration Legend: 1. Basic Self Test Progress Bar 2. Stop Self Test Button 3. Diagnostic Cartridge in Module 1 Top Drive FIGURE 5-6 Self Test Complete Illustration Legend: 1. Progress Bar 100% 2. Close Button 3.
- Page 69 Self-Test Overview b. Extend the Mailslot mechanism from the base module to access the diagnostic tape. c. Grasp the diagnostic tape and pull it out of the slot. d. Push the Mailslot fully into the base module. 3. Log out if you will not be performing other operations. Incomplete Test The test may not complete because of an error condition or the deliberate action to stop the test.
- Page 70 Self-Test Overview 70 SL150 Installation Manual October 2012...
-
Page 71: Adding Power Supplies And Tape Drives
Adding Power Supplies and Tape Drives The tape drives and power supplies are located at the back of the library (see FIGURE 6-1). Each module in the library has space for two tape drives and two power supplies. You can add tape drives and power supplies as your needs grow. The power supply and tape drive can be added while the library is powered-on. -
Page 72: Power Supply
Power Supply Two actions are involved to add a power supply (see FIGURE 6-2) to a library module: 1) removal of the power supply filler and 2) installation of the power supply. No tools are required to perform these tasks. FIGURE 6-2 Power Supply Illustration Legend: 1. -
Page 73: Tape Drive Tray
Tape Drive Tray Two actions are involved to add a tape drive tray (see FIGURE 6-3) to a library module: 1) removal of the tape drive filler and 2) installation of the tape drive tray. No tools are required to perform these tasks. Note –... -
Page 74: To Install An Additional Tape Drive Tray
▼ To Install an Additional Tape Drive Tray Task 1: Install the Tape Drive Tray Caution – Equipment damage. Do not touch the circuit card or static sensitive components. The circuit card is located on the right side of the drive tray (see FIGURE 6-3 on page 73). -
Page 75: Relocation
Relocation The following information is provided to aid for relocating a library in the data center. 1. Quiesce the host application to prevent disruption of active storage operations. 2. Perform a controlled power-down of the library while invoking the option to prepare the robot for removal. - Page 76 76 SL150 Installation Manual October 2012...
-
Page 77: Startup
Startup The SL150 library is typically started up when power is applied (the power cord is plugged in or the external power is switched on). If the library was manually powered down (from the front panel power switch or the shutdown function of the remote management interface), pressing the front panel power switch starts the library. - Page 78 78 SL150 Installation Manual October 2012...
-
Page 79: Drive Firmware
Drive Firmware New versions of drive firmware are periodically posted to MOS (MyOracleSupport). You should check MOS for firmware updates and load the update to your tape drives. Determine the Current Drive Firmware Version 1. Login to the SL150 remote interface. 2. -
Page 80: Download Firmware From Myoraclesupport
Note – The drive firmware levels at initial release of the SL150 were: Y5BS (FC) and Z55S (SAS). Task 1: Access MOS 1. Use a web browser and connect to https://support.oracle.com. 2. Click Register to create an account, if applicable. 3. Sign in. - Page 81 Download Firmware from MyOracleSupport 1. Click the Download button. 2. Sign out of MOS. 3. Follow the instructions in the Read Me file to install the firmware on your tape drive. Note – Load firmware through the drive interface port using the HP Library and Tape Tools (LTT) utility or the SCSI write buffer download.
- Page 82 Download Firmware from MyOracleSupport 82 SL150 Installation Manual October 2012...
-
Page 83: Controlling Contaminants
• Severity level G1 per ANSI/ISA 71.04-1985. Oracle currently requires the ISO 14644-1 standard approved in 1999, but will require any updated standards for ISO 14644-1 as they are approved by the ISO governing body. The ISO 14644-1 standard primarily focuses on the quantity and size of particulates as well as the proper measurement methodology, but does not address the overall mass of the particulates. -
Page 84: Contaminant Properties And Sources
Contaminant Properties and Sources particles than standard air in an office environment. Particles ten microns or smaller are harmful to most data processing hardware because they tend to exist in large numbers, and can easily circumvent many sensitive components’ internal air filtration systems. -
Page 85: Operator Activity
Contaminant Properties and Sources Submicron particulates are much more dangerous to sensitive computer hardware, because they remain airborne for a much longer period of time, and they are more apt to bypass filters. Operator Activity Human movement within the computer space is probably the single greatest source of contamination in an otherwise clean computer room. -
Page 86: Cleaning Activity
Contaminant Effects Cleaning Activity Inappropriate cleaning practices can also degrade the environment. Many chemicals used in normal or “office” cleaning applications can damage sensitive computer equipment. Potentially hazardous chemicals outlined in the “Cleaning Procedures and Equipment” section should be avoided. Out-gassing from these products or direct contact with hardware components can cause failure. -
Page 87: Shorts
Room Conditions Shorts Conductive pathways can arise through the accumulation of particles on circuit boards or other components. Many types of particulate are not inherently conductive, but can absorb significant quantities of water in high-moisture environments. Problems caused by electrically conductive particles can range from intermittent malfunctioning to actual damage to components and operational failures. -
Page 88: Exposure Points
Exposure Points Unsealed concrete, masonry or other similar materials are subject to continued degradation. The sealants and hardeners normally used during construction are often designed to protect the deck against heavy traffic, or to prepare the deck for the application of flooring materials, and are not meant for the interior surfaces of a supply air plenum. -
Page 89: Filtration
Filtration • Automatic doors should be avoided in areas where they can be accidentally triggered. An alternate means of control would be to remotely locate a door trigger so that personnel pushing carts can open the doors easily. In highly sensitive areas, or where the data center is exposed to undesirable conditions, it may be advisable to design and install personnel traps. -
Page 90: Positive Pressurization And Ventilation
Positive Pressurization and Ventilation Low efficiency filters are almost totally ineffective at removing sub-micron particulates from the air. It is also important that the filters used are properly sized for the air handlers. Gaps around the filter panels can allow air to bypass the filter as it passes through the air conditioner. -
Page 91: Daily Tasks
Cleaning Procedures and Equipment overall commitment to excellence and quality. An effective cleaning schedule must consist of specially designed short-term and long-term actions. These can be summarized as follows: Frequency Task Daily Actions Rubbish removal Weekly Actions Access floor maintenance (vacuum and damp mop) Quarterly Actions Hardware decontamination Room surface decontamination... -
Page 92: Quarterly Tasks
Cleaning Procedures and Equipment Quarterly Tasks The quarterly statement of work involves a much more detailed and comprehensive decontamination schedule and should only be conducted by experienced computer room contamination-control professionals. These actions should be performed three to four times per year, based on the levels of activity and contamination present. All room surfaces should be thoroughly decontaminated including cupboards, ledges, racks, shelves and support equipment. -
Page 93: Activity And Processes
Activity and Processes work and cleaned with a damp sponge as well. Any unusual conditions, such as damaged floor suspension, floor tiles, cables and surfaces, within the floor void should be noted and reported. Activity and Processes Isolation of the data center is an integral factor in maintaining appropriate conditions. - Page 94 Activity and Processes 94 SL150 Installation Manual October 2012...
-
Page 95: Glossary
Glossary This glossary defines terms and abbreviations in this publication. Some of the definitions are taken from other glossaries. The letters in the parentheses that follow some definitions indicate the source of the definition: (A) The American National Standard Dictionary for Information Systems, ANSI X3.172- 1990, copyright 1990 by the American National Standards Institute (ANSI). - Page 96 base module The smallest, fully functional library consisting of the base chassis with the midplane, robot, front control panel, mailslot, one or two power supplies, up to two half-height LTO Ultrium tape drives, left magazine, and right magazine. cartridge A storage device that consists of magnetic tape on a supply reel in a protective housing.
- Page 97 encryption The process of changing data into a form that cannot be read until it is deciphered, protecting the data from unauthorized access and use. Ethernet A local-area, packet-switched network technology. Originally designed for coaxial cable, it now also runs over shielded, twisted-pair cable. Ethernet is a 10 or 100 Megabytes-per-second LAN.
- Page 98 An activity in which a robot obtains a cartridge from a slot or drive. gripper The portion of the hand assembly that grasps and holds a cartridge. Graphical user interface. Software that allows the user to control the device through visual screens.
- Page 99 initialization The operations required for setting a device to a starting state, before the use of a data medium, or before implementation of a process. (T) interface Hardware, software, or both, that links systems, programs, or devices. (IBM) internet protocol (IP) A protocol used to route data from its source to its destination in an Internet environment.
- Page 100 mailslot A plastic and metal assembly located in the upper right corner of the base chassis used to enter tapes into the library and to remove tapes from the library. Previous StorageTek libraries called this a CAP (Cartridge Access Port). midplane A card mounted in the base chassis or expansion chassis that is behind the tape slots and in front of the tape drives.
- Page 101 port A specific communications end point within a host. A port is identified by a port number. (IBM) (2) In Fibre Channel, an access point in a device where a link attaches. An activity in which a robot places a cartridge into a slot or drive. power supply An AC to DC power supply that mounts into the rear of a module Module (1–10).
- Page 102 switch In Fibre Channel technology, a device that connects Fibre Channel devices together in a fabric. tape Also known as cartridge, tape cartridge, tape volume, volume, or cassette. tape cartridge A container holding magnetic tape that can be processed without separating the tape from the container.
- Page 103 Z mechanism The robotic assembly mounted at the back of the robot that raises and lowers the arm. The Z mechanism includes a motor, gears, the bullwheel, and the wires and pulleys that hold the arm. As the motor turns, the bullwheel rotates and extends or retracts the wires to lower or raise the arm.
- Page 104 104 SL150 Installation Manual October 2012...
-
Page 105: Index
Index accessory package environmental base module 27 contaminants 83 expansion module 38 information, SL150 22 addresses, network verification 61 expansion module air quality 83 clip nut installation 42 apply initial configuration settings 60 installation of 46 magazine removal 43 rail installation 47 back rail installation base module 29... - Page 106 robot lock release 50 expansion module 47 unpacking 22 front rail 31 mounting description 28 parts base module 27 keyboard screens 17 expansion module 39 robot lock, release of 50 label installation, module 49 library self test 65 control interface 13 service clearance 22 floor removal 41 settings, network 61...
Need help?
Do you have a question about the StorageTek SL150 and is the answer not in the manual?
Questions and answers