Advertisement
Advertisement
Table of Contents

Related Manuals for laerdal SimMan 3G Bleeding Module


Summary of Contents for laerdal SimMan 3G Bleeding Module
- Page 1 SimMan 3G Bleeding Modules Directions for Use www.laerdal.com...
- Page 3 Spare Parts Introduction The SimMan 3G Bleeding Module kit includes trauma modules which can be fitted to SimMan 3G to simulate bleeding patient cases. After the simulation is completed, leave the trauma modules connected, and perform the cleaning instructions as stated in SimMan 3G Directions for Use.
- Page 4 Removing SimMan 3G Left Arm 1. Unzip the clothing zippers on the right 2. Unzip the zippers on the left side of the side. Remove the shirt. torso. Open the Torso Skin to one side. 3. Open the Stomach Foam to one side. 4.
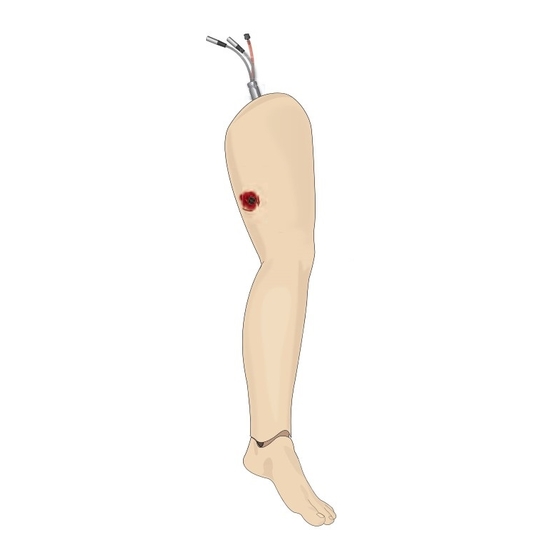
- Page 5 Attaching SimMan 3G Amputation or Shotgun Arm The Arm Adapter and Adapter Screw 1. Fit the Arm Adapter into the hole in the are designed to attach an Amputation or arm bracket from inside of the torso. Gunshot Arm to the SimMan 3G manikin. Ensure that the flat edge of the adapter is facing the chest hinge.
- Page 6 Replacing SimMan 3G Left Leg with Trauma Leg 1. Remove the SimMan 3G default leg. 2. Unscrew hip joint connector. Remove Open Torso skin and stomach foam as the leg cables/tubes from the connector. shown in steps 1-3, page 4. 3.
- Page 7 Spare Parts Items listed below are replacements parts for the SimMan 3G Bleeding Module kit. 212-07850 Amputated Arm SimMan 3G 212-07950 Gunshot arm SimMan 3G 212-08150 Amputated Leg SimMan 3G 212-08250 Gunshot Leg SimMan 3G 212-08350 Hardware Kit 212-08450 SimMan 3G Bleeding Trauma Directions for Use...
- Page 8 © 2010 Laerdal Medical AS. All rights reserved...
Need help?
Do you have a question about the SimMan 3G Bleeding Module and is the answer not in the manual?
Questions and answers