Table of Contents
Advertisement
Advertisement
Table of Contents

Related Manuals for laerdal SimMom


Summary of Contents for laerdal SimMom
- Page 1 SimMom ™ Directions for Use www.laerdal.com www.limbsandthings.com...
-
Page 3: Table Of Contents
Features Setup – Attaching Manikin Legs – Gown Features – Configuring System Software – User Interface – Changing SimMom Settings During Simulation – Changing Default Setting – Fetal Monitoring – Patient Monitor – Laerdal Debrief Viewer – Customizing Scenarios –... - Page 4 In cold conditions, wait until the manikin has reached room inaccuracies in anatomical features and the physiological modeling. temperature before starting up the manikin. This being the case, Laerdal does not guarantee that all features are To avoid overheating and reduce wear: completely accurate.
- Page 5 When performing defibrillation, use the defibrillator connectors – The SimMom manikin and accessories are heavy when packed in or the zap plate mounted on the manikin’s chest. Do not use boxes or combined in optional carrying cases. Always ensure that...
-
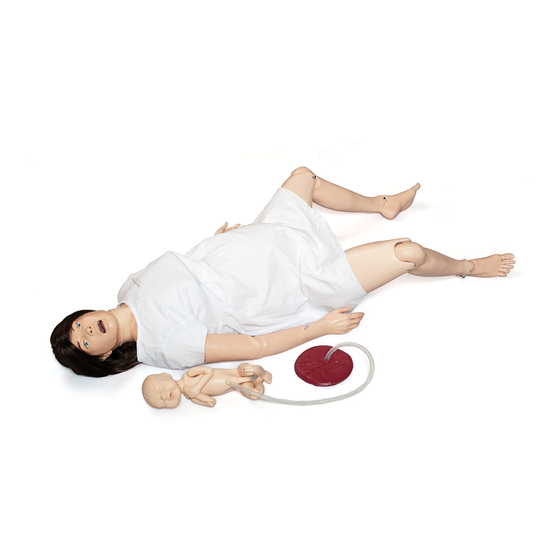
Page 6: Simmom Overview
Patient Monitor (in applicable versions only) mother and fetus. Accessories SimMom can be used to teach skills such as airway management, CPR, heart and lung sound auscultation, and blood pressure auscultation. SimMom can also simulate the following delivery scenarios: –... - Page 7 Introduction Right Arm ECG Left Arm ECG Lead Lead Sternum Defib Plate Intramuscular Injection Site Intramuscular Injection Site IV Fluid Connection IV Fluid Connection Left Leg ECG Lead BP Cuff Connection Right Leg ECG Apex Defib Plate Lead Blood Pressure Arm IV Access IV Access Intramuscular Injection Site...
-
Page 8: Features
Introduction Features – Realistic vulva and anus for digital exams – Realistic "at term" abdominal skin ement – Pre-incised C-section skin – Seizure indicator – Fluids (e.g. blood, stained amniotic fluid and urine) – Able to position at all fours: –... - Page 9 – Head designed and tested so it can be used for forceps deliveries (rotational and normal) and vacuum delivery (kiwi and ventouse) F. Remote connector: Not applicable to SimMom. – Head can be easily manipulated by “puppeteer” and flexes G. Blood pressure connector: Connects to the blood pressure tube naturally as it is pushed through the birth canal exiting lower right side of manikin.
-
Page 10: Setup
Gown Features – Configuring System PC, Patient Monitor, and Webcam The SimMom gown has two flaps that provide access to the abdomen during birthing simulations. The gown also has holes through which Connecting Belly Skin Audio Cable the manikin’s wires can pass. - Page 11 Setup them to the corresponding outlets located at the bottom of the touch each target as it changes position and follow the arrow screen. with your finger. -- Video cable – When the ELO Touchscreen dialog box appears, touch the green -- USB cable “check box”...
-
Page 12: Software
User Interface The Instructor PC uses the Instructor Application software to manage The graphical user interface for SimMom is controlled by the Instructor simulation scenarios. The instructor can pause a scenario at any time PC. It is highly configurable and easy to operate. It controls the... - Page 13 Event handlers enable events to trigger simulator responses. video recording), setting vital signs, adjusting Korotkoff controls, – Handlers window displays currently running handlers. and starting SimMom dialog. – Use the <Hide Trends> button to hide or show the trend –...
- Page 14 Software – Trend Preview Window is hidden by default. To activate, click – Set boggy uterus and bleeding uterus. <Show Trends> under the Handlers dialog box. To enable at – Set pulse strength. start up, go under <Edit> on the program menu bar and click <configuration>.
-
Page 15: Changing Simmom Settings During Simulation
Tongue edema – Uterus bleeding Changing SimMom Settings During Simulation pressure (0-6) flow (60-100) By accessing the SimMom Dialog Menu, you can adjust the Seizure, – Seizure intensity (75-100) – Pneumothorax Boggy uterus, and Uterus bleeding settings during the simulation. Any pressure (0-6) –... -
Page 16: Fetal Monitoring
1. Select the <General> tab on Configuration screen. the EFM display to open the Fetal simulation setup window. 2. Click the <Tongue edema pressure> option under the SimMom Under the Select preset tab, the user can perform the following feature set values subheading. - Page 17 Software – Early decelerations slider sets amplitude of decelerations Note: For greater detail on creating a composite fetal heart occurring simultaneously with each contraction. rate pattern, proceed to the ‘Creating A Composite Fetal Heart Rate Pattern’ section. – Late decelerations slider sets amplitude of decelerations occurring after each contraction.
-
Page 18: Patient Monitor
Software 2. Create sub patterns. Patient Monitor Interface 1. Top menu – Input a sub pattern duration by clicking in the dialogue boxes underneath the Sub pattern duration heading and typing in a Press <5wave> in the top menu to view and change number. - Page 19 <Main Setup> menu are identical to the Record Vocal Sounds similar options displayed on the Menu line. Vocal files can be recorded using a shortcut available in the SimMom software program group. To record vocal files and make them available for the simulation sessions: Select the <Main Screen>...
-
Page 20: Laerdal Debrief Viewer
Customizing Scenarios Ordering Radiology, Media or Labs The user can order Radiology, Media, or Labs by clicking on any of the SimMom scenarios can be created and edited using a set of editors: relevant menus in the Patient Monitor Application. –... -
Page 21: Using Handler Editor To Link Actions
Laerdal Advanced Video System (AVS) Using Handler Editor to Link Actions The Laerdal AVS (optional) can be installed to allow high quality video capture from up to 4 video cameras during a simulation session and To link a sound to certain events, like a contraction, follow these steps: be viewed in the Laerdal Debrief Viewer. -
Page 22: Performing Simulations
Installing Defibrillator Adapter Plates The manikin torso is fitted with two stud connectors for use with a SimMom is capable of performing a variety of simulations based on conventional defibrillator (defibrillator not included). the positioning of the manikin and the modules attached to it. This... -
Page 23: Preparing Iv Simulations
5. Legs in stirrups 3. All fours 6. McRoberts Preparing Baby for Delivery SimMom is delivered with a birthing baby that can be placed in multiple positions in order to simulate normal, difficult, instrumental and placenta deliveries. Connecting Umbilical Cord... -
Page 24: Delivery Techniques
PROMPT Birthing Lubricant (Laerdal Catalogue No. 376- Note: The belly skin should be attached by one peg on each 02950, Limbs & Things No. 50181) or SimMom Birthing side of the pelvis during the procedure. Lubricant (Laerdal Catalogue No. 377-14450, Limbs & Things No. -
Page 25: Deliveries
1. Push diagonally upwards, into the pelvic floor following the J-shape of the birth canal. Deliveries 2. Guide baby horizontally through birth canal opening. SimMom is capable of simulating normal, breech, instrumental, and – If using two-handed technique, apply continuous upward shoulder dystocia deliveries. -
Page 26: Pelvic Components
Modular Components 5. Carefully align holes on cervix module with locating pins on clamping face. Ensure that urinary connector is aligned with SimMom is equipped with the following modular components: similar notch on cervix module. 1. Cervix Module 3. Postpartum Hemorrhage, including Boggy Uterus and Retained Placenta 2. - Page 27 Performing Simulations Note: The same pump and connectors can be used to deliver Amniotic Bag Installation simulated amniotic fluid rather than blood, if this is required. The amniotic bag is required during delivery simulations in which blood and/or amniotic fluid will be used. Note: Prior to beginning simulation, apply liberal amounts of lubrication to the birth canal, cervix, baby, bag, and placenta (if required).
- Page 28 Performing Simulations 14. Fit sealing clip to top end of bag. Roll up end of bag and tuck it 4. Locate flange on pelvic clamping face. Align holes on flange with inside abdomen. pins on clamping face. Align notch for urinary connectors with similar notch on pubis.
- Page 29 Performing Simulations 1. Remove the abdominal skin and ensure the PPH uterus is installed. 7. Pump until dial reads -0.8-0.9 bar/-25 mmHg (approximately Lubricate the birth canal and inside of PPH uterus. 8-10 strokes of pump). 2. Lubricate placental fragment, and insert it into the uterus, ensuring the pointed part of the fragment points towards the manikin’s head.
- Page 30 Performing Simulations 3. Remove the reservoir cover and attach the air supply tube from 6. Fit indwelling catheterization bladder. the boggy uterus (green Luer connector) to green air outlet on the pelvic bulkhead (3/4 turn). Caution: Do not activate boggy uterus until abdominal skin is fastened in position.
-
Page 31: Catheter Installation
5. Grip the grey urinary value through the birth canal skin, and push a replacement urinary connector onto valve spigot. Ensure that the SimMom includes two types of urinary connectors. The first type is connector tube is pointing to the manikin’s right side. -
Page 32: Cleaning Blood And Urine Reservoirs
41 in the Maintenance Section. Using the Bed Strap SimMom packaging includes a bed strap that can be used to secure the manikin to the table during simulations. To use the bed strap: Cleaning Blood and Urine Reservoirs 1. -
Page 33: Maintenance
Replacing Baby Limbs – VitalSim Battery Replacement Pupil Replacement SimMom is delivered with normal pupils installed in the eyes. A separate kit included with SimMom contains plastic pupil inserts (constricted and dilated). To change the pupils: 1. Using the suction cup tool provided in the kit or with the edge 4. -
Page 34: Neck Collar/Cricothyroid Replacement
Maintenance Arm Replacement 2. Fill a sink with two quarts of cool water. Avoid using hot water as it may damage the wig. To remove left manikin arm: 3. Pour two cups of synthetic wig shampoo into the sink. Submerse wig into water. - Page 35 Maintenance 10. Replace hard chest plate. 7. Slide the stopper off of the pivot arm. 11. Reattach chest skin back onto shoulder area, ensuring ECG posts align. 12. Replace deltoid injection pad on upper arm. To remove Right BP arm: 1.
-
Page 36: Pneumothorax Bladder Replacement
Maintenance Pneumothorax Bladder Replacement 4. Pinch and remove bladder through opening between second and third intercostal spaces. These are located on the top side of the To remove the pneumothorax bladder from bilateral mid-clavicular chest plate. sites: 1. Detach the chest skin from torso by lifting the tabs at the shoulder and back. -
Page 37: Thoracentesis Module Replacement
Abdominal Skin Replacement 3. Disconnect bladder hose from inline hose connector. Ensure hose does not fall through hole and into torso. SimMom is delivered with two abdominal skins: normal and C-section deliveries. To replace abdominal skin: Note: Skin may have a slight oily feel which is normal and a part of the manufacturing process. -
Page 38: Perineum/Birth Canal Skin Replacement
Maintenance 5. Fit the replacement skin onto the pelvis and plug in the audio jack. valve (grey) and push the birth canal down into the pelvis. 5. Remove retaining screws on lower pubic clamping plate, behind 6. Secure the replacement skin on both sides and the pubis. upper part of perineal skin, using 4mm Allen key. -
Page 39: Cervix Replacement
Maintenance 10. Gently remove birth canal from pelvis. 19. Pull birth canal up out of pelvis. 20. Locate holes in birth canal flange on corresponding pins on pelvic clamping face. 21. Replace urinary valve, urinary connector, and pelvic ring clamp. Cervix Replacement To replace the cervix: 1. -
Page 40: Pelvic Floor Replacement
Maintenance Urine Reservoir Replacement 6. Ensure that holes in birth canal and cervix flanges are positioned correctly on the locating pins on the pelvic clamping face. The urine reservoir is located in the reservoir bay above the blood 7. Replace pelvic ring clamp and secure in place by tightening reservoir. -
Page 41: Blood Reservoir Replacement
Maintenance Pelvis Replacement 5. Remove urine reservoir. 6. Lay new reservoir in position in reservoir bay, with red filler cap To detach and replace the pelvis: on the manikin’s left, facing upwards. 1. Turn the manikin over so that the backside is facing up. 7. -
Page 42: Replacing Baby Limbs
Maintenance Replacing Baby Limbs To replace baby limbs, use a screwdriver to unscrew the limb where it connects to the torso. 7. Separate pelvis from torso. Note: To prevent the bolts, washers, and nuts from getting lost, reattach them to the torso section. VitalSim Battery Replacement The VitalSim unit holds 6 replaceable C-cell batteries. - Page 43 Maintenance...
- Page 44 Notes 44 44...
-
Page 45: Cautions And Warnings 4 Specifications
External power: Input voltage 9VDC, 1.5A Wig Size VitalSim battery: 6 C-cell batteries Use a large wig. Only use approved SimMom external power supply. Airway Adjustment Sizes Air Pressure External air connection: Max 16 psi 7.5 endotracheal tube #4 LMA... - Page 46 Notes 46 46...
-
Page 47: Introduction 6 Spare Parts And Accessories
Small Placenta with Retained Fragments 377-16950 Hand Pump Substitute XX with your local language version number. Contact your 377-17050 2-Part Nylon Sealing Clamp local Laerdal Customer Service Representative for more information. 377-17150 Indwelling Catheterization Bag (2) 377-17250 Indwelling Intermittent Catheterization Tube SimMom Manikin... - Page 48 Notes...
- Page 50 © 2012 Laerdal Medical. All rights reserved. 20-05176 Rev B. Printed in USA.
Need help?
Do you have a question about the SimMom and is the answer not in the manual?
Questions and answers