Advertisement
Advertisement
Table of Contents

Subscribe to Our Youtube Channel
Related Manuals for Everfit TFK 750


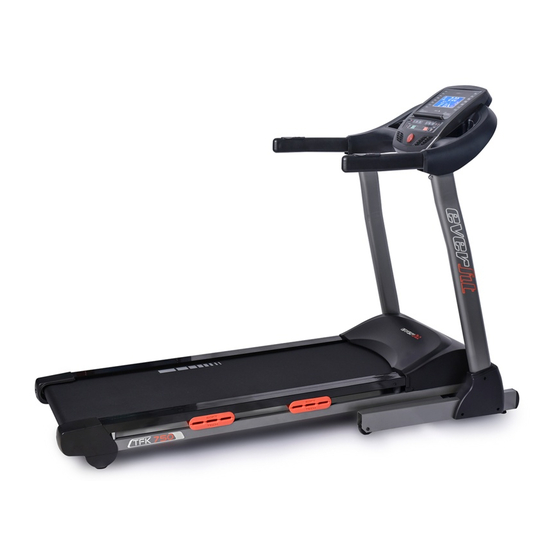
Summary of Contents for Everfit TFK 750
- Page 1 INSTRUCTION APP READY 2.0 Ed : 11/19 Rev : Cod : GRLDEVETFK750...
-
Page 2: Exploded Drawing
EXPLODED DRAWING... -
Page 3: Parts List
PARTS LIST PART NO PART NAME Q'TY FRONT ROLLER RUNNING BELT REAR ROLLER RUNNING DECK SIDE RAIL DECK FRAME SUPPORT CUSHION GEL CUSHION MOTOR BELT MOTOR MOTOR COVER SPEED SENSOR FRAME SPEED SENSOR MOTOR FIXED FRAME MOTOR CONTROL BOARD INCLINE MOTOR JS15 POWER WIRES CAP FOR MOTOR ADJUST BOLT DECK FRAME FRONT CAP... - Page 4 COMPUTER SUPPORT FRAME QUICK KEY INCLINE QUICK KEY FRAME SPEED QUICK KEY FRAME CONSOLE PLASTIC BOARD CONSOLE CONTROL BOARD SPEAK CONSOLE MAIN COVER RACK OVERLAY USB CONTROL BOARD SAFETY KEY SENSOR SPEAK SAFETY KEY MAGNETIC RING FILTER INCLINE MOVE WHEELS CONNECTION WIRE 1 CONNECTION WIRE 2 CONNECTION WIRE 3...
-
Page 5: Hardware Comparison Chart
M8*30ALLEN HEAD BOLT φ16 PLASTIC WASHER M8*60ALLEN HEAD BOLT M8*45ALLEN HEAD BOLT M8*50ALLEN HEAD BOLT M8*35ALLEN HEAD BOLT M10*20ALLEN HEAD BOLT φ10 WASHER M8*15ALLEN HEAD BOLT Φ8 ARE WASHER ST4.2*25 SCREW CAP FOR HAND FOAM ST4.2*30 SCREW ST2.9*8 SCREW HARDWARE COMPARISON CHART For your convenience, we have identified the hardware used in the assembly of this product. - Page 6 ASSEMBLY INSTRUCTIONS : WARNING: Please put on all the screws, washers and bolts then tighten them. STEP1: First make to connect the communication cable. Then fix the uprights on the base frame with M10*20mm Allen head bolt 90 and Ø10 washer 91.
- Page 7 STEP2: First make to connect the communication cable. Fix the computer on the uprights with M8*15 Allen head bolt57. STEP3: Fix the Upright protective cover on the upright with ST4.2 * 15 Screw 82.
- Page 8 Folding illustration: To unfold the treadmill: Folding illustration: To drop down treadmill: 1. Strike the damper. 2. Hold on to the top end covers and pull down the treadmill slowly on the ground. To fold up the treadmill: To fold up treadmill: Both hands hold on the bottom end covers and lift up the treadmill.
-
Page 9: Computer Operation
COMPUTER OPERATION Panel layout OPERATION INSTRUCTION KEY INSTRUCTION: Ø START: Press this key to start treadmill. Ø STOP: Press this key to stop treadmill. Ø PROGRAM:Auto program selection 1. In standby mode, press this key to enter the auto program setting. 2. - Page 10 Ø ENTER: Press this key to confirm the choosing item. Ø INCLINE+: Press this key to increase incline value. Ø INCLINE-: Press this key to decrease incline value. Ø VOLUME+/-:Press this key to increase or decrease volume value of music. Ø...
-
Page 11: Body Fat Program
C.AUTO MODE: Ø Enter auto mode: In initial standby mode, press the MODE button to select the time countdown mode, then the time window shows 30:00 minutes and blinking,set the calories by speed +/- key, setting range of 20 ~ 990.Press the start key to enter the calorie countdown mode. Ø... - Page 12 years old. The electronic table automatically calculates the upper and lower limits of the HRC: A: Upper limit: (220-AGE) * 95% B: Lower limit: (220-AGE) * 60% 3: Press the MODE key again. The time window displays the heartbeat value of a moving target and blinks.
-
Page 14: Heart Rate Instruction
HEART RATE INSTRUCTION Ø Heart function test method: hands palm were attached to the left and right handrails of the steel position, grip on both sides of the handle, 5 seconds later, LCD heartbeat display window will show the initial heartbeat, The display window will slowly change the display data, after 30 seconds close to the current actual heart rate value. - Page 15 Incline - 18 -...
-
Page 16: User Program
USER PROGRAM Ø User customized for each user can set their own speed incline program. Ø Setting method, press MODE key to select U-1 or U-2, or U-3, press ENTER key to enter the set state, To change the program data with speed and incline keys or shortcut, press ENTER confirm and enter the next program, pending final confirmation period (set) will exit after setting state, power is not lost modified data. -
Page 17: Maintenance
Ø At any time by turning off the power switch to turn off the treadmill, this does not damage the treadmill. MAINTENANCE Proper maintenance is very important to ensure your treadmill is always in top working condition. Improper maintenance could cause damage or shorten the life of your treadmill and exceed the LIMITED WARRANTY coverage. -
Page 18: Belt Adjustment
BELT ADJUSTMENT: Belt adjustment and tension performs two functions: adjustment for tension and centering. The running belt has been adjusted properly at the factory. However transportation, uneven flooring or other unpredicted reasons could cause the belt to shift off center resulting in the belt rubbing with the plastic side rail or end caps and possibly causing damage. -
Page 19: Deck Lubrication
Right and left Allen bolts are located at the rear of the treadmill. DECK LUBRICATION: The walking belt has been pre-lubricated at the factory. However, it is recommended that the walking board be checked periodically for lubrication to ensure optimal treadmill performance. Every 3 months of operation lift the sides of the walking belt and feel the top surface of the walking board as far as you can reach. - Page 20 GARLANDO SPA Via Regione Piemonte, 32 - Zona Industriale D1 15068 - Pozzolo Formigaro (AL) - Italy www.everfit.it - info@everfit.it...
Need help?
Do you have a question about the TFK 750 and is the answer not in the manual?
Questions and answers