Advertisement
Quick Links
G
D
L
RACE
ESIGN
U
P
PGRADE
ROCEDURE
• P
N
:
ARTS
EEDED
o Lunatec V3 Firmware Chip
• T
N
:
OOLS
EEDED
o #2 Phillips Screwdriver
o Small Flathead Screwdriver
• T
R
:
IME
EQUIRED
o Approximately 6.3 minutes
B
Y
B
EFORE
OU
EGIN
The Lunatec V3 Firmware Chip is a static sensitive device. Do not
touch or remove the chip from its protective packaging until you
are ready to install it. When performing the upgrade, you should
do so on a clean solid surface (not on the carpet). Additionally be
sure any static buildup on your body is discharged by touching a
grounded object before starting the upgrade.
U
!
PGRADE IT
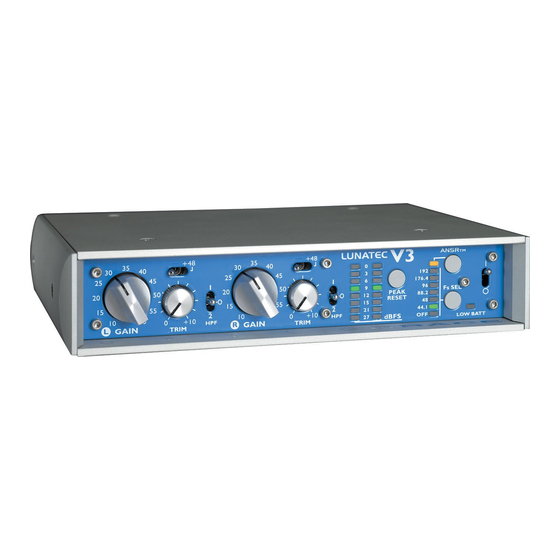
1. Disconnect the power from your V3.
2. Position your V3 such that the front is facing you.
3. Using the #2 Phillips screwdriver, remove the four top cover screws. Lift the
top cover off and set it aside.
4. Locate the ADC board, which is located in the upper right hand corner of your
V3.
5. Now locate the firmware chip location on the ADC board.
V3 F
UNATEC
IRMWARE
!
Advertisement

Related Manuals for Grace Lunatec V3


Summary of Contents for Grace Lunatec V3
- Page 1 Approximately 6.3 minutes EFORE EGIN The Lunatec V3 Firmware Chip is a static sensitive device. Do not touch or remove the chip from its protective packaging until you are ready to install it. When performing the upgrade, you should do so on a clean solid surface (not on the carpet).
- Page 2 6. Using the small flathead screwdriver carefully remove the old firmware chip. 7. Install the new V3 firmware chip in your V3. A few things to note here: a. Make sure that the dot cutout on the firmware chip is towards the rear of your V3.