
Related Manuals for Grace m802


Summary of Contents for Grace m802
- Page 1 Preamplifier firmware version 2.2 owner’s manual Remote firmware version 2.0 Manual RevF all contents © Grace Design/ Lunatec LLC...
-
Page 2: Table Of Contents
We have designed the m802 to be as easy and intuitive to use as possible. However, we strongly recom- mend that you read this product manual thoroughly to familiarize yourself with the unique features and capabilities of the m802. -
Page 3: Important Safety Information
Service Information The Grace Design m802 contains no user serviceable components. Contact Grace Design for repair and upgrade information. In the event that your Grace Design m802 needs to be returned to the factory, contact us for a return authorization number. -
Page 4: Overview
Philips I 2 C serial buss, which makes parallel connections between all of the devices in the system. In an m802 system, the RCU is the master and all of the preamplifiers are slaves. The data on the display of the RCU is echoed back from the preamplifier so it shows the actual status of the preamplifier. -
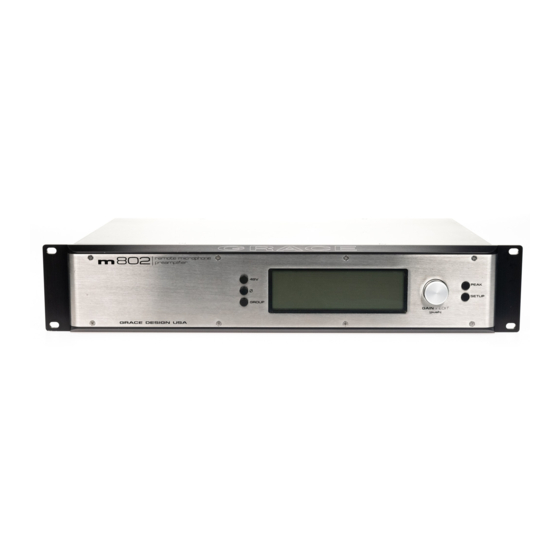
Page 5: Front Panel Controls
+48V PEAK SETUP GROUP DATA (push) -
Page 6: Rcu Controls
remote microphone preamplifier CHANNEL SELECT GROUP VIEW SETUP GAIN / EDIT push... -
Page 7: M802 Rearpanel With A/D Converters
A/D converters REMOTE IN MIC IN MIC IN (I C) REMOTE OUT DC IN MIDI LINE OUT LINE OUT WORD GRACE DESIGN USA ADAT OUT (SMUX 1-4) (SMUX 5-8) WORD WORD Digital Output Option A Digital Output option B... -
Page 8: Installation
Warning: A damaged DC power cord can create a shock hazard as Voltages of 66VDC (148VDC with the DPA Input option) can be present. Do not operate the m802 with a damaged DC power cord. Replace a damaged DC power cord with a replacement from Grace Design (WA084) only. - Page 9 RCU. Simply plugging the 2.1mm barrel connector into the DC power jack turns the power on. The m802 RCU is rated for 6.0-7.5V / 0.5A DC. (+) is in the center and (–) is on the outside sleeve.
- Page 10 Digidesign Pro Tools® LOOPSYNC signal. For optimal performance when using the external clock connection, the m802 must be connected directly to a 75 Ohm clock source. The external clock input is terminated to 75 ohms within the m802 and thus should not be terminated elsewhere.The clock output connector signal can be derived from two different sources, either a buffered copy of the incoming clock signal on the wordclock input connector, or the internally generated WORDCLOCK.
-
Page 11: Preamplifier Operation / Modes
+25dBu, which is indicated with a square “box” . The clipping level of the m802 is +25dBu. It should be noted that the bar graph meters in the m802 have an integration time that is approximately that of the DIN 45406 PPM meter standard. - Page 12 This is usually indicates that the AdcFs setting does not match the incoming clock rate. The A/D converter also configures the m802 level meters to display a 0dBFS scale instead of the stan- dard dBu scale. A/D converter sensitivity is factory set so that +24dBu level at the analog line outputs results in a 0dBFS level at the A/D converter.
- Page 13 Note that if 2-wire operation is selected here and the AD sample rate is set at 44.1 or 48kHz the m802 digital outputs will revert to 1-wire operation. The physical output configurations for each of these modes is discussed in the ”Digital Audio Connec- tions”...
-
Page 14: Input Select
Thus if phantom power was previously on, the bypassing will not be instantaneous. It should also be noted that no ribbon microphone should be connected until these caps have completely discharged. grace design m802 owner’s manual... - Page 15 Digidesign® pre microphone preamplifier. In Pro Tools® the mic pre controls will control the m802 as if it were a Digidesign pre. If there is no activity on the MIDI input port for a grace design m802...
-
Page 16: A/D Converter Sensitivity Calibration
> peripherals menu. The “heartbeat” signal happens every 8 seconds, which will keep the m802 in MIDI mode perpetually. If using a generic MIDI controller, the m802 will switch to MIDI Control mode whenever it sees a command on its MIDI input port and then switch back to normal control mode after 16 seconds of no MIDI activity. - Page 17 2)Remove the 8 top cover screws using a #2 Phillips driver. Lift the top cover off the unit and set it aside. 3)Enter the ADC Sensitivity Setup menu by powering up the m802 while the PEAK button is pressed. 4)Move the encoder until “ADC Sensitivity” is highlighted. Click the encoder to edit the parameter. Rotate the encoder to choose the sensitivity setting you wish to modify ((A) or (B)).
-
Page 18: Pro Tools Considerations
-7 to 63.5Db in 1.5db steps. When in MIDI control mode the m802 switches to a gain range of 0 to 63db in 3db steps. If the m802 has channels set to gain values that are not available in MIDI control mode and the m802 receives MIDI activity, it will change these channels to the next lowest gain setting that is available in MIDI control mode. -
Page 19: Remote Control Unit Operation
Pro Tools®. For example, when in ribbon mode, a gain setting of +63dB in Pro Tools® equates to an m802 gain setting of +73.0dB or similarly a Pro Tools® setting of +60.0dB is actu- ally +70.0dB on the m802. The same gain settings on the Pro Tools® interface (figure 8) are supported in ribbon mode. - Page 20 RCU is using the full bandwidth of the I 2 C serial interface to transmit level data from multiple preamplifiers simultaneously. SETUP: On the RCU, setup mode is accessed by pushing the SETUP pushbutton. Setup mode on the grace design m802 owner’s manual...
- Page 21 RCU contains the same menus as Setup mode on the preamplifier, with a few important distinctions. A/D converter Setup: For any preamp with the optional A/D converter module installed, the m802 RCU gives the user access to all of the converter setup parameters (except clock output selection). These controls do not function in a global manner like the preset operations, but rather affect the preamp that is currently active.
-
Page 22: Cable Diagrams
�� �� �� �� �� �� �� �� �� �� � � ��� � � ���� � � ������ � � ��� � � ���� � � ������ Unbalanced Output Cable Termination SHIELD SHIELD (OPEN) grace design m802 owner’s manual... -
Page 23: Specifications
IMPEDANCE Input 4350Ω Output 200Ω DIMENSIONS 6.7kg) Weight 14.7lbs ( Height Width 19” 10” Depth POWER SUPPLY SPECIFICATIONS POWER CONSUMPTION 100-240VAC 50/60Hz 60 Watts max DIMENSIONS Weight 6.25lbs (2.8kg) Height 1.7” Width 8.5” Depth 8.5” grace design m802 owner’s manual... -
Page 24: Cleaning And Maintenance
Your m802 will clean up very nicely, again to be the crown jewel of your equipment rack. -
Page 25: Warranty Information
During the time of this warranty, Grace Design will repair or replace, at its option, any defective parts or repair defective workmanship without charge, provided the customer has appropriate proof of purchase and that the product has its original factory serial number.
Need help?
Do you have a question about the m802 and is the answer not in the manual?
Questions and answers