
Related Manuals for Grace m903


Summary of Contents for Grace m903
- Page 1 / DAC / monitor controller Owner’s Manual Rev A all contents © Grace Design / Lunatec LLC 2434 30th Street, Boulder, CO 80301 USA www.gracedesign.com / 303.443.7454...
-
Page 2: Table Of Contents
In the event that you encounter any technical or operational difficulties with this or any Grace Design product, please feel free to contact us at 303-443-7454. Our office hours are from 9 to 5, Monday through Friday, MST. Or you can email questions to: info@gracedesign.com. -
Page 3: Important Safety Information
The Grace Design m903 contains no user serviceable components. Contact Grace Design for repair and upgrade information. In the event that your Grace Design m903 needs to be returned to the factory, contact us for a return authorization number. page 3... -
Page 4: M903 Key Features
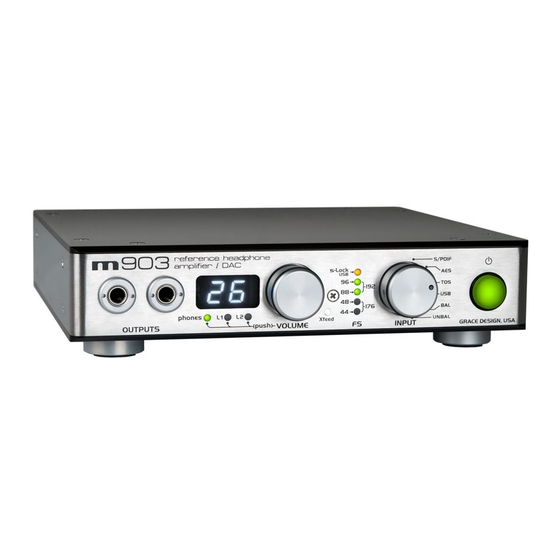
UNBAL OUTPUTS push VOLUME INPUT GRACE DESIGN, USA 1 ILLUMINATED POWER SWITCH - illuminates green when unit is powered on. 2 ROTARY INPUT SELECTOR SWITCH - selects between all available inputs. 3 s-lock INDICATOR LED - illuminates when s-lock is active. -
Page 5: M903 Rearpanel
Unit! We strongly urge you to register your unit with Grace Design. We provide a limited 5 year transferable warranty on all of our products, but if you register your system, it’s easier for us to help you if necessary. So please take a few minutes to complete the enclosed warranty registration card and mail it in, or you can simply go to the warranty registration form on our web site. -
Page 6: Powering Up The M903
into the 4 vacant threaded holes in each corner of the underside of the m903. For rack mount installation, the m903 chassis has a #10-32 threaded insert mounting hole on the bottom towards the back. Two m903’s can be mounted side by side in a standard 1U rack tray. Use a #10-32 x 1/2” or a #10-32 x 3/8” machine screw. Do not use a screw longer than 1/2”. -
Page 7: Input Connections
Input Connections The input / output / interface connections highlighted earlier in this manual are detailed below. Please contact us if you have any questions regarding cable terminations or pinout specifications. BALANCED ANALOG INPUTS - The balanced stereo analog input is provided via female XLRs. Connection is made using standard balanced XLR cables. -
Page 8: M903 Usb Input And Computer Audio Configuration
m903 USB Input and Computer Audio Configuration aSynCHronoUS aUDio The asynchronous mode USB converter in the m903 represents a significant improvement over any previous type of USB DAC. Previously, a USB DAC worked under standard adaptive mode USB audio, which means the DAC’s clock would have to sync to the non-audio related computer USB buss master clock. -
Page 9: Accessing And Using The Setup Menu
tions. Turning it one revolution slowly will result in a change of 12dB (24 x 0.5dB). As the rotation speed increases, each step goes from 0.5dB to 2.0dB and then to 4.0dB. This allows not only precise control but also convenience when large volume changes are desired. - Page 10 To exit the setup menu at any time, press and hold the encoder knob for 3 seconds. The 7-segment display will switch back to the current output level once the setup menu has been exited. Note: When the setup menu is exited, the last mode you were in will be the first mode activated the next time you enter the setup menu.
- Page 11 Turning the rotary encoder counter-clockwise turns this mode OFF, which is indicated by the OL symbol without the decimal points. This mode is reset to OFF whenever the m903 is power cycled. SeleCtinG USb ClaSS 1 or USb ClaSS 2. This setting determines the whether the m903 acts like a USB class 1 or class 2 audio device.
-
Page 12: Mono Mode
Mono MoDe This feature sums the left and right channels on every set of outputs. Quite useful for checking for phase and balance issues in mixing and mastering. Or listening to Beatles records as they were originally mixed. To activate mono mode: Push and hold the rotary encoder to enter the setup menu. -
Page 13: Infrared Wireless Remote Control Operation
Infrared Wireless Remote Control Operation A optional high quality wireless remote control is available as a very convenient control for the m903. The following section details all of the features available from the remote control. Several MUTE of the buttons on the remote have dual functions, accessed by either a ‘push’ or a ‘push and hold’ action, and are described below. -
Page 14: Block Diagram
Block Diagram CLOCK page 14... -
Page 15: Specs
Specs SPECIFICATIONS ANALOG IN Gain – Balanced Input Headphone output, volume at maximum Balanced Line output, volume at maximum +4dB Unbalanced Line output, volume at maximum -8dB Frequency Response – Unbalanced In > Unbalanced Out @ 0dBu out +/- .25dB 27Hz – 54kHz @ 0dBu out +/- .5dB 18Hz – 80kHz @ 0dBu out +/-3dB 6.5Hz –... -
Page 16: Cleaning And Maintenance
Warranty Information Grace Design warrants all of our products to be free of defective parts and workmanship for a period of five years. This war- ranty period begins at the original date of purchase and is transferable to any person who may subsequently purchase the product during this time. -
Page 17: Manual Revisions
Manual Revisions Revision Page Change Date Initials Initial release 12/20/2010 page 17...
Need help?
Do you have a question about the m903 and is the answer not in the manual?
Questions and answers