Table of Contents
Advertisement
Quick Links
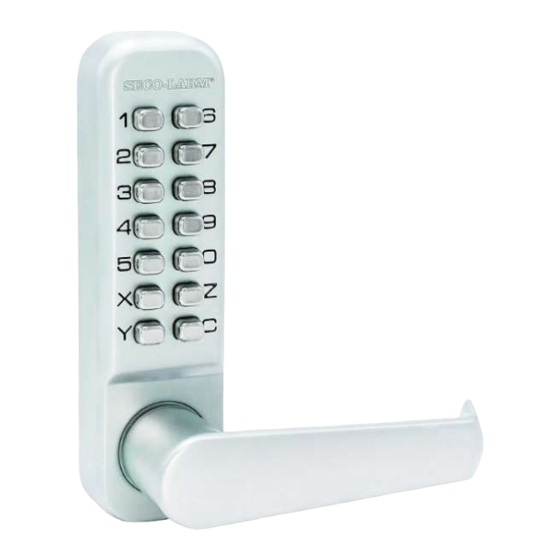
Features:
Non-handed installation
External and internal entry lever
13 code buttons, over 8,000 possible codes
Lock code easily changed
Suitable for door thicknesses from
1
/
"~2
/
" (30~54 mm)
3
1
16
8
SD-962H-8LAQ
Mechanical Keypad Door Lock
Manual
Tubular latchbolt included
Heavy-duty steel case US32D/630
Fully mechanical
No batteries or other power source required
Free egress from inside
Simple Installation
®
Advertisement
Table of Contents

Related Manuals for SECO-LARM SD-962H-8LAQ


Summary of Contents for SECO-LARM SD-962H-8LAQ
- Page 1 SD-962H-8LAQ Mechanical Keypad Door Lock Manual Features: Non-handed installation Tubular latchbolt included External and internal entry lever Heavy-duty steel case US32D/630 13 code buttons, over 8,000 possible codes Fully mechanical Lock code easily changed ...
- Page 2 SECO-LARM Mechanical Keypad Door Lock Introduction: The SECO-LARM Mechanical Keypad Door Lock provides secure locking while avoiding the hassle and cost of dealing with providing, duplicating, or replacing keys. Unlike keyed locks, the lock code can be easily changed by the user at any time. The code is not sequential, so the code letters/digits can be entered in any order.
- Page 3 SECO-LARM Mechanical Keypad Door Lock The Lock Code: Each lock assembly is given a random code at the factory Fig. 1 and that code is printed on a card shipped with the lock. The code can be easily changed as shown below.
- Page 4 SECO-LARM Mechanical Keypad Door Lock Setting the Lock Code (Continued): Replace the lock code plate and secure it with the 4 RED screws. Check the code to ensure accuracy before installing. First press the "C" (Clear) button followed by the chosen code and move the handle on the keypad assembly to test the lock.
- Page 5 SECO-LARM Mechanical Keypad Door Lock Prepare the Door and Install the Latchbolt (Continued): Positioning the Spindles Fig. 7 Choose the correct spindle that best matches the door's thickness. For doors less than 1 " (37mm), use the shorter spindle 2 "...
- Page 6 SECO-LARM Mechanical Keypad Door Lock Prepare the Lock for Mounting (Continued): Exterior Handle Assembly Fig. 12 The handedness of the external handle assembly (default, Right-handed left-handed) will be set after installation. Installing the Latchbolt Support Post Fig. 13 From the back of the exterior handle assembly, fit the latchbolt support post in the correct position.
- Page 7 SECO-LARM Mechanical Keypad Door Lock Install the Strike Plate: Partially close the door and mark where the Fig. 16 latchbolt contacts the door frame. Close the door. With the door in a closed Frame position, measure the distance from the Door door latch to the edge of the door frame.
- Page 8 (one (1) year from the date of sale to the original customer for the finish). SECO-LARM’s obligation is limited to the repair or replacement of any defective part if the unit is returned, transportation prepaid, to SECO-LARM.
Need help?
Do you have a question about the SD-962H-8LAQ and is the answer not in the manual?
Questions and answers