
Related Manuals for socomec Continental Control Systems MCM MB Series


Summary of Contents for socomec Continental Control Systems MCM MB Series
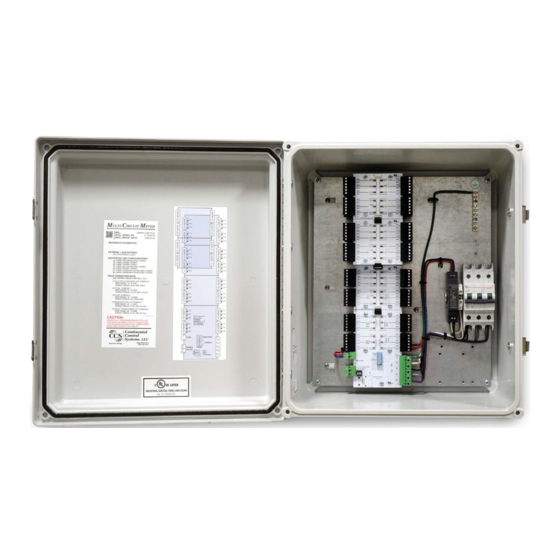
- Page 1 (MCM) ulti irCuit eter rtu , M odbus odbus ® ® Electric Power Meter - Installation Guide Models: MCMxx-y-MB-zzzz, MCMxx-y-MBT-zzzz www.ctlsys.com...
-
Page 2: Table Of Contents
Contents Precautions ............................... 3 Symbols ............................3 Terminology ............................3 Overview ..............................4 Model Number Scheme ........................4 Multi-Circuit Metering ........................5 Additional Literature ......................... 6 Installation ..............................7 Installation Record ..........................8 Electrical Service or Load Types ...................... 9 Installation Checklist ........................ -
Page 3: Precautions
1 Precautions ● Only licensed electricians or qualified personnel should install the MCM. The mains voltages of 100 to 600 Vac can be lethal! ● Follow all applicable local and national electrical and safety codes. ● The terminal block screws are not insulated. Do not contact metal tools to the screw terminals if the circuit is live! ●... -
Page 4: Overview
2 Overview ® Congratulations on your purchase of the Multi-Circuit Meter for Modbus (MCM) watt/watt-hour meter. The MCM can measure 100 to 600 Vac, single-phase and three-phase, wye and delta services. It supports demand-side management (DSM), submetering, energy monitoring, billing, and renewable energy applications. -
Page 5: Multi-Circuit Metering
From the overcurrent protection to 1-Phase, 2-Wire 277V with neutral the step-down transformer (N, L1) 3-Phase, 4-Wire 277V/480Y with neutral 277V tap to the AC/DC power supply From the fuse to the step-down 3-Phase, 4-Wire 347V/600Y with neutral transformer (L1, L2) 600V tap to the 3-Phase, 3-Wire 600V Delta (no neutral) AC/DC power supply <Comm>... -
Page 6: Additional Literature
2.3 Additional Literature ● Continental Control Systems, LLC website: ctlsys.com product and support pages ● MCM product page: https://ctlsys.com/product/mcm/ ● MCM support page: https://ctlsys.com/support/mcm/ ● Install record: https://ctlsys.com/s/mcm-install-rec/ ● Datasheet: https://ctlsys.com/m/MCM-Datasheet.pdf ● Modbus register list: https://ctlsys.com/m/WND-Modbus-Registers-FW37.xls Page 6 of 27 MCM-Inst-1.10... -
Page 7: Installation
3 Installation All CT connectors use the same numbering sequence (1, 2, 3) and white/black wire orientations. Baud Rate 5 Vdc – Address Modbus RS-485 Bias- 1 2 3 Bias+ Modbus Termination Ethernet Figure 1: Connection Diagram MCM-Inst-1.10 Page 7 of 27... -
Page 8: Installation Record
The figure above shows all possible connections for an MCM84, including both Modbus RTU and Modbus TCP, even though both will not be present on a single MCM. The line voltage connections in the lower-right are factory wired to the circuit protection, and the 5 Vdc connections are factory wired to the power supply. -
Page 9: Electrical Service Or Load Types
3.1.1 Example Meter and CT Schedule Chan- Submeter Modbus L1, L2, Meter Panel Load Name / Description nels Block Addr Amps or L3 Config Foyer Lighting Foyer Outlets #1 ADDR+0 Foyer Outlets #2 Kitchen Outlets #1 Kitchen Outlets #2 ADDR+1 P3 11 20 Kitchen Outlets #3 RTU #1... - Page 10 monitors multiple branch circuits or loads on a single service. Note: when describing service types, the number of wires only includes neutral and line conductors, not the ground conductor. The MCM only has one set of line voltage connections, so all submeter blocks (SMBs) share the same line voltages.
- Page 11 ○ MeterConfig = 10 for the CT around L1 ○ MeterConfig = 20 for the CT around L2 ○ MeterConfig = 30 for the CT around L3 ● Single-phase, two-wire, line-to-line, without neutral: See 3.2.2 Three-Phase, Three-Wire Delta below for details. ●...
- Page 12 ■ MeterConfig = 20 for any CT around L2 ■ MeterConfig = 30 for any CT around L3 ○ With one CT, assign MeterConfig as follows: ■ The load connected from L1 (ØA) to L2 (ØB) and the CT around L1: MeterConfig = 40 ■...
-
Page 13: Installation Checklist
3.2.4 Grounded Leg Service In rare cases with delta services or single-phase two-wire, line-to-line services, one of the phases may be grounded. The MCM will correctly measure the voltages, power, and energy for grounded leg ser- vices. Depending on how the MeterConfig registers are programmed, the measured voltage, power, and energy for the grounded phase may be zero, and the status LEDs will not light for the grounded phase. -
Page 14: Line Voltage Connections
3.5 Line Voltage Connections GROUND GROUND GROUND TERMINALS TERMINALS TERMINALS LINE VOLTAGE LINE VOLTAGE LINE VOLTAGE CONNECTIONS CONNECTIONS CONNECTIONS Figure 6: Circuit Breaker Figure 7: No Protection Figure 8: Fuse Block 3.5.1 Circuit Protection The MCM is considered “permanently connected equipment” and requires a disconnecting means (circuit breaker or disconnect switch) and overcurrent protection (fuse or circuit breaker). -
Page 15: Current Transformer Connections
● Use copper conductors only. The screw terminals are only rated for copper wire. ● Do not place more than one wire in a screw terminal; use wire nuts or terminal blocks if needed. ● Verify that the highest line-to-neutral or line-to-line voltage is nominally between 100 and 600 Vac. The absolute maximum operating voltage is 690 Vac. -
Page 16: Modbus Rtu (Rs-485) Communication
MeterConfig registers have not been configured yet. This can be corrected after installation using the CtDirections register. Install the CTs around the phase conductors to be measured as shown in section 3.2 Electrical Service or Load Types above. Connect the CT leads to the MCM. For revenue accuracy, use revenue-grade current transformers;... - Page 17 3.7.2 RS-485 Connection RS-485 wiring can be complex when multiple devices are connected, when running wires for long distances, and when using termination and biasing resistors. ● The MCM RS-485 outputs are electrically isolated from dangerous voltages. ● If the output wiring runs near line voltage wiring, use wires or cables with a 300 V or 600 V rating (not less than the service voltage).
-
Page 18: Modbus Tcp (Ethernet) Communication
Select the baud rate with DIP switch positions 7 and 8 (see below). The change will take effect imme- diately. Other baud rates may be factory configured or programmed using the BaudRate register. Table 3: Modbus Baud Rate DIP Switch Baud Rate DIP Switch 7 DIP Switch 8... - Page 19 3.8.2 RJ45 Jack LED Indications There are two LEDs on the RJ45 jack. They are used to indicate the connection speed and activity. In addition to these, the COMM LED shows Modbus traffic (see 4.3 Modbus Communication LED). Left LED (Link) ●...
- Page 20 Search the internet for Lantronix DeviceInstaller to find the latest version. Download and install the program, then run it. Windows may prompt you for firewall settings: be sure to allow it access to your local network. It uses port 30718 (0x77FE) to discover Lantronix devices and port 9999 for telnet access.
- Page 21 Modbus/TCP to RTU Bridge MAC address 0080A3D450CA Software version V3.3.0.6 (180102) XPTE Password :------ Press Enter for Setup Mode Model: Device Server Plus+! (Firmware Code:YM) Modbus/TCP to RTU Bridge Setup 1) Network/IP Settings: IP Address ....- 0.0.0.0/DHCP/BOOTP/AutoIP Default Gateway .... --- not set --- Netmask ....
- Page 22 IP Address (000) 192.(000) 168.(000) 1.(000) 100 Set Gateway IP Address (N) ? N Set Netmask (N for default) (N) ? N Change telnet config password (N) ? N ...<displays new configuration>... D)efault settings, S)ave, Q)uit without save Select Command or parameter set (1..7) to change: Figure 14: Change XPort Network/IP Settings 3.8.6 Windows Telnet Client If you are not using Lantronix DeviceInstaller, then you may need to install a telnet client.
-
Page 23: Operation
4 Operation 4.1 Initial Configuration Generally, the network integrator will remotely configure the MCM and the variables. The MCM does not include a display or buttons, so it is not possible to configure or monitor it directly, other than some Modbus settings and the basic LED diagnostics described below. If you have not configured the MeterConfig registers, then the LED indications may be incor- rect or misleading. -
Page 24: Modbus Communication Led
Note: it is possible to configure the meter elements using the ConnectionType or MeterConfig registers so that the meter elements are monitoring voltages that are near zero, even though higher voltage AC is being applied to other terminals. For example, if MeterConfig1 = 10 (VoltA or V MeterConfig2 = 10 (VoltA), and MeterConfig3 = 10 (VoltA), and at the same time, VoltA is near zero, then this LED pattern will appear, even if 230 Vac is present on VoltB (V ) and VoltC (V... -
Page 25: Specifications
5 Specifications The following is a list of basic specifications. For extended specifications, see the datasheet https:// ctlsys.com/m/MCM-Datasheet.pdf. 5.1 Measurement Update Rate: 0.1 second. Internally, all measurements occur at this rate, except the energy registers, which update every 1.0 seconds. Start-Up Time: ≤ 1 second after the supply voltage is applied. -
Page 26: Eia Rs-485 Interface
5.3 EIA RS-485 Interface RS-485 Output Isolation: 4500 Vac RMS Driver Output: Voltage (Open Circuit): ±6 Vdc maximum Voltage (54 Ω load): ±1.5 Vdc minimum Current (54 Ω load): ±60 mA typical Rise Time (54 Ω || 50 pF load): 900 nS typical Receiver: Common-Mode Range: -7 Vdc to +12 Vdc max Sensitivity: ±200 mV... -
Page 27: Warranty
not cause harmful interference, and (2) this device must accept any interference received, including interference that may cause undesired operation. The FCC limits are designed to provide reasonable protection against harmful interference in a res- idential installation. This equipment generates, uses and can radiate radio frequency energy and, if not installed and used in accordance with the instructions, may cause harmful interference to radio communications.
Need help?
Do you have a question about the Continental Control Systems MCM MB Series and is the answer not in the manual?
Questions and answers