Table of Contents
Advertisement
Quick Links
Advertisement
Table of Contents

Related Manuals for Colorjet SONIQ DUO


Summary of Contents for Colorjet SONIQ DUO
- Page 1 SOLVENT PRINTER...
- Page 2 Foreword This user manual is briefly describing the operational aspects of the SoniQ Duo machine. In this document, the step-wise instructions for handling various aspects of the machine with visual screens are provided for easy and better understanding. It also describes the error messages encountered while working with the machine with appropriate remedial actions required to be taken by the user.
-
Page 3: Table Of Contents
Bi-direction Calibration ......................... 26 Horizontal Calibration ........................27 Step Calibration ..........................28 Setting Print Origin ........................... 29 Setting Print Parameters ........................29 Adding Jobs ............................30 Editing Job ............................32 DPI and Print Mode .......................... 34 SONIQ DUO Page 3 of 42... - Page 4 Shutdown and Capping the Printhead ..................38 10. Maintenance ..........................39 Print Head Maintenance ........................39 Equipment Cleaning ......................... 39 Power System Maintenance ......................39 Control System Maintenance ......................39 Ink Supply System Maintenance ...................... 39 11. Troubleshooting..........................40 SONIQ DUO Page 4 of 42...
-
Page 5: About Document
Sometimes, the targeted audience has little knowledge about the printer but in most cases, the targeted audience is familiar with the terminologies of printer and printing business. Thus, this document is designed to facilitate both types of users. SONIQ DUO Page 5 of 42... -
Page 6: Machine Specifications
2. Machine Specifications Machine Specifications are shown in the table below: SONIQ DUO Model SB4412 SB8412 Printing Technology Drop on demand, Piezoelectric inkjet Print Heads Industrial Grade Jetting Assemblies No. of Heads Width 3300 mm (129 in) Thickness Maximum 3.0 mm (120 mil) with liner (flexible) Roll Outer Diameter Maximum 300mm (12 inch), 50.8 (2 in) - Page 7 Temperature: 5 to 40℃ Humidity: 20 to 80%RH (non-condensing) Print Mode Print DPI Passes Sqft/HR Sqft/HR (8 (4Heads) Heads) Mode 1 360X360 1232 2218 Mode 2 360X540 1540 Mode 3 360X720 1227 Mode 4 720X720 Mode 5 720X1080 Mode 6 720X1440 SONIQ DUO Page 7 of 42...
-
Page 8: Machine Overview
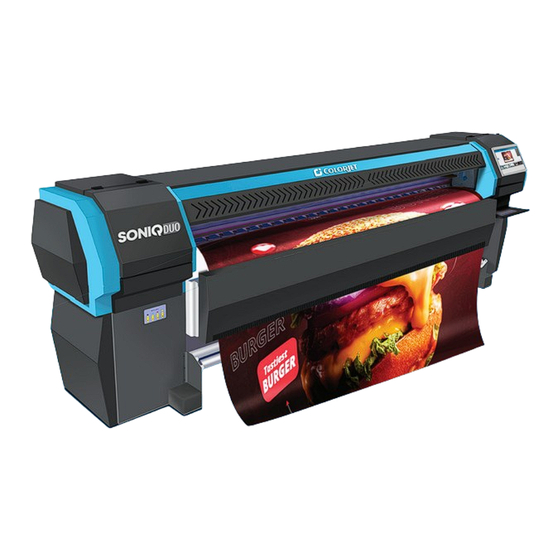
3. Machine Overview SoniQ Duo is a 3.2-meter Solvent Printer engineered to redefine the standards in both indoor and outdoor signage production. With 8 high-speed KM heads, it offers unmatched upgradability and ensures future-proof performance. Delivering quality at 2218 Sqft/hr, it is perfect for indoor and outdoor needs. -
Page 9: Back View
The back view of the machine is shown below. Figure 2: Back View of Printer Table 2: Different Parts of the Machine 1. Media Lever (inside the machine) 2. Supply Roller 3. Power Inlet (Machine and Heater Switches) SONIQ DUO Page 9 of 42... -
Page 10: Control Panel Details
Control Panel Details The control panel screen is shown below: Figure 3: Displaying Control panel SONIQ DUO Page 10 of 42... - Page 11 • MEDIA TAKE-UP: Enable to turn ON/OFF, control different modes; auto/manual, and change direction forward/reverse of the media take-up. • MEDIA SUPPLY: Enable to turn ON/OFF, control different modes; auto/manual, and change direction forward/reverse of the media supply. SONIQ DUO Page 11 of 42...
-
Page 12: Getting Familiar With Printer Manager Interface
Print Size, Print Area, DPI, Pass, and more. Job Preview Shows the preview of the selected job and printing status progress in this area. Job List Displays the thumbnail preview of added jobs. Error Information Displays the system-generated error messages. SONIQ DUO Page 12 of 42... -
Page 13: Main Menu Options
Main Board to Printer Manager software. • Edit: Using this option, the user can edit the previously made Printer settings. On clicking the Edit option, the Setting window with Printer, Move, Preference, and Calibration tabs appear. SONIQ DUO Page 13 of 42... - Page 14 Multiple Ink: Enable to select the color depth of an image according to the passes. The available options are Default, Double, and More. • Color Bar o Space: Specify the distance of the color bar from the image. SONIQ DUO Page 14 of 42...
- Page 15 Spray Before Print: This option enables spray before the start of print. The Move tab is shown in the image below: Figure 9: Move tab Note: X and Y manual speed can be selected using the Move tab SONIQ DUO Page 15 of 42...
- Page 16 • Language: Enable to change the language of the Printer Manager. • Unit: Enable to set the measuring unit like Millimetre. The Calibration tab is shown in the image below. Figure 11: Calibration Wizard SONIQ DUO Page 16 of 42...
-
Page 17: Tools
• Auto stop pump ink when time out: Enable or disable the pump automatically when time out occurs. Help Menu The Help menu option is shown in the image below: Figure 13: Help Menu • About: Enable to view the details about Printer Manager software viz. software version and copyrights. SONIQ DUO Page 17 of 42... -
Page 18: Getting Ready For Printing
Switch ON the print engine and heater power buttons, as shown below: Figure 14: Print Engine and Heat power Step 8 Load the media (refer to the Media Loading section). Step 9 Turn on the computer system and open the printer manager software. SONIQ DUO Page 18 of 42... -
Page 19: Loading Media
Insert the taken-out media between the platform and the pinch roller. Step 4 Pull the media out in front of the machine. Step 5 Hold the media firmly and push down the Media Lever. SONIQ DUO Page 19 of 42... - Page 20 Print command). Step 9 Paste the front edge of the media on the core. Step 10 Turn on the Take Up System and observe the media direction (either reverse or forward), as shown below. SONIQ DUO Page 20 of 42...
- Page 21 Note: Before issuing the Print command, verify the following things: • Check the Waste Bottle and empty it, if required. • Check the ink level in the main tanks and refill it, if required. SONIQ DUO Page 21 of 42...
-
Page 22: Ink Refilling
Please use the recommended ink in the printer for high printing quality and long life of print and print heads. To refill ink, open the left door of the printer and replace ink bottles, if empty. Ink gets filled in the Sub tanks shown below: Figure 19: Ink Sub tank SONIQ DUO Page 22 of 42... -
Page 23: Feeding Password
: Click on the Exit button to close the Password window. Step 5 : Restart the printer. Note: When “First Warning” appears, kindly contact Head Office with the following screen: • Password Screen • About Screen SONIQ DUO Page 23 of 42... -
Page 24: Printing
The Print Head calibration is categorized into the following types: • Mechanical Check includes Vertical Check and Angle Check • Software Calibration includes Bi-direction, Horizontal Calibration and Step Calibration Note: Mechanical checks are only performed by the Service Engineer. SONIQ DUO Page 24 of 42... -
Page 25: Calibration Wizard
Figure 24: Calibration Wizard option This bring up the calibration wizard which is shown below: Figure 25: Calibration Wizard Window Click on the Next button to redirect to the software calibration screen, as shown in the below images: SONIQ DUO Page 25 of 42... -
Page 26: Bi-Direction Calibration
Sometimes, the correction value can be either positive or negative. If the correction value is positive, then there is a need to add it in the current bi-direction adjust value or subtract the same if negative. SONIQ DUO Page 26 of 42... -
Page 27: Horizontal Calibration
The position at which the test head aligns perfectly with the reference head indicates the position error. The Left Calibration and Right Calibration Results are shown in the image below: Right Figure 28: Horizontal Check Check Left Check SONIQ DUO Page 27 of 42... -
Page 28: Step Calibration
From the above, it can be concluded that the pattern is corrected at the “0” position. The Step Calibration and its parameters are shown in the image below: Figure 31: Step Calibration Parameters Note: The base Step value should be 51200. SONIQ DUO Page 28 of 42... -
Page 29: Setting Print Origin
Print Parameter section. Setting Print Parameters Using the Printer Manager, user can manually change print preferences as per the printing requirements such as print origin, printing speed, no of steps, and more as shown below: SONIQ DUO Page 29 of 42... -
Page 30: Adding Jobs
Navigate to the location where the image file with extensions “.prt” and “.prn” is stored (Refer to Fig 37). Step 3 Click on the Open button to add the file to the Job List area, as shown below: SONIQ DUO Page 30 of 42... - Page 31 Figure 37: Adding the Job Now, the selected image appears in the Job List area, as shown below: Figure 38: Displaying Added Job and its detail SONIQ DUO Page 31 of 42...
-
Page 32: Editing Job
Select the desired checkbox in front of the Clip, Reverse Print, and Tile options. Clicking on any option will enable its related parameters on the right pane and the user can edit them as per the requirements. In our case, we have selected the Clip checkbox SONIQ DUO Page 32 of 42... - Page 33 Now, the user can print an image on the selected media simply by clicking on the Print Job button available on the Quick Access Toolbar, as shown below: SONIQ DUO Page 33 of 42...
-
Page 34: Dpi And Print Mode
Similarly, the user can abort the process by right-clicking on the selected Job in the Job List area and selecting the Abort Job option from the context menu. Note: The keyboard shortcut for pausing and resuming is Ctrl+TAB. SONIQ DUO Page 34 of 42... -
Page 35: Head Cleaning
• Do not pull the wiper blade from the head plate area, it may sprinkle inks over your body/clothes. • Keep the wiper on a clean surface (over a flex or cloth piece spread. SONIQ DUO Page 35 of 42... -
Page 36: Head Purging
If the printer is idle for more than 10 minutes, please perform the purging process. In the printer, the Head Purging button for each color is available on the carriage, as shown in the below figure: Head Purging Figure 47: Head Purging Button SONIQ DUO Page 36 of 42... -
Page 37: Head Spraying
To perform head spraying, click on the Spray button available under the Quick Access Toolbar, as shown below: Figure 48: Spray Button SONIQ DUO Page 37 of 42... -
Page 38: Shutdown And Capping The Printhead
Note: Be careful while doing this process. The nozzles must not be touched/scratched during this process. Figure 50: Engaging Night Plate with Head Plate Now, Print Heads are capped properly and protected from being dried. SONIQ DUO Page 38 of 42... -
Page 39: Maintenance
• Check for leakage between the joint & ink tank and joint & valve settings. • Check for damages on ink tubes. • Check Ink impurities in the ink tanks as this will affect the ink supply. SONIQ DUO Page 39 of 42... -
Page 40: Troubleshooting
• Selection of incorrect resolution (dpi) LINES IN PRINT • Head nozzles are blocked • Incorrect step calibration HEATERS NOT WORKING • Check if the inlet power cord is connected • Check the set temperature in the controller SONIQ DUO Page 40 of 42... - Page 41 • Check the ink and air pipe for any cuts or loose connection TAKE – UP NOT WORKING • Take-up switch is not ON or not in Auto mode MEDIA SUPPLY NOT WORKING • Supply switch is not ON • Media is not in sensor range SONIQ DUO Page 41 of 42...
- Page 42 For Any Query Please Contact Us www.colorjetgroup.com Call us on- 7217885728 Email on info@colorjetgroup.com For Ink Enquiry: - sales@colorjetgroup.com For Support: - support@colorjetgroup.com...
Need help?
Do you have a question about the SONIQ DUO and is the answer not in the manual?
Questions and answers