Table of Contents
Advertisement
Quick Links
Advertisement
Table of Contents

Related Manuals for Colorjet SubliXpress plus


Summary of Contents for Colorjet SubliXpress plus
- Page 2 Foreword This user manual is briefly describing the operational aspects of the SubliXpress Plus machine. In this document, the step-wise instructions for handling various aspects of the machine with visual screens are provided for easy and better understanding. It also describes the error messages encountered while working with the machine with appropriate remedial actions required to be taken by the user.
-
Page 3: Table Of Contents
Setting Print Origin ............................. 26 Setting Print Parameters ............................ 26 Adding Jobs ................................ 27 Editing Job ................................28 DPI and Print Mode ............................29 Pausing and Canceling Printing .......................... 30 8. Head Cleaning ..............................31 SubliXpress Plus Page 2 of 39... - Page 4 Print Margin is Shifting or Junk Printing ......................36 Print is Blur (Not Sharp) ............................. 36 Lines in Print ............................... 36 Heaters Not Working ............................36 Head Not Firing ..............................36 Ink Not Supply ..............................37 SubliXpress Plus Page 3 of 39...
-
Page 5: About Document
+0.1mm whichever is greater Media Drying System Infrared Heaters Printing Interface USB 3.1 RIP Software Onyx(ColorJet Edition) and NeoStampa(ColorJet Edition) Power Requirements AC 220 V, 36 A, 50/60 Hz Dimensions (Printer Only) 3926 x 1235 x 1824 mm (LxWxH) Dimensions (Feeder Only) -
Page 6: Machine Overview
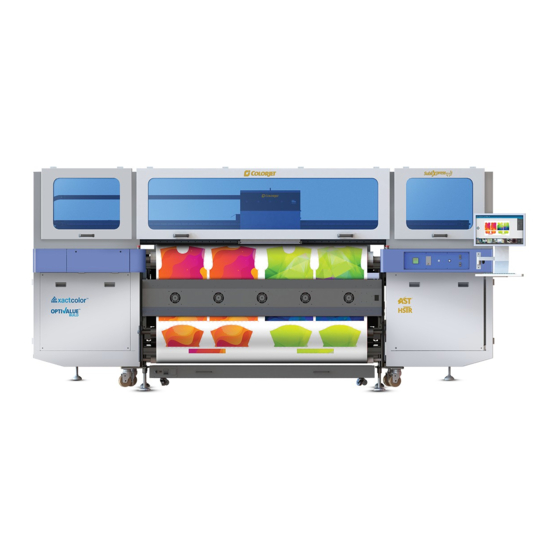
Fig 1: Displaying the Front View 1. Left Door (Carriage 2. Front Middle Door Home Position) 3. Console (TFT Screen) 4. Control Panel Unit 5. Leveller 6. Wheel 7. Dryer Fan Unit 8. Dancing Roller 9. Guiding Roller SubliXpress Plus Page 5 of 39... -
Page 7: Back View
8. Power Inlet (Machine MCB and Heater Switch) 9. Take-Up and Supply Control Buttons Control Panel Details The Control Panel Screen is shown as below: Bed Vacuum Control Regulator Fig 3: Displaying the Control Panel SubliXpress Plus Page 6 of 39... - Page 8 Different options of the Control Panel Bed Vacuum Regulator Control the bed vacuum. POWER ON/OFF Turn ON/OFF the printer power. USB Port Insert USB cable into the USB port. SubliXpress Plus Page 7 of 39...
- Page 9 The Take-Up and Supply controls are shown in the image below: Fig 4: Displaying the Take-Up and Supply Controls SubliXpress Plus Page 8 of 39...
-
Page 10: Getting Familiar With Printer Manager Interface
Move left, Move right, Set print origin, Move forward, jobs. Move backward, Move carriage to origin, and Edit job are available as buttons on the Quick access toolbar. F. Error message: Displays the system generated error messages. SubliXpress Plus Page 9 of 39... -
Page 11: Main Menu Options
Edit: Using this option, you can edit the previously made settings of Printer. On clicking the Edit option, the Setting window with Printer, Move, Preference, and Calibration tabs appears on the screen. Fig 7: Displaying the Setting Menu and Its Related Options SubliXpress Plus Page 10 of 39... - Page 12 This option must be enabled. image height. color depth of an image according Spray Before Print: This option enables to the passes. The available spray before start of print. options are Default, Double, and More. SubliXpress Plus Page 11 of 39...
- Page 13 The Move tab are shown in the image below: Fig 9: Displaying the Move Tab Note: X and Y manual moving speed can be selected using the Move tab. SubliXpress Plus Page 12 of 39...
- Page 14 Different options by the Preference tab: • View Mode: Enable to set the Printer Manager screen view. • Language: Enable to change the language of the Printer Manager. • Unit: Enable to set the measuring unit like Millimeter. SubliXpress Plus Page 13 of 39...
- Page 15 The Calibration and Multilayer Print tabs are shown in the image below: Fig 11: Displaying the Calibration and Multilayer Print Tabs SubliXpress Plus Page 14 of 39...
-
Page 16: Tools Menu
Fig 12: The Tools Menu Option Help Menu The Help menu option is shown in the image below: About: Enable to view the details about Printer Manager software viz. software version and copyrights. Fig 13: The Help Menu Option SubliXpress Plus Page 15 of 39... -
Page 17: Getting Ready For Printing
Print Head by performing the steps given in the Head Cleaning section. Step 9: Rip the image file using the Ripping software provided with the machine. Step 10: Set the print origin to specify the printing starting position. Now, the printer is ready for printing. SubliXpress Plus Page 16 of 39... -
Page 18: Loading Media
Step 4: After this, pass the media through guiding rollers and dancing. Finally, paste it on the take up roller, as shown in the image below: Fig 16: Showing the Media Path Note: Media on the take-up must be perfectly aligned according to the supply roller’s media. SubliXpress Plus Page 17 of 39... -
Page 19: Ink Refilling
Step 2: Feed Password in the Time Password field (Refer to Fig 19). Note: The length of the password field must be of 16 digits. Step 3: After feeding the passwords, click on the Set button (Refer to Fig 19). Fig 18: Selecting the Password Option SubliXpress Plus Page 18 of 39... - Page 20 Step 5: After performing the above steps, restart the printer. Note: When “First Warning” appears, kindly contact Head Office with the following screen: • Password Screen (Refer to Fig 19) • About Screen Fig 20: Displaying the About Us Screen SubliXpress Plus Page 19 of 39...
-
Page 21: Printing
Note: Mechanical checks are only performed by the Service Engineer. Calibration Wizard Print Heads should be calibrated to ensure good printing quality. To open the Calibration Wizard, click on the Main MenuToolsCalibration Wizard path. Fig 23: Selecting the Calibration Wizard Option SubliXpress Plus Page 20 of 39... - Page 22 This should bring up the calibration wizard which is shown below: Fig 24: Displaying the Calibration Wizard SubliXpress Plus Page 21 of 39...
-
Page 23: Bi-Direction Calibration
Right to Left test print at“0” position. In case of error in the Bi-Direction offset, the Left to Right and Right to Left print would align at some other point on the scale. SubliXpress Plus Page 22 of 39... -
Page 24: Horizontal Calibration
“0” position, but at some other point on the calibration scale. The position at which the test head aligns perfectly with the reference head, indicates the error in position. SubliXpress Plus Page 23 of 39... -
Page 25: Step Calibration
On the fly, Step value can be adjusted using the Steps field, as shown below: Fig 29: Selecting the Print Origin Option SubliXpress Plus Page 24 of 39... - Page 26 Step 3: Click on the => icon (Refer to Fig 31) on the Step Calibration window. The correction value result will be reflected in the Step field (Refer to Fig 31). The same step value will also be displayed in the Steps field on the Quick Access Toolbar. SubliXpress Plus Page 25 of 39...
-
Page 27: Setting Print Origin
Y DPI of the image selected. Increasing the number of passes improves the print quality but at the cost of printing time. • Speed: Choose the printing speed like High Speed, Medium, and Low. • Medium Speed: Set the Y printing speed viz. Standard Speed and Low. SubliXpress Plus Page 26 of 39... -
Page 28: Adding Jobs
On selecting the Add Job option, the Open window appears and follow the above-mentioned steps to add more jobs. Note: To delete the selected job, click on the Delete job icon on the Quick Access Toolbar. Fig 35: Adding Job SubliXpress Plus Page 27 of 39... -
Page 29: Editing Job
Foot note: You can add footnote printing with each printed image. Parameters required can be selected. Step 5: After making the desired changes, click on the OK button to apply the settings (Refer to Fig 37). SubliXpress Plus Page 28 of 39... -
Page 30: Dpi And Print Mode
Fig 39: Displaying the Printing Details DPI and Print Mode The DPI and passes are given as below: Print Mode Passes Mode 1 488X300 Mode 2 488X600 Mode 3 488X900 Mode 4 488X1200 SubliXpress Plus Page 29 of 39... -
Page 31: Pausing And Canceling Printing
Similarly, you can abort the process by right clicking on the selected Job in the Job List area and select the Abort Job option from the context menu. Note: Keyboard shortcut for pausing and resuming is Ctrl+TAB. SubliXpress Plus Page 30 of 39... -
Page 32: Head Cleaning
Head blotting refers to the process in which the head surface area is cleaned for better printing result and quality. In SubliXpress Plus, auto wiping option is available to clean the head surface area. The Auto Wiping icon is shown in the image below:... -
Page 33: Setting Wiping And Capping Height
Using the Setting window, user can set the wipping and capping height by updating values in the Z Clean Pos and Z Wet Pos list boxes, as shown below: Fig 43: Setting Wiping and Capping Height SubliXpress Plus Page 32 of 39... -
Page 34: Head Purging
To perform head spraying, click on the Spray button available under the Quick Access Toolbar, as shown below: Fig 45: Displaying the Spray Button SubliXpress Plus Page 33 of 39... -
Page 35: Switch Off Procedure
Manager, as shown below: Fig 46: Displaying the Auto Capping Option Note: Never move the carriage manually over elevated capping station. Step 6: Close the Printer Manager software. Now, the printer is switch off. SubliXpress Plus Page 34 of 39... -
Page 36: Maintenance
• Check the Waste Bottle regularly and empty it, if full Print Bed Maintenance • Clean dust particles and ink stains, if any Ink Filter Maintenance • Replace the Ink Filter after six months SubliXpress Plus Page 35 of 39... -
Page 37: Troubleshooting
Perform nozzle test and clean heads, if required • Check if any air lock or no ink in the head pipes • Check the ink and air pipe for any cuts or loose connection SubliXpress Plus Page 36 of 39... -
Page 38: Ink Not Supply
Ink Not Supply • Ink path have disclosure • No ink in the main or sub ink tanks SubliXpress Plus Page 37 of 39... - Page 40 For Any Query Please Contact Us www.colorjetgroup.com Call us on +91-120-4548195 Email on info@colorjetgroup.com For Ink Enquiry:- sales@colorjetgroup.com For Support:- support@colorjetgroup.com...
Need help?
Do you have a question about the SubliXpress plus and is the answer not in the manual?
Questions and answers