Tennant 7400 Service Manual
Hide thumbs
Also See for 7400:
- Operator's manual (86 pages) ,
- Operator's manual (92 pages) ,
- Operator's manual (88 pages)
Table of Contents
Advertisement
Quick Links
Advertisement
Chapters
Table of Contents
Troubleshooting

Related Manuals for Tennant 7400


Summary of Contents for Tennant 7400
- Page 1 7400 Service Manual MM428 Rev. 04 (3- - 02)
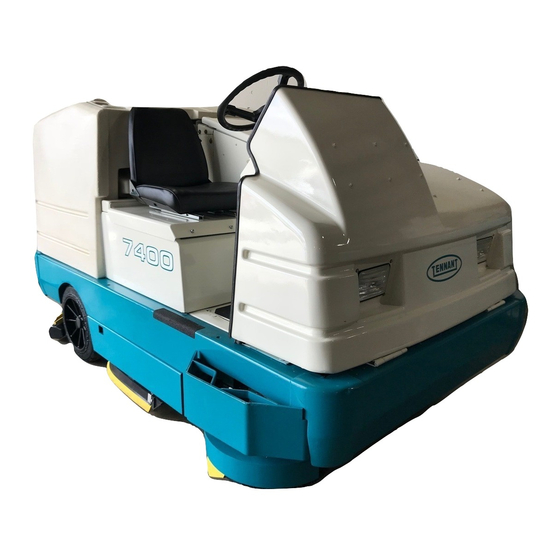
- Page 2 This service manual is intended to be an aid for the disassembly and reassembly of your TENNANT Model 7400. This manual is organized into seven major groups: General Information, Chassis, Scrubbing, Electrical, Hydraulics, Engine--G/LPG and Engine--D. General Information: Machine transport, machine jacking, machine storage, machine specifications, and machine maintenance chart.
-
Page 3: Table Of Contents
....1--20 HYDRAULIC O--RING FITTING TORQUE CHART ..... . 1--20 7400 MM428 (6- -01) - Page 4 GENERAL INFORMATION 7400 MM428 (6- -01)
-
Page 5: Safety Precautions
- - Use cardboard to locate leaking understood. hydraulic fluid under pressure. - - If it is not in proper operating - - Use Tennant supplied or approved condition. replacement parts. - - In flammable or explosive areas unless designed for use in those areas. - Page 6 EMISSIONS LABEL - - LOCATED ON THE SIDE FOR SAFETY LABEL - - LOCATED ON THE OF THE OPERATOR COMPARTMENT. SIDE OF THE OPERATOR COMPARTMENT. 10783 FLAMMABLE SPILLS LABEL - - LOCATED ON THE SIDE OF THE OPERATOR COMPARTMENT. 7400 MM428 (6- -01)
- Page 7 FAN AND BELT LABEL - - LOCATED ON THE STRONG VACUUM LABEL - - LOCATED ON ENGINE COMPARTMENT LINTEL. THE VACUUM FAN HOUSING. 10783 FLAMMABLE MATERIALS LABEL - - LOCATED NEXT TO THE SOLUTION TANK COVERS AND ON THE DETERGENT TANK. 7400 MM428 (6- -01)
-
Page 8: Specifications
Minimum aisle turn width 3190 mm (125.5 in) Minimum turning radius, right 2660 mm (104.75 in) Minimum turning radius, left 2030 mm (79.75 in) Maximum rated incline for scrubbing Maximum rated incline for transport of machine 7400 MM428 (6- -01) -
Page 9: Power Type
2400 + 50 rpm 1--2--4--3, counterclockwise rotation Spark plug gap Valve clearance, cold Engine lubricating oil with filter 1 mm (0.04 in) 0.20 mm (0.008 in) intake 3.3 L (3.5 qt) 10W30 0.50 mm (0.002 in) exhaust SAE--SG/SH 7400 MM428 (6- -01) -
Page 10: Steering
HYDRAULIC SYSTEM System Capacity Fluid Type TENNANT part no. 65869 -- above 7_ C (45_ F) Hydraulic reservoir 38 L (10 gal) TENNANT part no. 65870 -- below 7_ C (45_ F) Hydraulic total 74 L (19.5 gal) -
Page 11: Machine Dimensions
(97 in) 1686 mm (66.4 in) 1327 mm (52.25 in) 1610 mm (63.4 in) 1525 mm (60 in) 1483 mm (58.4 in) 2045 mm (80.5 in) 1475 mm (58 in) 1260 mm (49.6 in) 10919 MACHINE DIMENSIONS 7400 MM428 (6- -01) -
Page 12: Maintenance
Check for damage and wear Check fan belt tension Engine Check and adjust idle speed Check and adjust idle mixture Hydraulic fluid reservoir Check fluid level HYDO Tires Check for damage Rear squeegee Check leveling Rear squeegee casters Lubricate 1-10 7400 MM428 (6- -01) - Page 13 Tennant or approved hydraulic fluid . . . Water and permanent-type ethylene glycol anti-freeze, --34_ C (--30_ F) . . . Special lubricant, Lubriplate EMB grease (TENNANT part no. 01433--1) ..Distilled water 1-11 7400 MM428 (6- -01)
-
Page 14: Maintenance Chart / Diesel
100 Hours Radiator Check coolant level Engine crankcase Change oil and filter Engine fan belt Check tension Hydraulic fluid reservoir Check fluid level HYDO Tires Check for damage Rear squeegee Check leveling Rear squeegee casters Lubricate 1-12 7400 MM428 (6- -01) - Page 15 Tennant Company or approved hydraulic fluid . . . Water and permanent-type ethylene glycol anti-freeze, --34_ C (--30_ F) . . . Special lubricant, Lubriplate EMB grease (TENNANT part no. 01433--1) ..Distilled water 1-13 7400 MM428 (6- -01)
-
Page 16: Pushing, Towing, And Transporting The Machine
Turn the bypass valve 90_ from the normal position before pushing or towing the machine. The illustration shows the bypass valve in the pushing or towing position. 1-14 7400 MM428 (6- -01) - Page 17 FOR SAFETY: When loading machine onto truck or trailer, use winch. Do not drive the machine onto the truck or trailer unless the loading surface is horizontal AND is 380 mm (15 in) or less from the ground. 1-15 7400 MM428 (6- -01)
-
Page 18: The Machine
FOR SAFETY: When unloading machine off truck or trailer, use winch. Do not drive the machine off the truck or trailer unless the loading surface is horizontal AND 380 mm (15 in) or less from the ground. 1-16 7400 MM428 (6- -01) -
Page 19: Machine Jacking
FOR SAFETY: When servicing machine, block machine tires before jacking machine up. FOR SAFETY: When servicing machine, jack machine up at designated locations only. Block machine up with jack stands. 1-17 7400 MM428 (6- -01) -
Page 20: Storing Machine
ESt solution pump. 3. Raise the rear squeegee and the scrub head. 4. Park the machine in a cool, dry area. 5. Remove or charge the battery every three months. 1-18 7400 MM428 (6- -01) -
Page 21: Hardware Information
They include the following: 0.75 in 215--280 313--407 (291--380) (424--552) Locktite 515 sealant -- gasket forming material. TENNANT Part No. 75567,15 oz 1.00 in 500--650 757--984 (440 ml) cartridge. (678--881) (1026--1334) NOTE: Decrease torque by 20% when using a Locktite 242 blue -- medium strength thread thread lubricant. -
Page 22: Hydraulic Fitting Information1--20
(81 Nm) (122 Nm) 0.62 0.88--14 40 ft lb (54 Nm) NOTE: Do not use sealant on o- -ring threads. 0.75 1.12--12 70 ft lb (95 Nm) 1.31--12 90 ft lb (122 Nm) *Aluminum bodied components 1-20 7400 MM428 (6- -01) - Page 23 WHEEL SUPPORT ....TO REPLACE FRONT DRIVE MOTOR 2-9 TO REPLACE FRONT WHEEL HOUSING PIVOT BEARINGS . . . 2-11 7400 MM428 (12- -98)
-
Page 24: Chassis
CHASSIS 7400 MM428 (12- -98) - Page 25 CHASSIS INTRODUCTION This section includes information on the main chassis related components for example the seat, steering, brakes, and tires. 7400 MM428 (12- -98)
-
Page 26: Seat
CHASSIS SEAT The seat assembly is adjustable forward and backward on the 7400. TO REMOVE SEAT ASSEMBLY FOR SAFETY: Before Leaving Or Servicing Machine; Stop On Level Surface, Set Parking Brake, Turn Off Machine And Remove Key. 1. Tilt the seat assembly forward and engage the prop rod. -
Page 27: Operator Seat
A static drag chain prevents the buildup of static electricity in the machine. The chain is attached to the machine with a hex screw by the scrub head torque tube mount bearing. Make sure the chain is touching the floor at all times. 7400 MM428 (12- -98) -
Page 28: Brakes And Tires
9. Remove the two springs holding the brake shoes together. Remove the old brake shoes. 10. Position the new brake shoes on the brake mounting plate. 11. Reattach the two brake springs to the new brake shoes. 7400 MM428 (12- -98) - Page 29 25--50 mm (1--2 in) before engaging brakes. 22. Tighten the brake cable turn buckle jam nuts. 23. Reinstall the floor plate in the operators compartment. 24. Operate the machine and check the brakes for proper operation. 7400 MM428 (12- -98)
-
Page 30: Rear Tires And Wheels
8. Remove the tire and wheel assembly from the machine. 9. Pack the wheel bearings with Lubriplate EMB grease. 10. Slide the tire and wheel assembly on the axle. 11. Slide the outer bearing, flat washer and nut on the shaft. 7400 MM428 (12- -98) - Page 31 25--50 mm (1--2 in) before engaging brakes. 19. Tighten the brake cable turn buckle jam nuts. 20. Reinstall the floor plate in the operators compartment. 21. Operate the machine and check the rear wheels for proper operation. 7400 MM428 (12- -98)
- Page 32 6. Remove and plug the hydraulic hoses leading to the front wheel drive motor. NOTE: Observe hydraulic cleanliness requirements when opening hydraulic lines. 7. Remove the four drive motor mounting bolts. 8. Slide the motor out of front wheel housing. 2-10 7400 MM428 (12- -98)
- Page 33 14. Install the front tire. Torque the front wheel nuts to 142 -- 156 Nm (105 -- 115 ft lb). 15. Remove jack stands and lower machine. 16. Operate the machine and check the front drive motor for any leaks. 2-11 7400 MM428 (12- -98)
-
Page 34: Wheel Support
11. Remove the wheel housing and drive motor assembly out of the main frame. 12. Use a steel punch and hammer to drive the old bearing cups out of the wheel housing. 2-12 7400 MM428 (12- -98) - Page 35 23. Reinstall rod end of steering cylinder to the top of the wheel housing using the 3/4 in. x 3--1/4 in. hex screw,nyloc nut, and four flat washers. Tighten to 270 -- 300 Nm (200 -- 220 ft lb). 2-13 7400 MM428 (12- -98)
- Page 36 26. Install the front tire. Torque the front wheel nuts to 142 -- 156 Nm (105 -- 115 ft lb) 27. Re--connect battery cables, start engine, run propelling in both directions, check for leaks. 28. Remove jack stands, lower machine to the ground. 2-14 7400 MM428 (12- -98)
- Page 37 ..... . . 3-29 TO REMOVE VACUUM FAN ..3-29 TO INSTALL VACUUM FAN ..3-30 TO REPLACE VACUUM IMPELLER 3-31 7400 MM428 (9- -01)
- Page 38 SCRUBBING 7400 MM428 (12- -98)
-
Page 39: Introduction
As the machine is moved forward the squeegee wipes the dirty solution off the floor, which is then picked up and drawn into the recovery tank by the vacuum fan. There are three settings on the solution flow----high, low, and off. 7400 MM428 (12- -98) -
Page 40: Solution Tanks
8. Remove the two M8 hex screws from the front of the LH solution tank near the engine alternator. 9. The LH solution tank can now be lifted up and out of the machine frame. 7400 MM428 (12- -98) -
Page 41: To Install Lh Solution Tank
LH solution tank. 8. Close the rear radiator cover panel and latch. 9. Close the engine side door and engine cover. 10. Fill the LH solution tank with water and check for leaks. 7400 MM428 (12- -98) -
Page 42: To Remove Rh Solution Tank
RH solution tank where it attaches to the seat support. 5. Disconnect any solution lines still attached to the RH solution tank. 6. The RH solution tank can now be lifted up and out of the machine frame. 7400 MM428 (12- -98) -
Page 43: To Install Rh Solution Tank
4. Reconnect any solution lines that were disconnected from the RH solution tank. 5. The remain RH solution tank hardware will be installed during the recovery tank installation. See TO INSTALL RECOVERY TANK and TO INSTALL LH SOLUTION TANK instructions. 7400 MM428 (12- -98) -
Page 44: Recovery Tank
Remove the gas springs from the ball studs on the support channel. 8. Remove the hex screws holding the support channel to the tank lintel and hood lintel. Remove the support channel from the machine. 7400 MM428 (12- -98) - Page 45 18. Remove the one hex screw and two nyloc nuts holding the radiator assembly to the back of the recovery tank. Leave the black mount plate attached to the recovery tank. Do not disconnect the hoses from the radiator. 7400 MM428 (12- -98)
- Page 46 22. Carefully push the recovery tank forward, lift it up, and remove it from the machine. NOTE: An overhead hoist or two people must be. used when lifting the recovery tank out of the machine frame. 3-10 7400 MM428 (12- -98)
-
Page 47: To Install Recovery Tank
9. Reinstall the support channel to the tank lintel and hood lintel. Reinstall the four M8 hex screws. 10. Tighten the all of the M8 hex screws to 18 -- 24 Nm (15 -- 20 ft lb). 3-11 7400 MM428 (12- -98) - Page 48 18 -- 24 Nm (15 -- 20 ft lb). 18. Reinstall the solution and recovery tank drain covers. 19. Partially fill the recovery tank with water and check for any leaks and for proper operation of the float switches. 3-12 7400 MM428 (12- -98)
-
Page 49: Scrub Head
8. Reinstall the idler plate and side squeegee assembly in the machine. NOTE: Lift up on the brush wrap slightly when installing the idler plate in the machine so the attachment pins line up with the holes in the plate. 3-13 7400 MM428 (12- -98) -
Page 50: Checking And Adjusting Scrub Brush Pattern
If one or both of the brush patterns are tapered, the scrub head will have to be adjusted to straighten the brush pattern. 10652 3-14 7400 MM428 (12- -98) - Page 51 10653 8. Lengthen or shorten the leveling rods on both sides of the scrub head. Lengthening the rods will increase the rear brush pattern width. Shortening the rods will will increase the front brush pattern. 3-15 7400 MM428 (12- -98)
-
Page 52: To Replace Main Brush Idler Shaft Bearings
13. Use a press to install a new bearing in the bearing housing on the outside of the idler plate. The open face of the bearing points in. Use green loctite #680 on the outer diameter of the bearing before pressing in place. 3-16 7400 MM428 (12- -98) - Page 53 23. Reinstall the two hair pins in the brush wrap attachment pins. 24. Reconnect the front of the leveling rod to the ball stud. 25. Close the RH brush door and operate the machine. Check the main brushes for proper operation. 3-17 7400 MM428 (12- -98)
-
Page 54: To Remove Main Brush Drive Motor Mount Plate
7. Mark, disconnect, and plug the three hydraulic hoses leading to the main brush drive motors. NOTE: Observe hydraulic cleanliness requirements when opening hydraulic lines. 8. Remove the motor mount plate assembly from the machine. 3-18 7400 MM428 (12- -98) -
Page 55: To Install Main Brush Drive Motor Mount Plate
Tighten the three hex screws to 37 -- 48 Nm (26 -- 34 ft lb). 9. Close the LH brush door and operate the machine. Check the main brush motors for proper operation. 3-19 7400 MM428 (12- -98) -
Page 56: To Replace Optional Side Brush
5. Lift the side brush and line up the hub in the brush with the motor drive plug. Snap the brush up in place. 6. Operate the machine and check the side brush for proper operation. 3-20 7400 MM428 (12- -98) -
Page 57: Squeegees
Re--use the clevis and cotter pin. 9. Reinstall the cable roller and clevis pin in the frame. 10. Start the machine and raise the squeegee. Swing the squeegee assembly back in. Check the lift cable for proper operation. 3-21 7400 MM428 (12- -98) -
Page 58: To Replace Rear Squeegee Centering Springs
37 -- 48 Nm (26 -- 34 ft lb). 8. Repeat this procedure on the other side if needed. 9. Start the machine and raise the squeegee. Swing the squeegee assembly back in. Check the centering springs for proper operation. 3-22 7400 MM428 (12- -98) -
Page 59: To Remove Rear Squeegee Frame
4. Re--apply tension on the down pressure springs using the threaded rods and jam nuts. 5. Reinstall the vacuum hose on the squeegee frame. 6. Start the machine and raise the squeegee. Swing the squeegee assembly back in. 3-23 7400 MM428 (12- -98) -
Page 60: Squeegee Blades
6. Position the retaining band over the squeegee blade. Latch the retaining band clamp. 7. Adjust the squeegee blade leveling and deflection. See TO ADJUST REAR SQUEEGEE BLADE DEFLECTION or TO LEVEL THE REAR SQUEEGEE instructions. 3-24 7400 MM428 (12- -98) -
Page 61: To Adjust Rear Squeegee Blade Deflection
6. Start the engine and drive the machine forward again to check the squeegee blade deflection. Readjust the squeegee blade deflection if necessary. 7. Slide the locking brackets back to lock the height adjustment knobs. 8. Raise the squeegee when finished. 3-25 7400 MM428 (12- -98) -
Page 62: To Level The Rear Squeegee
6. Tighten the locking nuts. 7. Start the engine and drive the machine forward again to check the squeegee blade deflection. 8. Readjust the squeegee blade deflection if necessary. 3-26 7400 MM428 (12- -98) -
Page 63: Side Squeegees
00000 6. Replace the retainer bracket, deflector, clevis pin, and cotter pin. 7. Repeat for the side squeegee on the other side of the scrub head. 3-27 7400 MM428 (12- -98) -
Page 64: To Replace Side Brush Squeegee
7. Install the retainer clip on the end of the squeegee. 8. Install the side brush guard. SIDE BRUSH SKIRT The side brush skirt is located behind the squeegee blade. Check the skirt for wear and damage every 100 hours of operation. 3-28 7400 MM428 (12- -98) -
Page 65: Vacuum Fan
NOTE: Observe hydraulic cleanliness requirements when opening hydraulic lines. 4. Remove three M10 hex screws, washers, and nyloc nuts holding vacuum fan to mounting brackets. 5. Remove the vacuum fan assembly from the machine. 3-29 7400 MM428 (12- -98) -
Page 66: To Install Vacuum Fan
See schematic in HYDRAULIC section. 4. Reinstall vacuum hose from recovery tank to vacuum fan housing. Hand tighten clamps. 5. Start the engine and turn on the vacuum fan. Check for leaks and proper operation. 3-30 7400 MM428 (12- -98) -
Page 67: To Replace Vacuum Impeller
Reinstall the six hex screws and tighten to 22 -- 27 Nm (16 -- 20 ft lb). NOTE: Tennant part no. 57543 plastic shims must be used for proper fan to housing clearance. Remove these shims after housing hardware has been tightened. - Page 68 SCRUBBING 3-32 7400 MM428 (12- -98)
- Page 69 NOT TURN ON (FLOW CHART) 4-64 POWER UP (SCHEMATIC) ..4-36 ENGINE TEMPERATURE LIGHT WILL INSTRUMENT PANEL DOES NOT NOT TURN OFF (FLOW CHART) 4-64 POWER UP (FLOW CHART) . . . 4-37 7400 MM428 (9- -01)
- Page 70 4-71 FUEL GAUGE (GAS AND DIESEL) (FLOW CHART) ....4-72 FUEL GAUGE (LPG) (SCHEMATIC) 4-73 FUEL GAUGE (LPG) (FLOW CHART) 4-74 7400 MM428 (9- -01)
-
Page 71: Introduction
ELECTRICAL INTRODUCTION The machine electrical system consists of the battery, relays, instrument panels, and related components. This section includes information on these components and their troubleshooting. 7400 MM428 (12- -98) -
Page 72: Battery
Never add acid to the batteries, only distilled water. Keep the battery caps on the batteries always except when adding water or taking hydrometer readings. FOR SAFETY: When Servicing Machine, Avoid Contact With Battery Acid. 7400 MM428 (12- -98) -
Page 73: To Replace Battery
5. Clean the cables and the posts on the new battery and install back in the machine. 6. Reinstall the battery hold down bracket. 7. Reconnect the positive then the negative battery cables and close the seat support. 7400 MM428 (12- -98) -
Page 74: Instrument Panel
NOTE: Slot in panel must line up with notch on plug. Hand tighten the allen head screw. 11. Close the front cover. 12. Reconnect the battery cables and lower the seat support. 13. Start the machine and check for proper operation. 7400 MM428 (12- -98) -
Page 75: To Disassemble Instrument Panel
8. Any burned-out lamps can now be changed by turning them 1/4 turn counterclockwise and lifting out. 9. To replace the hour meter, unplug the two wires and remove the two pan head screws. 7400 MM428 (12- -98) -
Page 76: To Reassemble Instrument Panel
5. Reinstall the touch panel case on the outer case. 6. Reinstall the twelve pan head screws and lightly hand tighten. 7. The instrument panel is now ready to be reinstalled in the machine. See TO REPLACE INSTRUMENT PANEL instructions. 7400 MM428 (12- -98) -
Page 77: To Replace Machine Relay
See schematic in the ELECTRICAL section. 11. Reconnect the battery cables to the battery. 12. Lower the seat support. 13. Close the front cover on the machine. 14. Start and operate the machine, checking for proper operation. 7400 MM428 (12- -98) -
Page 78: To Replace Circuit Breaker
See schematic in the ELECTRICAL section. 11. Reconnect the battery cables to the battery. 12. Lower the seat support. 13. Close the front cover on the machine. 14. Start and operate the machine, checking for proper operation. 4-10 7400 MM428 (12- -98) -
Page 79: Gas/Lpg Electrical Schematic
COOLANT TEMP 23C/GRY 58/BLU CLOSES AT 225 ° F SENDER HYDRAULIC 13N/BLK 35/BRN FILTER SWITCH S- -14 36/GRN 13R/BLK PIN 20 S- -15 REVERSE TIED TO ENG. FLOW SWITCH OIL PRESS. SHEET 1 GAS/LPG ELECTRICAL SCHEMATIC 7400 MM428 (6- -01) 4-11... -
Page 80: Gas/Lpg Electrical Schematic
ELECTRICAL SHEET 2 GAS/LPG ELECTRICAL SCHEMATIC 4-12 7400 MM428 (6- -01) -
Page 81: Diesel Electrical Schematic
CLOSES AT 225 ° F 43/BLU COOLANT TEMP SE- -2 23C/GRY 58/BLU SENDER 13N/BLK 35/BRN HYDRAULIC FILTER SWITCH S- -14 36/GRN REVERSE 13R/BLK FLOW SWITCH S- -15 PIN 20 TIED TO ENG. OIL PRESS. SHEET 3 DIESEL ELECTRICAL SCHEMATIC 7400 MM428 (6- -01) 4-13... -
Page 82: Diesel Electrical Schematic
ELECTRICAL SHEET 4 DIESEL ELECTRICAL SCHEMATIC 4-14 7400 MM428 (6- -01) -
Page 83: Gas/Lpg Wire Harness Group
ELECTRICAL SHEET 5 GAS/LPG WIRE HARNESS GROUP 7400 MM428 (6- -01) 4-15... - Page 84 ELECTRICAL SHEET 6 GAS/LPG WIRE HARNESS GROUP 4-16 7400 MM428 (6- -01)
- Page 85 42/ORA 2/ORA 15/BLU 48/GRY 83/BRN 58/BLU 46/BRN 60/GRN 45/GRY 13U/BLK 13T/BLK MAIN INSTRUMENT 13S/BLK PANEL SOCKET REAR VIEW 1A/RED MAIN 1B/RED HARNESS 2/ORA 13A/BLK ENGINE MANDO BLOCK ALTERNATOR 60559 SHEET 7 GAS/LPG WIRE HARNESS GROUP 7400 MM428 (6- -01) 4-17...
-
Page 86: Gas/Lpg Wire Harness Group (Options)
ELECTRICAL SHEET 8 GAS/LPG WIRE HARNESS GROUP (OPTIONS) 4-18 7400 MM428 (6- -01) -
Page 87: Diesel Wire Harness Group (Options)
ELECTRICAL 13B/BLK 15B/BLU SHEET 9 DIESEL WIRE HARNESS GROUP 7400 MM428 (6- -01) 4-19... - Page 88 ELECTRICAL SHEET 10 DIESEL WIRE HARNESS GROUP 4-20 7400 MM428 (6- -01)
- Page 89 47/BRN 60559 51/PUR 1A/RED MAIN 42/ORA 1B/RED HARNESS 2/ORA 2/ORA 15/BLU 48/GRY 13A/BLK 83/BRN 58/BLU ENGINE 46/BRN BLOCK 60/GRN 45/GRY 13U/BLK 13T/BLK MAIN INSTRUMENT 13S/BLK PANEL SOCKET REAR VIEW SHEET 11 DIESEL WIRE HARNESS GROUP 7400 MM428 (6- -01) 4-21...
-
Page 90: Diesel Wire Harness Group (Options)
ELECTRICAL 13B/BLK 15B/BLU SHEET 12 DIESEL WIRE HARNESS GROUP (OPTIONS) 4-22 7400 MM428 (6- -01) -
Page 91: Diagnostics
ELECTRICAL DIAGNOSTICS The Model 7400 has an on--board diagnostic system. Each time the control board is powered up, it performs a self test. If the self test passes, the “OK” light is illuminated. This trouble shooting section describes the different operating modes that are available, how to enter that mode, and a detail description of how that mode works. -
Page 92: Operating Modes
ELECTRICAL OPERATING MODES The Model 7400 has 6 different operating modes. The machine operator can access each mode by pressing various buttons on the control panel, holding them, and turning on the key. The common operating modes are detailed in the following charts. -
Page 93: Normal Mode
The detergent pump will run at its slow rate if one LED is on. The detergent pump will run at its fast rate if two LED’s are on. 4-25 7400 MM428 (12- -98) -
Page 94: Squeegee Button
LED is on will cause the following actions: 1. The squeegee LED will turn off. 2. The squeegee will raise. 3. There will be a 30 second delay. 4. The vacuum fan will turn off. 4-26 7400 MM428 (12- -98) -
Page 95: Detergent
1. The overflow light will begin to blink. 2. A one minute delay will pass. 3. The overflow light will stop blinking and stay 4. The Scrub and Squeegee functions will be canceled. 4-27 7400 MM428 (12- -98) -
Page 96: Manual Mode
LED’s to scroll. If no LED’s are on, the detergent pump will be off. If one LED is illuminated, the detergent pump will run in low speed. If both LED’s are on, the detergent pump will run in high speed. 4-28 7400 MM428 (12- -98) -
Page 97: Input Display Mode
This segment will be illuminated when this input is shorted to ground. D ENGINE TEMPERATURE LIGHT -- In the Input Display Mode, the engine temperature light will blink until the engine reaches operating temperature. 4-29 7400 MM428 (12- -98) -
Page 98: Error Display Mode
D SEGMENT 0, 1 -- First and second segments from the right of the gas gauge. These segments would indicate that the output was open when the controller was trying to short it to ground. 4-30 7400 MM428 (12- -98) -
Page 99: Side Brush Led
D SEGMENT 2, 3 -- Third and forth segments from the right of the gas gauge. These segments would indicate that the vacuum fan motor output was open when the controller was trying to short it to ground. 4-31 7400 MM428 (12- -98) -
Page 100: Scrub Led
D SEGMENT 2, 3 -- Third and forth segments from the right of the gas gauge. These segments would indicate that the headlight pump output was open when the controller was trying to short it to ground. 4-32 7400 MM428 (12- -98) -
Page 101: Pressure Adjust Mode
D DETERGENT BUTTON - - Holding the detergent button will increase the down pressure. NOTE: To return to the factory brush pressure settings, run RESET SCRUB PRESSURES from the Diagnostics menu. 4-33 7400 MM428 (12- -98) -
Page 102: Reset Scrub Pressures
RESET SCRUB PRESSURES When the machine goes into this mode, the controller replaces the current brush down pressure settings with factory defaults. To initiate, follow the entry sequence (how to activate). The pressures will automatically reset. 4-34 7400 MM428 (12- -98) -
Page 103: Troubleshooting
ELECTRICAL TROUBLESHOOTING The following troubleshooting section is organized with the section of the electrical schematic that pertains to that particular problem first, followed by the flow chart. 4-35 7400 MM428 (12- -98) -
Page 104: Instrument Panel Does Not Power Up (Schematic)
14VDC TO INSTRUMENT PANEL (PIN 1) BATTERY 1/RED 13/BLK BATT. 20/BLU CB- -1 IGNITION SWITCH S- -3 20A/BLU 18/ORA 18A/ 19/BLU 19B/BLU 13D/BLK CB- -6 5.0A 23/GRY 13S/BLK ELECTRONIC INSTRUMENT PANEL BATTERY LINE SWITCHED LINE 4-36 7400 MM428 (12- -98) -
Page 105: Instrument Panel Does Not Power Up (Flow Chart)
PANEL CHECK CONTINUITY OF: 23/GREY FROM M3 (PIN 87) TO (PIN 1) OF PANEL 13S/BLACK FROM (PIN 22) OF PANEL TO BAT. NEG. GOOD OPEN WIRE CONTINUITY REPLACE REPAIR OR REPLACE INSTRUMENT OPEN WIRES PANEL 4-37 7400 MM428 (12- -98) -
Page 106: Scrub Brush Will Not Turn On And/Or Down (Schematic)
REVERSE 24B/PUR 47/BRN 11 (4 SEC FLOW SWITCH CB- -7 DELAY) 15 AMP SV- -2 VAC FAN 13R/BLK ON VALVE 24B/PUR 45/GRY 36/GRN S- -15 21 (8 SEC DELAY) SV- -6 SIDE BR. ON VALVE 4-38 7400 MM428 (12- -98) -
Page 107: Scrub Brush Will Not Turn On
DISCONNECT INST. PANEL CHECK CONTINUITY OF WIRE 46/BRN IS OPEN WIRE 46/BRN FROM INST. WIRE 46/BRN IS PANEL HARNESS (PIN 19) FROM PANEL (PIN 19) SHORTED TO TO GROUND CONTINUED ON GROUND NEXT PAGE CONTINUITY 4-39 7400 MM428 (12- -98) - Page 108 KEY IS OFF ACTIVATED FROM SV- -4 TO INST. DISCONNECT INSTRUMENT PANEL PANEL (PIN 16) CHECK CONTINUITY FROM 48/GRY TO GROUND HYDRAULIC PROBLEM CONTINUITY OPEN WIRE 48/GRY IS REPLACE PANEL SHORTED TO GROUND REPLACE BAD SOLENOID 4-40 7400 MM428 (12- -98)
-
Page 109: Squeegee And Vacuum Fan Not Turning On And Going Down
SV- -3 SQUEEGEE 21B/ DOWN VALVE REVERSE 24B/PUR 47/BRN 11 (4 SEC DELAY) FLOW SWITCH CB- -7 15 AMP SV- -2 VAC FAN 13R/BLK ON VALVE 24B/PUR 45/GRY 36/GRN S- -15 21 (8 SEC DELAY) 4-41 7400 MM428 (12- -98) -
Page 110: Squeegee And Vacuum Fan Not Turning On And Going Down
45/GRY AND SV- -3 FROM 24/PUR TO 47/BRN REPLACE HYD. COIL THAT WILL NOT TURN ON- -- -RE- -TEST SYSTEM 36/GRN, 13R/BLK, OR VOLTAGE S- -15 ARE OPEN NOTE: S- -15 IS CLOSED IN REVERSE CONTINUED ON NEXT PAGE 4-42 7400 MM428 (12- -98) - Page 111 WIRE 45/GRY ARE OPEN OPEN REMOVE THE SHORT TO GROUND ON - -RECONNECT PANEL 47/BRN AND/OR - -KEY OFF THEN ON 45/GRY DOES THE ”OK” PANEL LIGHT COME ON ? REPLACE RE- -TEST INSTRUMENT PANEL SYSTEM 4-43 7400 MM428 (12- -98)
-
Page 112: Side Brush Will Not Turn On And Go Down (Schematic)
SV- -12 LOW REVERSE WATER VALVE 96/GRY 46B/BRN FLOW SWITCH 13R/BLK SV- -13 HIGH WATER VALVE 36/GRN S- -15 46C/BRN CIRCUIT 2 95/BLU SV- -10 SIDE BR. DN. FORCE PROP. VALVE 52/YEL 25B/GRY 6 (3 SEC. DELAY) 4-44 7400 MM428 (12- -98) -
Page 113: Side Brush Will Not Turn On And Go Down (Flow Chart)
51/PUR IS OPEN FROM PANEL TO ALL - -DISCONNECT INSTRUMENT PANEL FOUR SOLENOID CHECK CONTINUITY OF 51/PUR FROM INSTR. PANEL (PIN 12) TO GROUND CONTINUITY OPEN WIRE 51/PUR IS SHORTED TO REPLACE INST. GROUND PANEL 4-45 7400 MM428 (12- -98) - Page 114 PANEL DISCONNECTED FROM SV- -10 TO CHECK CONTINUITY FROM INSTR. PANEL (PIN 6) 52/YEL TO GROUND REPLACE BAD SOLENOIDS OPEN CONTINUITY WIRE 52/YEL ALL SOLENOIDS REPLACE INSTRUMENT IS SHORTED PANEL TO GROUND HYDRAULIC PROBLEM SEE TROUBLESHOOTING 4-46 7400 MM428 (12- -98)
-
Page 115: Water Valves Not Operating
SV- -12 LOW REVERSE WATER VALVE 96/GRY 46B/BRN FLOW SWITCH 13R/BLK SV- -13 HIGH WATER VALVE 36/GRN S- -15 46C/BRN CIRCUIT 2 95/BLU SV- -10 SIDE BR. DN. FORCE PROP. VALVE 25B/GRY 52/YEL 6 (3 SEC. DELAY) 4-47 7400 MM428 (12- -98) -
Page 116: (Flow Chart)
- -IF SV- -12 IS NO VOLTAGE ALL SOLENOIDS WIRE 46B/BRN FROM SV- -12 TO (PIN 19) IS OPEN - -IF SV- -13 IS NO VOLTAGE WIRE 46C/BRN FROM SV- -13 TO (PIN 19) IS OPEN REPLACE ANY VALVE NOT OPERATING 4-48 7400 MM428 (12- -98) -
Page 117: Head Lights Will Not Turn On
5.0A 62C/YEL 13KK/BLK 20B/ HEADLIGHT R.H. 62/YEL 13CC/BLK 62A/YEL CB- -3 62B/YEL HEADLIGHT L.H. 13DD/BLK 15 AMP TAIL LHT R.H. 62E/BRN 13II/ 89/ORG 59A/BRN 89B/ORA TAIL LHT L.H. 62D/BRN S- -11 13HH/ 89A/ORA BRAKE SWITCH 4-49 7400 MM428 (12- -98) -
Page 118: Head Lights Will Not Turn On (Flow Chart)
REPAIR 60/GRN - -DISCONNECT THE INSTR. PANEL - -START ENGINE CHECK FOR GROUND ON 15/BLU AT INSTR. PANEL ON (PIN 15) GROUND AT (PIN 15) REPLACE INSTR. 15/BLU, S- -4, OR 13B/BLK PANEL IS OPEN 4-50 7400 MM428 (12- -98) -
Page 119: Est Pump Not Working (Schematic)
30 SEC. 23C/GRY RECOVERY TANK 28/YEL 5 SEC. DELAY 13J/BLK 1 MIN. TO VAC S- -8 N.C.H.O. FAN SHUT- -OFF 13S/BLK 13T/BLK 13U/BLK 13Y/BLK ES PUMP 20A/ 66/BRN 65/GRY 13PP/BLK CB- -2 AUTO FILL 15 AMP 4-51 7400 MM428 (12- -98) -
Page 120: Est Pump Not Working (Flow Chart)
S- -17 AND S- -18 CHECK VOLTAGE AT M5 NO VOLTAGE (PIN 85) FROM 23C/GRY TO GROUND SYSTEM O.K. VOLTAGE 23C/GRY IS OPEN FROM M5 (PIN 85) TO M3 (PIN 87) CONTINUED ON REPLACE PANEL NEXT PAGE 4-52 7400 MM428 (12- -98) - Page 121 13PP/BLK ARE OPEN 57/GRN IS OPEN FROM (PIN 4) ON INSTR. PAN- EL TO (PIN 86) PANEL DISCONNECTED POWER OFF M5 REMOVED CHECK CONTINUITY FROM 57/GRN TO GROUND REPLACE PANEL REMOVE SHORT TO GROUND ON 57/GRN 4-53 7400 MM428 (12- -98)
-
Page 122: Reverse Light Or Alarm Not Working (Schematic)
13T/BLK REVERSE 13U/BLK 13Y/BLK 58/BLU 23C/GRY ELECTRONIC INSTRUMENT ES PUMP PANEL 13R/BLK 36/GRN S- -15 REVERSE FLOW SWITCH 20C/ FLASHER 93A/ORA BACK- -UP ALARM UNIT 92/PUR 93/ORA 13JJ/BLK CB- -4 94/YEL 13RR/BLK 15 AMP 93B/ORA 4-54 7400 MM428 (12- -98) -
Page 123: Reverse Light Or Alarm Not Working (Flow Chart)
TURN KEY OFF THEN ON, IS ”OK LIGHT ON? POWER OFF DISCONNECT PANEL CHECK CONTINUITY ON WIRE 58/BLU TO GROUND CONTINUED ON 58/BLU IS SHORTED REPLACE NEXT PAGE PANEL TO GROUND, RE- PAIR AND REPLACE 4-55 7400 MM428 (12- -98) - Page 124 - -POWER OFF GROUND WHEN MACHINE IS RUNNING CHECK CONTINUITY OF 58/BLU NO CONTINUITY CONTINUITY OPEN CONTINUITY 36/GRN, 13R/BLK, OR S- -15 ARE OPEN AND IN REVERSE REPLACE INSTR. PANEL REPLACE INSTR. PANEL REPAIR 58/BLU 4-56 7400 MM428 (12- -98)
-
Page 125: Detergent Metering Pump Is Not Operating (Schematic)
ON WITH A PULSE WIDTH MODULATED SIGNAL BATTERY 13/BLK 1/RED 1D/RED BATT. 20/BLU CB- -1 IGNITION SWITCH S- -3 18A/ 19/BLU 13D/BLK CB- -6 13S/BLK 5.0A 23/GRY 13T/BLK 13U/BLK 13Y/BLK 23A/GRY 56/ORA ELECTRONIC DETERGENT METERING INSTRUMENT PANEL 4-57 7400 MM428 (12- -98) -
Page 126: Detergent Metering Pump Is Not Operating (Flow Chart)
SYSTEM FIRST VOLTAGE - -POWER OFF - -PANEL DISCONNECTED REPLACE CHECK CONTINUITY OF 56/ORA PUMP DETERGENT METERING FROM PANEL (PIN 9) TO PUMP TESTS OUT O.K. OPEN CONTINUITY REPAIR AND REPLACE 56/ORA REPLACE INST. PANEL 4-58 7400 MM428 (12- -98) -
Page 127: Alternator / Battery Warning Light Stays On When Engine Is Running (Schematic)
1E/RED 13A/BLK 1A/RED 55A MAX. CHARGE ALTERNATOR 1B/RED SENSE 1D/RED 1E/RED BATT. 18A/ 19/BLU 13D/BLK CB- -1 START 2/ORA CB- -6 5.0A ELECTRONIC 23/GRY INSTRUMENT 20/BLU PANEL 13S/BLK IGNITION 13T/BLK SWITCH 13U/BLK 13Y/BLK S- -3 4-59 7400 MM428 (12- -98) -
Page 128: Alternator / Battery Warning Light Stays On When Engine Is Running (Flow Chart)
TOUCH WIRE 2/ORA TO WIRE 1B/RED AT THE ALTERNATOR DOES THE ALTERNATOR LIGHT TURN OFF ? WIRE 2/ORA IS SHORTED TO BATTERY POSITIVE TIGHTEN ALTERNATOR BELT IF NECESSARY DOES LIGHT TURN OFF ? REPLACE ALTERNATOR 4-60 7400 MM428 (12- -98) -
Page 129: Alternator / Battery Warning Light Will Not Turn On
1E/RED 13A/BLK 55A MAX. 1A/RED CHARGE ALTERNATOR 1B/RED SENSE 1D/RED 1E/RED BATT. 18A/ 19/BLU 13D/BLK CB- -1 START 2/ORA CB- -6 5.0A ELECTRONIC 23/GRY INSTRUMENT 20/BLU PANEL IGNITION 13S/BLK SWITCH 13T/BLK S- -3 13U/BLK 13Y/BLK 4-61 7400 MM428 (12- -98) -
Page 130: Alternator / Battery Warning Light Will Not Turn On
ALTERNATOR IS SHORTED L2 TO BATTERY POSITIVE CHECK CONTINUITY 2/ORA OPEN OR WIRE 2/ORA IS SHORTED FROM ALTERNATOR TO TO BATTERY POSITIVE (PIN 14) CONTINUITY REPAIR AND REPLACE 2/ORA REPLACE LAMP L8 INSIDE THE PANEL 4-62 7400 MM428 (12- -98) -
Page 131: Engine Temperature Light Will Not Turn On Or Off
540 C.C.A. 13/BLK 1/RED 1D/RED 1E/RED BATT. 18A/ 19/BLU 13D/BLK CB- -1 START CB- -6 5.0A 20/BLU IGNITION SWITCH S- -3 SE- -2 23/GRY COOLANT TEMP 43/BLU SENDER 13S/BLK 13T/BLK 13U/BLK 13Y/BLK ELECTRONIC INSTRUMENT PANEL 4-63 7400 MM428 (12- -98) -
Page 132: Engine Temperature Light Will Not Turn On (Flow Chart)
POWER OFF DISCONNECT PANEL DISCONNECT SE- -2 IF ENGINE TEMP IS LESS CONTINUITY CHECK CONTINUITY THAN 225 DEGREES 43/BLU TO GROUND REPLACE SE- -2 SYSTEM IS OK OPEN WIRE 43/BLU IS GROUNDED REPLACE INSTR. PANEL 4-64 7400 MM428 (12- -98) -
Page 133: On Or Off (Schematic)
540 C.C.A. 13/BLK 1/RED 1D/RED 1E/RED BATT. 18A/ 19/BLU 13D/BLK CB- -1 START CB- -6 5.0A 20/BLU IGNITION SWITCH HYDRAULIC 13N/BLK 35/BRN S- -3 FILTER SWITCH S- -14 23/GRY 13S/BLK 13T/BLK 13U/BLK 13Y/BLK ELECTRONIC INSTRUMENT PANEL 4-65 7400 MM428 (12- -98) -
Page 134: Hydraulic (High) Pressure
- -DISCONNECT S- -14 - -DISCONNECT INSTR. IF HYDRAULIC SYSTEM OK CONTINUITY PANEL REPLACE S- -14 CHECK CONTINUITY 35/BRN TO GROUND OPEN 35/BRN IS SHORTED TO GROUND REPLACE INSTR. PANEL REPAIR AND RE- PLACE 35/BRN 4-66 7400 MM428 (12- -98) -
Page 135: Engine Oil Pressure Warning Light Will Not Turn On Or Off (Schematic)
26/BRN PANEL 27/PUR 13K/BLK 30 SEC. S- -17 N.O.H.C. 57/GRN S- -18 N.C.H.O. 23C/GRY 5 SEC. DELAY RECOVERY TANK 28/YEL 1 MIN. TO VAC 13J/BLK FAN SHUT- -OFF S- -8 N.C.H.O. 13S/BLK 13T/BLK 13Y/BLK 13U/BLK 4-67 7400 MM428 (12- -98) -
Page 136: Engine Oil Pressure Warning Light Will Not Turn On (Flow Chart)
- - OIL LIGHT TURNS OFF KEY ON ENGINE OFF DISCONNECT OIL PRESSURE SWITCH S- -4 GROUND WIRE 15/BLU DOES LIGHT SHUT OFF ? REPLACE OIL PRESSURE LIGHT WIRE 15/BLU IS OPEN FROM OIL PRES- SURE SWITCH TO (PIN 15) 4-68 7400 MM428 (12- -98) -
Page 137: Recovery Tank Full Light Will Not Turn On Or Off
CB- -1 IGNITION SWITCH S- -3 15/BLU 23/GRY ELECTRONIC INSTRUMENT ES PUMP PANEL 57/GRN 23C/GRY 5 SEC. DELAY RECOVERY TANK 28/YEL 1 MIN. TO VAC 13J/BLK FAN SHUT- -OFF S- -8 N.C.H.O. 13S/BLK 13T/BLK 13Y/BLK 13U/BLK 4-69 7400 MM428 (12- -98) -
Page 138: Recovery Tank Full Light Will Not Turn On (Flow Chart)
RECOVERY TANK IS FULL - -POWER OFF SYSTEM OK, OR - -DISCONNECT INSTR. PANEL S- -8 IS SHORTED DISCONNECT S- -8 CHECK CONTINUITY FROM WIRE 28/YEL TO GROUND CONTINUITY OPEN REPLACE INSTR. WIRE 28/YEL IS PANEL GROUNDED 4-70 7400 MM428 (12- -98) -
Page 139: Fuel Gauge (Gas And Diesel)
13D/BLK 1D/RED BATT. 23/GRY START 15/BLU 20/BLU CB- -1 IGNITION SWITCH S- -3 15/BLU 23/GRY ELECTRONIC INSTRUMENT 13L/BLK PANEL ES PUMP SE- -1 42/YEL FUEL SENDER 42A/YEL GAS- -DIESEL 57/GRN 23C/GRY 13S/BLK 13T/BLK 13Y/BLK 13U/BLK 4-71 7400 MM428 (12- -98) -
Page 140: Fuel Gauge (Gas And Diesel) (Flow Chart)
42A/YEL TO GROUND OPEN CONTINUITY REPLACE INSTR. 42/YEL IS SHORTED PANEL TO GROUND IF GAUGE IS INACCURATE REPLACE THE FLOAT GAUGE STILL WAY OFF REPLACE INSTR. PANEL OPEN CHECK CONTINUITY OF 42/YEL REPLACE INSTR. PANEL REPAIR 42/YEL 4-72 7400 MM428 (12- -98) -
Page 141: Fuel Gauge (Lpg) (Schematic)
1D/RED BATT. 23/GRY START 15/BLU 20/BLU CB- -1 IGNITION SWITCH S- -3 15/BLU 23/GRY ELECTRONIC INSTRUMENT ES PUMP PANEL 42/YEL 57/GRN CLOSES BELOW 42B/YEL S- -6 13M/BLK 40 PSI 23C/GRY N.C.H.O. 13S/BLK 13T/BLK 13Y/BLK 13U/BLK 4-73 7400 MM428 (12- -98) -
Page 142: Fuel Gauge (Lpg) (Flow Chart)
WORKING PROPERLY- -- - 42/YEL IS SHORTED REPLACE S- -6 TO GROUND REPLACE INSTR. PANEL - -POWER OFF CHECK CONTINUITY OF 42B/YEL FROM S- -6 TO PANEL (PIN 13) CONTINUITY OPEN REPLACE INSTR. REPAIR 42 /YEL PANEL 4-74 7400 MM428 (12- -98) - Page 143 ......5--75 (FLOW CHART) ....5--46 7400 MM428 (6- -01)
- Page 144 HYDRAULICS 7400 MM428 (12- -98)
- Page 145 HYDRAULICS INTRODUCTION The hydraulic system consists of the propel pump, accessory pump, control valve, drive motors, steering cylinder, and vacuum fan motor. 7400 MM428 (12- -98)
-
Page 146: Hydraulic Fluid Reservoir
The quality and condition of the hydraulic fluid play a very important role in how well the machine operates. Tennant’s hydraulic fluid is specially selected to meet the needs of Tennant machines. Tennant’s hydraulic fluids provide a longer life for the hydraulic components. There are two fluids available for different temperature ranges: Tennant part no. -
Page 147: Hydraulic Hoses
The lower temperature fluid is a thinner fluid for colder temperatures. If a locally-available hydraulic fluid is used, make sure the specifications match Tennant hydraulic fluid specifications. Using substitute fluids can cause premature failure of hydraulic components. European manufactured machines are filled with locally available hydraulic fluids. -
Page 148: To Replace Directional Pedal Centering Spring
Tighten one to the centering spring housing and the other one to the balljoint. Leave 1/16 in. between the two jam nuts. 11. Use the large jam nut to lock the centering spring assembly in place. 7400 MM428 (12- -98) - Page 149 If tire is rotating See TO ADJUST CENTERING SPRING instructions. 16. Once the neutral centering has been set, remove the jack stands, lower the machine, and close the operators seat. 7400 MM428 (12- -98)
-
Page 150: To Replace Directional Control Cable
Pull the directional control cable ball joint out of the pedal arm. 12. Loosen the large jam nut on the directional control cable. Drop the cable out of the slot. Remove the cable from the machine. 7400 MM428 (12- -98) - Page 151 If tire is rotating See TO ADJUST CENTERING SPRING instructions. 24. Once the neutral centering has been set, remove the jack stands, lower the machine, and close the operators seat. 7400 MM428 (12- -98)
-
Page 152: To Adjust Centering Spring
M6 hex screws that hold the two brackets together. Tighten to 11 -- 14 Nm (7 -- 10 ft lb). 8. Lower the operators seat. 9. Remove the jack stands and lower the machine to the ground. 5-10 7400 MM428 (12- -98) -
Page 153: To Replace Propel Pump
Remove the hub and arm from the pump. NOTE: The pump shaft is tapered so the hub may need to be removed with a puller. 10. Remove the two hex screws holding the propel pump to the engine bellhousing. 5-11 7400 MM428 (12- -98) - Page 154 21. Reinstall the detergent tank in the seat support area. 22. Reinstall the battery and reconnect the battery cables. 23. Start the machine. Check the propel pump for leaks and proper operation. 5-12 7400 MM428 (12- -98)
-
Page 155: To Replace Accessory Pump
10. Place grease on the splines of the new pump and install back in the machine. 11. Position the accessory pump back in the propel pump. Make sure the O--ring is in place on the accessory pump. 5-13 7400 MM428 (12- -98) -
Page 156: To Replace Steering Cylinder
1. Turn the steering wheel to the left and open the machine front cover. 2. Mark, remove, and plug the two hydraulic hoses leading to the steering cylinder. NOTE: Observe hydraulic cleanliness requirements when opening hydraulic lines. 5-14 7400 MM428 (12- -98) - Page 157 Tighten the hardware to 18 -- 24 Nm (15 -- 20 ft lb). 13. Start the machine and operate the steering. Check for any leaks and proper operation. Close the front cover. 5-15 7400 MM428 (12- -98)
-
Page 158: To Replace Hydraulic Steering Valve
8 -- 10 Nm (5 -- 7 ft lb). 7. Reconnect hydraulic hoses to steering valve. See schematic in this section. 8. Start the machine and operate the steering. Check for any leaks and proper operation. 5-16 7400 MM428 (12- -98) -
Page 159: To Replace Main Hydraulic Valve
10. Reinstall the mount bracket on the new valve. Reinstall the three M8 hex screws and washers. Tighten to 18 -- 24 Nm (15 -- 20 ft lb). 5-17 7400 MM428 (12- -98) - Page 160 See ELECTRICAL section. 14. Reinstall the LP tank. 15. Reinstall the engine side door. 16. Reconnect the battery cables and close the operators seat. 17. Start the machine and check the main valve for any leaks. 5-18 7400 MM428 (12- -98)
-
Page 161: To Replace Side Brush Hydraulic Valve
NOTE: Observe hydraulic cleanliness requirements when opening hydraulic lines. 9. Position the new valve back in the machine. Reinstall the three M8 hex screws and washers. Tighten to 18 -- 24 Nm (15 -- 20 ft lb). 5-19 7400 MM428 (12- -98) - Page 162 See ELECTRICAL section. 12. Reinstall the LP tank. 13. Reinstall the engine side door. 14. Reconnect the battery cables and close the operators seat. 15. Start the machine and check the side brush valve for any leaks. 5-20 7400 MM428 (12- -98)
-
Page 163: To Replace Solenoid Valve Cartridge
8. Install a new or rebuilt cartridge stem back in the port. Tighten to 47 Nm (35 ft lb). NOTE: Make sure the new cartridge had an O- -ring installed and oiled. 9. Slip the O--ring and coil back over the stem. 5-21 7400 MM428 (12- -98) - Page 164 Electrical section. 12. Reinstall the LP tank. 13. Reinstall the engine side door. 14. Reconnect the battery cables and close the operators seat. 15. Start the machine and check the side brush valve for any leaks. 5-22 7400 MM428 (12- -98)
-
Page 165: To Replace Engine Cooling Fan Hydraulic Motor
NOTE: The notch in the mount bracket is for the motor fitting. 10. Install the square key on the fan motor shaft. NOTE: A small amount of super glue helps keep the key in place when installing the fan hub. 5-23 7400 MM428 (12- -98) - Page 166 15. Reinstall the air cleaner hose and vacuum fan hose. 16. Reconnect the engine cover outer gas spring to lower ball. 17. Start machine and check for leaks. Check the engine fan for proper rotation. (air blows out the back of machine). 5-24 7400 MM428 (12- -98)
-
Page 167: To Replace Main Scrub Brush Hydraulic Motors
10. Use a puller to remove the drive plug from the brush motors. Remove and retain the square key. 11. Remove the steel hydraulic tube running between the brush drive motors. 5-25 7400 MM428 (12- -98) - Page 168 22. Reinstall the brush arm and C--clip to the motor plate if they were removed earlier. 23. Align the two pins on the lift tube with the two holes in the brush arm. 5-26 7400 MM428 (12- -98)
- Page 169 Tighten the three hex screws to 37 -- 48 Nm (26 -- 34 ft lb). 27. Close the LH brush door and operate the machine. Check the main brush motors for proper operation. 5-27 7400 MM428 (12- -98)
-
Page 170: To Replace Scrub Head Assembly Lift Cylinder
11. Reconnect the hydraulic hoses to the new lift cylinder. See schematic in this section. 12. Remove the jack stands and lower the machine. 13. Start the machine and check the scrub head lift cylinder for proper operation. 5-28 7400 MM428 (12- -98) -
Page 171: To Replace Optional Side Brush Hydraulic Motor
13. Reinstall the side brush guard to the machine frame. Tighten the four hex screws to 37 -- 48 Nm (26 -- 34 ft lb). 14. Operate the machine and check the side brush for proper operation. 5-29 7400 MM428 (12- -98) -
Page 172: To Replace Optional Side Brush Lift Cylinder
11. Reinstall the side brush guard to the machine frame. Tighten the four hex screws to 37 -- 48 Nm (26 -- 34 ft lb). 12. Operate the machine and check the side brush lift cylinder for proper operation. 5-30 7400 MM428 (12- -98) -
Page 173: To Replace Optional Side Brush Swing Cylinder
10. Reconnect the hydraulic hoses to the cylinder. See schematic in this section. 11. Operate the machine and check the side brush swing cylinder for proper operation. 5-31 7400 MM428 (12- -98) -
Page 174: To Replace Squeegee Lift Cylinder
10. Reconnect the hydraulic hoses to the squeegee lift cylinder. See schematic in this section. 11. Start the machine and raise the squeegee. Swing the squeegee assembly back in. Check the lift cylinder for proper operation. 5-32 7400 MM428 (12- -98) -
Page 175: To Replace Vacuum Fan Hydraulic Motor
7. Install the new motor on the plate. Reinstall the flat head screws. Tighten to 9 -- 13 Nm (7 -- 10 ft lb). 8. Remove the hydraulic fittings from the old motor and install in the new motor in the same orientation. 5-33 7400 MM428 (12- -98) - Page 176 Reinstall the six hex screws and tighten to 22 -- 27 Nm (16 -- 20 ft lb). NOTE: Tennant part no. 57543 plastic shims must be used for proper fan to housing clearance. Remove these shims after housing hardware has been tightened.
-
Page 177: Hydraulic Schematic
HYDRAULICS F G H I A B C D HYDRAULIC SCHEMATIC 5-35 7400 MM428 (6- -01) - Page 178 HYDRAULICS A B C D G H I S- - 14 HYDRAULIC SCHEMATIC 5-36 7400 MM428 (6- -01)
-
Page 179: Hydraulic Hose Group
HYDRAULICS Front Reservoir Steering Valve Vac Fan Filter Wheel Drive Motor Control Valve Flow Sensor Switch Scrub Head Lift Cylinder Cooling Motor Scrub Brush Motors Rear SqueegeeLift Cylinder Pump Cooler HYDRAULIC HOSE GROUP 5-37 7400 MM428 (6- -01) -
Page 180: Hydraulic Hose Group/Side Brush Option
HYDRAULICS SIDE BRUSH MAIN CONTROL VALVE VALVE VACUUM FAN MOTOR SIDE BRUSH MOTOR SIDE BRUSH LIFT CYL SIDE BRUSH SWING CYL HYDRAULIC HOSE GROUP / SIDE BRUSH OPTION 5-38 7400 MM428 (6- -01) -
Page 181: Troubleshooting
HYDRAULICS TROUBLESHOOTING The following troubleshooting section is organized with the section of the hydraulic schematic pertaining to that particular problem first, followed by the flow chart. 5-39 7400 MM428 (12- -98) -
Page 182: Engine Fan Circuit (Schematic)
HYDRAULICS ENGINE FAN CIRCUIT (SCHEMATIC) 400 PSI 3.7GPM ENGINE 1160 PRESSURE SUCTION RETURN CASE DRAIN PRESSURE READINGS BASED ON 150 F 2400 STRAINER 3 PSI 5-40 7400 MM428 (12- -98) -
Page 183: Engine Fan Slow Or Doesn't Run (Flow Chart)
ENGINE FAN SLOW OR DOESN’T RUN (FLOW CHART) MOTOR INLET FLOW OK? REPAIR OR PLUMBING OK? REPLACE MOTOR REPAIR OR STEERING INLET REPLACE PLUMBING PRESSURE OK? REPAIR OR PUMP OUTLET REPLACE STEERING FLOW OK? CONTROL REPAIR OR REPLACE PUMP 5-41 7400 MM428 (12- -98) -
Page 184: Engine Fan Motor Shaft Seal Leaks (Flow Chart)
HYDRAULICS ENGINE FAN MOTOR SHAFT SEAL LEAKS (FLOW CHART) MOTOR CASE PRESSURE OK? < 25 PSI REPAIR OR REPAIR OR REPLACE CASE DRAIN REPLACE MOTOR PLUMBING & MOTOR 5-42 7400 MM428 (12- -98) - Page 185 HYDRAULICS 5-43 7400 MM428 (12- -98)
-
Page 186: Main Brush On Circuit (Schematic)
MAIN 2500 BRUSHES LEVEL #1 400 PSI LEVEL #1 800 PSI LEVEL #2 550 PSI LEVEL #2 1000 PSI LEVEL #3 700 PSI LEVEL #3 1300 PSI 8.3 GPM 8.4 GPM STRAINER FILTER 3 PSI 5-44 7400 MM428 (12- -98) -
Page 187: Main Brushes Do Not Turn On (Flow Chart)
REPLACE SV1 FLOW OK? STEM CARTRIDGE REPAIR OR PLUMBING OK? REPLACE MOTOR PUMP OUTLET REPAIR OR FLOW OK? REPLACE PLUMBING REPAIR OR RV1 RELIEF REPLACE CARTRIDGE OK? PUMP 2500 PSI REPAIR OR REPLACE RV1 RELIEF CARTRIDGE 5-45 7400 MM428 (12- -98) -
Page 188: Main Brushes Do Not Turn Off (Flow Chart)
HYDRAULICS MAIN BRUSHES DO NOT TURN OFF (FLOW CHART) SV1 STEM MAGNETIZED? SV1 STEM CHECK CARTRIDGE ELECTRICAL SYSTEM SHIFTING OK? REPAIR OR REPLACE SV1 STEM CARTRIDGE 5-46 7400 MM428 (12- -98) - Page 189 HYDRAULICS 5-47 7400 MM428 (12- -98)
- Page 190 SV04 S.BR. SV06 LEVEL #1 350 PSI LEVEL #2 500 PSI SV02 LEVEL #3 650 PSI 2500 SV01 MAIN 2500 BRUSHES PRESSURE SUCTION RETURN CASE DRAIN PRESSURE READINGS BASED ON 150 F STRAINER 3 PSI 5-48 7400 MM428 (12- -98)
-
Page 191: Main Brushes Do Not Lower (Flow Chart)
SV7 STEM REPAIR OR REPLACE CARTRIDGE SV5 STEM SHIFTING OK? CARTRIDGE REPAIR OR REPLACE G4 PORT PR1 STEM PRESSURE OK? CARTRIDGE 460 - - 730 PSI REPAIR OR REPLACE SV7 STEM REPLACE CARTRIDGE SV4 STEM CARTRIDGE 5-49 7400 MM428 (12- -98) -
Page 192: Main Brush Lift Circuit (Schematic)
1.0 GPM WHILE MOVING (2.0 - - 3.0 SEC) SV07 MAIN BRUSH LIFT SV05 SV04 S.BR. SV06 SV02 2500 SV01 MAIN 2500 BRUSHES PRESSURE SUCTION RETURN CASE DRAIN PRESSURE READINGS BASED ON 150 F STRAINER 3 PSI 5-50 7400 MM428 (12- -98) -
Page 193: Main Brushes Do Not Raise (Flow Chart)
LIFT REPAIR OR CYLINDER REPLACE SEALS OK? PLUMBING SV5 STEM ORIFICE CARTRIDGE PLUGGED? SHIFTING OK? REPLACE LIFT REPAIR OR CYLINDER REPLACE OR1 ORIFICE REPAIR OR REPAIR OR REPLACE PR1 REPLACE SV5 STEM CARTRIDGE STEM CARTRIDGE 5-51 7400 MM428 (12- -98) -
Page 194: Main Brushes Do Not Stay Up (Flow Chart)
MAIN BRUSHES DO NOT STAY UP (FLOW CHART) SV7 STEM CARTRIDGE MAGNETIZED? SV7 STEM CHECK CARTRIDGE ELECTRICAL SHIFTING & SEAT OK? SYSTEM REPAIR OR PLUMBING REPLACE SV7 STEM CARTRIDGE REPAIR OR LIFT REPLACE CYLINDER PLUMBING SEALS OK? REPLACE LIFT CYLINDER 5-52 7400 MM428 (12- -98) - Page 195 HYDRAULICS 5-53 7400 MM428 (12- -98)
-
Page 196: Scrub Fan Circuit (Schematic)
SV03 SV07 1700 PSI SV05 6.3 GPM 11,000 +/- - 1000 SV04 S.BR. VACUUM FAN SV06 SV02 2500 SV01 2500 PRESSURE SUCTION RETURN CASE DRAIN PRESSURE READINGS BASED ON 150 F STRAINER FILTER 3 PSI 5-54 7400 MM428 (12- -98) -
Page 197: Scrub Fan Does Not Turn On (Flow Chart)
REPLACE SV2 FLOW OK? STEM CARTRIDGE REPAIR OR PLUMBING OK? REPLACE MOTOR PUMP OUTLET REPAIR OR FLOW OK? REPLACE PLUMBING REPAIR OR RV2 RELIEF REPLACE CARTRIDGE OK? PUMP 2500 PSI REPAIR OR REPLACE RV2 RELIEF CARTRIDGE 5-55 7400 MM428 (12- -98) -
Page 198: Scrub Fan Does Not Turn Off (Flow Chart)
HYDRAULICS SCRUB FAN DOES NOT TURN OFF (FLOW CHART) ROTOR SPEED < 200 RPM SYSTEM SV2 STEM NORMAL MAGNETIZED? SV2 STEM CHECK CARTRIDGE ELECTRICAL SYSTEM SHIFTING OK? REPAIR OR REPLACE SV2 STEM CARTRIDGE 5-56 7400 MM428 (12- -98) -
Page 199: Scrub Fan Motor Shaft Seal Leaks (Flow Chart)
HYDRAULICS SCRUB FAN MOTOR SHAFT SEAL LEAKS (FLOW CHART) MOTOR CASE PRESSURE OK? < 25 PSI REPAIR OR REPAIR OR REPLACE CASE DRAIN REPLACE MOTOR PLUMBING & MOTOR 5-57 7400 MM428 (12- -98) -
Page 200: Main Brush On Circuit (Schematic)
MAIN 2500 BRUSHES LEVEL #1 400 PSI LEVEL #1 800 PSI LEVEL #2 550 PSI LEVEL #2 1000 PSI LEVEL #3 700 PSI LEVEL #3 1300 PSI 8.3 GPM 8.4 GPM STRAINER FILTER 3 PSI 5-58 7400 MM428 (12- -98) -
Page 201: Side Brush Does Not Turn On (Flow Chart)
REPLACE SV6 FLOW OK? STEM CARTRIDGE REPAIR OR PLUMBING OK? REPLACE MOTOR PUMP OUTLET REPAIR OR FLOW OK? REPLACE PLUMBING REPAIR OR RV2 RELIEF REPLACE CARTRIDGE OK? PUMP 2500 PSI REPAIR OR REPLACE RV2 RELIEF CARTRIDGE 5-59 7400 MM428 (12- -98) -
Page 202: Side Brush Does Not Turn Off (Flow Chart)
HYDRAULICS SIDE BRUSH DOES NOT TURN OFF (FLOW CHART) BRUSH SPEED < 10 RPM SYSTEM SV6 STEM NORMAL MAGNETIZED? SV6 STEM CHECK CARTRIDGE ELECTRICAL SYSTEM SHIFTING OK? REPAIR OR REPLACE SV6 STEM CARTRIDGE 5-60 7400 MM428 (12- -98) - Page 203 HYDRAULICS 5-61 7400 MM428 (12- -98)
-
Page 204: Side Brush Extend Circuit (Schematic)
ON 150 F SV04 S.BR. SV06 SV02 2500 SV01 2500 SIDE BRUSH OPTION P5 G6 SV08 SV10 SIDE BRUSH 100- - LIFT SV11 SV09 SIDE BRUSH EXTEND EXTEND 300 PSI 1.0 GPM WHILE MOVING STRAINER 3 PSI 5-62 7400 MM428 (12- -98) -
Page 205: Side Brush Does Not Go Out (Flow Chart)
PRESSURE OK? 300 PSI CYLINDER REPAIR OR LINKAGE & SEALS REPLACE PLUMBING REPAIR OR REPLACE SV9 STEM PR2 PRESSURE CARTRIDGE CONTROL CARTRIDGE SHIFTING OK? REPAIR CYLINDER LINKAGE REPAIR OR REPLACE OR SEALS SV9 STEM CARTRIDGE 5-63 7400 MM428 (12- -98) -
Page 206: Side Brush Does Not Go In (Flow Chart)
REPAIR CYLINDER REPAIR OR LINKAGE REPLACE OR2 OR SEALS ORIFICE SC1 SHUTTLE REPAIR OR CHECK CARTRIDGE REPLACE SV9 SHIFTING OK? STEM CARTRIDGE REPAIR OR REPLACE REPAIR OR REPLACE SHUTTLE CHECK PR2 PRESSURE CARTRIDGE CONTROL CARTRIDGE 5-64 7400 MM428 (12- -98) - Page 207 HYDRAULICS 5-65 7400 MM428 (12- -98)
-
Page 208: Side Brush Lower Circuit (Schematic)
2500 LEVEL #2 270 PSI LEVEL #3 320 PSI 1.0 GPM WHILE MOVING SIDE BRUSH OPTION P5 G6 SV08 SV10 SIDE BRUSH 100- - LIFT SV11 DOWN SV09 SIDE BRUSH RETRACT EXTEND STRAINER 3 PSI 5-66 7400 MM428 (12- -98) -
Page 209: Side Brush Does Not Stay Up (Flow Chart)
SIDE BRUSH DOES NOT STAY UP (FLOW CHART) SV11 STEM CARTRIDGE MAGNETIZED? SV11 STEM CHECK CARTRIDGE ELECTRICAL SHIFTING & SEAT OK? SYSTEM REPAIR OR PLUMBING REPLACE SV11 STEM CARTRIDGE REPAIR OR LIFT REPLACE CYLINDER PLUMBING SEALS OK? REPLACE LIFT CYLINDER 5-67 7400 MM428 (12- -98) -
Page 210: Side Brush Does Not Raise (Flow Chart)
REPAIR LINKAGE REPAIR OR OR REPLACE REPLACE OR2 LIFT CYLINDER ORIFICE SC1 SHUTTLE REPAIR OR CHECK CARTRIDGE REPLACE SV8 SHIFTING OK? STEM CARTRIDGE REPAIR OR REPLACE REPAIR OR REPLACE SHUTTLE CHECK PR2 PRESSURE CARTRIDGE CONTROL CARTRIDGE 5-68 7400 MM428 (12- -98) -
Page 211: Side Brush Does Not Lower (Flow Chart)
SV11 STEM REPAIR OR REPLACE CARTRIDGE SV8 STEM SHIFTING OK? CARTRIDGE REPAIR OR REPLACE G6 PORT PR2 PRESSURE PRESSURE OK? CONTROL CARTRIDGE > 200 PSI REPAIR OR REPLACE SV11 STEM REPLACE CARTRIDGE SV10 STEM CARTRIDGE 5-69 7400 MM428 (12- -98) -
Page 212: Squeegee Lift Circuit (Schematic)
(SCHEMATIC) 350 PSI 1.0 GPM WHILE MOVING P3 DR1 SV03 SQUEEGEE LIFT SV07 SV05 SV04 S.BR. SV06 SV02 PRESSURE SUCTION 2500 SV01 RETURN CASE DRAIN 2500 PRESSURE READINGS BASED ON 150 F STRAINER 3 PSI 5-70 7400 MM428 (12- -98) -
Page 213: Squeegee Does Not Lower (Flow Chart)
ELECTRICAL SYSTEM SHIFTING OK? REPAIR OR PC1 PILOT REPLACE SV3 CHECK CARTRIDGE STEM CARTRIDGE SHIFTING OK? REPAIR OR REPLACE PC1 PILOT ORIFICE CHECK CARTRIDGE PLUGGED? LIFT CLEAN OR CYLINDER SEALS REPLACE ORIFICE REPLACE LIFT CYLINDER 5-71 7400 MM428 (12- -98) -
Page 214: Squeegee Does Not Raise (Flow Chart)
ELECTRICAL SYSTEM SHIFTING OK? REPAIR OR PC1 PILOT REPLACE SV3 CHECK CARTRIDGE STEM CARTRIDGE SHIFTING OK? REPAIR OR REPLACE PC1 PILOT ORIFICE CHECK CARTRIDGE PLUGGED? LIFT CLEAN OR CYLINDER SEALS REPLACE ORIFICE REPLACE LIFT CYLINDER 5-72 7400 MM428 (12- -98) -
Page 215: Squeegee Does Not Stay Up (Flow Chart)
HYDRAULICS SQUEEGEE DOES NOT STAY UP (FLOW CHART) PC1 PILOT CHECK CARTRIDGE SHIFTING & SEAT OK? REPAIR OR PLUMBING REPLACE PC1 PILOT CHECK CARTRIDGE REPAIR OR LIFT REPLACE CYLINDER PLUMBING SEALS OK? REPLACE LIFT CYLINDER 5-73 7400 MM428 (12- -98) -
Page 216: Steering Circuit (Schematic)
850 PSI (TURNING) 1500 PSI (HELD AT STOP ON STEERING WHEEL) 3.7 GPM PRESSURE SUCTION RETURN CASE DRAIN PRESSURE READINGS BASED ON 150 F 4000 PROPEL SYSTEM S- - 15 2400 4000 STRAINER 3 PSI 5-74 7400 MM428 (12- -98) - Page 217 No. 7-623 Eaton ® July,1995 Medium Duty Piston Pump Repair Information Model 70142 / 70144, 20.3 cm /r [1.24 in /r] Displacement and 70145, 23.6 cm /r [1.44 in /r] Displacement Variable Displacement Piston Pump 01 02 design code Valve Plate with...
- Page 218 Model 70142 / 70144 and 70145 Introduction Table of Contents Introduction ....................... Identification ...................... Required Tools ....................Exploded View Drawing ..................4 & 5 Parts List ......................6 & 7 Disassembly and Inspection ................Reassembly ....................... Appendix A: ....................... Appendix B: ....................... Fault-Logic Trouble Shooting ................
-
Page 219: Required Tools
Model 70142 / 70144 and 70145 Identification and Tools Required Identification Numbers Stamped on each unit. B - Rotation, A - Product Number Discription R = Righthand, 70142 = Piston Pump with Gerotor (20.3 cm /r [1.24 in /r]) L = Lefthand 70144 = Piston Pump without Gerotor (20.3 cm... - Page 220 Model 70142 / 70144 and 70145 Parts Drawing - Figure 1-1 51-1 Date Code and Assembly Number Location 50-1 Left Side Right Side Shaft assembly for single pump or front pump of tandem. Shaft assembly for rear pump of tandem.
- Page 221 Model 70142 / 70144 and 70145 49-1 49-2 K2-4 49-3 49-4 49-5 K2-3 K1-1 19-1 (K2-2) K2-3 design code K2-2 (K2-1) 19-1 K4-3 (K3-3) K4-2 (K4-4) (K4-1) design code Groove (K3-2) 34-1 (K3-1) 49-1 49-2 49-3 49-4 49-5 19-1 design code 19-1...
-
Page 222: Parts List
Model 70142 / 70144 and 70145 Parts List Item Qty. Description Drive Shaft Backplate Assembly Housing Assembly Rotating Kit Assembly Camplate Washer Retaining Ring Retaining Ring Thrust Bearing Bearing Race + 11 Shaft Seal, Drive + 12 Housing Gasket Needle Bearing + 14 O-ring, 3.175 mm Dia. - Page 223 Model 70142 / 70144 and 70145 Parts List Item Qty. Description Dump Valve sub-assembly + 49-1 Retaining Ring 49-2 Separator Plug 49-3 Separator + 49-4 O-ring, 1.59 mm Dia. x 9.53 mm I.D. [.0625 in. Dia. x .375 in. I.D.] + 49-5 O-ring, 2.46 mm Dia.
- Page 224 Model 70142 / 70144 and 70145 Disassembly Disassembly The following instructions apply to a variable displacement Remove housing gasket from housing or backplate. piston pump with or without a gerotor charge pump. A tandem To remove rotating kit assembly from housing, first pump assembly should be separated into individual pumps remove pump from vise holding the rotating kit assembly in before disassembly.
-
Page 225: Reassembly
Model 70142 / 70144 and 70145 Reassembly Reassembly All parts should be cleaned and critical moving parts 13 Apply a small amount of petroleum jelly to the steel side of lubricated before reassembly. valve plate to hold in place for installation. Aligning the index pin, place the valve plate in position onto the backplate, with If necessary, press new bearing in housing to dimension steel side against backplate. - Page 226 Model 70142 and 70145 Appendix A - Charge Pump Adapter Assembly Configuration for 13.8 to 17.2 bar [200 to 250 lbf/in ] or 36-4a 17.2 to 20.7 bar [250 to 300 lbf/in Charge Relief Valve 36-3a or 3b 36-2a Pressure Check Port or Remote Charge Port 36-4 36-3...
- Page 227 Model 70142 / 70144 and 70145 Appendix B - Rotating Kit Assembly Item Qty. Description Piston assemblies Spider Spider Pivot Retainer Piston Block Pins Washer Spring Retaining Ring The following parts are required to disassemble the piston block: 2 ea. 5/16 in.
-
Page 228: Fault-Logic Trouble Shooting
Model 70142 / 70144 and 70145 Fault - Logic Trouble Shooting Explanatory Diagram This fault - logic trouble shooting guide is a diagnostic aid in Symptom: locating transmission problems. Action Match the transmission symptoms with the problem statements Step and follow the action steps shown in the box diagrams. This will give expedient aid in correcting minor problems eliminating Comment Inspect... - Page 229 Model 70142 / 70144 and 70145 Fault - Logic Trouble Shooting Symptom: Neutral Difficult or Impossible to Find Inspect Inspect External Control Servo Control Linkage (If used) Defective Defective Repair Repair Replace Replace Symptom: System Operating Hot Inspect Heat Check Inspect Check Exchanger...
- Page 230 Model 70142 / 70144 and 70145 Fault - Logic Trouble Shooting Symptom: Operates in One Diection Only Inspect Inspect Inspect External Control Servo Control System Relief Linkage (If used) Valves Defective Defective Defective Repair Repair Repair Replace Replace Replace Symptom: System Response Sluggish Check Inspect Inspect...
- Page 231 Model 70142 / 70144 and 70145 Fault - Logic Trouble Shooting Symptom: System Will Not Operate In Either Direction Inspect Check Check External Check Dump Valve Oil Level in Control Charge Reservoir Linkage (If used) Pressure Below Level Defective Defective Fill to Repair Repair...
- Page 232 Model 70142 / 70144 and 70145 Fault - Logic Trouble Shooting Diagram Action Step Comments Inspect External Control Linkage for: 11 Inspect Charge Relief Valve for: a. misadjusted or disconnected a. improper charge relief pressure setting * b. binding, bent, or broken b.
-
Page 233: Start-Up Procedure
Model 70142 / 70144 and 70145 Start-up Procedure When initially starting a new or a rebuilt transmission system, it After the system starts to show signs of fill, slowly move is extremely important that the start-up procedure be followed. pump camplate to a slight cam angle. Continue to operate It prevents the chance of damaging the unit which might occur system slowly with no load on motors until system responds if the system was not properly purged of air before start-up. - Page 234 Model 70142 / 70144 and 70145 Notes...
- Page 235 Model 70142 / 70144 and 70145 Notes...
- Page 236 Order parts from number 6-632 Parts Information booklet. Each order must include the following information. 1. Product and/or Part Number 2. Serial Code Number 3. Part Name 4. Quantity Eaton Corporation Eaton Ltd. Hydraulics Division Hydraulics Division 15151 Hwy. 5 Glenrothes, Fife Eden Prairie, MN 55344 Scotland, KY7 4NW...
- Page 237 Char-Lynn ® No. 7-118 May, 1999 Disc Valve Motor Repair Information 4000 Series ® Geroler Motors -004 -006 Std., Whl. and Brgl. Std. and Whl.
- Page 238 4000 Series Char-Lynn Motors Shuttle (Two Way) Balance Check Plug Assembly Spring Plug Ring Valve Assembly Plug Poppet Outer Valve Assembly Spring Spring Plug Assembly Face Seal Spring Seal Valve Sleeve, Dash Pot Plate Plug Ball Piston Shuttle Seal Sleeve, Dash Pot Housing, Bearing Drive Plug...
- Page 239 4000 Series Char-Lynn Motors Tools Wheel motor and bearingless motor repair information on page 9 and 10. Shuttle valve and seal guard repair information on page 10. Seal guard reference on page 10. Tools required for disassembly and reassembly — Torque wrench (68 Nm [600 lb-in] capacity) —...
- Page 240 4000 Series Char-Lynn Motors Disassembly Cleanliness is extremely important when repairing a hydraulic motor. 3 Lift valve housing straight up. If done carefully, the springs and Work in a clean area. Before disconnecting the lines, clean port area of balance ring subassembly will remain on valve for easy removal. motor thoroughly.
- Page 241 4000 Series Char-Lynn Motors Disassembly Valve Drive Valve Plate Seal Seal Figure 7 Figure 5 16 Use a stud remover or vise grips to remove studs (earlier models only). Clamp bearing housing in vise as shown in Figure 7. Loosen 8 9 Remove valve plate.
- Page 242 4000 Series Char-Lynn Motors Disassembly 18 Remove shaft and bearing assembly. You may need a press to Shaft Face Seal Shaft and remove shaft and bearing assembly (see Figure 10). Bearing Assembly 19 Remove shaft face seal from bore of bearing housing (see Figure 10).
- Page 243 4000 Series Char-Lynn Motors Reassembly 23 Apply petroleum jelly to 88,6 [3.49] ID seal. Install seal in seal 29 Pour a small amount of light oil inside the output shaft. groove of bearing housing (see Figure 13). 30 Apply a light film of petroleum jelly on 88,6 mm [3.49 inch] I.D. 24 Use a small press, if available, to install dust seal in retainer.
- Page 244 4000 Series Char-Lynn Motors Reassembly 41 Apply a light film of petroleum jelly on 82,3 mm [3.24 inch] I.D. 36 Apply a light film of petroleum jelly on 88,6 mm [3.49 inch] I.D. seal. Install seal in outside seal groove of valve housing. seal.
- Page 245 4000 Series Char-Lynn Motors Reassembly 44 Insert your finger through port of housing. Apply pressure to side 45 Install and finger tighten 2 bolts (or studs for earlier models) of balance ring assembly. Hold ring in position until valve housing is opposite alignment studs.
- Page 246 4000 Series Char-Lynn Motors Reassembly Important: This motor requires Loctite in threaded holes of mounting flange. Follow these procedures: Attention: Adequate Loctite penetration and sealing depend highly on cleanliness Do not use and dryness of threads. Use a non-petroleum base solvent to clean more than excess oil from threads of flange after disassembly.
- Page 247 4000 Series Char-Lynn Motors How to Order Replacement Parts Date Code Char-Lynn ® 00 0 Each Order Must Include the Following: Product number 1. Product Number 4. Part Number 2. Date Code 5. Quantity of Parts Week of Last 3. Part Name Year 01 Number Eaton Corp.
- Page 248 Disc Valve Motors 4000 Series Motors Eaton Corporation Eaton Ltd. Eaton B.V. Sumitomo Eaton Hydraulic Co. Hydraulics Division Hydraulics Division Boeing Avenue 11 8 Temasek Blvd. 15151 Hwy. 5 Glenrothes, Fife 1119 PC Schiphol-Rijk 42-01 Suntec Tower Three Eden Prairie, MN 55344 Scotland, KY7 4NW The Netherlands Singapore 03988...
- Page 257 Char-Lynn ® No. 7-310 January, 1995 Power Steering Repair Information 2 Series Steering Control Unit...
- Page 258 Power Steering 2 Series Steering Control Units Thrust Bearing O-ring Quad Seal Housing Seal Bearing Race (2) Dust Seal Check Ball O-ring Plug Manual Steering Relief Valve O-ring Spacer Plug Drive Centerin O-ring Springs Wear Plate Sleeve Spool Screw Gerotor Spring Retaining Ring...
- Page 259 Power Steering 2 Series Steering Control Units Screw Disassembly Cleanliness is extremely important when repairing hydraulic Seal Steering Control Units (SCU). Work in a clean area. Before Ring disconnecting the hydraulic lines, clean the port area of the Gerotor SCU. Before disassembly, drain the oil, then plug the ports and thoroughly clean the exterior of the SCU.
- Page 260 Power Steering 2 Series Steering Control Units Centering Springs and Spacers Sleeve Spring Retaining Ring Spool Figure 3 7 Remove the pin that holds the spool and sleeve together 9 Remove the retaining ring and springs. (see Figure 3). Caution: The centering springs are under tension. Remove 8 Carefully slide the spool out of the sleeve.
- Page 261 Power Steering 2 Series Steering Control Units 20 Lubricate and install a new o-ring seal in the groove in Thrust Bearing the housing. Dust Seal and Race (2) 21 Install the wear plate and align the holes in the wear plate with threaded holes in the housing.
- Page 262 Power Steering 2 Series Steering Control Units Product Numbers 2 Series (Standard — 69 Bar [1000 PSI]) Relief Valve Displacement cm /r [in /r] and Product Number System Ports Setting 31 [1.9] 39 [2.4] 51 [3.1] 63 [3.8] 74 [4.5] 100 [6.1] Bar [PSI] None...
- Page 263 Power Steering 2 Series Steering Control Units...
- Page 264 Power Steering 2 Series Steering Control Units How to Order Replacement Parts Char-Lynn Date Code ® Each Order Must Include the Following: 00 00 Product number 000 0000 000 1. Product Number 4. Part Number Week of Last Number(s) of Year Year Eaton Corp.
- Page 265 ... . . 6-35 TO INSTALL ENGINE ....6-38 TO PURGE AIR FROM RADIATOR 6-40 7400 MM428 (3- -02)
- Page 266 ENGINE- -GAS/LP 7400 MM428 (12- -98)
-
Page 267: Introduction
ENGINE- -GAS/LP INTRODUCTION This section includes repair information on the engine and related systems, such as fuel, electrical, and drive belts. 7400 MM428 (12- -98) -
Page 268: Lubrication
FOR SAFETY: When Servicing Machine, Wear Eye And Ear Protection When Using Pressurized Air Or Water. Flush the radiator and the cooling system every 800 hours of operation, using a dependable cleaning compound. 7400 MM428 (12- -98) -
Page 269: Engine Fan Belt
Service the air filter element only when the air filter indicator shows restriction in the air intake system. Do not remove the air filter element from the housing unless it is restricting air flow. 7400 MM428 (12- -98) -
Page 270: To Replace Air Filter Element
11. Install the dust cap with the arrows pointing up. Tighten the clamp ring to hold it in place. Check all intake hose connections for leaks or abrasions. 12. Reset the air filter restriction indicator. 13. Close the access doors. 7400 MM428 (12- -98) -
Page 271: Fuel System -- Gasoline
Increase the engine speed by turning the screw clockwise. Decrease the engine speed by turning the screw counter--clockwise. Idle speed is 800 to 900 rpm for gasoline, and 900 to 1000 for LPG, with no power to the electronic governor. 7400 MM428 (2- -94) -
Page 272: Fuel System -- Lpg
Never operate an LPG powered machine if the LPG fuel system is leaking, or if any component in the fuel system is malfunctioning. Operating the machine under either of these conditions may cause a fire or explosion. 7400 MM428 (12- -98) - Page 273 Check after engine reaches operating temperature. Check routings of all LPG hoses. Keep them away from sharp edges, exhaust manifolds, or other hot surfaces. Check for signs of abrasion or deterioration. Replace worn or damaged hoses. 7400 MM428 (12- -98)
-
Page 274: Lp Fuel Tanks
The valve must be closed except when in service. Tank Service Valve Coupling -- Check for proper functioning, thread condition, and damaged or missing washers or o-rings. 6-10 7400 MM428 (12- -98) - Page 275 Store the tanks in a way that if the safety relief valves do function, they will relieve vapor and not liquid. 6-11 7400 MM428 (12- -98)
-
Page 276: To Change An Lpg Fuel Tank
8. Store the tank in a designated, safe area. 9. Select a filled LPG fuel tank and inspect it for damage or leaks. NOTE: Make sure the LPG fuel tank matches the fuel system (liquid tank with liquid system). 6-12 7400 MM428 (12- -98) - Page 277 13. Open the tank service valve slowly and check for leaks. Close the service valve immediately if an LPG leak is found, and tell the appropriate personnel. 14. If no leaks are found, the engine is ready to start. 6-13 7400 MM428 (12- -98)
-
Page 278: Fuel Filter Lock
OIL PRESSURE SWITCH The engine oil pressure switch requires no regular maintenance. Never bypass the oil pressure switch. The switch is a safety feature that prevents LPG fuel from flowing when the engine is not operating properly. 6-14 7400 MM428 (12- -98) -
Page 279: Lpg Fuel Troubleshooting
50 hours of operation and every 400 hours there after. See Ford VSG 411/413 Engine Service Manual. CRANKCASE VENTILATION SYSTEM Clean the crankcase ventilation hoses, tubes, and fittings and replace the PCV valve every 400 hours of operation. 6-15 7400 MM428 (12- -98) -
Page 280: Governor Troubleshooting
They are the Yellow Wire #71 and the Yellow Wire #72. To test this, use the governor test harness (TENNANT Part No. 66137). Once the harness is in place, use a tach/dwell meter to test for the proper RPM’s and a flat ignition signal. - Page 281 RPM’s depending on where you have the speed control switch set After you have verified that the ignition system and the fuel system are not at fault, go to the next step. 6-17 7400 MM428 (12- -98)
- Page 282 High = + 9VDC Instrument Low = 0VDC Panel (85/BLU) (H) Speed ELECTRONIC GOVERNOR WIRING PICTORIAL TO: HARNESS TO: GOVERNOR TEST PLUG NOTE: The wire colors of the test harness do not necessarily match the machine harness. 6-18 7400 MM428 (12- -98)
- Page 283 BEFORE REPLACING IT. 7. Throttle Control Switch Check If the engine doesn’t respond to the throttle switch control: a. With the engine running, disconnect Wire 86, purple wire, at the actuator. 6-19 7400 MM428 (12- -98)
- Page 284 NOTE: when you are testing if you should be in the DC or AC scale on your multimeter. You will also need your tach/dwell for the RPM checks. The readings are taken with either a Fluke or Beckman digital multimeter: 6-20 7400 MM428 (12- -98)
- Page 285 Pin C -- Check ignition system and fuel systems. Pin D -- Check ignition system and fuel systems. Pin E -- Possible control board. Pin F -- Possible control board. Pin G -- Possible switch. Pin F -- Possible switch. 6-21 7400 MM428 (12- -98)
- Page 286 Turn the screw approximately 2_ at a time and wait for 30 seconds to verify the change. Be careful. Only a slight change is necessary, and the “pot” can be broken if too much force is used. 6-22 7400 MM428 (3- -02)
- Page 287 After the adjustments are made and verified, reassemble the back plate and reseat the plate with a bead of RTV to keep dust and moisture out of the box. FOR DIGITAL CONTROLLERS: See TO ADJUST GOVERNOR section of this manual. 6-23 7400 MM428 (3- -02)
-
Page 288: Governor
Repeat until surges do not occur. Replace hole plug if removed for adjustment. 6. For DIGITAL CONTROLLER: Follow the instructions on the DIGITAL CONTROLLER SET- -UP diagram. 7. Remove the jack stands and lower the machine. 6-24 7400 MM428 (3- -02) -
Page 289: Digital Controller Set--Up
ENGINE- -GAS/LP DIGITAL CONTROLLER SET-- UP 6-25 7400 MM428 (3- -02) -
Page 290: Ignition System
4. Clean the spark plug seat in the cylinder head. 5. Use a new seat gasket and screw the plug in by hand. 6. Tighten the spark plugs with a socket wrench of the correct size. 6-26 7400 MM428 (12- -98) -
Page 291: Ford Distributorless Ignition System
UESC. Minimum --39_ C 38_ F Maximum 112_ C 232_ F When the engine is starting, at 250 RPM or less, the timing is set at 10_ before top dead center (BTDC). 6-27 7400 MM428 (3- -02) -
Page 292: Run Mode
Using a vacuum pump, apply 15” Hg to the UESC and vacuum inlet. The diaphragm should hold the pressure. If it fails, replace UESC unit. To test the sensors and wiring harness, follow the direction on the next three pages. 6-28 7400 MM428 (12- -98) -
Page 293: Failure Mode Of Dis" Ignition Harness
The only obvious damage will probably occur to the propelling pump, as the fan is rated for operation to 10,000 rpm. If the acc. are on when the lead becomes intermittent, the engine will not develop enough power to overspeed excessively. 6-29 7400 MM428 (12- -98) -
Page 294: Ford Dis Ignition
71 Yellow 0.5 --- 1.0 (Phase 850A Distributorless Ohms Ignition Coil 852A (Phase 72 Gray Remove the coil connector and probe 12.6 the center female terminal Volts + D.C. --- To Pin #9 FORD DIS IGNITION 6-30 7400 MM428 (12- -98) -
Page 295: Engine Coolant Sensor
--20 271,000 281,000 --10 158,000 168,000 95,000 105,000 58,750 68,750 37,300 47,300 24,270 34,270 16,150 26,150 10,970 20,970 7,600 17,600 5,360 15,360 3,840 13,840 2,800 12,800 2,070 12,070 1,550 11,550 1,180 11,180 10,930 10,701 10,550 6-31 7400 MM428 (12- -98) -
Page 296: Alternator
9. Install the new alternator back in the machine. Reinstall the lower hex screw and nyloc nut. Leave loose for now. 10. Reinstall the hex screw in the upper arm and the top of the alternator. Leave loose for now. 6-32 7400 MM428 (12- -98) - Page 297 14. Reinstall the plastic belt cover to the front of the engine. Hand tighten the hex screws tight. 15. Reconnect the battery cables, close the operators seat and start the machine. 16. Check the new alternator for proper operation. 6-33 7400 MM428 (12- -98)
-
Page 298: To Replace Engine Starter
The nyloc nut goes on the bottom hex screw. Tighten to 31 -- 40 Nm (27 -- 35 ft lb). 11. Reconnect the battery cable and electrical wires to the starter. See schematic in the ELECTRICAL section. 6-34 7400 MM428 (12- -98) -
Page 299: To Remove Engine
NOTE: The main suction line to the accessory pump is held, by plastic ties, in a bundle of hoses near the main valve. Remove the plastic ties to gain slack in the suction line to ease pump removal. 6-35 7400 MM428 (12- -98) - Page 300 14. Remove the radiator hoses where they connect to the engine. 15. Drain the engine oil. NOTE: Disconnect the engine oil drain hose from the oil pan before lifting the engine completely out of the machine. 6-36 7400 MM428 (12- -98)
- Page 301 Put a slight amount of tension on the chain. 23. Remove the three M12 hex screws and nyloc nuts holding the motor mounts to the rubber isolators on the machine frame. 24. Engine can now be carefully lifted out. 6-37 7400 MM428 (12- -98)
-
Page 302: To Install Engine
9. Reinstall the detergent tank in the seat support area. 10. Reinstall the battery tray and battery. 11. Reinstall the exhaust pipe back on the manifold. Reinstall the muffler clamp and tighten tight. 6-38 7400 MM428 (12- -98) - Page 303 Block machine up with jack stands 24. Start the machine. Check the engine, hydraulic motors, and pumps for leaks. 25. Reinstall the engine side door and close the covers. 6-39 7400 MM428 (12- -98)
-
Page 304: To Purge Air From Radiator
10. If the machine overheats----repeat steps 4 thru 8. NOTE: There may be air trapped in one of the radiator hoses. It might take one or two tries to completely purge all of the air from the cooling system. 6-40 7400 MM428 (12- -98) - Page 305 ....7-12 TO INSTALL ENGINE ....7-14 TO PURGE AIR FROM RADIATOR ..7-16 7400 MM428 (9- -01)
- Page 306 ENGINE- -DIESEL 7400 MM428 (12- -98)
- Page 307 ENGINE- -DIESEL INTRODUCTION This section includes repair information on the engine and related systems, such as fuel, electrical, and drive belts. 7400 MM428 (12- -98)
-
Page 308: Lubrication
FOR SAFETY: When Servicing Machine, Wear Eye And Ear Protection When Using Pressurized Air Or Water. Flush the radiator and the cooling system every 400 hours of operation, using a dependable cleaning compound. 7400 MM428 (12- -98) -
Page 309: Engine Fan Belt
Service the air filter element only when the air filter indicator shows restriction in the air intake system. Do not remove the air filter element unless it is restricting air flow. 7400 MM428 (12- -98) -
Page 310: To Replace Air Filter Element
11. Install the dust cap with the arrows pointing up. Tighten the clamp ring to hold it in place. Check all intake hose connections for leaks or abrasions. 12. Reset the air filter restriction indicator. 13. Close the access doors. 7400 MM428 (12- -98) -
Page 311: Fuel System
2. Remove the filter cartridge from the filter head. 3. Lubricate the o-ring of the new filter cartridge and spin it onto the filter head. 4. Bleed the fuel lines of air as described in TO PRIME FUEL SYSTEM instructions. 7400 MM428 (12- -98) -
Page 312: Fuel Lines
4. Close the air vent and shut off the engine. 5. Clean up any fuel that was spilled during the bleeding process. 7400 MM428 (12- -98) - Page 313 9. Install the new alternator back in the machine. Reinstall the lower hex screw, spacer, and nyloc nut. Leave loose for now. 10. Reinstall the hex screw in the upper arm and the top of the alternator. Leave loose for now. 7400 MM428 (12- -98)
- Page 314 14. Reinstall the belt cover to the front of the engine. Hand tighten the hex screws tight. 15. Reconnect the battery cables, close the operators seat and start the machine. 16. Check the new alternator for proper operation. 7-10 7400 MM428 (12- -98)
- Page 315 9. Reinstall the two hex screws and tighten to 18 -- 24 Nm (15 -- 20 ft lb). 10. Reconnect the battery cable and electrical wires to the starter. See schematic in the ELECTRICAL section. 7400 MM428 (12- -98) 7-11...
- Page 316 See TO INSTALL VACUUM FAN instructions in the SCRUBBING section. 13. Reconnect the battery cables to the battery and close the operators seat. 14. Reinstall the engine side door and close the covers. 15. Start the machine. 7-12 7400 MM428 (12- -98)
- Page 317 NOTE: The engine hood must be supported in the open position before the next step can be completed. 10. Remove the clips on the bottom of the engine hood gas springs. Remove the gas springs from the ball studs on the support channel. 7400 MM428 (12- -98) 7-13...
- Page 318 Put a slight amount of tension on the chain. 21. Remove the three M12 hex screws and nyloc nuts holding the motor mounts to the rubber isolators on the machine frame. 22. Engine can now be carefully lifted out. 7-14 7400 MM428 (12- -98)
- Page 319 9. Reinstall the detergent tank in the seat support area. 10. Reinstall the battery tray and battery. 11. Reinstall the exhaust pipe back on the manifold. Reinstall the muffler clamp and tighten tight. 7400 MM428 (12- -98) 7-15...
- Page 320 Block machine up with jack stands 22. Start the machine. Check the engine, hydraulic motors, and pumps for leaks. 23. Reinstall the engine side door and close the covers. 7-16 7400 MM428 (12- -98)
- Page 321 10. If the machine over heats----repeat steps 4 thru 8. NOTE: There may be air trapped in one of the radiator hoses. It might take one or two tries to completely purge all of the air from the cooling system. 7400 MM428 (12- -98) 7-17...
- Page 322 ENGINE- -DIESEL 7-18 7400 MM428 (12- -98)
Need help?
Do you have a question about the 7400 and is the answer not in the manual?
Questions and answers
tannant7400 가스청소차 레규레이터 노킹