
Related Manuals for Cypress CYTVII-B-E-1M-SK


Summary of Contents for Cypress CYTVII-B-E-1M-SK
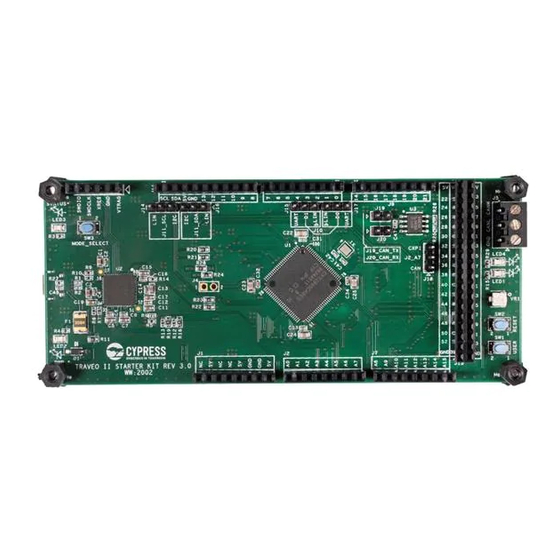
- Page 1 CYTVII-B-E-1M-SK Evaluation Board Quick Start Guide Doc. # 002-25315 Rev. ** Cypress Semiconductor 198 Champion Court San Jose, CA 95134-1709 www.cypress.com...
- Page 2 Cypress is not liable, in whole or in part, and you shall and hereby do release Cypress from any claim, damage, or other liability arising from or related to all Unintended Uses of Cypress products.
- Page 3 All information included in this document is current as of the date it is issued. Such information is subject to change without any prior notice. Please confirm the latest relevant information with the sales representatives. Operating Temperature 0 to 40 °C CYTVII-B-E-1M-SK Evaluation Board Quick Start Guide, Doc. # 002-25315 Rev. **...
-
Page 4: Table Of Contents
TCPWM Function ......................8 CAN FD Function.......................10 3. IAR Debugger....................11 IAR EMBEDDED WORKBENCH FOR ARM Software Installation and License Setting ...........................11 Debug Example for CYTVII-B-E-1M-SK Firmware ............12 Revision History .......................19 CYTVII-B-E-1M-SK Evaluation Board Quick Start Guide, Doc. # 002-25315 Rev. **... -
Page 5: Power On
Power ON Hardware setup will be completed by following two steps. 1. Connect the USB cable from PC to CYTVII-B-E-1M-SK Evaluation Board. This turns the power ON. Please confirm that the STATUS LED and Power LED are lit, and that the User LED is blinking. -
Page 6: Firmware Usage
3. Set the line feed code to LF only Receive Side. 4. Set the baud rate as 115200. 5. Press the reset switch to display the menu. See CYTVII-B-E-1M-SK Evaluation Board User Guide about reset switch location. CYTVII-B-E-1M-SK Evaluation Board Quick Start Guide, Doc. # 002-25315 Rev. **... -
Page 7: Adc Control
As an operation, input 1 and press enter key for ADC control test. When you turn the potentiometer, the value displayed in real time changes. Press Ctrl + C to return to the menu. CYTVII-B-E-1M-SK Evaluation Board Quick Start Guide, Doc. # 002-25315 Rev. **... -
Page 8: Interrupt Function
In this item, the brightness of the User LED is changed by using TCPWM according to the voltage value of the potentiometer. As an operation, input 3 and press enter key for TCPWM test. CYTVII-B-E-1M-SK Evaluation Board Quick Start Guide, Doc. # 002-25315 Rev. **... - Page 9 Firmware Usage Turning the potentiometer will change the brightness of the User LED (LED1). Press Ctrl + C to return to the menu. CYTVII-B-E-1M-SK Evaluation Board Quick Start Guide, Doc. # 002-25315 Rev. **...
-
Page 10: Can Fd Function
On the terminal menu, one is input 4, another is input 5. Transmission data and reception data are displayed respectively. Transmission data can be changed by turning the potentiometer. Potentiometer Potentiometer Press Ctrl + C return to the menu. CYTVII-B-E-1M-SK Evaluation Board Quick Start Guide, Doc. # 002-25315 Rev. **... -
Page 11: Iar Debugger
IAR Debugger IAR Embedded Workbench for ARM Software Installation Download and install the software. After the installation, set the license as a 30-day time-limited but fully functional license. https://www.iar.com/iar-embedded-workbench/#!?architecture=Arm CYTVII-B-E-1M-SK Evaluation Board Quick Start Guide, Doc. # 002-25315 Rev. **... -
Page 12: Debug Example For Cytvii-B-E-1M-Sk Firmware
IAR Debugger Debug Example for CYTVII-B-E-1M-SK Firmware Contact Cypress for this firmware example. Follow the instructions that you received to install the firmware example on your PC. 1. Start IAR Embedded Workbench IDE. 2. Open Workspace: select File > Open Workspace. - Page 13 IAR Debugger 3. Select Workspace File (.eww). This example uses the SRAM debug project. Open Firmware\tools\iar\sram\tviibe1m_sram_template.eww 4. Select Project > Options. CYTVII-B-E-1M-SK Evaluation Board Quick Start Guide, Doc. # 002-25315 Rev. **...
- Page 14 IAR Debugger 5. Select General Options > Device and select Cypress CYT2B75CA_M0+ 6. Click Debugger. On the Setup tab, select CMSIS DAP. CYTVII-B-E-1M-SK Evaluation Board Quick Start Guide, Doc. # 002-25315 Rev. **...
- Page 15 IAR Debugger 7. Click CMSIS DAP. On the Setup tab, under Reset, select Disabled (no reset). 8. On the Interface tab, in the Interface group, select SWD. CYTVII-B-E-1M-SK Evaluation Board Quick Start Guide, Doc. # 002-25315 Rev. **...
- Page 16 9. Make the same set of configurations for the CM4 tab (processor type, Debugger, CMSIS DAP). The preparation of the IAR debugger is now complete. 10. Return to the “CM0plus side” window. CYTVII-B-E-1M-SK Evaluation Board Quick Start Guide, Doc. # 002-25315 Rev. **...
- Page 17 11. Select Project > Rebuild all, and start the Debug Project. 12. Click the Download and Debug button. Two windows open (CM0plus and CM4). 13. Close the window if a Memory Allocation Alert Dialog appears as follows: CYTVII-B-E-1M-SK Evaluation Board Quick Start Guide, Doc. # 002-25315 Rev. **...
- Page 18 IAR Debugger CM0plus side CM4 side CYTVII-B-E-1M-SK Evaluation Board Quick Start Guide, Doc. # 002-25315 Rev. **...
-
Page 19: Revision History
Document Revision History Document Title: CYTVII-B-E-1M-SK Evaluation Board Quick Start Guide Document Number: 002-25315 Origin of Revision ECN# Issue Date Description of Change Change 6352095 11/01/2018 GSHI New User Guide CYTVII-B-E-1M-SK Evaluation Board Quick Start Guide, Doc. # 002-25315 Rev. **...
Need help?
Do you have a question about the CYTVII-B-E-1M-SK and is the answer not in the manual?
Questions and answers