
Related Manuals for Griven VESUVIO CYM 250


Summary of Contents for Griven VESUVIO CYM 250
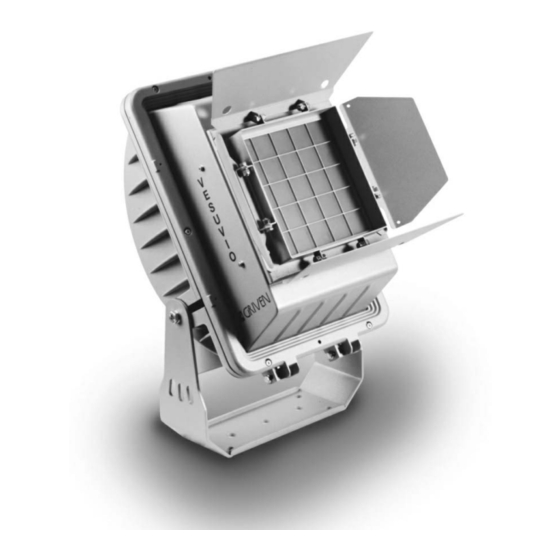
- Page 1 Foglio di Istruzioni Owner’s Manual VESUVIO CYM 250 VESUVIO CYM 250 HFT AD 3212 HQI-TS 250/D UVS AD 3214 HFT HQI-TS 250/D UVS AD3212 Rev. 0 22 Lug-2002...
-
Page 2: Table Of Contents
INDICE INDICE Pag. 1.0 CONTENUTO DELL’IMBALLAGGIO 2.0 SICUREZZA 3.0 INSTALLAZIONE DEL PROIETTORE 3.1 Montaggio della Lampada 3.2 Posizionamento del Proiettore 3.3 Installazione del paraluce 3.4 Collegamento elettrico 3.5 Connessione dei cavi di segnale DMX 4.0 USO DEL PROIETTORE 4.1 Funzionamento DMX/Slave 4.2 Funzionamento Master/Automatico 4.3 Funzionamento Master-Slave 4.4 Funzionamento via radio (OPZIONALE) -
Page 3: Contenuto Dell'imballaggio
Controllate attentamente il contenuto del cartone e, in caso di danni al prodotto, contattate il Vs. trasportatore. Nell’imballaggio del presente proiettore sono contenuti i seguenti prodotti: n° 1 proiettore VESUVIO CYM 250; n° 1 lampada HQI-TS 250/D UVS; n° 1 Foglio di Istruzioni;... -
Page 4: Posizionamento Del Proiettore
figura 3 figura 4 3.2 Posizionamento del proiettore Mantenere una distanza dalle pareti di almeno 1m per favorire la libera circolazione dell’aria intor- no al proiettore e contenerne il riscaldamento. Vesuvio è dotato di una forcella che permette una stabile collocazione a terra e a soffitto. Per il fissaggio del proiettore al pavimento, oppure al soffitto, è... -
Page 5: Collegamento Elettrico
3.4 Collegamento elettrico Il collegamento alla rete elettrica richiede l’utilizzo di un cavo 3 poli x 1,5 mm di sezione minima. Inserire un’estremità del cavo di alimentazione attraverso il pressacavo (figura 7) e collegarlo alla morsettiera mostrata in figura 8. Accertarsi di rispettare le polarità (GND/Neutro/Fase). Assicurarsi inoltre che il dado del pressacavo sia adeguatamente stretto, in modo che assicuri la protezione contro la penetrazione di polveri e getti d’acqua. -
Page 6: Uso Del Proiettore
4.0 USO DEL PROIETTORE Il significato dei dip-switch cambia a seconda del metodo di funzionamento: - funzionamento in modo MASTER o in modo SLAVE. La luce rossa del LED indica la ricezione corretta del segnale DMX oppure la modalità master atti- va. -
Page 7: Funzionamento Master/Automatico
4.2 Funzionamento MASTER/AUTOMATICO Per funzionare in modo MASTER/AUTOMATICO, il proiettore VESUVIO, deve avere settato il relativo dip-switch su ON (dip-switch numero 2 del gruppo 1-6). Quando il proiettore VESUVIO lavora in modo MASTER/AUTOMATICO i dip-switch numerati da 1 a 8 selezionano il programma preimpostato (riferirsi alla tabella 2). EFFETTO Programma 1 Rosso, Magenta,Giallo... -
Page 8: Funzionamento Master-Slave
4.3 Funzionamento Master-Slave E’ possibile settare più proiettori VESUVIO in modalità Slave in modo che seguano il programma eseguito da un proiettore Master. Il proiettore Master deve essere settato con il relativo dip-switch settato su ON (dip-switch n°2 del gruppo 1-6), i proiettori Slave devono avere tutti i dip-switch settati in OFF. -
Page 9: Funzionamento Via Radio (Opzionale)
4.4 Funzionamento via RADIO per VESUVIO 250 HFT AD3214 VESUVIO 250 è disponibile anche nella versione HFT la cui caratteristica è la trasmissione del segnale DMX via radio oltre che nel normale standard via cavo. I dip switch assumono lo stesso significato che assumono durante il funzionamento in modo DMX/SLAVE (vedi paragrafo 4.1 Funzionamento in DMX/SLAVE) con la sola eccezione dei dip switch n°1 e n°6 del secondo gruppo: - il dip switch n°1 permette di selezionare il tipo di trasmissione: OFF via cavo, ON via radio;... -
Page 10: Informazioni Tecniche
Tutti i componenti del proiettore VESUVIO sono disponibili come parti di ricambio su richiesta. La responsabilità di Griven S.r.l. cessa all’atto della consegna del materiale al vettore: reclami per eventuali danni dovuti al trasporto dovranno essere indirizzati direttamente al corriere. -
Page 11: Packing
1.0 PACKING Check carefully the content of the box and in case of damage contact your forwarder immediately. The following items are included in the box: n° 1 VESUVIO unit; n° 1 HQI-TS 250/D UVS lamp; n° 1 instructions leaflet. 2.0 SAFETY Disconnect the lantern from mains supply before servicing the unit or replacing the lamp. -
Page 12: Mounting Position
picture 3 picture 4 3.2 Mounting position Minimum distance from flammable objects must be 1 mt so as to make air circulation easy. Vesuvio is fitted with a support base which allows a steady position on the floor and at the ceiling. 12 mm Ø... -
Page 13: Electrical Connection
3.4 Electrical connection A supply cable 3x1.5mm minimum is needed. One end of the supply cable must be fixed through the cable clip (Pict.7) and then connected to the terminal box, as shown in Pict.8. Make sure that negative and positive polarities are respected (GND/Neutral/Phase). -
Page 14: Use Of The Projector
4.0 USE OF THE PROJECTOR The function of the dip-switches will change according to the selected mode, which can be DMX/Slave mode or Master/Automatic mode. The LED red light on indicates that the reception of the DMX signal is correct or that the MASTER mode is activated. -
Page 15: Master/Automatic Mode
4.2 MASTER/AUTOMATIC mode To access the MASTER/AUTOMATIC mode, the dip-switch of the VESUVIO unit must be set to ON (group 1-6, dip-switch no.2). When the VESUVIO unit works in MASTER/AUTOMATIC mode the dip switches from no.1 to no.8 (from the group 1-10) must be used to select the preset program (refer to table 2). EFFECT Programme 1 Red, Magenta, Yellow... -
Page 16: Master-Slave Mode
4.3 Master-Slave mode More VESUVIO units can be set to "Slave" option to follow the "Master" unit in synchrony. The "Master" unit must be set with the relevant dip-switch in the ON position (group 1-6, dip- switch no.2); the "Slave" units must be set with all the relevant dip-switches in the OFF posi- tion. -
Page 17: Wireless Dmx Signal Transmission (Optional)
ON = wireless transmission; - the dip switch no.6 (second group) allows to change the transmission frequency of the DMX signal, so to avoid conflicts between adjacent similar devices by Griven that are running different programmes. 5.0 MAINTENANCE The VESUVIO unit does not require particular maintenance. -
Page 18: Technical Information
All components for the VESUVIO are available on request. Griven s.r.l. is liable for the product until the unit is delivered to the shipping company: any claim for damage occurred during transport must be addressed directly to the forwarding company. - Page 20 WORLD LIGHTING CHALLENGE Professional Lighting Manufacturer Via Bulgaria, 16 - 46042 CASTEL GOFFREDO (MN) Telefono 0376/779483 - Fax 0376/779682 - 0376/779552 http://www.griven.com/ e-mail griven@griven.com http://www.griven.it/ e-mail griven@griven.it...
Need help?
Do you have a question about the VESUVIO CYM 250 and is the answer not in the manual?
Questions and answers