Table of Contents
Advertisement
Quick Links
Advertisement
Table of Contents

Related Manuals for Telair Energy 4010G


Summary of Contents for Telair Energy 4010G
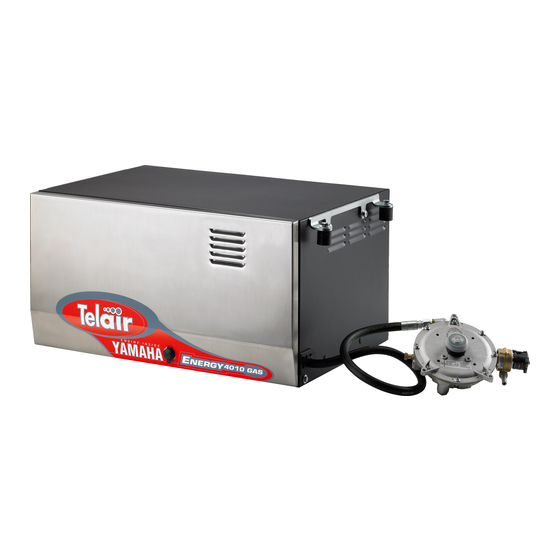
- Page 1 v. 004 – March 2018 Rev. 004 Energy 4010 G...
-
Page 2: Table Of Contents
INDEX 1 FOREWORD ........................... 5 2 GENERATING SET IDENTIFICATION DATA ................. 6 2.1 Components (Fig. 1) ......................... 6 2.2 Identification plate (Fig. 2) ......................6 2.3 Overall dimensions ........................6 2.4 Technical specifications ......................7 3 SHIPPING, HANDLING, STORAGE ....................7 3.1 Storage ............................. - Page 3 To use the generator at temperatures below 0 ° C, we recommend to employ propane, up to a mini- mum temperature of -15 ° C. Rev. 004 Energy 4010 G...
- Page 4 Via E. Majorana , 49 48022 Lugo (RA) ITALY "CE" COMPLIANCE STATEMENT Under Machine Directive 2006/42/CE, attachment II A We hereby represent that the generator-set, the data concerning which appear below, has been designed and built to correspond to the essential safety and health requirements laid down by the European Directive on Machine Safety.
-
Page 5: Foreword
1 FOREWORD 1.2 Symbols and Definitions Refer carefully to this man- "Graphic safety symbols” have been employed in ual before performing any operation on the this booklet to identify different levels of danger power generator set. or important information. 1.1 Purpose and scope of this manual This means that you must pay attention to avoid serious consequences This manual has been drawn up by the Manufac-... -
Page 6: Generating Set Identification Data
Rated voltage 230V AC GENERATING SET IDENTIFICATION Current delivered at 12V/DC DATA Weight 2.1 Components (Fig. 1) Sound-proofing casing Supporting brackets Access door Access door closure Technical features sticker Anti-vibration support Anchoring bracket Electronic control panel Gas pipe and cable outlet block 10 Sliding surface locking screw 11 Fuel pipe 12 Sliding surface all out locking screw... -
Page 7: Technical Specifications
2.4 Technical specifications ENERGY 4010 G ENGINE Type Single cylinder, 4 stroke LPG, overhead valves, air cooling Yamaha MZ 250 GAS Engine Displacement 70 x 57 Bore x Stroke Max Fuel Consumption kg/h LPG or Propane pure when it is cold Fuel supply Electronic Ignition system... -
Page 8: Handling
dampers. The brackets allow for hanging and 3.3 Handling floor assembly. This kind of assembly provides the following ad- The generating sets, complete with their packag- vantages: less room taken up, quick installation, ing, can be handled using common lifting and easy access for routine and unscheduled main- transport vehicles. -
Page 9: Floor Fastening
4.2.2 Floor fastening The package contains a drilling jig, which allows the generator bearing surface to be prepared quickly, fig. 7. Place a spongy, heat- resistant gasket around the outlet opening of the exhaust pipe. The gasket height must reach the bottom of the generator and has the purpose of preventing hot air from spreading inside the generator compartment. -
Page 10: Wiring Connection Instructions
The generator can now be located on the previ- ously drilled surface (fig.7) using the suitable vi- bration-damping cylinders (fig. 10 ref. 1) and spacers (fig. 10 rif.2) 4.4 Battery connection To start up the generating set, connection to the battery of the vehicle must be provided using a sheathed power cable up to current standards, with the cross-section shown in Table 1. -
Page 11: Electric Load Connection
Use the special cable outlet (Fig.11 Ref.1) to Always fit a 100 A fuse prevent water seeping into the generating set. onto the positive cable connecting the gener- Although the generating set is equipped with a ating set to the positive pole of the battery. special internal thermal cut-out to cut power de- livery in the event of overload or short circuits (Fig.13 Ref.5), it is advisable to install (in the ve-... -
Page 12: Auxiliary Electric Cable Connection
4.6 Auxiliary electric cable connection 4.8 Electric System fuses All 2 auxiliary cables to connect are equipped with a polarized connector. The unit is provided with two protection fuses: • One cable is necessary for generator operation, a 15 Ampere fuse (Fig. 13 Ref. 7) protects while the other is optional cables. -
Page 13: Battery Charger
the pressure reducer and the gas bottle (Fig. 15 Fit the ogive (7), hold the fixed hexagon ring (8) Ref. 3) is not supplied. by means of a wrench and tighten the ring nut For this connection, the installer will use a suit- (9). -
Page 14: Connecting An Additional Silencer
The generating set will not autonomously recharge the battery used for starting-up unless this is connected to a bat- tery charger or the CHARG terminal this is connected (see par. 4.10). 4.12 Connecting an additional silencer To further reduce the generating set operating noise, an (optional) additional silencer can be in- stalled externally. -
Page 15: Connecting An External Network Relay
Jumper the PINS 6 – B. • Connect all the grounding cables together Do not use silencers not supplied by TELAIR. Silencers that have not been specially sized may damage the motor. 4.13 Connecting an External Network Relay An (optional) relay or change-over switch code 05930 (Fig.28) should be fitted to the vehicle wir-... -
Page 16: Operating Instructions
5 OPERATING INSTRUCTIONS 6 USING THE GENERATING SET The generating set is de- 6.1 Starting up the generating set livered without engine oil. Use oil for multigrade 4-stroke petrol engines, The generating sets are provided with an elec- having SAE viscosity suitable for the operat- tronic remote control panel (Fig. -
Page 17: Turning The Generating Sets Off
During the first 50 hours of operation (run-in If the generating set has not started up after sev- time), it is important not to submit the generating eral attempts, contact the manufacturer’s After- set to a working load exceeding 75% of its rated sales service. -
Page 18: Automatic Version (Optional)
while holding it down, turn the panel on and re- 4 Minimum oil level indicator lease the push-button when the unit has started 5 Start-up failed indicator 6 Generator running indicator (flashing) Alarm: the red ‘service’ light is lit. 7 Maintenance request indicator Cause: 100 hours have elapsed since the latest 8 Fuel reserve indicator engine oil change and engine oil should be... -
Page 19: Maintenance Instructions
• Unscrew the engine oil filler cap and clean the Applying any load higher dipstick (Fig.33 Ref.1). than the energy just then available in the bat- • Put the dipstick back in without screwing. tery will prevent the generating set from turn- •... -
Page 20: Air Filter Maintenance
To make it easier to drain the spent engine oil, it is advisable to let the engine run for 3 - 5 min- Table 2 utes; in this way, the oil will be more fluid and MODEL Oil quantity (litres) emptying will be quicker and more thorough. -
Page 21: Spark Plug Maintenance
• Correct the distance if necessary, bending the side electrode. • Make sure that the spark plug washer is in good condition and then screw back on by hand to make sure that it is correctly put back in place. Finally, tighten to the right torque us- ing the special wrench (see instructions in the engine user and maintenance manual). - Page 22 Turn the screw clockwise to increase the engine rpm and consequently, the voltage. Turn the screw counter-clockwise to decrease the engine rpm and consequently, the voltage. 7.4.5 Adjusting the choke The choke operates at 1 and the 3 rd attempt to start and has a response time of 2 sec.
-
Page 23: Routine Maintenance Schedule
8 ROUTINE MAINTENANCE SCHEDULE First Every Every Every ROUTINE MAINTENANCE SCHEDULE Every Month 3 Months 6 Months 12 Mths To be performed after the period of time or the number of running hours listed here, whichever the earlier 20 hours 50 hours 100 hrs 300 hrs... -
Page 24: General Warranty Terms
GENERAL WARRANTY TERMS TELAIR guarantees its products against any construction material and/or manu- facturing faults and defects. The right to warranty cover for new products is valid for a period of 24 months from the time of handing over to the end user, or for a maximum of 1000 operating hours, whichever limit is reached first. -
Page 25: Wiring Diagram Energy 4010 G
WIRING DIAGRAM ENERGY 4010 G Rev. 004 Energy 4010 G... - Page 26 Rev. 004 Energy 4010 G...
-
Page 27: Drawing For Spare Parts List Energy 4010 G
DRAWING FOR SPARE PARTS LIST ENERGY 4010 G Rev. 004 Energy 4010 G... - Page 28 Rev. 004 Energy 4010 G...
- Page 29 Rev. 004 Energy 4010 G...
- Page 30 Rev. 004 Energy 4010 G...
- Page 31 Descrizione Dèsignation Denomination Pos. Code Q.tà Description Bezeichnung Descripcion Sportello Tôle de fermeture de porte Afdekplaat deurtje 04698 N. 1 Door closing plate Türblech Chapa cierre puerta Image adhésive de porte du boî- Adesivo Sportello Zelfklevend beeld van gevaldeur tier 04763 N.
- Page 32 Descrizione Dèsignation Denomination Pos. Code Q.tà Description Bezeichnung Descripcion Isolante Basamento Isolation Base Isolatie voor onderstel 04212 N. 1 Base insulation Isolierung für Grundrahmen Aislante Base Basamento cassa Base de la caisse Onderstel kast 04554 N. 1 Case base Kasten-Grundrahmen Base caja Condensatore 18 µF Condensateur 18 µF...
- Page 33 Descrizione Dèsignation Denomination Pos. Code Q.tà Description Bezeichnung Descripcion Staffa fissaggio motore Bride de fixation du moteur Bevestigingsbeugel motor 02184 N. 1 Engine fastening bracket Motor-Befestigungsbugel Abrazadera sujeciòn motor Serratura Serrure Slot 01224 N. 1 Lock Schloss Cerradura Tassello Portacavi Carburante Serre-câbles Carburant Kabeldoorvoer Brandstof...
- Page 34 Descrizione Dèsignation Denomination Pos. Code Q.tà Description Bezeichnung Descripcion Rondella 8 UNI 8842A Rondelle 8 UNI 8842A Onderlegring 8 UNI 8842A 02586 N. 8 Washer 8 UNI 8842A Scheibe 8 UNI 8842A Arandela 8 UNI 8842A Rondella 6 UNI 6592 Rondelle 6 UNI 6592 Onderlegring 6 UNI 6592 00967 N.
- Page 35 Descrizione Dèsignation Denomination Pos. Code Q.tà Description Bezeichnung Descripcion Fusibile 15A Fusible 15A Zekering 15A 01607 N. 1 15A fuse 15A Sicherung Fusible 15A Potafusibile Tableau des fusibles Zekeringhouder 01605 N. 2 Fuse carrier Sicherungshalter Portafusible Plaque de fixation tableau des Bevestigingsplaat zekeringhou- Piastra fissaggio Potafusibile fusibles...
- Page 36 Descrizione Dèsignation Denomination Pos. Code Q.tà Description Bezeichnung Descripcion Cuscinetto alternatore Palier de l’alternateur Lager dynamo 02051 N. 1 Alternator bearing Lager der Lichtmaschine Cojinete alternador Statore alternatore Stator de l’alternateur Stator dynamo 06172 N. 1 Alternator stator Stator der Lichtmaschine Estator alternador Motore EL.
- Page 37 Descrizione Dèsignation Denomination Pos. Code Q.tà Description Bezeichnung Descripcion Coperchio filtro aria Couvercle du filtre à air Kap luchfilter 02730 N. 1 Air filter lid Luftfilterdeckel Tapa filtro aire Filtro aria Filtre à air Luchtfilter 02729 N. 1 Air cleaner Luftfilter Filtro aire Supporto filtro aria...
- Page 38 Descrizione Dèsignation Denomination Pos. Code Q.tà Description Bezeichnung Descripcion Bobina di starter Bobine d'allumage Starterspoel 103 02292 N. 1 Starter coil Starterspule Bobina de starter Tappo Bouchon 104 04548 N. 1 Kappe Tapón Raccordo uscita GAS Raccordo uscita GAS GAS uitlaatkoppeling 105 04042 N.
- Page 39 Notes ........................................................................................................................................................................................................................................................................................................................................................................................................................................................................................................................................................................................................................................................................................................................................................................................Rev. 004 Energy 4010 G...
- Page 40 Rev. 004 Energy 4010 G...
Need help?
Do you have a question about the Energy 4010G and is the answer not in the manual?
Questions and answers