AVer TR311HN Quick Start Manual
Professional tracking camera
Hide thumbs
Also See for TR311HN:
- User manual (68 pages) ,
- User manual (77 pages) ,
- User manual (86 pages)
Table of Contents
Advertisement
Quick Links
Professional Tracking Camera
Quick Start Guide
Package Contents
Camera unit
(Batteries included)
Power adapter &
Ceiling mount
bracket(x2)
Power cord
Optional accessory
Din8 to D-Sub9
RS232 In/Out
Cable
Y Cable
LED Indicator
LED
Status
Blue(Solid)
Normal Operation
Orange(Blinking)
Camera Initialization
Orange (Solid)
Standby
Red (Blinking)
FW Updating
Blue (Blinking)
Tracking is on
1/4"-20L=6.5mm
Cable ties(x5)
Screw(x3)
M2 x 4mm
M3 x 6mm
Screw(x3)
Screw(x4)
Cable Fixing
Quick Guide
plates(x2)
Wall mount
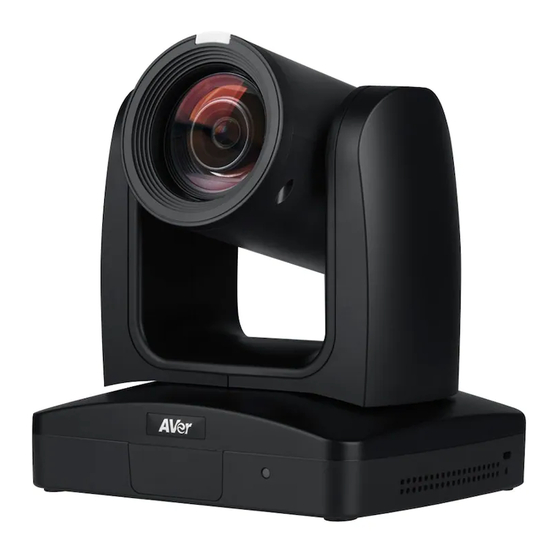
Camera
bracket
Controller
Overview
(1)
(2)
(3)
(1) Tally Lamp
(5) PoE+ IEEE 802.3at
(2) IR Sensor
(6) RS232 Port
(3) Power Indicator
(7) RS422 Port
(4) Kensington Lock
(8) Audio In
*TR311HN does not support this feature.
Connections
Joystick
(Camera control)
Microphone
Audio input
RS232, RS422 or IP
USB
3G-SDI
or
PoE+
or
HDMI
Camera
LAN
Web application
(Remote Management)
USB
(4)
(5) (6) (7)(8)(9)
(11)
(10)
(12)
(9) USB 3.0 Port (Type C)
(10) HDMI Port
(11) 3G-SDI Port*
(12) DC Power Jack
Laptop
(Management/Presentation/
Video Conference)
Monitor/TV
(Display)
Lecture capture system
(Record)
Advertisement
Table of Contents

Related Manuals for AVer TR311HN


Summary of Contents for AVer TR311HN
- Page 1 Ceiling mount Cable Fixing Quick Guide bracket(x2) Power cord plates(x2) (4) Kensington Lock (8) Audio In (12) DC Power Jack *TR311HN does not support this feature. Optional accessory Connections Joystick (Camera control) Laptop (Management/Presentation/ Video Conference) Microphone Din8 to D-Sub9...
- Page 2 Install Cable Fixing Plate Remote Control The remote controller requires two (2) “AAA” size batteries, make sure batteries are installed properly before use. Name Name Function (1) Power Turn the unit on/standby. (2) Menu Open and exit the OSD menu. CAM1 to CAM3 button (3) Camera Select Selects a camera to operate.
- Page 3 Setup Tracking Point Ceiling installation Setup a tracking point as a start point of auto tracking. In general, the tracking point is set at the position of 1. Secure the mount bracket on the ceiling. 2. Install the mount bracket on the camera. the speaker.
- Page 4 ©2020 AVer Information Inc. All rights reserved. All rights of this object belong to AVer Information Inc. Reproduced or transmitted in any form or by any You can find guided video tours like the ones listed below. means without the prior written permission of AVer Information Inc. is prohibited. All information or specifications are subject to change without prior notice.
Need help?
Do you have a question about the TR311HN and is the answer not in the manual?
Questions and answers