Advertisement
Quick Links
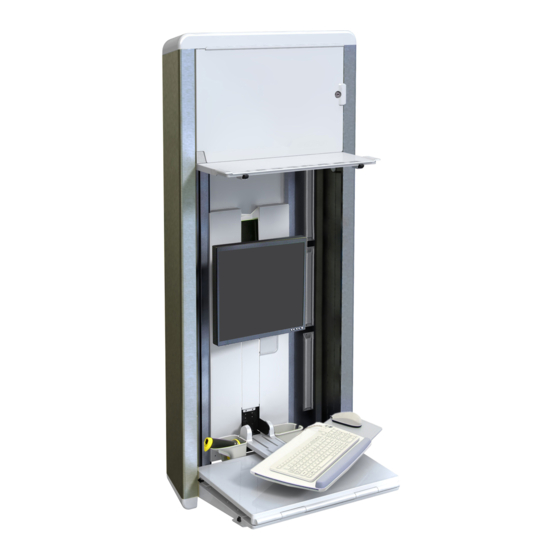
StyleView VL Enclosure
9"
(229 mm)
For the latest User Installation Guide please visit: www.ergotron.com
Para acceder a la última versión de la Guía de instalación para el usuario, ingrese a www.ergotron.com
Pour la dernière version du Guide d'installation de l'utilisateur, visitez : www.ergotron.com.
Die aktuellste Anleitung für die Montage durch den Benutzer fi nden Sie hier: www.ergotron.com
De nieuwste Gids voor installatie door de gebruiker kunt u vinden op: www.ergotron.com
Per la versione più recente della Guida all'installazione per l'utente, visitare il sito web: www.ergotron.com
För den senaste Installationshandboken se: www.ergotron.com
最新のユーザー インストール ガイドは、www.ergotron.com でご確認いただけます。
若需最新的用户安装指南,请访问:www.ergotron.com
English, Español, Français, Deutsch, Nederlands, Italiano, Svenska, 日本語, 汉语
www.ergotron.com |
USA: 1-800-888-8458
888-60-506-W-03 rev. J • 01/19
|
Europe: +31 (0)33-45 45 600
|
|
China: 400-120-3051
Japan: japansupport@ergotron.com
1 of 22
Advertisement

Related Manuals for Ergotron StyleView VL Enclosure


Summary of Contents for Ergotron StyleView VL Enclosure
- Page 1 (229 mm) For the latest User Installation Guide please visit: www.ergotron.com Para acceder a la última versión de la Guía de instalación para el usuario, ingrese a www.ergotron.com Pour la dernière version du Guide d’installation de l’utilisateur, visitez : www.ergotron.com.
- Page 2 DO NOT DISCARD! Mounting Hole Pattern Patrón de orifi cios de taladro NO DESECHE Confi guration des trous de montage Abstände der Befestigungslöcher CONSERVEZ CE GUIDE Patroon van montagegaten Disposizione dei fori di fi ssaggio NICHT WEG Mönster för monteringshål NIET WEG 取付け穴間隔...
- Page 3 Changes or modifi cations not expressly approved Los cambios o modifi caciones no expresamente Tout changement et toute modifi cation non by Ergotron, Inc. could void the user’s authority to aprobados por Ergotron, Inc. podrían anular la expressément approuvés par Ergotron, Inc. peuvent operate the equipment.
- Page 4 Specifi cations Combined weight of all equipment mounted to lift engine should be: 8 - 33 lbs (3.63 - 14.97 kg) Especifi caciones El peso combinado de todo el equipo montando sobre el motor de elevación debería ser: 3,63 - 14,97 kg (8 - 33 lbs) Spécifi cations Le poids total de l’ensemble des équipements fi xés au moteur d’élévation devrait être de : 3,63 –...
- Page 5 Set Your Workstation to Work For YOU! Confi gure su estación de trabajo para que trabaje para USTED. Ajustez votre station de travail en fonction de VOS besoins ! Richten Sie Ihren Arbeitsplatz so ein, dass er für SIE arbeitet! Stel uw werkstation zo in dat het voor U werkt! Approntare la stazione di lavoro nella posizione ergonomica ottimale.
- Page 6 ATTENTION : En raison de la diversité des surfaces de fi xation et de l’impossibilité pour Ergotron de contrôler que la méthode de fi xation choisie est la plus appropriée dans chaque cas, il est fortement recommandé de consulter ou de confi er l’installation à une personne compétente (installateur professionnel, professionnel du bâtiment) pour vous assurer que votre fi xation Ergotron est installée de manière à...
- Page 7 Mounting Height Altura de montaje Hauteur de fi xation Montagehöhe Montagehoogte Altezza di montaggio Monteringshöjd 取付け高さ 安装高度 86" (2184 mm) - x = H To Floor Al suelo Vers le sol Zum Boden Tot de vloer Rispetto al pavimento Till golv 床に設置...
- Page 8 1/4-20 x 2" 5/32" 8 of 22 888-60-506-W-03 rev. J • 01/19...
- Page 9 1/4-20 x 2" 5/32" Plug cables into monitor Enchufe los cables en el monitor Branchez les câbles dans l'écran M4 x 10mm Schließen Sie die Kabel am Monitor an. Sluit kabels aan op monitor Collegare i cavi nel monitor Anslut kablar till skärm ケーブルをモニターに接続します。...
- Page 10 Center CPU in top compartment to allow for suffi cient air fl ow. Route Cables DO NOT place anything above the CPU, this will prevent proper ventilation. Pase los cables Centre la CPU en el compartimento superior para que circule sufi ciente aire. Acheminer les câbles NO coloque NADA encima de la CPU, ya que impediría una ventilación adecuada.
- Page 11 It is important that you adjust this product according to the weight of the mounted equipment as described in the following steps. Any time equipment is added or removed from this product, resulting in a change in the weight of the mounted load, you should repeat these adjustment steps to ensure safe and optimum operation. Adjustments should move smoothly and easily through the full range of motion and stay where you set it.
- Page 12 Tilt Inclinación Inclinaison Neigung Tighten screws for less keyboard tilt. Kantel Apriete los tornillos para reducir la inclinación del teclado. Inclinazione Serrez les vis pour que le clavier s’incline moins. Vinkel Ziehen Sie die Schrauben an, um die Tastaturneigung zu verringern. チルト...
- Page 13 3 Press 1 and 2 on number pad at the same time 4 Follow "Lost Master Code" instructions to reset to the default Master Code Lost Master Code Contact Ergotron Customer Care for instructions. Troubleshooting • Key pad numbers are dark Flashing LED: Meaning -Touch anywhere on number pad to activate back-light, (remains locked 3 &...
- Page 14 Español Manuel de l’utilisateur - Français Gebruikersgids - Nederlands Benutzerhandbuch - Deutsch Guida per l’utente - Italiano Svenska ユーザーガイ ド : 日本語 用户指南 : 汉语 사용자 안내서 : 대한민국 Compruebe que las baterías están instaladas en el paquete de baterías. NOTA: El usuario debe cambiar el código maestro en cuanto reciba el recinto.
- Page 15 4 Suivre les instructions « Code principal perdu » afi n de rétablir le code principal par défaut Code principal perdu Contacter le service client d’Ergotron pour obtenir les instructions. Dépannage du tiroir • Les chiff res du pavé numérique sont éteints -Toucher le pavé...
- Page 16 4 Befolgen Sie die Anweisungen in „Generalcode vergessen“, um die Einstellung des Generalcodes erneut vorzunehmen. Generalcode vergessen Wenden Sie sich für Anweisungen an den Ergotron-Kundendienst. Fehlerbehebung bei der Schublade • Die Nummern auf dem Nummernblock leuchten nicht Berühren Sie den Nummernblock an einer beliebigen Stelle, um die Blinkende LED: Bedeutung Hintergrundbeleuchtung zu aktivieren(bleibt verschlossen, bis Sie einen gültigen...
- Page 17 4 Volg de instructies “Hoofdcode verloren” om de standaardhoofdcode te herstellen. Verloren hoofdcode Neem voor instructies contact op met de klantenservice van Ergotron. Problemen met de laden oplossen • De toetsen op het numerieke toetsenblok blijven donker. Knipperend lampje: Betekenis...
- Page 18 4 Per ripristinare il codice principale predefi nito seguire le istruzioni “In caso di perdita del codice principale” In caso di perdita del codice principale Contattare il servizio clienti Ergotron. Soluzione di problemi relativi al cassetto • I numeri del tastierino sono scuri...
- Page 19 Svenska ユーザーガイ ド : 日本語 用户指南 : 汉语 사용자 안내서 : 대한민국 Se till att batterierna har installerats i batterifacket. OBS: Användaren bör ändra masterkoden vid mottagande av skåpet. Att programmera nya koder (standard masterkod: 12345) Tryck in masterkod på siff erpanelen. Siff rorna 3 och 5 på...
- Page 20 日本語 用户指南 : 汉语 사용자 안내서 : 대한민국 バッテリーパックに電池が装着されているこ とを確認します。 注: エンクロージャのご使用前にマスターコードを変更して ください。 新しいコードのプログラミング手順: (デフォルトのマスターコード: 12345) キーパッ ドにマスターコードを入力します。 キーパッ ドの3番と5番が点滅し、 マスターコードが受理されたこ とが分かります。 3番と5番が点滅している間に、 この2つを同時に押します。 すべての番号が点灯します (コードを入力できる時間は3秒間です) 。 新しいコードを入力します (任意の数字5桁) 。 (最初に入力したコードがマスターコードとなります。 ) コードが受け入れられるとすべてのLEDが点滅し、 コードの受け入れが確認できます (コードを入力できる時間は3秒間です) 。 次に個人コードを10件までプログラムできます。 ステップ5と6を繰り返して ください。 コードの入力完了後はLEDの点滅が3秒間続き、 システムがプログラムモードを終了します。 全コードの削除(1つのコードだけを削除することはできません): ロック解除...
- Page 21 • 输入私人密码。 • 同时按数字键盘上的1 和 2 2 同时按 3 和 5(正在闪烁时) • 钥匙 - 逆时针转动 1/8 圈 3 同时按数字键盘上的 1 和 2 4 遵照¡°忘记主密码¡±说明重设为默认主密码 忘记主密码 请联络 Ergotron 客户服务中心获取相关说明。 抽屉故障解决 • 键盘上的数字不亮 闪烁 LED 指示灯: Meaning 触摸数字键盘上的任何地方激活背光,(保持锁定状态直到输入有效 3 和 5: 设备已经准备好编制主密码或用户密码(请见¡°编制新密码¡±部分) 密码) 4: 电池电量低时,请根据需要充电和/或更换电池...
- Page 22 For Warranty visit: www.ergotron.com/warranty For Service visit: www.ergotron.com For local customer care phone numbers visit: http://contact.ergotron.com Para acceder a la última versión de la Guía de instalación para el usuario, ingrese a www.ergotron.com Para Garantía, visite: www.ergotron.com/warranty Para servicio, visite: www.ergotron.com Para conocer los números telefónicos locales de atención al cliente, visite: http://contact.ergotron.com...
Need help?
Do you have a question about the StyleView VL Enclosure and is the answer not in the manual?
Questions and answers