
Related Manuals for Ropox Medi 2


Summary of Contents for Ropox Medi 2
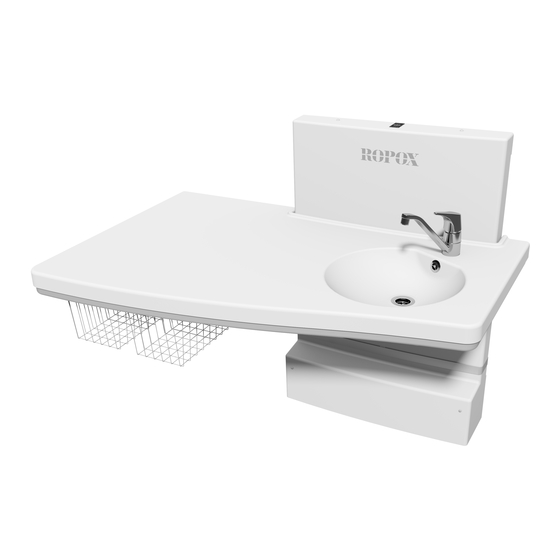
- Page 1 95091447 Ropox Puslebord Medi 2 Brugermanual Montagevejledning Denne manual skal altid ledsage produktet PDF 6102 / 01.12.2013...
-
Page 2: Table Of Contents
Indholdsfortegnelse Produktinformation ............................... 3 Varenumre ................................3 Tekniske data ................................. 4 Daglig brug ................................4 Anbefalinger i brug ..............................5 Vigtige oplysninger før montage ..........................6 1. Montage til væggen ............................9 2. Montage af dækkappe ............................10 3. Montage af bordplade ............................11 4. -
Page 3: Produktinformation
Produkt Ropox Puslebord Medi 2 Producent : Ropox, DK-4700 Næstved, Tel. +45 55 75 05 00 Anvendelsesområde – Det højdeindstillelige puslebord kan benyttes til at pusle børn op til 75 kg. Puslebordet kan benyttes i private hjem, daginstitutioner eller tilsvarende institutioner for at sikre korrekte og optimale arbejdsforhold for personalet/brugeren. -
Page 4: Tekniske Data
Generelle oplysninger Tekniske data Strømforsyning: 230V, 50Hz, max 2.0A Standby forbrug: Intermittens: Maks. 10%, 2min/18min Højde: Arbejdshøjde 65 – 100cm Unit B=70cm, H=102cm, D=10/12,4cm Materiale – ramme: Svejste stålrør St.37, rustfri og aluminium Bordplade: ABS / PMMA Overfladebehandling: Pulverlakeret, hvid RAL 9010 mat, chromat Max. -
Page 5: Anbefalinger I Brug
Generelle oplysninger Anbefalinger i brug Højdejusteringen tillader individuel arbejdshøjde for hver enkelt medarbejder og kan ligeledes bidrage til at reducere antallet af løft. For at sikre optimal udnyttelse af puslebordets funktioner og for at undgå ulykker er det vigtigt at forholde sig til disse grundlæggende sikkerhedsprocedurer. -
Page 6: Vigtige Oplysninger Før Montage
Montagevejledning Vigtige oplysninger før montage Målskitse af Puslebord Medi 2: Puslebord Medi 2 90 cm Puslebord Medi 2 130 Side 6... - Page 7 Montagevejledning Til denne montagevejledning medfølger: Løfteunit Rawplugs Dækkappe for løfteunit Bolt M5 x 25 Bordplade Bolt M4 x 10 Afløbsslange Bolt M8 x 20 Montageskruer Side 7...
- Page 8 Montagevejledning 1. Montage til væggen Montering til væggen Fastgørelseshullerne kan afmærkes på væggen, og der er fire muligheder i toppen og to muligheder i bunden af rammen. Anbring rammen mod væggen og sørg for, at den er i vater. Rammen står på to justerbare fødder.
-
Page 9: Montage Til Væggen
Montagevejledning Montage til væggen !! Hvis der skal monteres bensektion på puslebordet, skal separat montagevejledning for bensektion følges inden løfteenheden monteres på væggen !! Side 9... -
Page 10: Montage Af Dækkappe
Montagevejledning 2. Montage af dækkappe Side 10... -
Page 11: Montage Af Bordplade
Montagevejledning 3. Montage af bordplade Side 11... -
Page 12: Tilslutning Af Vand Og Afløb
Montagevejledning 4. Tilslutning af vand og afløb Side 12... - Page 13 Montagevejledning Hvis bordet er tilkøbt med sikkerhedsstop, tilsluttes ledningerne mellem Løfteenhed og bordpladeenhed. Side 13...
-
Page 14: Ledningsdiagram
Elektriske komponenter Ledningsdiagram Puslebordet leveres med kontrolboksen monteret på rammen. Diagrammet viser hvordan kablerne forbindes med kontrolboksen. Alle stikforbindelser er vandtætte, hvorfor de kan være lidt tricky at montere/afmontere. Sørg for, at alle stik vender korrekt, inden de stikkes ind i kontrolboksen. -
Page 15: Forbindelser
Elektriske komponenter Forbindelser Puslebordet leveres med kontrolboksen monteret på rammen. Motorkabel forbindes til indgang 1. Indgang 2, 3 & 4 benyttes ikke og er derfor blændet med blindprop. Håndbetjening tilsluttes indgang ”HB”. Netkablet forbindes til indgangen placeret på siden af kontrolboksen. Afmontering Netkablet kan trækkes direkte ud. -
Page 16: Mærkning
Hvert puslebord har sin egen label som vist. Denne label indeholder vigtig information, som skal opgives ved henvendelse til leverandøren. Den indeholder ligeledes oplysning om, hvilken strømforsyning der skal tilsluttes. Varenummer Serienummer 50-50675 Navn / Medi 2, 130cm model 75 KG 2014-01 Se forklaring nedenfor Produktionsår og Maks. belastning 75kg produktionsmåned... -
Page 17: Support
3. Kører bordet kun op, check om sikkerhedsstoppet er blokeret/aktiveret. 4. Afmonter alle kabler og monter dem igen 5. Kontakt Ropox for support Affaldshåndtering Det brugte udstyr skal bortskaffes i henhold den nationale lovgivning. Vi anbefaler at adskille produktet mest muligt, således at så meget som muligt kan genbruges. -
Page 18: Servicering
!! Vedligeholdelse af puslebordet må kun udføres af fagpersonale !! Hvis man ikke selv vil stå for denne gennemgang, kan Ropox kontaktes for at aftale et besøg af en servicetekniker. Se kontaktoplysninger sidst i denne manual. -
Page 19: Reservedele
Reservedele Gængse reservedele 97000473 Aktuator Type : LA31.3 Slaglængde 175 mm 97000434 Kontrolboks Type : CB9096-2 97000244 Ropox Håndbetjening Side 19... -
Page 20: Vedligeholdelse
Vedligeholdelse Ropox puslebord er vedligeholdelsesfrit. Af sikkerhedsmæssige hensyn anbefales det dog jævnligt at checke alle montageskruer og bevægelige dele for at sikre, at fastspændingen på væggen er i orden og sikker. Rengøring Benyt ikke højtryksrenser til rengøring af dette produkt. -
Page 21: Ce- Erklæring
CE- erklæring EU – konformitetserklæring Jeg erklærer herved, at jeg er ene ansvarlig for, at følgende produkter 50-50675 Puslebord Medi 2, 130 cm 50-50677 Puslebord Medi 2, 90 cm er i overensstemmelse med følgende direktiver og standarder: DIREKTIVER Rådets Direktiv nr. 89/392/EØF, vedrørende Maskiner ændret ved Direktiv nr. -
Page 22: Reklamationer
Reklamationer Se venligst Generelle Salgs- og Leveringsbetingelser på www.ropox.com Ropox A/S Ringstedgade 221 DK – 4700 Næstved Tel.: +45 55 75 05 00 Fax.: +45 55 78 05 50 E-mail: info@ropox.dk www.ropox.dk Ropox A/S Ringstedgade 221 DK – 4700 Naestved Tel.: +45 55 75 05 00 Fax.: +45 55 78 05 50... - Page 23 95091447 Ropox nursing Table Medi 2 User Manual Mounting Instructions Keep this manual with the product at all times PDF 6102 / 01.12.2013 Side 23...
- Page 24 Contents Product information ..............................25 Item numbers ................................25 Technical data ...............................26 Daily use ................................26 Recommendations for use .............................27 Important information prior to mounting ......................28 1. Wall mounting ..............................30 2. Mounting of cover .............................32 3. Mounting of tabletop ............................33 4. Connection of water and drain ..........................34 Wiring diagram ..............................36 Connections ................................37 Dismounting ................................37...
-
Page 25: Product Information
Ropox Nursing Table Medi 2 Manufacturer: Ropox, DK-4700 Næstved, Tel. +45 55 75 05 00 Application – The height-adjustable nursing table is designed for nursing persons up to 75 kg. The nursing table may be used in private homes, care centres or the like to ensure correct and optimum working conditions for the staff/user. -
Page 26: Technical Data
General information Technical data Power supply: 230V, 50Hz, max 2.0A Standby consumption: 7W Duty cycle: Max. 10%, 2min/18min Height: Working height 65 – 100cm Unit W=70cm, H=102cm, D=10/12,4cm Material – frame: Welded steel pipe St.37, stainless and aluminium Tabletop: ABS / PMMA Surface treatment: Powder-coated, white RAL 9010 mat, chromate Max. -
Page 27: Recommendations For Use
General information Recommendations for use The height adjustment allows individual working height for each carer and contributes to reducing the need for heavy lifting. To ensure optimum utilisation of the functions of the nursing table and to avoid accidents it is important to observe these basic safety procedures. -
Page 28: Important Information Prior To Mounting
Mounting instructions Important information prior to mounting Dimension sketch of nursing table Medi 2: 70 cm Nursing table Medi 2, 90 cm 70 cm Drain Ø40mm Water connection: ½ ” with union nut Socket 230V Nursing table Medi 2, 130 cm... - Page 29 Mounting instructions These mounting instructions comprise: Lifting unit Rawlplugs Cover for lifting unit x1 Bolt M5 x 25 Tabletop Bolt M4 x 10 Drain hose Bolt M8 x 20 Assembly bolts Lifting chain Controlbox CB9 Socket 230V Side 29...
-
Page 30: Wall Mounting
Mounting Instructions 1.Mounting to the wall The nursing table is being supplied with a set (8 pcs) of screws and rawlplugs, which is ONLY used to mount the unit in a concrete wall. The installer must always examine the material, condition and strength of the wall and use appropriate screws and rawlplugs. - Page 31 Mounting instructions Wall mounting !! If the nursing table is to be provided with a leg section, follow separate mounting instructions for leg section before fastening the lifting unit on the wall !! Side 31...
-
Page 32: Mounting Of Cover
Mounting instructions 2. Mounting of cover Side 32... -
Page 33: Mounting Of Tabletop
Mounting instructions 3. Mounting of tabletop Side 33... -
Page 34: Connection Of Water And Drain
Mounting instructions 4. Connection of water and drain Side 34... - Page 35 Mounting instructions If the nursing table is provided with a safety stop, connect the cables between lifting unit and tabletop. Side 35...
-
Page 36: Wiring Diagram
7. Mains cable 230V 8. Motor, to be connected to port 1 9. Hand-control switch 10. Safety stop cable (optional) Electrical system for nursing table Medi 2 with optional safety stop under the Electrical system for nursing table Medi 2 tabletop Side 36... -
Page 37: Connections
Electrical components Connections The nursing table is delivered with the control unit mounted on the frame. Connect motor cable to port 1. Ports 2, 3 & 4 are not used and have therefore been provided with a blind plug. Connect hand-control switch to port ”HB”. Connect mains cable to the port on the side of the control unit. -
Page 38: Marking
Each nursing table has a label of its own as illustrated. This label contains important information to be stated in connection with inquiries to the supplier. Item number Serial number 50-50675 Name / Medi 2, 130cm model 75 KG 2014-01 See explanation below Production year and Max. -
Page 39: Support
8. If the tale only moves upward, check if the safety stop has been blocked/activated. 9. Dismount all cables and mount them again. 10. Contact Ropox for support. Waste handling Used equipment must be disposed of according to national law. We recommend dismantling of the product to the greatest possible extent so that most parts may be recycled. -
Page 40: Maintenance
Ropox recommends testing the functions of the nursing table and retightening of all bolts and nuts once a year. In case of defects, please contact Ropox as soon as possible, and do not use the nursing table until the problem has been solved/remedied. -
Page 41: Spare Parts
Spare parts Usual spare parts 97000473 Actuator Type : LA31.3 Stroke 175 mm 97000434 Control unit Type : CB9096-2 97000244 Ropox hand-control switch Side 41... -
Page 42: Maintenance
Maintenance Ropox nursing table is maintenance-free. However, for safety reasons we recommend regular inspection of all bolts and moving parts to ensure correct and secure fastening to the wall. Cleaning Do not use a high-pressure washer to clean this product. -
Page 43: Ce Declaration
CE Declaration EU Declaration of Conformity I hereby declare under sole responsibility that the following products 50-50675 Nursing Table Medi 2, 130 cm 50-50677 Nursing Table Medi 2, 90 cm are in conformity with the following directives and standards: DIRECTIVES ... -
Page 44: Complaints
Complaints Please see General Terms of Sale and Delivery on www.ropox.com Ropox A/S Ringstedgade 221 DK – 4700 Næstved Tel.: +45 55 75 05 00 Fax.: +45 55 78 05 50 E-mail: info@ropox.dk www.ropox.dk Ropox A/S Ringstedgade 221 DK – 4700 Naestved Tel.: +45 55 75 05 00 Fax.: +45 55 78 05 50... - Page 45 95091447 Ropox Wickeltisch Medi 2 Benutzerhandbuch Montageanleitung Verbleibt beim Produkt PDF 6102 / 01.12.2013 Side 45...
- Page 46 Inhaltsverzeichnis Produktinformation ..............................47 Warennummern ..............................47 Technische Daten ..............................48 Täglicher Gebrauch..............................48 Empfehlungen zum Gebrauch ..........................49 Wichtige Auskünfte vor Montage ..........................50 1. Wandmontage ..............................52 2. Montage der Abdeckung ...........................54 3. Montage der Tischplatte............................55 4. Anschluss von Wasser und Ablauf ........................56 Schaltdiagramm ..............................58 Anschlüsse................................59 Demontage ................................59 Kennzeichnung .............................
-
Page 47: Produktinformation
Produkt Ropox Wickeltisch Medi 2 Hersteller : Ropox, DK-4700 Næstved, Tel. +45 55 75 05 00 Anwendungsbereich – Der höhenverstellbare Wickeltisch ist zur Pflege von Personen von bis zu 75 kg entwickelt worden. Er kommt in Privatwohnungen, Tageszentren o.dgl. zum Einsatz zur Erreichung der optimalen Arbeitsverhältnisse für das Pflegepersonal/den Benutzer. -
Page 48: Technische Daten
Allgemeine Auskünfte Technische Daten Stromversorgung: 230V, 50Hz, max. 2.0A Standby Verbrauch: Einschaltdauer: Max. 10%, 2 Min./18 Min. Höhe: Arbeitshöhe 65 – 100cm Einheit B=70cm, H=102cm, T=10/12,4cm Material – Rahmen: Geschweißte Stahlrohre St.37, rostfrei und Aluminium Tischplatte: ABS / PMMA Oberflächenbehandlung: Pulverlackiert, weiß RAL 9010 matt, Chromat Max. -
Page 49: Empfehlungen Zum Gebrauch
Allgemeine Auskünfte Empfehlungen zum Gebrauch Die Höhenverstellung ermöglicht individuelle Arbeitshöhe für das Pflegepersonal und wird auch zur Herabsetzung des belastenden Hinaufhebens der Benutzer beitragen. Zur Sicherstellung der optimalen Ausnutzung der Funktionen des Wickeltisches und zur Vermeidung von Unfällen sind die untenstehenden Sicherheitsvorschriften einzuhalten. -
Page 50: Wichtige Auskünfte Vor Montage
Montageanleitung Wichtige Auskünfte vor Montage Maßskizzen der Wickeltische Medi 2: 70 cm Wickeltisch Medi 2, 90 cm 70 cm Wickeltisch Medi 2, 130 cm Side 50... - Page 51 Montageanleitung Zu dieser Montageanleitung gehören: Hebeeinheit Dübel Abdeckung für Hebeeinheit Bolzen M5 x 25 Tischplatte Bolzen M4 x 10 Ablaufschlauch Bolzen M8 x 20 Montagebolzen Side 51...
-
Page 52: Wandmontage
Montageanleitung 1.Wandmontage Das Wickeltisch wird mit einem Satz (8 Stück) Schrauben und Dübel geliefert was für die Montage des Wickeltisch an einer Betonwand berechnet worden ist.Der Monteur muss immer das Material, die Beschaffenheit und Stärke der Wand bewerten und geeignete Schrauben und Dübel, für diesen Typ Wand, anwenden. - Page 53 Montageanleitung Wandmontage !! Soll der Wickeltisch mit Beinsektion versehen werden, vor Wandmontage der Hebeeinheit die separate Montageanleitung der Beinsektion befolgen !! Side 53...
-
Page 54: Montage Der Abdeckung
Montageanleitung 2. Montage der Abdeckung Side 54... -
Page 55: Montage Der Tischplatte
Montageanleitung 3. Montage der Tischplatte Side 55... -
Page 56: Anschluss Von Wasser Und Ablauf
Montageanleitung 4. Anschluss von Wasser und Ablauf Side 56... - Page 57 Montageanleitung Ist der Tisch mit einem Sicherheitsstop versehen, die Kabel zwischen Hebeeinheit und Tischplatteneinheit verbinden. Side 57...
-
Page 58: Schaltdiagramm
Einschaltdauer von 10%; 2 Min. EIN /18 Min. AUS. 11. Steuereinheit 12. Netzkabel 230V 13. Motor, Anschluss an Eingang 1 14. Handbedieneinheit 15. Sicherheitsstop-Kabel (Sonderausstattung) Elektrisches System für Wickeltisch Elektrisches System für Medi 2, mit Sicherheitsstop unter der Wickeltisch Medi 2 Tischplatte Side 58... -
Page 59: Anschlüsse
Elektrische Komponenten Anschlüsse Der Wickeltisch wird mit am Rahmen montierter Steuereinheit geliefert. Motorkabel an Eingang 1 verbinden. Eingang 2, 3 & 4 werden nicht benutzt und sind deshalb mit Blindstopfen versehen. Die Handbedieneinheit an Eingang ”HB” verbinden. Das Netzkabel an den Eingang auf der Seite der Steuereinheit verbinden. -
Page 60: Kennzeichnung
Jeder Wickeltisch hat ein eigenes Label wie abgebildet. Dieses Label enthält wichtige Auskünfte, die bei Anfragen an den Lieferanten anzugeben sind. Warennummer Seriennummer 50-50675 Name / Medi 2, 130cm Modell 75 KG 2014-01 Siehe Erläuterung unten Herstellungsjahr und Max. Belastbarkeit 75kg Herstellungsmonat Symbolübersicht:... -
Page 61: Support
überprüfen ob der Sicherheitsstop blockiert/aktiviert ist. 14. Alle Kabel demontieren und wieder montieren. 15. Kontakt zu Ropox zwecks Support Abfallentsorgung Die gebrauchte Ausstattung muss gemäß nationaler Gesetzgebung entsorgt werden. Wir empfehlen Zerlegung des Produktes, damit möglichst viele Teile wieder verwendet werden können. Beachten, dass dieses Produkt elektrische Komponenten enthält. -
Page 62: Wartung
Wartung Ropox empfiehlt eine Funktionsprüfung des Wickeltisches sowie das Nachziehen aller Bolzen und Muttern einmal jährlich. Bei Fehlern oder Mängeln möglichst bald mit Ropox Kontakt aufnehmen. Der Wickeltisch darf erst nach Abhilfe des Problems wieder verwendet werden. !! Die Wartung des Wickeltisches darf nur von kompetentem Fachpersonal durchgeführt werden !! -
Page 63: Ersatzteile
Ersatzteile Übliche Ersatzteile 97000473 Aktuator Typ : LA31.3 Hublänge 175 mm 97000434 Steuereinheit Typ : CB9096-2 97000244 Ropox Handbedieneinheit Side 63... -
Page 64: Wartung
Wartung Ropox Wickeltisch ist wartungsfrei. Aus Sicherheitsgründen empfiehlt sich jedoch eine regelmäßige Überprüfung aller Montagebolzen und beweglichen Teile zur Sicherstellung, dass die Befestigung an der Wand korrekt und sicher ist. Reinigung Nie für die Reinigung des Produktes einen Hochdruckreiniger benutzen. Einfach einen weichen Lappen oder Schwamm mit Seifenwasser von höchstens 60°C (pH 7) -
Page 65: Ce Erklärung
CE Erklärung EU – Konformitätserklärung Ich erkläre hierdurch, dass ich dafür alleinverantwortlich ist, dass die unten erwähnten Produkte 50-50675 Wickeltisch Medi 2, 130 cm 50-50677 Wickeltisch Medi 2, 90 cm den untenstehenden Richtlinien und Normen entsprechen: RICHTLINIEN Richtlinie des Rates Nr. 89/392/EWG über Maschinen, abgeändert durch Richtlinie Nr. -
Page 66: Reklamationen
Reklamationen Bitte siehe Allgemeine Verkaufs- und Lieferungsbedingungen auf www.ropox.com Side 66... - Page 67 Side 67...
- Page 68 Ropox A/S Ringstedgade 221 DK – 4700 Næstved Tel.: +45 55 75 05 00 Fax.: +45 55 78 05 50 E-mail: info@ropox.dk www.ropox.dk Ropox A/S Ringstedgade 221 DK – 4700 Naestved Tel.: +45 55 75 05 00 Fax.: +45 55 78 05 50 E-mail: info@ropox.dk...
Need help?
Do you have a question about the Medi 2 and is the answer not in the manual?
Questions and answers