
Related Manuals for VERDER Verderflex Rapide


Summary of Contents for VERDER Verderflex Rapide
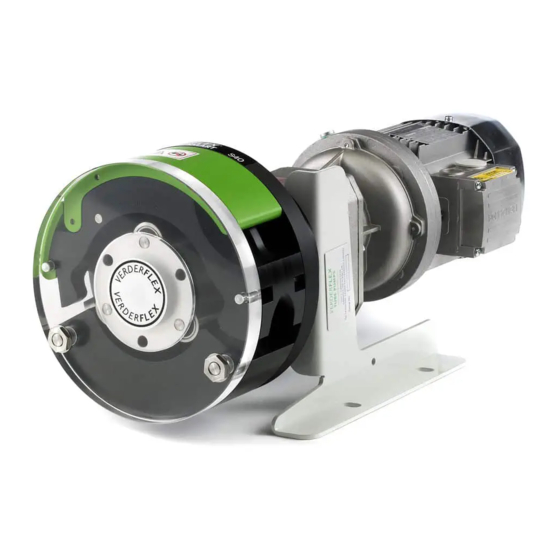
- Page 1 Peristaltic Industrial Tube Pump Original Operating Manual Rapide Rapide S Rapide 5000 Version 2.0v-11/2019 Print-No.
- Page 2 Rapide Version 2.0v-11/2019 Print-No. Rapide S Rapide 5000 The information in this document is essential for the safe operation and servicing of Verderflex ® Rapi- de family of pumps. This document must be read and understood thoroughly prior to installation of unit, electrical connection and commissioning.
-
Page 3: Table Of Contents
Table of Contents About this Document Operation Target Groups Pre-commissioning the Pump Warnings and Symbols Used in the Manual 6.1.1 Checking the Direction of Rotation Tools used on the Rapide 5000 Pump with Dry Pump 6.1.2 Starting the Pump Safety 6.1.3 Switching OFF the Pump Intended Use Commissioning the Pump... -
Page 4: About This Document
About this Document The Verderflex Rapide range of peristaltic pumps have been developed according to the latest technology and subject to con- tinuous quality control. These operating instructions are intended to facilitate familiarisation with the pump and its designed use. -
Page 5: Tools Used On The Rapide 5000 Pump
1.3 Tools used on the Rapide 5000 Pump Tools Image Description Tool for 17mm nut – used to access the hand crank hexagon nut when install- ing the tube (g 5.4 Installing the Rapide 5000) Tool for 17mm nut – used to undo the shaft guard cover to gain access to the cover (4mm allen hand crank hexagon nut (g 5.4 Installing the Rapide 5000) key) -
Page 6: Safety
The warranty is void if the customer fails to follow any premises of the machine. Instruction, Warning or Caution in this document. Verder Not only must the general safety instructions laid down has made every effort to illustrate and describe the prod- in this chapter on “Safety”... -
Page 7: Obligation Of Personnel
2.2.3 Obligation of Personnel It is imperative that the instructions contained in this manual are complied with by the operating personnel at all times. Pump and associated components: – Do not lean or step on them or use as climbing aid –... -
Page 8: Transport, Storage And Disposal
Transport, Storage and Disposal Tubes should be stored as supplied in their wrapper and should be stored away from direct sunlight and at room temperature. Transport Gearboxes may require intermittent attention as indicated Always transport the pump in a stable position and ensure by the gearbox manufacturer’s recommendations. -
Page 9: Layout And Function
Layout and Function The medium to be pumped does not come into contact with any moving parts and is totally contained within the tube. A roller passes along the length of the tube, com- pressing it. This motion forces the contents of the tube di- rectly in front of the roller to move forward along the length of the tube in a ‘positive displacement’... -
Page 10: Layout
4.3 Layout 4.3.1 Rapide Exploded View Figure 3 Rapide Exploded View (Generic View) Front Cover Rotor Assembly Drive Shaft Connectors Pump Body External Cir-Clip Tube Element Bearing Gearbox Tube Clamp Assembly Adaptor Sleeve Motor Rapide 2.0v-11.2019 10 | Page... -
Page 11: Rapide 'S' Exploded View
4.3.2 Rapide ‘S’ Exploded View 9 10 11 Figure 4 Rapide ‘S’ Exploded View (Generic View) Locking Nuts Roller and Rotor Assembly Drive Shaft Mounting Flange Front Cover Ski Boot Catch Drive Coupling Bush Frames Clamping Assembly Ski Boot Handle Bearing Gearbox Tie Bar... -
Page 12: Rapide 5000 Exploded View
4.3.3 Rapide 5000 Exploded View Figure 5 Rapide 5000 Exploded View (Generic View) Bearing Strut Main Rollers Tube Clamp Continuous Tube Horizontal Guide Rollers Motor Gearbox Rotor Assembly Pump Door Motor Vertical Guide Rollers Pump Head Key Operated Lock 10 Unlock Key Note The lock key (item10) is used to unlock/open the pump door. -
Page 13: Installation And Connection
Installation and Connection 5.1.3 Connecting to a Power Supply DANGER CAUTION Risk of electrocution! Material damage due to unauthorized modification on All electrical work must be carried out by qualified pump electricians. Unauthorized modification will invalidate the warranty. Make sure that the electrical information. on the rating plate agrees with the power supply. -
Page 14: Installing The Rapide Pump
Installing the Rapide Pump DANGER Rotor setting distance Isolate power supply from the pump before open- 2.5mm ing the pump head. 5.2.1 Installing the Rotor Align grub screw hole with flat on shaft. Align peak of roller with peak of tube track or set rotor distance back from front of pump housing as Fastening indicated (g Figure 6 Installing the Rotor). -
Page 15: Optional Tube Saddle Status Detection Ssd
5.3.2 Optional Tube Saddle Status Detection SSD The tube saddle status detection interlocks the tube saddle and the pump. The tube saddle status detec- tion comprises two main components: A reed switch embedded in the back plate of the pump head A set of two magnets fitted to the tube saddle, one at either side. -
Page 16: Installing The Rapide 5000
Installing the Rapide 5000 5.4.1 Installing Continuous Tube DANGER Isolate the pump from the main power supply before opening the pump door or performing any positioning, removal or maintenance operation. CAUTION Make sure the tube is compatible with the rotor assembly. Before using a new tube assembly, make sure the pump is run in the clockwise direction for 1 minute. -
Page 17: Installing The Tube Element
5.4.2 Installing the Tube Element DANGER Isolate the pump from the main power supply before opening the pump door or performing any positioning, removal or maintenance operation. CAUTION Make sure the tube is compatible with the rotor assembly. Before using a new tube assembly, make sure the pump is run in the clockwise direction for 1 minute. -
Page 18: Rotor Assembly Replacement
5.4.3 Rotor Assembly Replacement DANGER Isolate the pump from the main power supply before opening the pump door or performing any positioning, removal or maintenance operation. Note Before removing the rotor assembly, make sure the tube has been correctly removed. (g 5.4.1 Installing Continuous Tube) Unscrew the M4 bearing strut retaining screw using a screwdriver. -
Page 19: Operation
Operation 6.1.3 Switching OFF the Pump WARNING Pre-commissioning the Pump Risk of injury due to hot pump parts! 6.1.1 Checking the Direction of Rotation with Use personal protective equipment when carrying out any Dry Pump work on the pump. Switch the motor on and check the direction of rotation; NOTE switch immediately off again. -
Page 20: Commissioning The Pump
Commissioning the Pump Shutting Down the Pump 6.2.1 Switching ON the Pump Take the following measures whenever the pump is shut down: DANGER Pump is... Measure Risk of injury due to running pump! shut down Take measures according to the Do not touch the moving parts of a running pump. -
Page 21: Inspection, Maintenance And Repair
7 Inspection, Maintenance 7.2.1 Cleaning the Pump and Repairs NOTE Only trained service technicians should be employed High water pressure or spray water can damage for fitting and repair work. Present a pumped medium certificate (DIN safety data sheet or safety certificate) motors! when requesting service. -
Page 22: Rapide Maintenance Schedule
7.2.3 Rapide Maintenance Schedule Task Frequency Action Check pump and gearbox for leaks and – Before pump start up u Repair leaks and damage before damage – Daily visual inspection operating the pump – Scheduled intervals during u Replace components as necessary. operation u Clean up any spillage. -
Page 23: Repairs
7.3 Repairs There are no user serviceable parts inside the pump. Repairs can only be carried out by the manufacturer or authorised service centre. 7.3.1 Returning the Pump to the Service Centre Completely emptied and decontaminated. Pump cooled down. Tube removed. Obtain prior authorisation and returns advice number (for tracking purposes) before return of the pump. -
Page 24: Troubleshooting
8 Troubleshooting 8.1 Pump Malfunctions If malfunctions occur which are not specified in the following table or cannot be traced back to the specified causes, please consult the manufacturer. Possible malfunctions are identified and respective cause and remedy are listed in the table. Rapide and Rapide ‘S’... - Page 25 8.1 Pump Malfunctions (continuous) Rapide 5000 Pump Troubleshooting List: Problem Cause Solution Use thicker wall tube with the same inner diameter. This will require a different rotor assembly. Ratio of inner diameter/wall thickness too large Run pump slower with larger inner diameter tube. for the application (tube too ‘soft’).
-
Page 26: List Of Figures And Tables
List of Figures and Tables List of Figures Figure 1 Lifting the Pump 3.1.2 Figure 2 Name Plate 4.2.1 Figure 3 Rapide Exploded View (Generic View) 4.3.1 Figure 4 Rapide ‘S’ Exploded View (Generic View) 4.3.2 Figure 5 Rapide 5000 Exploded View (Generic View) 4.3.3 Figure 6 Installing the Rotor - Rapide Pump... -
Page 27: Ec Declaration Of Conformity
EC Declaration of Conformity EC declaration of conformity according to machinery directive, appendix II A VERDER Ltd., Unit 3 California Drive, Castleford hereby declare that the following machine adheres to the relevant EC directives detailed below Verderflex Rapide Designation Verderflex Rapide ‘S’ Verderflex Rapide 5000 EC directives: •... -
Page 28: Technical Specifications
Appendix A 11.5 Ambient Conditions Operation under other ambient condition 11 Technical Specifications would require approval from the manufacturer: 11.1 Pump Specifications – Rapide Rapide, Rapide ‘S’ and Rapide 5000: Operating conditions Size Value • Ambient temperature 5 °C to +45 °C Max. delivery pressure 2 bar •...
Need help?
Do you have a question about the Verderflex Rapide and is the answer not in the manual?
Questions and answers