Advertisement
InstallatIon InstructIons
warning: never exceed your vehicle manufacturer's recommended towing capacity
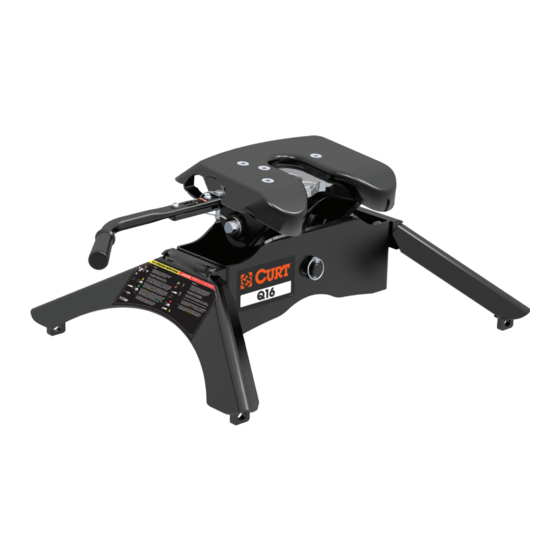
Q16 5th Wheel hItch
table of contents
Page#
Description
1
Warnings & Precautions
2 - 4
5 - 7
7
8
8 - 9
9
DanGer zone precautIons
Block all trailer tires in front and behind with appropriate
wheel chocks. Do not substitute objects such as, but not
limited to: stones, wood blocks, etc.
Front trailer lifting jacks must be supporting the
trailer and resting on a firm and level surface.
Towing vehicle must be stationary with automatic
transmission in park, emergency brake applied and engine
off. If equipped with a manual transmission place in neutral,
apply emergency brake and shut off the engine.
WarnInGs
Read and understand instructions before using this product.
Fully instruct and demonstrate the operation of this 5th
wheel hitch to the end user. Include the importance of
observing all warnings contained herein, including warning
labels on 5th wheel hitch mid section. Provide this manual
in its entirety to the end-user. Serious injury or death may
result if the warnings above are not observed.
To avoid serious injury, do not expose hands, body parts
or clothing between the truck and trailer or the truck's bed
sides and trailer. Extreme care should be observed to avoid
serious injury to self, property and observers.
Never exceed the rated towing capacity of your vehicle.
Trailer and contents combined must not exceed tow vehicle,
hitch and/or trailer tow ratings. Exceeding rated capacity
may result in separation. Exceeding rated capacity may
result in damage to 5th wheel hitch, towing vehicle, trailer
and or cause serious injury or death.
Never position yourself or others under the trailer's kingpin
area (danger zone) during coupling and uncoupling. If for
any reason you must position any part of your body under
the trailer, between the truck and the trailer or between the
trailer's kingpin and 5th wheel hitch, you must follow the steps
in the 'Danger Zone Precautions' section to the left. Improperly
coupled trailers can separate and drop without notice.
PAGE 1 • 16120-INS-RA • 1.800.798.0813 • NEED ASSISTANCE?
• CURTMFG.COM
Advertisement
Table of Contents

Related Manuals for Curt Group Q16


Summary of Contents for Curt Group Q16
-
Page 1: Table Of Contents
InstallatIon InstructIons warning: never exceed your vehicle manufacturer's recommended towing capacity Q16 5th Wheel hItch table of contents WarnInGs Read and understand instructions before using this product. Fully instruct and demonstrate the operation of this 5th Page# Description wheel hitch to the end user. Include the importance of Warnings &... -
Page 2: Assembly & Installation
With your trailer on a firm and level surface, set chock blocks The Q16 5th wheel hitch is an engineered unit that has been in front of and behind the tires. (Do not substitute wood designed and tested at the rating of 16,000 lbs. - Page 3 With the base rails correctly positioned, the Q16 5th wheel assembly will drop into the slots on the top surface of the base rails. Align the four tabs on the bottom of the Q16 legs with the corresponding slots in the tow vehicles mounting rails.
- Page 4 Step 1 Locate the handle assemble and hardware pack provided Figure 10 with your Q16 5th wheel hitch as shown on the front page. WARNING: The jaws on the 16120 head are spring loaded. Step 6 The jaws will open rapidly when the safety pin is removed With both M8 bolts in place through the handle assembly, and the handle is moved to the unlock position.
-
Page 5: Coupling & Locking
Figure 15 above. If the jaw's are open be used in front of and behind trailer tires. Do not substitute and the handle is in the unlocked position, your Q16 5th wheel objects such as, but not limited to: stones, wood blocks, etc. - Page 6 preparatIon couplInG troubleshootInG If you are using a lube plate on the trailer's kingpin, you are ready to couple the trailer to the 5th wheel. A single 3/16" red indicator with jaws open - do not tow thick lube plate may be used. If you are not using a lube plate, apply a high-pressure wheel bearing grease to the WARNING: Do not tow in this configuration.
-
Page 7: Uncoupling & Resetting
pull test preparInG to toW After coupling and prior to removing trailer wheel blocks Confirm handle safety lynch pin has been installed. and or raising front trailer jacks, you must do the following: Attach electrical harnesses. Set towing vehicle in a forward gear and lightly tug on Attach lanyard and insert electric brake break-away the trailer to ensure that 100% coupling has taken place. -
Page 8: Removal & Reinstallation
For your convenience, the Q16 5th wheel hitch may be Your CURT Q16 5th wheel hitch has been designed to disassembled to ease removal. This section will discuss offer years of safe and reliable service. To achieve the best the two different ways the 5th wheel can be removed. -
Page 9: Warranty
Complete Q16 Clean After each use, For optimal service life, clean your Q16 after each use with warm soapy water and 5th wheel hitch before long term dry with towels or compressed air. It is also recommended that the 5th wheel is storage removed from the vehicle or covered when not in use for extended periods of time.
Need help?
Do you have a question about the Q16 and is the answer not in the manual?
Questions and answers
Hi I'm looking for the part number for the bolt that holds the roller on my Q16 slider