Graco Reactor 2 H-30 Repair Parts
Hydraulic proportioning systems
Hide thumbs
Also See for Reactor 2 H-30:
- Repair manual (102 pages) ,
- Manual (102 pages) ,
- Operation (78 pages)
Table of Contents
Advertisement
Repair-Parts
Reactor® 2 2 2 Hydraulic
Reactor®
Reactor®
Systems
Systems
Systems
Hydraulic, heated,
heated, plural
plural component
Hydraulic,
Hydraulic,
heated,
plural
Not
Not for
Not
for outdoor
for
outdoor use.
outdoor
use. For
use.
For professional
For
Not
Not approved
Not
approved for
approved
for use
for
use in in in explosive
use
Important Safety
Important
Important
Safety
Safety Instructions
Read all warnings and instructions in this manual. Save these
instructions.
For model information, see page 10.
Hydraulic Proportioning
Proportioning
Hydraulic
Proportioning
component proportioner
proportioner for
component
proportioner
professional use
professional
use
use only.
only.
only.
explosive
explosive atmospheres
atmospheres
atmospheres or or or hazardous
Instructions
Instructions
PROVEN QUALITY. LEADING TECHNOLOGY.
for spraying
spraying polyurethane
polyurethane foam
for
spraying
polyurethane
hazardous (classified)
hazardous
(classified) locations.
(classified)
334946H
foam and
and polyurea
polyurea coatings.
foam
and
polyurea
locations.
locations.
EN
coatings.
coatings.
Advertisement
Table of Contents

Subscribe to Our Youtube Channel
Related Manuals for Graco Reactor 2 H-30


Summary of Contents for Graco Reactor 2 H-30
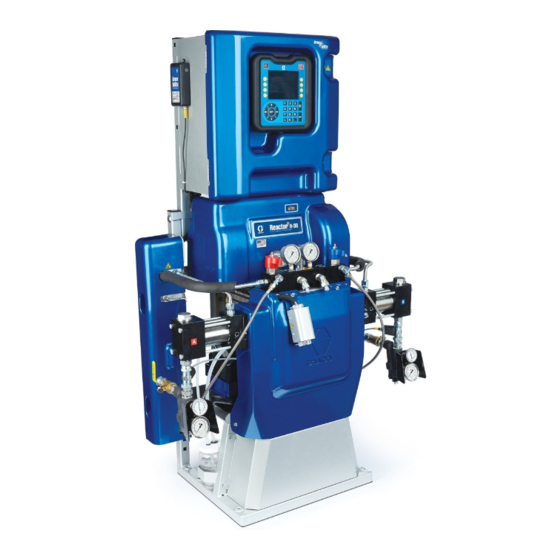
- Page 1 Repair-Parts Reactor® 2 2 2 Hydraulic Hydraulic Proportioning Proportioning Reactor® Reactor® Hydraulic Proportioning 334946H Systems Systems Systems Hydraulic, heated, heated, plural plural component component proportioner proportioner for for spraying spraying polyurethane polyurethane foam foam and and polyurea polyurea coatings. coatings. Hydraulic, Hydraulic, heated,...
-
Page 2: Table Of Contents
Replace Pressure Transducers ..... 59 Reference........... 107 Repair Primary Heater........60 Technical Specifications........108 Repair Heater Overtemperature Switch..........60 California Proposition 65 ........109 Replace RTD..........61 Graco Extended Warranty ......... 110 Repair Heated Hose........62 Repair Fluid Temperature Sensor (FTS) ..........64 334946H... -
Page 3: Warnings
Warnings Warnings Warnings Warnings The following warnings are for the setup, use, grounding, maintenance, and repair of this equipment. The exclamation point symbol alerts you to a general warning and the hazard symbols refer to procedure-specific risks. When these symbols appear in the body of this manual or on warning labels, refer back to these Warnings. - Page 4 Warnings WARNING WARNING WARNING SKIN SKIN SKIN INJECTION INJECTION INJECTION HAZARD HAZARD HAZARD High-pressure fluid from dispensing device, hose leaks, or ruptured components will pierce skin. This may look like just a cut, but it is a serious injury that can result in amputation. Get immediate surgical surgical treatment.
- Page 5 Warnings WARNING WARNING WARNING THERMAL THERMAL THERMAL EXPANSION EXPANSION HAZARD EXPANSION HAZARD HAZARD Fluids subjected to heat in confined spaces, including hoses, can create a rapid rise in pressure due to the thermal expansion. Over-pressurization can result in equipment rupture and serious injury.
- Page 6 Warnings WARNING WARNING WARNING EQUIPMENT EQUIPMENT EQUIPMENT MISUSE MISUSE HAZARD MISUSE HAZARD HAZARD Misuse can cause death or serious injury. • Do not operate the unit when fatigued or under the influence of drugs or alcohol. • Do not exceed the maximum working pressure or temperature rating of the lowest rated system component.
-
Page 7: Important Isocyanate Information
Important Isocyanate Information Important Isocyanate Isocyanate Information Information Important Important Isocyanate Information Isocyanates (ISO) are catalysts used in two component materials. Isocyanate Conditions Conditions Isocyanate Isocyanate Conditions Spraying or dispensing fluids that contain isocyanates creates potentially harmful mists, vapors, and atomized particulates. - Page 8 Important Isocyanate Information Material Self Self - - - Ignition Ignition Moisture Sensitivity Sensitivity of of of Isocyanates Isocyanates Material Material Self Ignition Moisture Moisture Sensitivity Isocyanates Exposure to moisture (such as humidity) will cause ISO to partially cure, forming small, hard, abrasive crystals that become suspended in the fluid.
-
Page 9: Related Manuals
17G340 Caster Kit System System System Manuals Manuals Manuals 17F837 Inlet Sensor Kit 334945 Reactor 2 Proportioner, Operation 16X521 Graco InSite Extension cable 24.6 ft Displacement Displacement Displacement Pump Pump Pump Manual Manual Manual (7.5 m) 3A3085 Pump, Repair-Parts 24N449... -
Page 10: Models
Models Models Models Models Reactor 2 2 2 H H H - - - 30 30 and and H H H - - - 30 30 Elite Elite Reactor Reactor Elite H H H - - - 30 30 Model Model Model H H H - - - 30... - Page 11 Models Reactor 2 2 2 H H H - - - 40 40 and and H H H - - - 40 40 Elite, Elite, Reactor Reactor Elite, 200–240V 200–240V 200–240V H H H - - - 40 40 Model Model Model H H H - - - 40...
-
Page 12: (350-415V)
Models Reactor 2 2 2 H H H - - - 40 40 and and H H H - - - 40 40 Elite, Elite, Reactor Reactor Elite, 350–415V (Continued) (Continued) 350–415V 350–415V (Continued) H H H - - - 40 40 Model Model Model... - Page 13 Models Reactor 2 2 2 H H H - - - 50 50 and and H H H - - - 50 50 Elite Elite Reactor Reactor Elite H H H - - - 50 50 Model Model Model H H H - - - 50 50 Elite Elite Model Elite...
- Page 14 Models Reactor 2 2 2 H H H - - - XP2 XP2 and and H H H - - - XP2 XP2 Elite Elite Reactor Reactor Elite H H H - - - XP2 XP2 Model Model Model H H H - - - XP2 XP2 Elite Elite Elite Model...
- Page 15 Models Reactor 2 2 2 H H H - - - XP3 XP3 and and H H H - - - XP3 XP3 Elite Elite Reactor Reactor Elite H H H - - - XP3 XP3 Model Model Model H H H - - - XP3 XP3 Elite Elite Model Elite...
-
Page 16: Troubleshooting
QR code with your smartphone to be sent directly to online troubleshooting for the active error code. Otherwise, manually navigate to http://help.graco.com and search for the active error. To avoid injury due to unexpected machine operation initiated by a remote controller, disconnect the cellular module from the system prior to troubleshooting. - Page 17 Troubleshooting Error Codes Codes Error Error Codes NOTE: NOTE: When an error occurs be sure to determine the code before resetting it. If you forget which error code NOTE: occurred, see the Errors screen to view the last 200 errors, with date, time, and description. Error Location Type...
- Page 18 Troubleshooting Error Location Type Description Cause Solution Error Error Location Location Type Type Description Description Cause Cause Solution Solution A7DH Hose Unexpected Current Shorted TCM If error cannot be cleared Hose or regenerates consistently, replace module. A8DA Heater A Tripped circuit Visually check circuit No Current A breaker...
- Page 19 Troubleshooting Error Location Type Description Cause Solution Error Error Location Location Type Type Description Description Cause Cause Solution Solution CACM HCM Communica- Module does not Insert a system token into have software the ADM module and cycle tion Error the power. Wait until the upload is complete before removing the token.
- Page 20 Troubleshooting Error Location Type Description Cause Solution Error Error Location Location Type Type Description Description Cause Cause Solution Solution CACT TCM Communication Module does not Insert a system token into have software the ADM module and cycle Error the power. Wait until the upload is complete before removing the token.
- Page 21 Troubleshooting Error Location Type Description Cause Solution Error Error Location Location Type Type Description Description Cause Cause Solution Solution EVCH Hose Manual Mode Hose Manual Mode Install a functioning fluid Enabled has been enabled temperature sensor (FTS) in System Setup in the hose or run in Hose screen Resistance Mode with a...
- Page 22 Troubleshooting Error Location Type Description Cause Solution Error Error Location Location Type Type Description Description Cause Cause Solution Solution MMUX Maintenance Due - USB logs have Insert a USB drive into the reached a level ADM and download all logs. where data loss will occur if logs are not downloaded.
- Page 23 Troubleshooting Error Location Type Description Cause Solution Error Error Location Location Type Type Description Description Cause Cause Solution Solution P1FA Low Inlet Pressure A Inlet pressure Ensure that inlet pressure lower than defined to the pump is sufficient. value Value defined too Ensure that the low high pressure alarm level...
- Page 24 Troubleshooting Error Location Type Description Cause Solution Error Error Location Location Type Type Description Description Cause Cause Solution Solution P4BX High Pressure B System Pressure in the hose and pumps will increase as the pressurized before allowing heat to system heats up. Turn on heat and allow all zones reach setpoint to reach the temperature...
- Page 25 Troubleshooting Error Location Type Description Cause Solution Error Error Location Location Type Type Description Description Cause Cause Solution Solution P6BX Pressure Sensor Loose/bad Check to ensure the connection Error B pressure transducer is properly installed and all wires are properly connected.
- Page 26 Troubleshooting Error Location Type Description Cause Solution Error Error Location Location Type Type Description Description Cause Cause Solution Solution P7AX Pressure Imbalance Pressure Ensure material flow is A High difference between equally restricted on both A and B material material lines. is greater than the defined value Pressure...
- Page 27 Troubleshooting Error Location Type Description Cause Solution Error Error Location Location Type Type Description Description Cause Cause Solution Solution R1D0 Low Ratio Low Flow Damaged ISO Inspect the ISO pump and pump replace if necessary. Fluid leak between Inspect fluid lines for ISO ISO pump and leaks.
- Page 28 Troubleshooting Error Location Type Description Cause Solution Error Error Location Location Type Type Description Description Cause Cause Solution Solution T2DA Heater A Low Temperature A Flow is too high at Use a smaller mix chamber current setpoint that is rated for the unit in use.
- Page 29 Troubleshooting Error Location Type Description Cause Solution Error Error Location Location Type Type Description Description Cause Cause Solution Solution T2FA Low Temperature Inlet fluid Recirculate fluid through Inlet A temperature is heaters until inlet fluid below the defined temperature is above level defined error level.
- Page 30 Troubleshooting Error Location Type Description Cause Solution Error Error Location Location Type Type Description Description Cause Cause Solution Solution T4DA Heater A High Temperature A Bad RTD or bad Swap A and B heater output RTD placement cables and RTD cables and against heater see if issue follows.
- Page 31 Troubleshooting Error Location Type Description Cause Solution Error Error Location Location Type Type Description Description Cause Cause Solution Solution T4EA Heater A High Temperature Overtemperature Heater was delivered too Switch A much power, causing the switch sensed a fluid temperature overtemperature switch to open.
- Page 32 Troubleshooting Error Location Type Description Cause Solution Error Error Location Location Type Type Description Description Cause Cause Solution Solution T6DH Hose Sensor Error Hose Disconnected or Expose each hose RTD shorted RTD cable connection to check and in hose or bad FTS retighten any loose con- nector.
- Page 33 Troubleshooting Error Location Type Description Cause Solution Error Error Location Location Type Type Description Description Cause Cause Solution Solution T8DA Heater A No Temperature Bad RTD or bad Swap A and B heater output Rise A RTD placement cables and RTD cables and against heater see if issue follows.
- Page 34 Troubleshooting Error Location Type Description Cause Solution Error Error Location Location Type Type Description Description Cause Cause Solution Solution V2MA Low Voltage A Loose connection Check wiring for loose or tripped circuit connection or tripped circuit breaker breaker. Low incoming line Measure voltage at circuit voltage.
- Page 35 Troubleshooting Error Location Type Description Cause Solution Error Error Location Location Type Type Description Description Cause Cause Solution Solution V4MB High Voltage B Incoming line Ensure incoming system voltage is too high power is wired properly. Verify voltage at each circuit breaker is between 195 and 264 VAC.
-
Page 36: Hydraulic Drive System
Troubleshooting Hydraulic Drive Drive System System Hydraulic Hydraulic Drive System 2. Turn the main power switch OFF. 3. Allow equipment to cool. Try the recommended solutions in the order given for each problem, to avoid unnecessary repairs. Also, determine that all circuit breakers, switches, and controls are properly set and wiring is correct before Before performing any troubleshooting procedures: assuming there is a problem. - Page 37 Troubleshooting PROBLEM PROBLEM PROBLEM CAUSE CAUSE CAUSE SOLUTION SOLUTION SOLUTION Hydraulic pump does not develop Pump is not primed or lost its prime. Check electric motor rotation. Both pressure. Low or zero pressure motor and hydraulic pump must with screeching noise. rotate counterclockwise when viewed from shaft end.
-
Page 38: Proportioning System
Troubleshooting Proportioning System System Proportioning Proportioning System 2. Turn the main power switch OFF. 3. Allow equipment to cool. Problems: Problems: Problems: Try the recommended solutions in the order given for each problem, to avoid unnecessary repairs. Also, Before performing any troubleshooting procedures: determine that all circuit breakers, switches, and controls are properly set and wiring is correct before 1. -
Page 39: Pressure/Material Imbalance
Troubleshooting PROBLEM PROBLEM PROBLEM CAUSE CAUSE CAUSE SOLUTION SOLUTION SOLUTION Pumps do not reverse direction or Loose reversing proximity switch. Pumps Do Not Reverse pumps do not move. Direction, page Loose piston packing bolt. Pumps Do Not Reverse Direction, page Faulty directional valve. -
Page 40: Pumps Do Not Reverse Direction
Troubleshooting Pumps Do Do Not Not Reverse Reverse Direction Direction Pumps Pumps Reverse Direction 1. Check the functionality of each proximity switch (211). For proportioning pumps to reverse direction, the a. Remove the front cover. proximity switches (211) must sense the switching b. - Page 41 Troubleshooting 4. Check functionality of the directional valve (207). If one or both sides are not operating properly, according to the table, first a. Confirm that the directional valve cable reconfirm wiring to directional valve (207) is connected properly from HCM port 15 Electrical Schematics, page 102, then to the directional valve body (207) and...
-
Page 42: Hose Heat System
Troubleshooting Hose Heat Heat System System Hose Hose Heat System Before performing any troubleshooting procedures: 1. Follow Pressure Relief Procedure, page 2. Turn the main power switch OFF. 3. Allow equipment to cool. Problem Cause Solution Problem Problem Cause Cause Solution Solution Hose heats but heats slower... - Page 43 Troubleshooting Problem Cause Solution Problem Problem Cause Cause Solution Solution Hose temperature exceeds A and/or B heaters are overheating Check primary heaters for either setpoint. material. an RTD problem or a failed element attached to RTD, see Electrical Schematics, page 102.
- Page 44 Troubleshooting Problem Cause Solution Problem Problem Cause Cause Solution Solution Hoses near Reactor are warm, but Shorted connection or failed hose With power off, check the hose hoses downstream are cold. heating element. resistance with and without the whip hose attached. With the whip hose attached, the reading should be less than 3 ohm.
-
Page 45: Primary Heater
Troubleshooting Primary Heater Heater Primary Primary Heater 2. Turn the main power switch OFF. 3. Allow equipment to cool. Try the recommended solutions in the order given for each problem, to avoid unnecessary repairs. Also, determine that all circuit breakers, switches, and controls are properly set and wiring is correct before Before performing any troubleshooting procedures: assuming there is a problem. -
Page 46: Flow Meter
Troubleshooting Flow Meter Meter Flow Flow Meter 1. Relieve pressure. Pressure Relief Procedure, page 2. Turn the main power switch OFF. 3. Allow equipment to cool. Try the recommended solutions in the order given for Before performing any troubleshooting procedures: each problem, to avoid unnecessary repairs. -
Page 47: Pressure Relief Procedure
Pressure Relief Procedure Pressure Relief Relief Procedure Procedure Pressure Pressure Relief Procedure 4. Close gun fluid inlet valves A and B. Follow the Pressure Relief Procedure whenever you see this symbol. 5. Shut off feed pumps and agitator, if used. 6. -
Page 48: Shutdown
Shutdown Shutdown Shutdown Shutdown 6. Turn off the air compressor, air dryer, and NOTICE NOTICE NOTICE breathing air. Proper system setup, startup, and shutdown procedures are critical to electrical equipment reliability. The following procedures ensure steady voltage. Failure to follow these procedures will cause voltage fluctuations that can damage electrical equipment and void the warranty. -
Page 49: Flushing
Flushing Flushing Flushing Flushing To flush feed hoses, pumps, and heaters separately from heated hoses, set PRESSURE RELIEF/SPRAY valves (SA, SB) to PRESSURE RELIEF/CIRCULATION . Flush through bleed To avoid fire and explosion: lines (N). • Flush equipment only in a well-ventilated area. •... -
Page 50: Repair
Repair Repair Pumpline Disassembly Disassembly Repair Repair Pumpline Pumpline Disassembly Repairing this equipment requires access to parts that may cause electric shock or other serious injury if work is not performed properly. Be sure to shut off all power to equipment before repairing. 1. -
Page 51: Flush Inlet Strainer Screen
Repair Flush Inlet Inlet Strainer Strainer Screen Screen Flush Flush Inlet Strainer Screen 4. Ensure the pipe plug (D) is screwed into the strainer plug (C). Install the strainer plug with the screen (A) and o—ring (B) in place and tighten. Do not overtighten. -
Page 52: Repair Proportioning Pumps
Repair Repair Proportioning Proportioning Pumps Pumps Repair Repair Proportioning Pumps 4. Disconnect the A (ISO) side pump inlet line, the inlet y-strainer, and hard tube (55). Use the pin extractor tool (101) to remove the pin (213), which disconnects the pump from the hydraulic cylinder (201). -
Page 53: Clean Flow Meter
Repair Clean Flow Flow Meter Meter Clean Clean Flow Meter 9. Reinstall the gears. a. Place the gear with the magnets (MG) on the 1. Perform Shutdown, page left pin of the housing. 2. Perform Pressure Relief Procedure, page 3. Disconnect the flow meter cable. 4. -
Page 54: Change Pump Lubricant
Repair Change Pump Pump Lubricant Lubricant Change Change Pump Lubricant 8. The lubrication system is ready for operation. No priming is required. Check the condition of the ISO pump lubricant daily. Change the lubricant if it becomes a gel, its color darkens, or it becomes diluted with isocyanate. - Page 55 Repair Table 3 3 3 Approved Approved Anti Anti- - - Wear Wear (AW) (AW) Hydraulic Hydraulic Oils Oils 3. Place a pan under the reservoir drain plug (16f) Table Table Approved Anti Wear (AW) Hydraulic Oils to catch oil. Name Supplier Supplier...
-
Page 56: Replace Electric Motor
Repair Replace Electric Electric Motor Motor Replace Replace Electric Motor 5. Remove motor and belt covers (123, 131, 132). Lift cover (132) and loosen the blue bracket (131) fasteners. Lift the blue bracket (133) off of the fasteners and set aside. Remove the belt covers (131, 132). - Page 57 Repair 6. Remove the belt (51). See Replace Belt, page 9. Note or label the wire connections. See the Remove the two pulley screws (48) and the belt Electrical Schematics, page 102 and the diagram tensioning assembly from the motor. inside the motor junction box cover.
-
Page 58: Replace Belt
Repair Replace Belt Belt Replace Fluid Fluid Inlet Inlet Sensor Sensor Replace Replace Belt Replace Replace Fluid Inlet Sensor 1. Follow Shutdown, page 2. Remove the heater cover (134) and the belt cover fasteners (19). NOTICE NOTICE NOTICE NOTE: For Elite models only. NOTE: NOTE: To prevent damage to the overtemperature... -
Page 59: Replace Flow Meter
Repair Replace Flow Flow Meter Meter Replace Pressure Pressure Transducers Transducers Replace Replace Flow Meter Replace Replace Pressure Transducers NOTE: For H-30, H-40, and H-50 Elite models only. NOTE: NOTE: 1. Flush. See Flushing, page 1. Perform Shutdown, page 2. See Shutdown, page 2. -
Page 60: Repair Primary Heater
Repair Repair Primary Primary Heater Heater Repair Heater Heater Overtemperature Overtemperature Repair Repair Primary Heater Repair Repair Heater Overtemperature Switch Switch Switch Replace Replace Replace Heater Heater Heater Element Element Element 1. Perform Shutdown, page 2. Wait for heaters to cool. 3. -
Page 61: Replace Rtd
Repair Replace RTD Replace Replace 8. Replace RTD cable (512). a. Apply PTFE tape and thread sealant to male pipe threads and tighten RTD housing (H) into adapter (506). b. Push in RTD (512) so tip contacts heater element (508). 1. -
Page 62: Repair Heated Hose
Repair Repair Heated Heated Hose Hose Repair Repair Heated Hose 4. Retest at each length of hose, including whip hose, until failure is located. Refer to the heated hose manual 309572 for hose 5. If the FTS is not reading properly at the end of replacement parts. - Page 63 Repair RTD Resistance Resistance Resistance vs. vs. Temperature Temperature Temperature Approximate Approximate Resistance Approximate Resistance (Ohms) Resistance (Ohms) (Ohms) Temperature Temperature °C Temperature °C (°F) °C (°F) (°F) -40 (-40) -30 (-22) -20 (-4) -10 (14) 1000 0 (32) 1039 10 (50) 1078 20 (68)
-
Page 64: (Fts)
Repair Repair Fluid Fluid Temperature Temperature Sensor Sensor (FTS) (FTS) Repair Repair Fluid Temperature Sensor (FTS) Installation Installation Installation The Fluid Temperature Sensor (FTS) is supplied with the system. Install FTS between main hose and whip hose. See Heated Hose manual 309572 for instructions. -
Page 65: Calibration Procedure
Repair Calibration Procedure Procedure Calibration Calibration Procedure 3. Wait while the system measures the hose resistance. NOTICE NOTICE NOTICE To prevent damage to the heated hose, a hose calibration is required if any of the following conditions are true: • The hose has never been calibrated before. •... -
Page 66: Repair Circuit Breaker Module
Repair Table 4 4 4 H H H - - - 30, 30, H H H - - - XP2 XP2 Circuit Circuit Breakers Breakers 4. Accept or cancel the hose calibration. Table Table Circuit Breakers NOTE: A temperature estimate will be displayed NOTE: NOTE: Ref. -
Page 67: Transformer Primary Check
Repair Transformer Transformer Primary Transformer Primary Check Primary Check Check 2. Check transformer: a. Remove lower cover. Electrical Schematics, page 102. b. Locate the two larger (6 AWG) wires, labeled 1. Check wires and transformer: 3 and 4, coming out of transformer. Trace these wires back to TB31. -
Page 68: Replace Transformer
Repair Replace Transformer Transformer Replace Power Power Supply Supply Replace Replace Transformer Replace Replace Power Supply 1. Perform Shutdown, page 48 1. Perform Shutdown, page 2. Remove four bolts (23) and shroud (10). 2. Disconnect input and output cables from both sides of the power supply (805). -
Page 69: Replace Surge Protector
Repair Replace Surge Surge Protector Protector Replace Temperature Temperature Control Control Module Module Replace Replace Surge Protector Replace Replace Temperature Control Module (TCM) (TCM) (TCM) 1. Loosen connections on terminals 1 and 3 on CB13. See Electrical Schematics, page 102. 1. -
Page 70: Replace Hcm
Repair Replace HCM Replace ADM Replace Replace Replace Replace 1. Follow Before Beginning Repair, page 1. Loosen four screws (142) on the inside of the electrical enclosure door. Lift up and pull out to 2. Open the electrical enclosure and disconnect all remove ADM (140). -
Page 71: Update Adm Software
Repair Update ADM ADM Software Software Update Update Software NOTE: When the ADM display turns on, you may NOTE: NOTE: see the following screens: First: First: First: Software is checking which modules will take the available updates. 1. Turn the main power switch OFF. Second: Second: Second:... -
Page 72: Parts
Parts Parts Parts Parts Elite Proportioners Proportioners Elite Elite Proportioners Elite Proportioner Proportioner Description Proportioner Elite Kit Elite Elite Proportioner Description Description Proportioner Proportioner Elite Elite Proportioner Proportioner Parts Proportioner Parts, , , Parts see manual manual manual 3A3084 3A3084 3A3084 page 73 73. -
Page 73: Proportioner Parts
Parts Proportioner Parts Parts Proportioner Proportioner Parts Apply anaerobic pipe sealant to all non-swiveling Install pulley (45) flush with motor shaft (43). pipe threads. Ensure that the fan (9) direction arrow points Install pulley (44) overhung on pump shaft (27) away from the mounting panel. - Page 74 Parts Apply anaerobic pipe sealant to all non-swiveling pipe threads. Labels are from safety label (629) included in the Electrical Enclosure. See Electrical Enclosure, page Apply single component thixotropic anaerobic sealant to threads.. 334946H...
- Page 75 Parts Apply anaerobic pipe sealant to all non-swiveling pipe threads. Apply high viscosity anaerobic sealant to threads. Fill reservoir (16) with hydraulic oil. 334946H...
- Page 76 Parts Apply anaerobic pipe sealant to all non-swiveling pipe threads. Labels are from safety label (629) included in the Electrical Enclosure. See Electrical Enclosure, page Apply single component thixotropic anaerobic sealant to threads. 334946H...
- Page 77 Parts H-30, H-XP2 H-XP2 H-30, H-30, H-XP2 Quantities Quantities Quantities H H H - - - 30 H H H - - - XP2 17H031 17H032 17H062 17H031 17H031 17H032 17H032 17H062 17H062 Description Description Description Ref. Ref. Ref. Part Part Part - - -...
- Page 78 Parts Quantities Quantities Quantities H H H - - - 30 H H H - - - XP2 17H031 17H031 17H031 17H032 17H032 17H032 17H062 17H062 17H062 Description Description Description Ref. Part Ref. Ref. Part Part 120804 FITTING, elbow, 1/2 npt x 1 jic 247793 HOSE, inlet, coupled 15G784...
- Page 79 Parts Quantities Quantities Quantities H H H - - - 30 H H H - - - XP2 17H031 17H031 17H031 17H032 17H032 17H032 17H062 17H062 17H062 Description Description Description Ref. Part Ref. Ref. Part Part - - - BUSHING, strain relief 17G645 TIE, cable, fir tree 17G599...
- Page 80 Parts Quantities Quantities Quantities H H H - - - 30 H H H - - - XP2 17H031 17H031 17H031 17H032 17H032 17H032 17H062 17H062 17H062 Description Description Description Ref. Part Ref. Ref. Part Part 17G610 COVER, 10kw, left ●17G608 COVER, heater, right 17G609...
- Page 81 Parts H-40, H-50, H-50, H-XP3 H-XP3 H-40, H-40, H-50, H-XP3 Quantity Quantity Quantity H H H - - - 40 H H H - - - 50 H H H - - - XP3 17H043 17H043 17H044 17H043 17H044 17H044 17H045 17H045 17H045 17H046 17H046...
- Page 82 Parts Quantity Quantity Quantity H H H - - - 40 H H H - - - 50 H H H - - - XP3 17H043 17H044 17H044 17H045 17H045 17H046 17H046 25R549 25R549 17H053 17H053 17H056 17H056 17H074 17H074 17H076 17H076 17H043 17H043...
- Page 83 Parts Quantity Quantity Quantity H H H - - - 40 H H H - - - 50 H H H - - - XP3 17H043 17H044 17H044 17H045 17H045 17H046 17H046 25R549 25R549 17H053 17H053 17H056 17H056 17H074 17H074 17H076 17H076 17H043 17H043...
- Page 84 Parts Quantity Quantity Quantity H H H - - - 40 H H H - - - 50 H H H - - - XP3 17H043 17H044 17H044 17H045 17H045 17H046 17H046 25R549 25R549 17H053 17H053 17H056 17H056 17H074 17H074 17H076 17H076 17H043 17H043...
- Page 85 Parts Quantity Quantity Quantity H H H - - - 40 H H H - - - 50 H H H - - - XP3 17H043 17H044 17H044 17H045 17H045 17H046 17H046 25R549 25R549 17H053 17H053 17H056 17H056 17H074 17H074 17H076 17H076 17H043 17H043...
-
Page 86: Proportioner Assembly Parts
Parts Proportioner Assembly Assembly Parts Parts Proportioner Proportioner Assembly Parts Torque to 200 in-lb (22.6 N●m). Fully seat pin (213) with a hammer and punch. Thread in proximity switch (211) all the way until Pin (213) to be clocked horizontal as shown. it contacts the clocking plate, then back off a 1/4–1/2 turn. - Page 87 Parts Proportioner Assembly Assembly Parts Parts Proportioner Proportioner Assembly Parts Ref. Ref. Ref. Part Part Part Description Description Description Qty. Qty. Qty. Ref. Ref. Ref. Part Part Part Description Description Description Qty. Qty. Qty. 17G499 CYLINDER, hydraulic, 17G605 SENSOR, proximity, with spacers switch 247377...
-
Page 88: Hydraulic Cylinder Parts, 17G499
Parts Hydraulic Cylinder Cylinder Parts, Parts, 17G499 17G499 Hydraulic Hydraulic Cylinder Parts, 17G499 Torque spacers (313, 314) and rod (315) to 200 in-lb (22.5 N•m). Torque to 40 +/- 5 ft-lb (345 +/- 54 N•m) Apply grease to all soft parts before assembly. Ref. - Page 89 Parts Fluid Manifold Manifold Fluid Fluid Manifold 24U844 24U844 24U844 Apply PTFE tape and thread sealant to gauge Torque to 355–395 in.-lbs (40–44.6 N●m) threads. Apply sealant (113500) to threads. Apply grease on valve. Valve must be closed with handle position as Apply PTFE tape or thread sealant to tapered shown on drawing.
- Page 90 Parts 24U844, Fluid Fluid Manifold Manifold 24U844, 24U844, Fluid Manifold Part Description Part Description Ref. Ref. Ref. Part Part Description Description Qty. Qty. Qty. Ref. Ref. Ref. Part Part Description Description Qty. Qty. Qty. 401† 255228 MANIFOLD, fluid 150829 SPRING, compression 402◊...
- Page 91 Parts Heater Parts Parts Heater Heater Parts 17G646, 17G646, 17G646, 7.5kw 7.5kw Single 7.5kw Single Zone Single Zone Heater Zone Heater Heater 17G648, 10.2 10.2 kw kw Single Single Zone Zone Heater Heater 17G648, 17G648, 10.2 Single Zone Heater Apply lithium grease lubricant to o-rings before Torque to 120 ft-lb (163 N•m).
- Page 92 Parts 17G647, 10.2 10.2 kW kW Dual Dual Zone Zone Heater Heater 17G647, 17G647, 10.2 Dual Zone Heater Apply lithium grease lubricant to o-rings before Torque to 120 ft-lb (163 N•m). assembling in block (501). Orientate sensor as shown. Insert probe until it Torque to 23 ft-lb (31 N•m).
-
Page 93: Electrical Enclosure
Parts Electrical Enclosure Enclosure Electrical Electrical Enclosure Install disconnect switch (609) so that up is ON and left is OFF. Mount fans (604, 632) with arrows pointing towards the panel. 334946H... - Page 94 Parts Quantity Quantity Quantity H H H - - - 30, 30, H H H - - - XP2 XP2 H H H - - - 40, 40, H H H - - - 50, 50, H H H - - - XP3 XP3 (230V) (230V) (230V) H H H - - - 40,...
-
Page 95: Kits
Parts System Din Din Rail Rail and and Harness Harness Module Module Kits Kits System System Rail Harness Module Kits H H H - - - 30, 30, H H H - - - XP2 XP2 Din Din Rail Rail and and Harness Harness Module Module Kit... -
Page 96: Block Module
Parts H H H - - - 30, 30, H H H - - - XP2 XP2 Power Power Supply Supply and H H H - - - 30, 30, H H H - - - XP2 XP2 System System Circuit Circuit Breaker Breaker Power... - Page 97 Parts H–40, H–50, H–50, H–XP3 H–XP3 Din Din Rail Rail and and Harness Harness Module Module Kits Kits H–40, H–40, H–50, H–XP3 Rail Harness Module Kits H–40, H–40, H–40, H–50, H–50, H–50, H–XP3 H–XP3 (200–240V) H–XP3 (200–240V) (200–240V) H–40, H–40, H–40, H–50, H–50, H–XP3 H–50,...
-
Page 98: Inlet Sensor Kit
Parts Inlet Sensor Sensor Kit Inlet Inlet Sensor 17F837 17F837 17F837 Ref. Ref. Ref. Part Part Part Description Description Description Qty. Qty. Qty. – – – – ASSEMBLY, transducer; includes 1a and 1b 624545 FITTING, nipple, pipe 24U851 TRANSDUCER, includes foam 16W130 CABLE, M12 5p, f x m, 2.0 m... - Page 99 Parts Fluid Inlet Inlet Kits Kits Fluid Fluid Inlet Kits 24U320, 24U320, 24U320, Standard Standard Standard 25N920, 25N920, 25N920, Elite Elite Elite Apply sealant to all tapered pipe threads. Apply sealant to female threads. Apply to at least the first four threads and approximately 1/4 turn wide. Apply thermal paste to the stem of dial before assembling into housing.
- Page 100 Parts Ref. Part Description Quantity Ref. Ref. Part Part Description Description Quantity Quantity 24U320 24U320 24U320 25N920 25N920 25N920 160327 FITTING, union adapter, 90° 118459 FITTING, union, swivel, 3/4 in. 603‡ 247503 MANIFOLD, strainer, inlet 24U852 THERMOMETER, dial 24U853 GAUGE, press, fluid - - - 606†...
-
Page 101: Terminal Block Module
Parts H H H - - - 40, 40, H H H - - - 50, 50, H H H - - - XP3 XP3 Power Power Supply Supply and H H H - - - 40, 40, H H H - - - 50, 50, H H H - - - XP3 XP3 System System Circuit... -
Page 102: Electrical Schematics
Electrical Schematics Electrical Schematics Schematics Electrical Electrical Schematics H H H - - - 30, 30, H H H - - - XP2 XP2 DIN DIN Assembly Assembly Schematic Schematic Assembly Schematic System Din Rail and Harness Module Kits, page 95, for additional part numbers. - Page 103 Electrical Schematics H H H - - - 40, 40, H H H - - - 50, 50, H H H - - - XP3 XP3 DIN DIN Assembly Assembly Assembly Schematics (200–240V) (200–240V) Schematics Schematics (200–240V) System Din Rail and Harness Module Kits, page 95, for additional part numbers.
- Page 104 Electrical Schematics H H H - - - 40, 40, H H H - - - 50, 50, H H H - - - XP3 XP3 DIN DIN Assembly Assembly Assembly Schematics (350–415V) (350–415V) Schematics Schematics (350–415V) System Din Rail and Harness Module Kits, page 95, for additional part numbers.
-
Page 105: Cb11 Cb12 Cb13 Cb14
Electrical Schematics HCM Schematic Schematic Schematic ti26608b 24R735 To Power Supply B Pressure Transducer A Pressure Transducer 127068 B Inlet Pressure / Temperature Transducer 24Y263 A Inlet Pressure / 16W130 Temperature Transducer 16W130 B Inlet A Inlet WHITE ORANGE 17G690 To CT01 GREEN BLACK... -
Page 106: To Hcm
Electrical Schematics TCM Schematic Schematic Schematic CB11 CB12 CB13 CB14 CB15 HOSE MOTOR A HEAT B HEAT TRANS To Ground Bar 24U855 B RTD 127068 To ADM B HEATER 127068 To HCM Overtemperature Switchs 17G687 (15kW, 20kW), 24T242 (10 kW) A HEATER A RTD TB21 / 17B856... -
Page 107: Hydraulic Reactor 2 Repair Spare Parts
Hydraulic Reactor 2 Repair Spare Parts Reference Hydraulic Reactor Reactor 2 2 2 Repair Repair Spare Spare Parts Parts Reference Reference Hydraulic Hydraulic Reactor Repair Spare Parts Reference Recommended Common Common Spare Spare Parts Parts Recommended Recommended Common Spare Parts Ref. -
Page 108: Technical Specifications
Technical Specifications Technical Specifications Specifications Technical Technical Specifications Reactor 2 2 2 Hydraulic Hydraulic Proportioning Proportioning System System Reactor Reactor Hydraulic Proportioning System U.S. U.S. U.S. Metric Metric Metric Maximum Fluid Fluid Working Working Pressure Pressure for for Bare Bare Proportioners Proportioners Maximum Maximum... -
Page 109: California Proposition 65
California Proposition 65 Supply Voltage Voltage Tolerance Tolerance Supply Supply Voltage Tolerance 200–240V nominal, 1 phase 195–264 VAC, 50/60 Hz (H-30, H-XP2 only) 200–240V nominal, 3 phase 195–264 VAC, 50/60 Hz 350–415V nominal, 3 phase 338–457 VAC, 50/60 Hz Amperage Requirement Requirement (phase) (phase) Amperage... -
Page 110: Graco Extended Warranty
Graco will, for a period as defined in the table below from the date of sale, repair or replace any part of the equipment determined by Graco to be defective.
Need help?
Do you have a question about the Reactor 2 H-30 and is the answer not in the manual?
Questions and answers