Table of Contents
Advertisement
Quick Links
Model No. WLIVEX42514.0
Serial No. : ___________
Serial No Decal
Write the serial number in the
space above for reference.
QUESTIONS ?
If you have questions, or if there are
missing parts, please contact us:
UK
Call: 08457 089 009
From Ireland: 053 92 36102
Website: www.iconsupport.eu
E-mail: csuk@iconeurope.com
Write:
ICON Health & Fitness, Ltd.
c/o HI Group PLC
Express Way
Whitwood, West Yorkshire
WF10 5QJ
UK
CAUTION
Read all precautions and instruc-
tions in this manual before using
this equipment. Keep this manual
for future reference.
USERʼS MANUAL
Visit our website
www.iconsupport.eu
Advertisement
Table of Contents

Related Manuals for Weslo WLIVEX42514.0


Summary of Contents for Weslo WLIVEX42514.0
- Page 1 USERʼS MANUAL Model No. WLIVEX42514.0 Serial No. : ___________ Serial No Decal Write the serial number in the space above for reference. QUESTIONS ? If you have questions, or if there are missing parts, please contact us: Call: 08457 089 009 From Ireland: 053 92 36102 Website: www.iconsupport.eu...
-
Page 2: Table Of Contents
TABLE OF CONTENTS WARNING DECAL PLACEMENT ............2 IMPORTANT PRECAUTIONS . -
Page 3: Important Precautions
IMPORTANT PRECAUTIONS WARNING : To reduce the risk of serious injury, read all important precautions and instructions in this manual and all warnings on your bike before using it. ICON assumes no responsibility for personal injury or property damage sustained by or through the use of this product. -
Page 4: Before You Begin
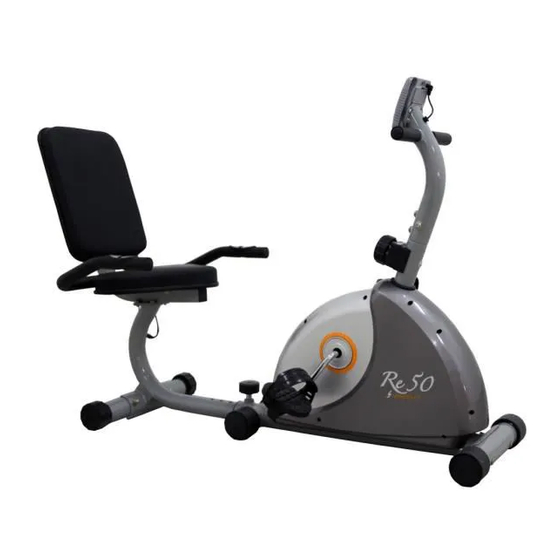
BEFORE YOU BEGIN Thank you for purchasing the Weslo® Re 50. The this manual. To help us assist you, note the prod- bike provides an array of features designed to uct model make your workouts at home more effective and number and serial number before contacting us. -
Page 5: Assembly
ASSEMBLY Assembly requires two persons. Place all parts of the elliptical exerciser in a cleared area and re- move the packing materials. Do not dispose of the packing materials until assembly is completed. In addition to the included tool(s), assembly requires a Phillips screwdriver an adjustable wrench. - Page 6 STEP 1 I. Attach the Front Stabilizer(3) to the Main Frame(1) with Screw (7),Arc Washer(8) and Acorn Nut(9) II. Fix the Pedal (6L/R) onto the Crank(2) of the Main Frame(1). STEP 2 I. Connect the Trunk Wire 3(17) with the Trunk Wire 2(10) and Connect Sensor (11) with the Sen- sor Wire(18).
- Page 7 STEP 4 I. Assemble the Saddle Support(30) to the Saddle Stem(25) with Bolt (13) Spring Washer(35) and Washer(33). II. Fix the Saddle(36) and Back pad(37)onto the Saddle Support(30) with Bolt (13) and Washer(33). STEP 5 I. Attach the Handlebar post(38) and Handlebar Hold- er(14) to the Saddle Support(30) and secure with Screw(31),Washer(33) and Acorn Nut (9).
-
Page 8: How To Operate The Bike
HOW TO OPERATE THE BIKE HOW TO ADJUST THE HEIGHT AND THE LATERAL POSITION OF THE SEAT The seat can be adjusted forward or backward to the position that is the most comfortable. To adjust the seat, unlock the knob and then slide the central tube to the desired position, and then lock the knob firmely. -
Page 9: Console Features
CONSOLE FEATURES 3. Start pedaling and follow your progress with the display : While you exercise, the console will display the selected mode. 4. When you are finished exercising, the console will automatically turn off. If the pedals do not move for a few seconds, the console will pause. -
Page 10: Maintenance And Troubleshooting
MAINTENANCE AND TROUBLESHOOTING IMPORTANT: To avoid damage to the console, Inspect and tighten all parts of the exercise bike keep liquids away from the console and keep the regularly. console out of direct sunlight. Replace any worn parts immediately. To clean the exercise bike, use a damp cloth and a small amount of mild soap. -
Page 11: Exercise Guidelines
EXERCISE GUIDELINES Burning Fat—To burn fat effectively, you must exer- WARNING: cise at a low intensity level for a sustained period of time. During the first few minutes of exercise, your Before beginning this or any exercise pro- body uses carbohydrate calories for energy. Only af- gram, consult your physician. -
Page 12: Exploded Drawings
EXPLODED DRAWING—Model No. WLIVEX42514.0 part 1... - Page 13 EXPLODED DRAWING—Model No. WLIVEX42514.0 part 2...
-
Page 14: Part List
PART LIST—Model No. WLIVEX42514.0 Item Description Qty. Item Description Qty. MAIN FRAME WRENCH CRANK CONSOLE WIRE FRONT STABILIZER BELT END CAP MAGNET LOCATION GRID KNOB MAGNETIC BOARD AXLE PEDAL MAGNETIC BOARD JOIN SCREW TENSION SPRING ARC WASHER CHECK RING ACOM NUT... -
Page 15: Notes
NOTES:... -
Page 16: Ordering Replacement Parts
ORDERING REPLACEMENT PARTS To order replacement parts, please see the front cover of this manual. To help us assist you, be prepared to provide the following information when contacting us: • the model number and serial number of the product (see the front cover of this manual) •...
Need help?
Do you have a question about the WLIVEX42514.0 and is the answer not in the manual?
Questions and answers