Table of Contents

Related Manuals for Weslo pursuit G 3.1


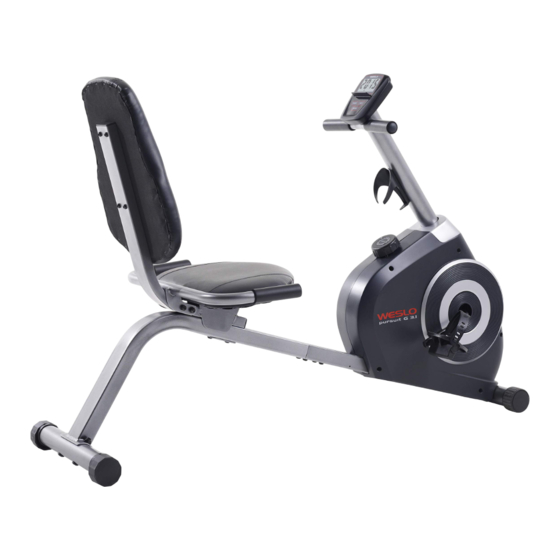
Summary of Contents for Weslo pursuit G 3.1
-
Page 1: Warning Decal Placement
USER’S MANUAL Model No. WLEX61115.2 Serial No. Write the serial number in the space above for reference. Serial Number Decal CAUTION Read all precautions and instructions in this manual before using this equipment. Keep this manual for future reference. -
Page 2: Table Of Contents
Apply the decal in the location shown. Note: The decal(s) may not be shown at actual size. WESLO is a registered trademark of ICON Health & Fitness, Inc. -
Page 3: Important Precautions
IMPORTANT PRECAUTIONS WARNING: To reduce the risk of serious injury, read all important precautions and instructions in this manual and all warnings on your exercise bike before using your exercise bike. ICON assumes no responsibility for personal injury or property damage sustained by or through the use of this product. -
Page 4: Before You Begin
® PURSUIT G 3.1 manual. To help us assist you, note the product model exercise bike. The PURSUIT G 3.1 exercise bike number and serial number before contacting us. The provides a selection of features designed to make your model number and the location of the serial number workouts at home more effective and enjoyable. -
Page 5: Part Identification Chart
PART IDENTIFICATION CHART Use the drawings below to identify the small parts needed for assembly. The number in parentheses below each drawing is the key number of the part, from the PART LIST near the end of this manual. The number following the key number is the quantity needed for assembly. -
Page 6: Assembly
“R” or “Right.” wrenches. To avoid damaging parts, do not use power tools. • To identify small parts, see page 6. 1. Go to weslo on your computer and register your product. • documents your ownership • activates your warranty •... - Page 7 3. Attach the Seat Frame (2) to the Frame (1) with four M8 x 20mm Screws (40); start all the Screws, and then tighten them. 4. Orient the Seat Carriage (4) and the Handlebar (5) as shown. Attach the Handlebar (5) to the Seat Carriage (4) with two M8 x 80mm Bolts (39) and two M8 Locknuts (35).
- Page 8 6. Insert the pin on the underside of the Seat Carriage (4) into the desired adjustment hole in the Seat Frame (2). Attach the Seat Carriage (4) to the Seat Frame (2) with the Carriage Plate (31) and two M8 x 55mm Screws (46). 7.
- Page 9 8. Attach the Water Bottle Holder (13) to the Upright (3) with two M4 x 19mm Screws (27). Then, orient the Upright Cover (49) as shown and slide it onto the Upright (3). 9. Have a second person hold the Upright (3) near the Frame (1).
- Page 10 11. Untie and discard the wire tie on the Reed Switch Wire (33). Avoid pinching the wires While a second person holds the Console (8) near the Upright (3), connect the wire on the Console to the Reed Switch Wire (33). Insert the excess wire into the Upright (3) or into the Console (8).
-
Page 11: How To Use The Exercise Bike
HOW TO USE THE EXERCISE BIKE HOW TO ADJUST THE SEAT HOW TO LEVEL THE EXERCISE BIKE The seat can be adjusted forward or backward to the If the exercise bike position that is the most comfortable for you. rocks slightly on your floor during To adjust the seat, first remove the two indicated use, turn one or... - Page 12 CONSOLE DIAGRAM FEATURES OF THE CONSOLE The easy-to-use console features five modes that provide instant exercise feedback during your workouts. Scan (SCAN)—This mode displays the time, speed, distance, and calories modes, for a few seconds each, in a repeating cycle. Time (TMR)—This mode displays the elapsed time.
-
Page 13: Fcc Information
HOW TO USE THE CONSOLE Time, speed, distance, calories mode—To select one of these modes for continuous display, press Make sure that batteries (not included) are installed in the MODE button repeatedly until the name of the the console (see assembly step 10 on page 10). If desired mode appears in the display. -
Page 14: Maintenance And Troubleshooting
MAINTENANCE AND TROUBLESHOOTING MAINTENANCE Next, locate the Reed Switch (33). Rotate the Pulley (24) until a Magnet (32) is aligned with the Reed Regular maintenance is important for optimal Switch. Then, slightly loosen the indicated M4 x 19mm performance and to reduce wear. Inspect and properly Screw (27), and slide the Reed Switch slightly toward tighten all parts each time the exercise bike is used. - Page 15 HOW TO ADJUST THE DRIVE BELT Next, loosen the two M10 Flange Locknuts (37)—one on each side of the Eddy Mechanism (22). Then, If the pedals slip while you are pedaling, even while the tighten the two M6 Nuts (38) until the Drive Belt (not resistance is adjusted to the highest setting, the drive shown) is tight.
-
Page 16: Exercise Guidelines
EXERCISE GUIDELINES Aerobic Exercise—If your goal is to strengthen your WARNING: cardiovascular system, you must perform aerobic Before beginning this exercise, which is activity that requires large amounts or any exercise program, consult your physi- of oxygen for prolonged periods of time. For aerobic cian. -
Page 17: Part List
PART LIST Model No. WLEX61115.2 R0719A Key No. Qty. Description Key No. Qty. Description Frame M10 x 65mm Bolt Seat Frame Eyebolt Upright Tension Bracket Seat Carriage Carriage Plate Handlebar Magnet Seat Reed Switch/Wire Backrest Clamp Console M8 Locknut Left Shield Idler Pulley Right Shield M10 Flange Locknut... -
Page 18: Exploded Drawing
EXPLODED DRAWING Model No. WLEX61115.2 R0719A If you’re looking for quality exercise & fitness equipment, visit our website.
Need help?
Do you have a question about the pursuit G 3.1 and is the answer not in the manual?
Questions and answers