Omron NJ Series Network Connection Manual
Machine automation controller patlite io-link signal tower lr6-il connection
Hide thumbs
Also See for NJ Series:
- User manual (668 pages) ,
- Troubleshooting manual (250 pages) ,
- Startup manual (168 pages)
Table of Contents
Advertisement
Quick Links
Advertisement
Table of Contents

Related Manuals for Omron NJ Series


Summary of Contents for Omron NJ Series
- Page 1 Machine Automation Controller NJ /NX-series IO-Link Connection Guide (EtherCAT Host Communications) ® PATLITE Corporation IO-Link Signal Tower (LR6-IL) [IO-Link Master Unit] OMRON Corporation NX-series IO-Link Master Unit (NX-ILM□□□) P733-E1-01...
- Page 2 EtherCAT® is registered trademark and patented technology, licensed by Beckhoff Automation GmbH, Germany. Sysmac is a trademark or registered trademark of OMRON Corporation in Japan and other countries for OMRON factory automation products. Company names and product names in this guide are the trademarks or registered trademarks...
-
Page 3: Table Of Contents
Contents Related Manuals ..................1 Terms and Definitions ................2 Precautions ....................3 Overview ....................4 Applicable Devices and Device Configuration ........5 5.1. Applicable Devices ................5 5.2. Device Configuration ................6 Communications Settings ................ 8 6.1. EtherCAT Connection Parameter ............8 6.2. -
Page 4: Related Manuals
Safety Precautions and Precautions for Safe Use in the manuals for each device which is used in the system. The table below lists the manuals provided by PATLITE Corporation (hereinafter referred to as "PATLITE") and OMRON Corporation (hereinafter referred to as "OMRON"), which pertain to this guide. Manufacturer Cat. -
Page 5: Terms And Definitions
2.Terms and Definitions 2. Terms and Definitions The terms and definitions used in this guide are given below. Term Explanation and Definition IO-Link device A device with a sensor or an actuator that can perform IO-Link communications with an IO-Link master. IO-Link master A device that performs IO-Link communications with IO-Link devices in an IO-Link System and that simultaneously functions as a slave for... -
Page 6: Precautions
(4) It is prohibited to copy, to reproduce, and to distribute a part or the whole of this guide without the permission of OMRON Corporation. (5) The information contained in this guide is current as of July 2019. It is subject to change for improvement without notice. -
Page 7: Overview
4. Overview This guide describes procedures for: connecting a PATLITE IO-Link Signal Tower LR6-IL (hereinafter referred to as the "Signal Tower") via IO-Link to an OMRON NX-series IO-Link Master Unit (NX-ILM□□□); connecting an OMRON NJ/NX-series Machine Automation Controller (hereinafter referred to as the "Controller") via EtherCAT through an OMRON EtherCAT Coupler Unit (NX-ECC20□) to which the IO-Link Master Unit is connected;... -
Page 8: Applicable Devices And Device Configuration
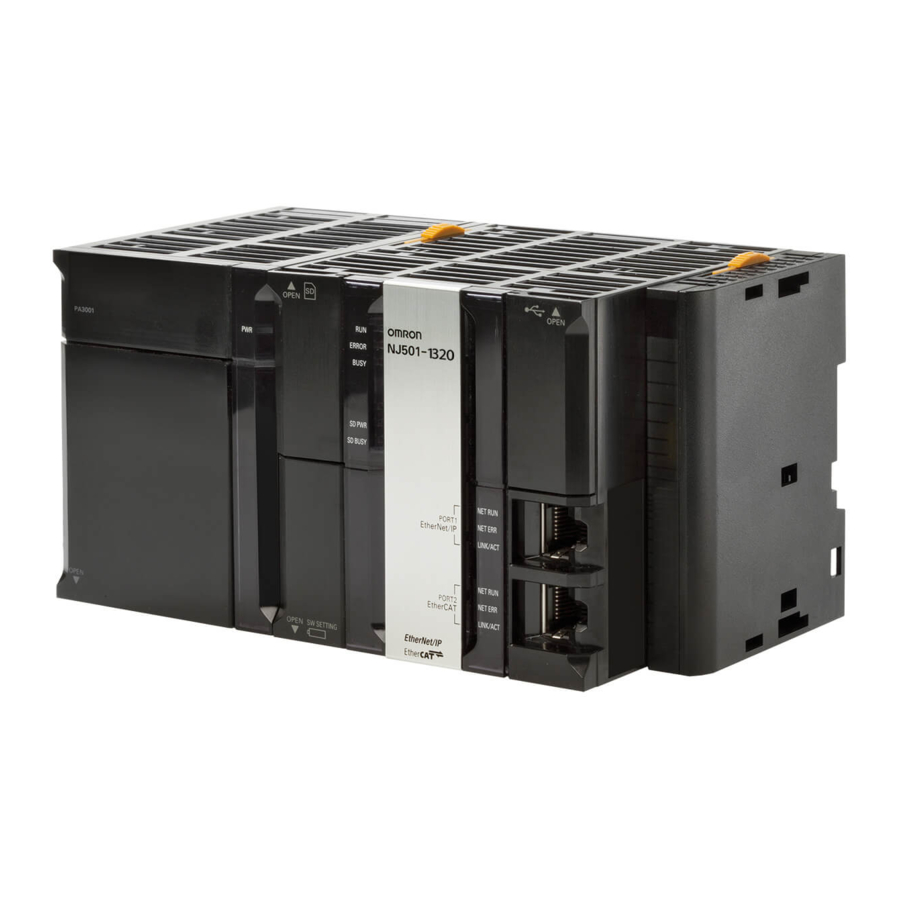
5.Applicable Devices and Device Configuration 5. Applicable Devices and Device Configuration 5.1. Applicable Devices The applicable devices are as follows: Manufacturer Name Model OMRON NJ/NX-series CPU Unit NX701-□□□□ NX102-□□□□ NX1P2-□□□□ NJ501-□□□□ NJ301-□□□□ NJ101-□□□□ OMRON NX-series NX-ECC20□ EtherCAT Coupler Unit OMRON NX-series NX-ILM□□□... -
Page 9: Device Configuration
OS: Windows 10) supply cable Ethernet cable LAN cable Unit power supply I/O power supply Manufacturer Name Model Version OMRON NX-series CPU Unit NX102-1200 Ver.1.31 (Built-in EtherCAT port) - - Power supply (24 VDC for Controller) OMRON Sysmac Studio SYSMAC-SE2□□□... - Page 10 5.Applicable Devices and Device Configuration Precautions for Correct Use The connection line of EtherCAT communications cannot be shared with other Ethernet networks. Do not use devices for Ethernet such as an Ethernet switch. Use an Ethernet cable (double shielding with aluminum tape and braiding) of Category 5 or higher, and use a shielded connector of Category 5 or higher.
-
Page 11: Communications Settings
6.Communications Settings 6. Communications Settings This section describes the parameters and device variables that are all defined in this guide. 6.1. EtherCAT Connection Parameter The following parameter is required to connect the Controller and the Slave Terminal via EtherCAT. Slave Terminal setting Item Setting value Remarks... -
Page 12: Device Variables
6.Communications Settings 6.4. Device Variables The process data of the Signal Tower (as PDOs in the Slave Terminal) is assigned to the Controller's device variables. The device variables are automatically named from a combination of the device names and the port names. The following show the device variables and data types to which the process data of the Signal Tower is assigned. -
Page 13: Io-Link Connection Procedure
7.IO-Link Connection Procedure 7. IO-Link Connection Procedure This section describes the procedures for connecting the Signal Tower via IO-Link to the IO-Link Master Unit and for connecting the Controller via EtherCAT to the Slave Terminal made up of the IO-Link Master Unit. The procedures for setting up the Controller and Slave Terminal in this guide are based on the factory default settings. - Page 14 7.IO-Link Connection Procedure Confirm that cyclic communications in the IO-Link 7.6. IO-Link Communication Status System is performed normally. Check ↓ Check the connection status of each device. 7.6.1. Checking the Connection Status ↓ Install the IODD file of the Signal Tower. 7.6.2.
-
Page 15: Slave Terminal Setup
7.IO-Link Connection Procedure 7.2. Slave Terminal Setup Set up the Slave Terminal. Hardware Settings Build the Slave Terminal, set hardware switches and connect the Signal Tower. Precautions for Correct Use Make sure the power supplies are OFF before setting up. If either of them is ON, the settings described in the following steps and subsequent procedures may not be applicable. - Page 16 7.IO-Link Connection Procedure Connect an Ethernet cable to Communications Communications connector (IN) connector (IN) on EtherCAT Coupler Unit. Ethernet cable Connect Unit power supply and I/O power supply to Unit power Unit power supply terminals supply terminals and I/O power supply terminals on EtherCAT Coupler Unit, respectively.
-
Page 17: Network Configuration For Host Communications
7.IO-Link Connection Procedure 7.3. Network Configuration for Host Communications Set up the network configuration for host communications. Starting Sysmac Studio Start Sysmac Studio and go online with the Controller. Additional Information For information on online connections, refer to Section 6. Online Connections to a Controller of the Sysmac Studio Version 1 Operation Manual (Cat. - Page 18 7.IO-Link Connection Procedure Sysmac Studio starts up. Click Connect to Device. The Connect to Device Screen is displayed. Select Controller from the pull-down list in the Device Field and Direct connection via Ethernet in the Connection type Field. Uncheck the boxes for both Transfer from Device and Display the Troubleshooting Dialog Box in the Operation after...
- Page 19 7.IO-Link Connection Procedure The Auto Connect Project Dialog Box is displayed online. When an online connection is established, a yellow line is displayed under the toolbar. Toolbox The following panes are Multiview Controller Edit Pane displayed in the window. Explorer Status Pane Left: Multiview Explorer...
- Page 20 7.IO-Link Connection Procedure Setting the EtherCAT Network Configuration Set the EtherCAT network configuration. Double-click EtherCAT under Configurations and Setup in the Multiview Explorer. The EtherCAT Tab Page is displayed in the Edit Pane. Right-click Master on the EtherCAT Tab Page of the Edit Pane, and select Compare and Merge with Actual Network Configuration.
- Page 21 7.IO-Link Connection Procedure A confirmation dialog box is displayed. Check the contents and click Apply. A result dialog box is displayed. Check the contents and click Close. As a node address 1 slave, E001 NX-ECC202 Rev:1.2 is added to the Network configuration on Sysmac Studio.
-
Page 22: Io-Link Master Unit Setup
7.IO-Link Connection Procedure 7.4. IO-Link Master Unit Setup Set up the IO-Link Master Unit. Parameter Settings Set parameters for the IO-Link Master Unit. Additional Information If you use the functions such as "connected device verification" and "backup and restoration of parameter settings in IO-Link devices", refer to the NX-series IO-Link Master Unit User's Manual (Cat. - Page 23 7.IO-Link Connection Procedure The Unit 1[Node1]:NX-ILM400 (N1)Unit Operation Settings Tab Page is displayed. ▼ Select Port1 – Port1 IO-Link Device Configuration Data from the pull-down list (just above the column header "Item name") to narrow down the parameters. The items of Port1 IO-Link Device Configuration Data are displayed.
- Page 24 7.IO-Link Connection Procedure I/O Allocation Settings Set I/O allocations for the IO-Link Master Unit. In this guide, the data size of the output data area for Port 1 is set to 6 bytes. Click the Node1 : NX-ECC202 (E001) Tab. Select IO-Link Master Unit (NX Unit number 1) and click Edit I/O Allocation Settings.
- Page 25 7.IO-Link Connection Procedure The Add I/O Entry Dialog Box is displayed. Select from 0x7001:02 Port1 Output Data02 to 0x7001:03 Port1 Input Data03 by holding the shift key down. Click OK. Add the following I/O entries to the table of "I/O entries included in the Output Data Set 1".
-
Page 26: Controller Setup
7.IO-Link Connection Procedure 7.5. Controller Setup Set up the Controller. Setting Device Variables Set device variables to use for the Slave Terminal. Double-click I/O Map under Configurations and Setup in the Multiview Explorer. The I/O Map Tab Page is displayed in the Edit Pane. Check that Node1 is displayed in the Position Column and that the added Slave Terminal is... - Page 27 7.IO-Link Connection Procedure Additional Information The device variables are automatically named from a combination of the device names and the port names. For slave units, the default device names are "E" followed by a serial number starting from "001". For NX Units, the default device names are "N" followed by a serial number starting from "1".
- Page 28 7.IO-Link Connection Procedure Transferring the Project Data Place Sysmac Studio online and transfer the project data to the Controller. Regardless of the operating mode of the CPU Unit, devices or machines may perform unexpected operation when you transfer any of the following data from Sysmac Studio: a user program, configuration data, setup data or device variables.
- Page 29 7.IO-Link Connection Procedure The dialog box on the right is displayed. Confirm that there is no problem, and click Yes. Check that "0 Errors" and "0 Warnings" are displayed on the Build Tab Page. Select Online from the Controller Menu. When an online connection is established, a yellow line is displayed under the toolbar.
- Page 30 7.IO-Link Connection Procedure The dialog box on the right is displayed. Confirm that there is no problem, and click Yes. A screen is displayed stating "Synchronizing". The dialog box on the right is displayed. Confirm that there is no problem, and click No. *Do not return to RUN mode.
- Page 31 7.IO-Link Connection Procedure Check that the following LED indicators on Slave Terminal show the communication ready status. RUN: Not lit ERR: Not lit Green flashing L/A IN: Green flickering L/A OUT: Not lit The LED indicators on Controller are as shown below when an error occurs in EtherCAT communications due to the temporary interruption of...
- Page 32 7.IO-Link Connection Procedure Check that the error is not displayed. Click X at the top right of the Troubleshooting Dialog Box to close. Turn ON I/O power supply to Slave Terminal.
-
Page 33: Io-Link Communication Status Check
7.IO-Link Connection Procedure 7.6. IO-Link Communication Status Check Confirm that cyclic communications in the IO-Link System is performed normally. Checking the Connection Status Check the connection status of each device. Check with the LED indicators on Controller that PDO communications via EtherCAT is performed normally. - Page 34 Installing the IODD File Install the IODD file of the Signal Tower. When you use IO-Link devices other than those produced by OMRON, you need to first install the IODD file relevant to your IO-Link device in order to use with CX-ConfiguratorFDT.
- Page 35 7.IO-Link Connection Procedure Checking Sent Data Check that correct data is sent. Ensure that CX-ConfiguratorFDT is installed on your personal computer, which is provided in the Sysmac Studio package. In this procedure, the output of the Signal Tower is performed, which may have a risk of unexpected operation of the devices connected to the Signal Tower.
- Page 36 7.IO-Link Connection Procedure Click Input Name and enter the following variable names for monitoring. ・・・ Select the following display formats for the variables. Name: N1_Port1_Output_Data02[1] Display format: Binary Name: N1_Port1_Output_Data03[0] Display format: Binary Name: N1_Port1_Output_Data03[1] Display format: Binary Start CX-ConfiguratorFDT. *When you start CX-ConfiguratorFDT, the dialog box on the right is displayed asking...
- Page 37 7.IO-Link Connection Procedure Check that <OMRON EtherCAT> Nx built-in EtherCAT is added under MyNetwork in the Network View. Right-click <OMRON EtherCAT> Nx built-in EtherCAT and select Configuration from the menu. The <OMRON EtherCAT> Nx built-in EtherCAT - Configuration Tab Page is displayed.
- Page 38 Nx built-in EtherCAT and select Scan – Create Network from the menu. The Lifelist Dialog Box is displayed after the network scan is completed. Check that <OMRON EtherCAT:1> NX-ECC Coupler is added under Nx built-in EtherCAT. Click Add All and Continue.
- Page 39 7.IO-Link Connection Procedure The Lifelist Dialog Box is displayed again after the network scan is completed. Check that <IO-Link Port_1:NOT_APPLICABLE> LR6-IL IODD1.1 is added under NX-ILM400. Click Add All and Continue. Check that the network configuration (as shown on the right) is created in the Network View.
- Page 40 7.IO-Link Connection Procedure Check that Signal Tower is online. Right-click <IO-Link Port_1:-> LR6-IL IODD1.1 and select Load from device from the menu. *Signal Tower is online when <IO-Link Port_1:-> LR6-IL IODD1.1 is displayed in bold italic font. The parameters of Signal Tower are uploaded.
- Page 41 7.IO-Link Connection Procedure Select Parameter listed under Menu on the <IO-Link Port_1:-> LR6-IL IODD1.1 - Configuration Tab Page. Check that Operating mode displayed on the right side of the tab page is set to Simple - mode (default). With Sysmac Studio, check that the following online values are displayed on the Watch Tab Page.
- Page 42 7.IO-Link Connection Procedure On the Watch Tab Page of Sysmac Studio, enter 0000 0001 in the Modify Column for N1_Port1_Output_Data02[1] . The bit 0 value of N1_Port1_Output_Data02[1] (LED unit (Green) ON/OFF) changes to 1. *Controller turns ON the green light of the LED unit on Signal Tower.
-
Page 43: Initialization Method
8.Initialization Method 8. Initialization Method The setting procedures in this guide are based on the factory default settings. Some settings may not be applicable unless you use the devices with the factory default settings. 8.1. Initializing a Slave Terminal To initialize a Slave Terminal, connect the Slave Terminal directly to your personal computer on which Sysmac Studio runs. - Page 44 8.Initialization Method 3) The configuration of the connected Slave Terminal is displayed. Click Online. 4) Right-click EtherCAT Coupler Unit (Unit 0) after checking the online connection. Select Clear All Memory from the menu.
- Page 45 8.Initialization Method 5) The Clear All Memory for Coupler Dialog Box is displayed. Check that Coupler + NX Units is selected. Click Execute. Precautions for Correct Use In the initialization of a Slave Terminal, the backup data of IO-Link devices that is stored in an IO-Link Master Unit is not cleared.
-
Page 46: Initializing A Controller
8.Initialization Method 8.2. Initializing a Controller To initialize a Controller, clear all memory of a CPU Unit. With Sysmac Studio, change the operating mode of Controller to PROGRAM mode and select Clear All Memory from the Controller Menu. The Clear All Memory Dialog Box is displayed. Check the contents and click OK. -
Page 47: Revision History
9.Revision History 9. Revision History Revision Date of revision Description of revision code November 2019 First edition... - Page 48 2019 P733-E1-01 1119(1119)
Need help?
Do you have a question about the NJ Series and is the answer not in the manual?
Questions and answers