
Related Manuals for Griven AD 3318


Summary of Contents for Griven AD 3318
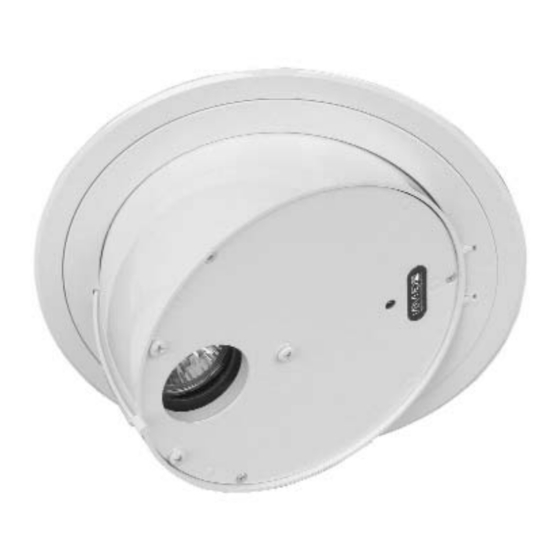
- Page 1 Foglio di Istruzioni Owner’s Manual TIROS EYEBALL AD 3318 AD3318 Rev. 0 07 Dic 2004...
-
Page 2: Table Of Contents
INDICE INDICE Pag. 1.0 CONTENUTO DELL’IMBALLAGGIO 2.0 SICUREZZA 3.0 INSTALLAZIONE DEL PROIETTORE 3.1 Montaggio della lampada 3.2 Installazione del proiettore 3.3 Collegamento elettrico 4.0 USO DEL PROIETTORE 4.1 Funzionamento in Master/Automatico 4.2 Funzionamento sincronizzato 4.3 Funzionamento DMX/SLAVE 4.4 Connessione dei cavi di segnale 4.5 Funzionamento Master-Slave 5.0 MANUTENZIONE 6.0 INFORMAZIONI TECNICHE... -
Page 3: Contenuto Dell'imballaggio
1.0 CONTENUTO DELL’IMBALLAGGIO Controllate attentamente il contenuto del cartone e, in caso di danni al prodotto, contattate il Vs. trasportatore. Nell’imballaggio del presente proiettore sono contenuti i seguenti prodotti: n° 1 proiettore TIROS EYEBALL; n° 1 Foglio di Istruzioni. 2.0 SICUREZZA Prima di effettuare qualsiasi operazione sul proiettore, sconnettere fisicamente la linea di alimenta- zione staccando la spina (ad esempio durante la manutenzione o l’installazione della lampada). -
Page 4: Installazione Del Proiettore
3.2 Installazione del proiettore 3.3 Collegamento elettrico Morsetto per la connessione dei cavi di bassa tensione 12-15V Morsetto per la connessione dei cavi di alimentazione 220-240V 50/60Hz... -
Page 5: Uso Del Proiettore
4.0 USO DEL PROIETTORE Il significato dei dip-switch cambia a seconda del metodo di funzionamento (DMX- SLAVE/MASTER-AUTOMATICO). La luce rossa del led presente sulla scheda indica la ricezione corretta del segnale DMX oppure la modalità MASTER attiva, mentre il led spento indica l’assenza del segnale oppure il segnale DMX non corretto. -
Page 6: Funzionamento Sincronizzato
COLOURS SCENE LENGTH permette di stabilire la durata di ogni scena colore secondo i tempi mostrati in tabella: COMBINAZIONE Durata scena colore OFF/OFF 5 secondi Tabella 2 ON/OFF 10 secondi OFF/ON 20 secondi ON/ON 40 secondi 4.2 Funzionamento sincronizzato (senza cavo di segnale) Impostare tutti i proiettori che si desidera far funzionare in modo sincrono come segue: - Settare il funzionamento in modo master;... -
Page 7: Connessione Dei Cavi Di Segnale
4.4 Connessione dei cavi di segnale Morsetto per la connes- sione dei cavi di segnale Data - Data + Utilizzare cavo schermato 2 poli + calza (GND) la calza (GND) non deve Min.Sect. toccare parti metalliche Calza 0.35 mm Hose 4.5 Funzionamento Master-Slave E’... -
Page 8: Manutenzione
Tutti i componenti del proiettore TIROS EYEBALL sono disponibili come parti di ricambio su richiesta. La responsabilità di Griven S.r.l. cessa all’atto della consegna del materiale al vettore: reclami per eventuali danni dovuti al trasporto dovranno essere indirizzati direttamente al corriere. -
Page 9: Accessori Opzionali
Accessorio opzionale AD3320 GOBO PROFILER N°2 lenti φ 60 +7.5... - Page 10 Accessorio opzionale AD3321 GRANDANGOLO Lente φ55 +11...
-
Page 11: Packing
1.0 PACKING Check carefully the content of the box and in case of damage contact your forwarder immediately. The following items are included in the box: n° 1 TIROS EYEBALL projector; n° 1 Owner's manual. 2.0 SAFETY Disconnect the unit from mains supply before servicing it or performing any other operation (for example during maintenance or replacing the lamp). -
Page 12: Mounting Position
3.2 Mounting position 3.3 Electrical connection Junction box for the low voltage cable connection 12-15V Junction box for the power supply cable connection 220-240V 50/60Hz... -
Page 13: Use Of The Projector
4.0 USE OF THE PROJECTOR The function of the dip-switches will change according to the selected mode (DMX-SLAVE/ MASTER-AUTOMATIC). Once the unit is connected to the mains, the LED red light on the circuit board indicates that the digital data is correctly received or that the MASTER mode is activated. If the LED red light is off, it means that the DMX signal is either absent or not correctly received. -
Page 14: Synchronized Mode
The function COLOR SCENE LENGTH allows you to select the duration of each color scene according to the time frames shown in table 2: COMBINATION Colours Scene Length OFF/OFF 5 sec. Tabella 2 ON/OFF 10 sec. OFF/ON 20 sec. ON/ON 40 min. -
Page 15: Dmx Cable Connection
4.4 DMX cable connection Junction box for the DMX cable connection Data - Data + Use 2-pole shielded cable + hose (GND) The hose (GND) must not Min.Sect. touch metal parts Calza 0.35 mm Hose 4.5 MASTER-SLAVE mode More TIROS EYEBALL units can be set to "Slave" option to follow the "Master" unit in synch- rony. -
Page 16: Maintenance
7.0 SPARE PARTS All components for TIROS EYEBALL units are available on request. Griven S.r.l. shall be under no liability for any loss or demage in transit. Claims must be adressed directly to the forwarder. Griven S.r.l. will accept claims for broken or missing goods only within seven days of receipt of the goods. -
Page 17: Optional Accessory
Optional accessory AD3320 GOBO PROFILER N°2 φ60 +7.5 lenses... - Page 18 Optional accessory AD3321 WIDE ANGLE φ55 +11 lens...
- Page 20 WORLD LIGHTING CHALLENGE Professional Lighting Manufacturer Via Bulgaria, 16 - 46042 CASTEL GOFFREDO (MN) Telefono 0376/779483 - Fax 0376/779682 - 0376/779552 http://www.griven.com/ e-mail griven@griven.com http://www.griven.it/ e-mail griven@griven.it...
Need help?
Do you have a question about the AD 3318 and is the answer not in the manual?
Questions and answers