
Related Manuals for Backyard Products Heritage Series


Summary of Contents for Backyard Products Heritage Series
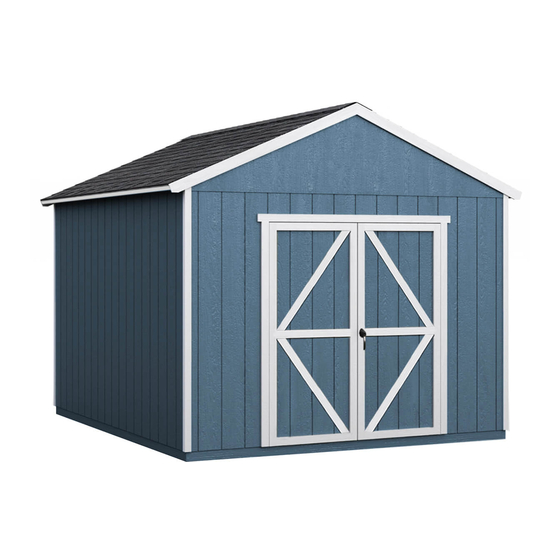
- Page 3 16674-T 07/22/2011 Heritage / Signature Series Customer Service (Servico al cliente) 8’ Wide Saltbox 1-888-827-9056 1000 Ternes Drive Techo a dos aguas 8’ Monroe, MI 48162 Includes 8’x12’ (244x367 cm), 8’x16’ (244x488 cm) Instrucciones para ediÀ cios de Building Instructions 8’x12’...
- Page 4 8’ X 12’ (244 x 366 cm) 8’ X 12’ (244 x 366 cm) PARTS LIST LISTA DE PIEZAS 2x4x68” (173 cm) 3/8”x15-7/8”x72” 3/8”x23-7/8”x72” 2”x4”x48” 3/8”x48”x72” (.9x61x183 cm) (5x10x122 cm) (.9x40x183 cm) (.9x122x183 cm) 2x6x92-1/2” (235 cm) 2x6x48” (122 cm) 2x4x92-1/2”...
-
Page 5: Actual Size
8’ X 12’ (244 x 366 cm) 8’ X 12’ (244 x 366 cm) PARTS LIST LISTA DE PIEZAS Actual Size Dimensiones Verdadera 3” (7.6 cm) x 301 2” (5.0 cm) x 747 2” (5.0 cm) x 238 1-1/2” (3.8 cm) x 212 3”... - Page 6 I M P O R T A N T E ! ! ! I M P O R T A N T ! ! ! C o n s e j o B u i l d i n g T i p F O R T H E B E S T L O O K I N G F I N I S H E D P R O D - C O N E L F I N D E O B T E N E R E L P R O D U C T O A C A B A D O D E M E J O R A S P E C T O R E C O -...
- Page 7 F O U N D A T I O N O P T I O N S O P C I O N E S P A R A L A C I M E N T A C I Ó N ( N o i n c l u i d a s ) ( N o t s u p p l i e d w i t h k i t ) H A Y Q U E C O N S T R U I R E L E D I F I C I O S O B R E U N...
- Page 8 Antes de continuar determine la Before proceeding, determine STOP STOP posición de la puerta y construya desired door location and el muro con la puerta primero. build door wall À rst. BUILD WALL CONSTRUYA LOS NÚMEROS DE NUMBERS SPECIFIED LOS MUROS ESPECIFICADOS. WALL NUMBER EQUALS EL NUMERO DEL MURO CORRESPONDE PAGE NUMBER...
- Page 9 I M P O R T A N T E ! ! ! I M P O R T A N T ! ! ! C o n s e j o B u i l d i n g T i p YOUR BUILDING CAN BE CONFIGURED IN A ES PRECISO ALINEAR LOS PANELES DE LOS MUROS Y VARIETY OF WAYS.
- Page 10 I M P O R T A N T E ! ! ! I M P O R T A N T ! ! ! C o n s e j o B u i l d i n g T i p Y O U M A Y N E E D T O R A C K Y O U R W A L L ES PRECISO ALINEAR LOS PANELES DE LOS P A N E L S A N D R O O F P A N E L S T O E N S U R E...
- Page 11 3”(7.6 cm) WALL #9 MURO #9 x 20 Parte Superior UM x5 TJ x2 20-1/2" (52 cm) 24" (61 cm) 24" 71" 92-1/2" (61 cm) (180 cm) (235 cm) 24" (61 cm) 24" 24" 24" 20-1/2" (61 cm) (61 cm) (61 cm) (52 cm) End View...
- Page 12 3”(7.6 cm) WALL #10 MURO #10 x 28 SP x2 UM x6 Parte Superior TJ x2 64" (163 cm) 20-1/2" (52 cm) 16" (41 cm) 71" 140-1/2" (180 cm) (357 cm) 16" (41 cm) 24" (61 cm) 24" 16" 20-1/2" 64"...
- Page 13 3”(7.6 cm) MURO #11 WALL #11 x 28 SP x2 UM x6 Parte Superior TJ x2 12-1/2" 64" (32 cm) 24" (163 cm) (61 cm) 24" (61 cm) 71" (180 cm) 140-1/2" (357 cm) 16" (41 cm) 12-1/2" 24" 24" 16"...
- Page 14 3”(7.6 cm) WALL #12 MURO #12 x 28 TJ x2 UM x6 Parte Superior SP x2 64" (163 cm) 12-1/2" (32 cm) 71" 140-1/2" (180 cm) 24" (357 cm) (61 cm) 24" (61 cm) 16" (41 cm) 24" 24" 16" 64"...
- Page 15 3”(7.6 cm) MURO #13 WALL #13 x 32 UM x7 Parte Superior TJ x2 SP x2 20-1/2" (52 cm) 24" (61 cm) 24" (61 cm) 71" 24" (61 cm) (180 cm) 140-1/2" 24" (357 cm) (61 cm) 24" (61 cm) 20-1/2"...
- Page 16 3”(7.6 cm) WALL #14 MURO #14 x 40 Parte Superior SP x2 UM x8 TJ x2 SP x2 64" (163 cm) 20-1/2" (52 cm) 24" (61 cm) 16" (41 cm) 71" (180 cm) 16" 188-1/2" (41 cm) (479 cm) 24" (61 cm) 24"...
- Page 17 3”(7.6 cm) WALL #15 MURO #15 x 40 Parte Superior SP x2 UM x8 SP x2 TJ x2 12-1/2" 24" (32 cm) (61 cm) 64" 24" (163 cm) (61 cm) 24" (61 cm) 24" (61 cm) 71" (180 cm) 188-1/2" (479 cm) 16"...
- Page 18 3”(7.6 cm) WALL #16 MURO #16 x 42 Parte Superior UM x8 TJ x2 SP x2 64" (163 cm) SP x2 12-1/2" (32 cm) 24" 188-1/2" (61 cm) 24" (479 cm) (61 cm) 71" 24" (180 cm) (61 cm) 24" (61 cm) 16"...
- Page 19 3”(7.6 cm) WALL #17 MURO #17 x 44 Parte Superior UM x9 TJ x2 SP x2 SP x2 20-1/2" (52 cm) 24" (61 cm) 24" (61 cm) 24" (61 cm) 71" 24" (61 cm) (180 cm) 24" 188-1/2" (61 cm) (479 cm) 24"...
- Page 20 3”(7.6 cm) x 10 (8’x12’) (244 x 366 cm) x 14 (8’x16’) (244 x 488 cm) CONSTRUYENDO ERECTING LOS MUROS WALLS 2”(5 cm) x 13 (8’x12’) (244 x 366 cm) x 17 (8’x16’) (244 x 488 cm) See Page 7 for Building Tip!!! ¡Ver la página 7 para un consejo! Level Wall and Brace, Do not sink nails completely.
- Page 21 3”(7.6 cm) x 17 (8’x12’) (244 x 366 cm) CONSTRUYENDO ERECTING x 21 (8’x16’) (244 x 488 cm) WALLS LOS MUROS 2”(5 cm) x 18 (8’x12’) (244 x 366 cm) x 22 (8’x16’) (244 x 488 cm) See Page 7 for Building Tip!!! ¡Ver la página 7 para un consejo! See Page 6 for wall # Ver la página 6 para # muro...
- Page 22 3”(7.6 cm) x 56 (8’x12’) (244 x 366 cm) DOBLADORES DOUBLERS x 68 (8’x16’) (244 x 488 cm) INSTALL AS SHOWN INSTALE COMO EN EL DIBUJO 100" 254 cm 1-5/8" (4,13 cm) 1-5/8" (4,13 cm) 1-5/8" 100" (4,13 cm) 254 cm 1-5/8"...
- Page 23 1-1/2”(3.8 cm) ROOF TECHO x 24 x 40 Conjunto de vigas terminales x2 End Rafter Assembly x2 Flush Nivelado Glue Pegamento 109-1/4" (277 cm) Flush Nivelado Glue Pegamento 109-1/4" (277 cm)
- Page 24 1-1/2”(3.8 cm) 2”(5 cm) ROOF TECHO x 24 Middle Rafter Assembly Conjunto de vigas centrales (Ver las dimensiones abajo para la cantidad) (See sizes below for quantity) Flush Nivelado Glue Pegamento 2" (5 cm) Nails/Clavos Q x2 Glue Pegamento 109-1/4" (277 cm) 8’x12’...
- Page 25 ROOF TECHO 3”(7.6 cm) x36 x 40 Attaching Rafters Fijando las vigas (See below for dimensions) (Ver abajo para las dimensiones) End Rafters have one gusset 8’x12’ (244 x 366 cm) Shown / Indicado to the inside Las vigas terminales tienen una placa de unión 24”...
- Page 26 2”(5 cm) TECHO ROOF x112 x 40 See Page 8 for Building Tip!!! ¡Ver la página 8 para un consejo! 8’x12’ (244 x 366 cm) Shown / Indicado 8’x16’ (244 x 488 cm) x160...
- Page 27 1-1/2” (3.8 cm) TECHO ROOF x 76 x 40 Gable Panels Paneles del techo a dos aguas 1-3/4” (4.4cm) 7“ (17.5cm) 1-1/2“ (3.8cm) 1-3/4” (4.4cm) 8“ (20cm)
- Page 28 2”(5 cm) MOLDURA TRIM x 40 x 21 2”(5 cm) TRIM MOLDURA x 40 x 66...
- Page 29 2”(5 cm) TRIM MOLDURA x 28 8’x12’ (244 x 366 cm) Shown / Indicado ZP x4 8’x16’ (244 x 488 cm) ZP x4 ZT x2 x 40...
- Page 30 1-5/8”(4.1 cm) DOOR PUERTA Parte Supe- 3/8” (.9cm) 3/8” (.9cm) 7/16” (1.1cm) rior 7/16” (1.1cm) 3/4” (19 mm) PUERTA DOOR x 11 Place a center mark for door location. Ponga un señal en el centro para la puerta. Cut out bottom plate at door opening Leave treated sill on concrete slab if desired.
- Page 31 3” (7.6 cm) x 6 DOOR PUERTA 2” (5 cm) x 8 1” (2.5 cm) x 12 Attach with 3” (7.6 cm) Screws À rst, check doors to open properly and nail Fije con tornillos de 3” (7.6 cm) primero, compruebe que las puertas abren bien y clave.
- Page 32 DOOR PUERTA Y x 8 ZWR x 2 ZWL x 2 Diamond Traditional X Plain Contemporary Outer Diamond Inner Diamond Double X 3/4”(1,9 cm) PUERTA DOOR x 32...
- Page 33 1”(2.5 cm) 2”(5 cm) DOOR PUERTA x 20 x 23 2” (5 cm) x 20 Glue Inside View Visión Interior Exterior Trim Exterior Moldura 2”(5 cm) PUERTA DOOR x 12 UP x 2 Center vertically on Door Centro verticalmente en puerta Top View: Attaching Door Stiffiner Visión De arriba: Atadura del apoyo de la puerta Existing Door...
- Page 34 1”(2.5 cm) DOOR PUERTA x 34 Flush Al ras Flush Al ras Flush Al ras...
- Page 35 DOOR PUERTA x 28 1/2”(1.2cm) 1-3/4” (4.4cm) 35-3/4” (91cm) If installing optional 3 point lock refer to the next 2 pages. If not, skip to page 40. Si instalando opcional 3 cerradura del punto se reÀ ere a las próximas 2 páginas. Si no, sáltese para paginar 40.
- Page 36 OPTIONAL 3 POINT LOCKING MECHANISM OPCIONAL See next page for mounting location of brackets and plates Vea próxima página para montar paréntesis...
- Page 37 OPTIONAL 3 POINT LOCKING MECHANISM OPCIONAL 1. Locate exact plate position and mark guide hole 1. Localice la posición exacta de plato y hoyo de guía de marca 2. Drill a 3/8” hole, 2-1/2” deep going into the header 2. Taladre un 3/8” hoyo, entrar profundo el hoyo de encabezamiento 2a.
- Page 38 3”(7.5 cm) MOLDURA TRIM x 40 Z x2 One at each end, centered on trim Uno en cada extremo del edificio, centrado en moldura HOOK AND EYE AND BARREL BOLT Hooks and eyes should go into a trim or stud Inside of Door/ Hay que fijar los corchetes a la moldura o un montante Interior de la...
- Page 39 PINTURA Y MASILLADO PAINT AND CAULK (No Incluidos) (Not Included) Use Acrylic Latex Caulk that is paintable. Caulk at all Use un masillado acrílico de latex que se puede pintar. horizontal and vertical seams, between the Trim and Masille todas las junturas horizontales y verticales, entre la moldura y los muros, y alrededor de la moldura de la Walls, and all around the Door Trim.
- Page 40 SHINGLES TEJAS (Not Included) (No Incluidas) x 40 Building Size Shingles Needed 1/2" 1" Dimensiones del ediÀ cio Tejas Necesarias 1" (1.3 cm) (2.5 cm) Sealing Strip (2.5 cm) Sellador 5 Bundles 8’ x 12’ (244 x 366 cm) 5 bultos 7 Bundles 8’...
- Page 41 TEJAS SHINGLES (No Incluidas) (Not Included) x 40 Ridge Cap tapa de cumbrera Cut Shingles into 3 pieces Corte las tejas en tres partes 5-1/8" (13 cm) Apply pieces to ridge as shown Fije las piezas a la cumbrera como 5-7/8"...
-
Page 42: Warranty
Notice of failure or defect must be reported to Heartland Industries within a reasonable time. In no event will Backyard Products, LLC be liable for loss or damage to personal property placed in building (including any damage caused by the existence of any defect in building), or for any indirect, incidental, consequential damages nor failure(s) which are caused by events, acts or omissions beyond our control including, but not limited to, misuse or improper maintenance. - Page 43 Se debe notificar a Heartland Industries de las fallas o defectos dentro de un plazo razonable. En ningún caso se hará responsable a Backyard Products, LLC por la pérdida o los daños a objetos personales contenidos en el edificio (incluido cualquier daño causado por la existencia de cualquier defecto de la construcción), ni por cualquier daño indirecto, incidental o consecuente, ni por falla(s) provocada(s) por eventos, actos u omisiones...
Need help?
Do you have a question about the Heritage Series and is the answer not in the manual?
Questions and answers