
Related Manuals for Xterra SB120


Summary of Contents for Xterra SB120
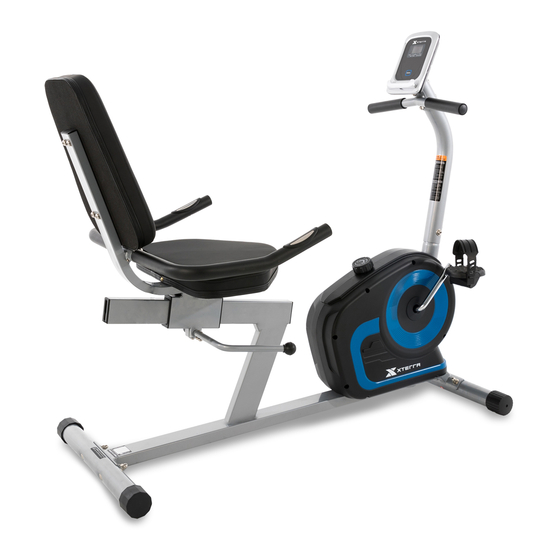
- Page 1 SB120 Recumbent Bike OWNER’S MANUAL PLEASE CAREFULLY READ THIS ENTIRE MANUAL BEFORE OPERATING YOUR NEW RECUMBENT BIKE.
-
Page 2: Table Of Contents
Table Of Contents Product Registration Important Safety Instructions Important Operation Instructions Exploded View and Parts Lists SB120 Assembly Instructions Final Considerations Exploring Your New Bike Troubleshooting Manufacturer’s Limited Warranty WARRANTY COMPLIANCE THIS RECUMBENT BIKE IS INTENDED FOR RESIDENTIAL USE ONLY AND IS WARRANTED FOR THE APPLICATION. -
Page 3: Product Registration
XTERRA Fitness will do all we can to make your ownership experience as pleasant as possible for many years to come. -
Page 4: Important Safety Instructions
WARNING: This product can expose you to chemicals including Toluene and Acrylamide which are known to the State of California to cause cancer and birth defects or other reproductive harm. For more information go to www.P65Warnings.ca.gov SAVE THESE INSTRUCTIONS - THINK SAFETY! SB120 Recumbent Bike... -
Page 5: Important Operation Instructions
6. Proper installation and regular maintenance are required to ensure user’s safety. Maintenance is the sole responsibility of the owner. SB120 Recumbent Bike... -
Page 6: Exploded View And Parts Lists
SB120 Exploded View Diagram SB120 Recumbent Bike... - Page 7 SB120 Parts List Part No. Serial No. Description Q’TY SB120-RB1036-PART01 Main frame SB120-RB1036-PART02 Front post SB120-RB1036-PART03 Backrest support bracket SB120-RB1036-PART04 Front handlebar SB120-RB1036-PART05 Rear handlebar SB120-RB1036-PART06 Front stabilizer φ50x1.2tx395L SB120-RB1036-PART07 Rear stabilizer φ50x1.2tx490L SB120-RB1036-PART08 Adjustable bar 16x2tx305L SB120-RB1036-PART09 Connection axle φ12x95L...
- Page 8 SB120 Parts List SB120-RB1036-PART36 Sticker SB120-RB1036-PART37 Crossed head self-tapping screw ST4.2x12L SB120-RB1036-PART38 Flange nut M10x1Px6t SB120-RB1036-PART39 Crossed head self-tapping screw st4.2x20L SB120-RB1036-PART40 Flat washer φ4.3xφ12x1t SB120-RB1036-PART41 Sensor bracket SB120-RB1036-PART42 Chain cover L SB120-RB1036-PART43 Chain cover R SB120-RB1036-PART44 Cover for crank JE437...
-
Page 9: Sb120 Assembly Instructions
SB120 Assembly Pack Checklist #72. 13mm/15mm (1 pc) #15. M8 x 60L (4 pcs) #18. M8 x 35L (4 pcs) #30. M8 x 16t #33. 8.5 x 20 #73. 5mm (4 pcs) x 1.5t (8 pcs) (1 pc) #16. M8 x 40L (2 pcs) #27. - Page 10 SB120 Parts Checklist NO. 01 NO. 02 NO. 03 NO. 04 NO. 05 NO. 06 NO. 07 NO. 08 NO. 24 NO. 25 NO. 26 NO. 28 NO. 29 DESCRIPTION Q’TY PART NO. Main frame Front post Backrest support bracket...
- Page 11 Bolts (No. 15), 2 Curved Washers (No. 33) and 2 Domed Nuts (No. 30). 2. Attach Rear Stabilizer (No. 07) to Main Frame (No. 01) using with 2 Carriage Bolts (No. 15), 2 Curved Washers (No. 33) and 2 Domed Nuts (No. 30). SB120 Recumbent Bike...
- Page 12 3. Connect the Right Pedal (No. 29) to the right side of Crank w/ Pulley (No. 35), twist it clockwise to tighten. Note that the straps should face outwards and the pedals should be mounted to their respective sides to be functional. SB120 Recumbent Bike...
- Page 13 2. Connect Upper Pulse Sensor Wire (No. 12) with Lower Pulse Sensor Wire (No. 13) (see fig. 3.3). 3. Insert the Front Post (No. 02) into the Main Frame (No. 01) and secure with 4 Allen Bolts (No. 17) and 4 Curved Washers (No. 33). SB120 Recumbent Bike...
- Page 14 2. Insert the Adjustable Bar (No. 08) into Connection Axle (No. 09) as shown above, then tighten with 2 Allen Bolts (No. 20) and 2 Flat Washers (No. 34). 3. Attach the Seat (No. 25) to Backrest Support Bracket (No. 03) and tighten with 4 Allen Screws (No. 32). SB120 Recumbent Bike...
- Page 15 Adjustable Bar (No. 08) is pointing upright when inserting for proper assembly. 2. Attach the Limited Bracket (No. 27) onto the Main Frame (No. 01) and tighten with 1 Crossed Head Self-Tapping Screw (No. 22). SB120 Recumbent Bike...
- Page 16 2 Allen Bolts (No. 16) and 2 Curved Washers (No. 33). 3. Remove the Sticker (No. 36) from the Main Frame (No. 01), gently pull the Middle Pulse Sensor Wire (No. 14) out of the upright and connect it to the Lower Pulse Sensor Wire (No. 21). SB120 Recumbent Bike...
- Page 17 Attaching the Seat Back 4 pcs M8 x 35L Allen Key 1. Attach the Back Cushion (No. 26) to the Backrest Support Bracket (No. 03), tighten with 4 Allen Bolts (No. 18). SB120 Recumbent Bike...
- Page 18 (No. 12) to the Console (No. 24), and then attach the Console (No. 24) to the Front Post (No. 02), secure with 2 Crossed Head Screws (No. 23). *NOTE: CHECK TO ENSURE THAT ALL BOLTS AND NUTS ARE TIGHTENED BEFORE USING THE MACHINE. SB120 Recumbent Bike...
-
Page 19: Final Considerations
• Use the Tension Knob (No. 51) on to adjust the resistance. Level 1 is the minimum resistance. Transporting the Bike • There is a set of transport wheels on the Front Stabilizer (No. 6). To move the bike carefully tilt the handlebar forwards and roll away. SB120 Recumbent Bike... -
Page 20: Exploring Your New Bike
0°C ~ +40°C, 32˚F ~ 104˚F STORAGE TEMPERATURE -10°C ~ +60°C, 14˚F ~ 140˚F The console turns on when you start pedaling or when you press a key. The console turns off automatically after 4 minutes of inactivity. SB120 Recumbent Bike... - Page 21 Please note that due to contact delay, the heart rate will be higher than the actual heart rate during the first 2 ~ 3 seconds of measurement, then will return to normal level. The measurement value shouldn’t be regarded as the basis of medical treatment. SB120 Recumbent Bike...
-
Page 22: Troubleshooting
Upright. • Check that the batteries are correctly positioned and are in proper contact with the battery springs. • The batteries in the computer may be dead. Remove and replace with new batteries. SB120 Recumbent Bike... -
Page 23: Manufacturer's Limited Warranty
Effective September 10, 2019 - SB120 Recumbent Bike LIMITED WARRANTY XTERRA Fitness Inc. warrants all its home use Recumbent Bike parts for a period of time listed below, from the date of retail sale, as determined by a sales receipt or in the absence of a sales receipt, eighteen (18) months from the original factory shipping date. XTERRA Fitness’s... - Page 24 3000 Nestle Road Jonesboro, AR 72401 - Phone: 870-336-4286 - Fax: 870-935-7611 www.xterrafitness.com ©2019 All Rights Reserved. SB120 Owner’s Manual...
Need help?
Do you have a question about the SB120 and is the answer not in the manual?
Questions and answers