Table of Contents
Advertisement
Quick Links
Advertisement
Table of Contents

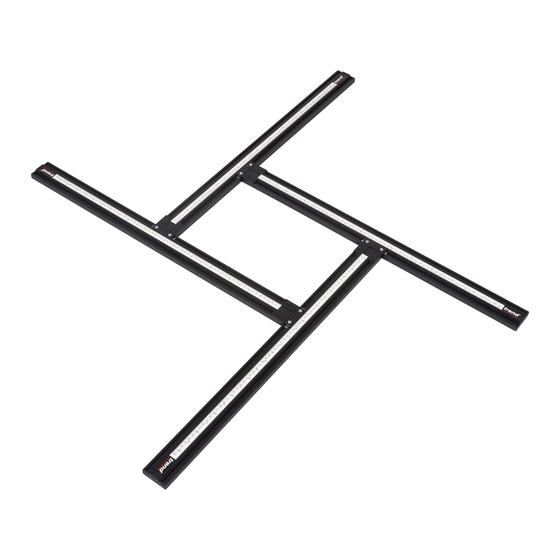
Summary of Contents for TREND VARIJIG
- Page 1 MANU-VJS v1.0 18/2/05 10:31 am Page 1 VARIJIG...
-
Page 2: Table Of Contents
MANU-VJS v1.0 18/2/05 10:31 am Page 1 VARIJIG Dear Customer TECHNICAL DATA Thank you for purchasing this Trend product, we Extrusion thickness 15.8mm hope you enjoy many years of creative and Extrusion width 54.0mm productive use. Working area size (max.) -
Page 3: Safety
MANU-VJS v1.0 18/2/05 10:31 am Page 2 VARIJIG ■ Use the attachment with the power ■ Connect dust extraction equipment. SAFETY tools and accessories specified in If devices are provided for the this manual only. Do not force the connection of dust extraction and... - Page 4 Trend Routing Catalogue. appropriate spanner or key in the design requirements and ■ Always use router cutters in a...
-
Page 5: Items Enclosed
MANU-VJS v1.0 18/2/05 10:31 am Page 4 VARIJIG ITEMS ENCLOSED x 16 Pre-assembled Silver Black ASSEMBLY TOOLS REQUIRED ■ No. 2 Pozi ® Screwdriver ■ Square or long rule/tape measure. -
Page 6: Description Of Parts
MANU-VJS v1.0 18/2/05 10:31 am Page 5 VARIJIG DESCRIPTION OF PARTS Alloy extrusion T-nut Corner bracket Machine screw M5 (black-fixed) Machine screw M5 (silver-adjustable) Anti-tilt shoe Anti-tilt shoe fixing screw Scale... -
Page 7: Assembly & Adjustment
MANU-VJS v1.0 18/2/05 10:31 am Page 6 VARIJIG ■ Place the ends of each extrusion with the ASSEMBLY & ADJUSTMENT corner bracket fitted onto the bottom slot of each extrusion, line up the T-nut and using The T-nuts are held by the silver screws onto the... -
Page 8: Operation
8mm. When using the guide bush the router sits on top of the Varijig frame. Choose a cutter with a diameter which will pass through the centre of the guide bush leaving enough clearance. The cutter can be straight or shaped. -
Page 9: Adjusting Frame For Size
After every adjustment, the frame will need to be checked for Batten Batten squareness. Clamping Varijig Frame ■ Clamp frame to component using shallow battens with pins or gripper clamps if they do Batten Batten not foul router, or use the optional accessory clamps Ref. -
Page 10: Routing Squares And Rectangles
■ Ensure guide bush and cutter is fitted to the router. ■ Set the cutter depth. ■ Place router onto Varijig with the anti-tilt shoe sitting on the component. ■ Place router so that guide bush is touching the inside edge of the frame and switch on router. -
Page 11: Optional Accessory
MANU-VJS v1.0 18/2/05 10:31 am Page 10 VARIJIG OPTIONAL ACCESSORY CLAMP KIT VJS/CK Comprises a pair of clamps, which slide into the underside of the extrusion and clamps frame to workbench or component. The clamp will not impede router path and can clamp material up to a maximum of 32mm thickness. -
Page 12: Maintenance
MANU-VJS v1.0 18/2/05 10:31 am Page 11 VARIJIG MAINTENANCE The template has been designed to operate over a long period of time with minimum of maintenance. Continual satisfactory operation depends upon proper tool care and regular cleaning. ■ Cleaning Keep the grooves on the extrusion clear of sawdust. -
Page 13: Spare Parts - Spare Parts List
MANU-VJS v1.0 18/2/05 10:31 am Page 12 VARIJIG VARIJIG - SPARE PARTS LIST v1.0 03/2005 Qty. Desc. Ref. T-Nut M4 WP-VJS/01 Machine Screw Csk M4 x 6mm Pozi Silver WP-VJS/02 Machine Screw Csk M4 x 6mm Pozi Black WP-VJS/03 Scale Metric/Imperial 640mm... - Page 14 Web: ____________www.trendmachinery.co.uk RECYCLABLE © Copyright Trend 2005. No part of this publication may be reproduced, stored or transmitted in any form without prior permission. Our policy of continuous improvement means that specifications may change without notice. Trend Machinery and Cutting Tools...


Need help?
Do you have a question about the VARIJIG and is the answer not in the manual?
Questions and answers