Honda EB10000 Owner's Manual
Hide thumbs
Also See for EB10000:
- Owner's manual (111 pages) ,
- Information (28 pages) ,
- Owner's manual (96 pages)

Related Manuals for Honda EB10000


Summary of Contents for Honda EB10000
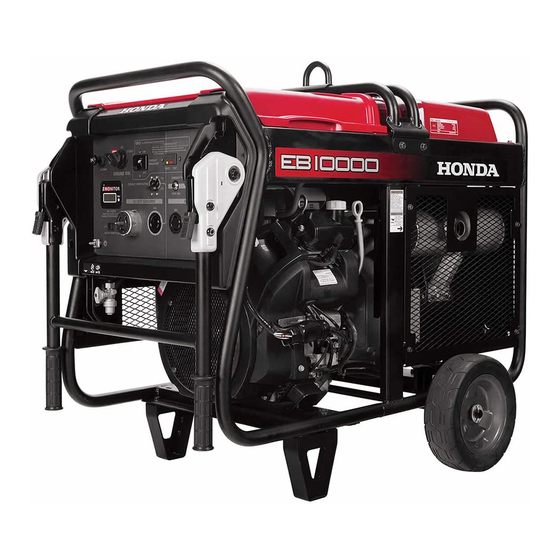
- Page 1 Owner’s Manual GENERATOR EB10000 See page 12 for instructions on assembling your generator. See page 17 for Initial Use Instructions. 2020 Honda Motor Co., Ltd. -All Rights Reserved...
- Page 2 The information and specifications included in this publication were in effect at the time of approval for printing. Honda Motor Co., Ltd. reserves the right, however, to discontinue or change specifications or design at any time without notice and without incurring any obligation whatsoever.
-
Page 3: Introduction
When your generator needs scheduled maintenance, keep in mind that your Honda servicing dealer is specially trained in servicing Honda generators and is supported by the parts and service divisions of American Honda. Your Honda servicing dealer is dedicated to your satisfaction and will be pleased to answer your questions and concerns. - Page 4 INTRODUCTION A FEW WORDS ABOUT SAFETY Your safety and the safety of others are very important. We have provided important safety messages in this manual and on the generator. This information alerts you to potential hazards that could hurt you or others.
-
Page 5: Table Of Contents
CONTENTS INTRODUCTION ....................1 GENERATOR SAFETY ..................7 IMPORTANT SAFETY INFORMATION................7 Operator Responsibility....................7 Carbon Monoxide Hazards..................... 8 Electric Shock Hazards ..................... 9 Fire and Burn Hazards ...................... 9 Refuel With Care.......................10 Vehicles and Transportation Hazards...............10 SAFETY LABEL LOCATIONS....................11 ASSEMBLY ....................... - Page 6 CONTENTS Ground Terminal......................38 Fuel Gauge .........................39 BEFORE OPERATION..................40 ARE YOU READY TO GET STARTED? ................40 Knowledge .........................40 IS YOUR GENERATOR READY TO GO?................40 Check the Engine ......................41 Check the GFCI........................41 Check the Battery......................41 AC Appliance and Power Cord..................42 ENGINE OIL LEVEL CHECK ....................43 AIR FILTER CHECK .........................44 SAFE OPERATING PRECAUTIONS ..................46 OPERATION .....................
- Page 7 TECHNICAL INFORMATION ................92 SERIAL NUMBER LOCATION ....................92 CARBURETOR MODIFICATION FOR HIGH ALTITUDE OPERATION.......93 EMISSION CONTROL SYSTEM INFORMATION.............94 AIR INDEX..........................96 SPECIFICATIONS ........................97 WIRING DIAGRAM.........................99 CONSUMER INFORMATION................100 DEALER LOCATOR INFORMATION ................100 Honda PUBLICATIONS...................... 100 CUSTOMER SERVICE INFORMATION ................101...
- Page 8 CONTENTS Distributor’s Limited Warranty ..................102 Emission Control System Warranty ................107 REGISTRATION ........................112 INDEX ......................113 QUICK REFERENCE INFORMATION ........inside back cover...
-
Page 9: Generator Safety
GENERATOR SAFETY IMPORTANT SAFETY INFORMATION Honda generators are designed for use with electrical equipment that has suitable power requirements. Other uses can result in injury to the operator or damage to the generator and other property. Most injuries or property damage can be prevented if you follow all instructions in this manual and on the generator. -
Page 10: Carbon Monoxide Hazards
GENERATOR SAFETY Carbon Monoxide Hazards A generator's exhaust contains toxic carbon monoxide, which you cannot see or smell. Breathing carbon monoxide can KILL YOU IN MINUTES. To avoid carbon monoxide poisoning, follow these instructions when operating a generator: • Only run a generator OUTSIDE, far away from windows, doors, and vents with engine exhaust directed away from occupied structures. -
Page 11: Electric Shock Hazards
GENERATOR SAFETY Electric Shock Hazards The generator produces enough electric power to cause a serious shock or electrocution if misused. • Do not use in wet conditions. Keep the generator dry. – Do not use in the rain or snow. –... -
Page 12: Refuel With Care
GENERATOR SAFETY Refuel With Care Gasoline is highly flammable, and gasoline vapor can explode. • Do not refuel during operation. • Allow the engine to cool if it has been in operation. • Refuel only outdoors in a well-ventilated area and on a level surface. •... -
Page 13: Safety Label Locations
GENERATOR SAFETY SAFETY LABEL LOCATIONS These labels warn you of potential hazards that can cause serious injury. Read them carefully. If a label comes off or becomes hard to read, contact your servicing dealer for a replacement. -
Page 14: Assembly
ASSEMBLY SAFETY The Importance of Proper Assembly Proper assembly is essential to operator safety and the reliability of the machine. Improper assembly can cause an unsafe condition. Failure to properly follow assembly procedures can lead to serious injury or death. Follow the procedures and precautions in this owner’s manual carefully. -
Page 15: Assembly
ASSEMBLY ASSEMBLY Unpacking 1. Remove the generator and loose parts box from the carton. 2. Compare the loose parts with the inventory list below. Tools Required: 12 mm wrench (2), pliers Do not add fuel or oil before tipping the generator. Oil or fuel may damage the engine or your property. -
Page 16: Handle Installation
ASSEMBLY Handle Installation Install the handle assembly on the generator upper frame using the 12 mm washers, spring washers and handle holder bolts. Torque: 19.5 lbf·ft (26.5 N·m, 2.7 kgf·m) SPRING WASHER (2) HANDLE HOLDER BOLT (2) 12 mm WASHER (2) HANDLE ASSEMBLY TO EXTEND HANDLE: Raise the handle to the horizontal position. -
Page 17: Wheel Kit Installation
ASSEMBLY Wheel Kit Installation 1. Install the two stands on the under frame using two 8×20 mm flange bolts, two 8×45 mm flange bolts, and two collars. 2. Install the two wheels on the axle shaft using the plain washers and split pins. After installing the split pins, bend the pins to ensure that the wheels are secured to the axle. -
Page 18: Hanger Kit Installation
ASSEMBLY Hanger Kit Installation 1. Remove the center beam. 2. Loosely install the hanger to the center beam using the hanger bracket and two 8×20 mm flange bolts. 3. Reinstall the center beam. Make sure to tighten the four 8×16 mm bolts securely. -
Page 19: Initial Use Instructions
INITIAL USE INSTRUCTIONS ENGINE OIL The generator is shipped WITHOUT OIL in the engine. 1. Place the generator on a level surface. 2. Open the maintenance cover. 3. Remove the oil filler cap and oil level dipstick. 4. Add enough oil to bring the oil level to the upper limit mark on the oil dipstick. -
Page 20: Engine Oil Recommendations
AMBIENT TEMPERATURE Read the instructions on the oil container before use. The SAE oil viscosity and service category are in the API label on the oil container. Honda recommends that you use API service category SJ or later (or equivalent) oil. -
Page 21: Fuel
INITIAL USE INSTRUCTIONS FUEL Add fuel to the generator in a well-ventilated area. Fuel only outdoors. Keep gasoline away from appliance, such as pilot lights, barbecues, electric appliances, power tools, etc. Spilled fuel is not only a fire hazard, it causes environmental damage. - Page 22 INITIAL USE INSTRUCTIONS 1. Remove the fuel tank cap. 2. Fuel carefully to avoid spilling fuel. Do not fill the fuel tank above the upper level mark (red) on the fuel strainer. 3. After refueling, reinstall the fuel tank cap securely. FUEL TANK CAP TETHER UPPER LEVEL MARK (RED)
-
Page 23: Fuel Recommendations
INITIAL USE INSTRUCTIONS FUEL RECOMMENDATIONS This engine is certified to operate on regular unleaded gasoline with a pump octane rating of 86 or higher. Never use gasoline that is stale, contaminated, or mixed with oil. Avoid getting dirt or water in the fuel tank. You may use regular unleaded gasoline containing no more than 10% ethanol (E10) or 5% methanol by volume. -
Page 24: Controls & Features
CONTROLS & FEATURES COMPONENT & CONTROL LOCATIONS Use the two illustrations on these pages to locate and identify the most frequently used controls. AC CIRCUIT BREAKER GFCI TEST BUTTON ENGINE SWITCH AC CIRCUIT PROTECTORS CHOKE KNOB CO-MINDER i-MONITOR GROUND TERMINAL RECEPTACLES GFCI RECEPTACLES AUTO THROTTLE SWITCH... - Page 25 CONTROLS & FEATURES FUSE FUEL TANK CAP FUEL GAUGE OIL LEVEL DIPSTICK AIR CLEANER OIL FILLER CAP MAINTENANCE COVER MUFFLER FUEL VALVE LEVER SPARK PLUG CAP BATTERY SPARK PLUG CAP OIL FILTER OIL DRAIN BOLT...
-
Page 26: Controls
CONTROLS & FEATURES CONTROLS Fuel Valve Lever The fuel valve lever is located between the fuel tank and carburetor. The fuel valve lever must be in the ON position for the engine to run. After stopping the engine, turn the fuel valve lever to the OFF position. -
Page 27: Co-Minder (Co Shut-Off System)
CONTROLS & FEATURES CO-MINDER (CO Shut-off System) CO-MINDER is a system that automatically stops the engine before the surrounding carbon monoxide concentration exceeds a certain level. If the CO-MINDER detects a high carbon monoxide concentration, the engine will stop and the CO ALARM indicator will flash for about five minutes. Continuously using the generator in areas with high concentrations of carbon monoxide can cause serious health hazards due to carbon monoxide poisoning (see page 8). - Page 28 • The FAULT/CO SENSOR LIFE indicator indicates the estimated life left in the CO- MINDER. • The generator stopping period and storage period are also included in the useful lifespan of the CO-MINDER. • Contact an authorized Honda Power Equipment dealer for CO-MINDER replacement.
-
Page 29: Ac Circuit Protectors
CONTROLS & FEATURES AC Circuit Protectors The AC circuit protectors will automatically switch to OFF if there is a short circuit or a significant overload of the generator at each receptacle. If an AC circuit protector switches OFF automatically, check that the appliance is working properly and does not exceed the rated load capacity of the circuit before resetting the AC circuit protector ON. -
Page 30: Ac Circuit Breaker
CONTROLS & FEATURES AC Circuit Breaker The AC circuit breaker will automatically switch OFF in the following cases. • If there is a short circuit or a significant overload at the receptacles. • If there is a ground-fault current from either receptacles A, B or C. The AC circuit breaker may be used to switch the generator power ON or OFF. -
Page 31: Ground Fault Circuit Interrupter (Gfci)
CONTROLS & FEATURES Ground Fault Circuit Interrupter (GFCI) This generator has two types of Ground Fault Circuit Interrupter (GFCI) systems, GFCI system ① and GFCI system ②. GFCI SYSTEM ① (120V-30A, 120V/240V-30A, 120V/240V-37.5A RECEPTACLES) If there is a ground-fault current from either A, B or C receptacle, it will shut off the power to receptacles A, B, and C. - Page 32 CONTROLS & FEATURES All receptacles on the generator are protected by a Ground Fault Circuit Interrupter (GFCI) for protection against the shock hazard of ground-fault current. An example of ground-fault current is the current that would flow through a person who is using an appliance with faulty insulation and, at the same time, is in contact with an electrical ground such as a plumbing fixture, wet floor, or earth.
-
Page 33: Auto Throttle® System
CONTROLS & FEATURES Auto Throttle® System The Auto Throttle® system automatically reduces engine speed when all loads are turned off or disconnected. When appliances are turned on or reconnected, the engine returns to the rated speed. SWITCH POSITION ON - Recommended to minimize fuel consumption and further reduce noise levels when no load is applied to the generator. -
Page 34: Folding Handle
CONTROLS & FEATURES Folding Handle The foldable handle is intended for ease of transportation and should be folded when the generator is stationary. Do not rest objects on the extended handle. To extend the handle, lift handle upward. Lock levers will lock and secure the handle into place. -
Page 35: Features
CONTROLS & FEATURES FEATURES Oil Alert® System The Oil Alert® system is designed to prevent engine damage caused by an insufficient amount of oil in the crankcase. Before the oil level in the crankcase can fall below a safe limit, the Oil Alert indicator will come on and the Oil Alert system automatically will stop the engine (the engine switch will remain in the ON position). -
Page 36: I-Monitor
CONTROLS & FEATURES i-Monitor The i-Monitor is a user interface that allows the operator to view (when the generator is running) total operating time in hours, generator output voltage, battery voltage, and error messages. i-Monitor at Start Up When the engine switch is turned to the ON position, all segments of the i- Monitor display turn on for a second. - Page 37 CONTROLS & FEATURES i-Monitor Display The four-digit screen displays the total operating hours, battery voltage, and power output voltage or any activated error messages. FOUR-DIGIT SCREEN DISPLAY Total Operating Hours This mode displays the total operating hours of the generator. When the generator is running, the total operating time accumulates.
- Page 38 CONTROLS & FEATURES Power Output Voltage This mode displays an approximate single-phase output voltage. Battery Voltage This mode displays the battery condition, expressed in Volts DC. The battery voltage can be displayed from 8 V up to 16 V. When the battery voltage is less than 8 V, the i-Monitor shows 8 V. When above 16 V, 16 V is shown.
- Page 39 System Error Messages If the generator has a system malfunction, it will show an error message on the i-Monitor display. If an error message displays, contact an authorized Honda Power Equipment dealer. When there are a number of errors, they are indicated alternately for two seconds for each.
-
Page 40: Ground Terminal
CONTROLS & FEATURES Ground Terminal The ground terminal is connected to the frame of the generator, the metal non- current-carrying parts of the generator, and the ground terminals of each receptacle. Before using the ground terminal, consult a qualified electrician, electrical inspector, or local agency having jurisdiction for local codes or ordinances that apply to the intended use of the generator. -
Page 41: Fuel Gauge
CONTROLS & FEATURES Fuel Gauge The fuel gauge is a mechanical device that measures the fuel level in the tank. The red indicator in the window will reference the level in relation to full or empty. To provide increased operating time, start with a full tank before beginning operation. -
Page 42: Before Operation
BEFORE OPERATION ARE YOU READY TO GET STARTED? Your safety is your responsibility. A little time spent in preparation will significantly reduce your risk of injury. Knowledge Read and understand this manual. Know what the controls do and how to operate them. -
Page 43: Check The Engine
BEFORE OPERATION Before beginning your pre-operation checks, be sure the generator is on a level surface and the engine switch is in the OFF position. Generators with standard equipment transport wheels must not be operated with the wheels and/or stands removed or else the generator may not operate correctly and can become damaged. -
Page 44: Ac Appliance And Power Cord
BEFORE OPERATION AC Appliance and Power Cord Before connecting an AC appliance or power cord to the generator: • Use grounded 3-prong extension cords, tools, and appliances, or double- insulated tools and appliances. • Inspect cords and plugs, and replace if damaged. •... -
Page 45: Engine Oil Level Check
BEFORE OPERATION ENGINE OIL LEVEL CHECK Check the engine oil level with the engine stopped and in a level position. 1. Open the maintenance cover to access the oil level dipstick. 2. Remove the oil level dipstick and wipe it clean. 3. -
Page 46: Air Filter Check
BEFORE OPERATION AIR FILTER CHECK 1. Open the maintenance cover to access the air cleaner. MAINTENANCE COVER 2. Pull the air cleaner cover latch to the unlocked position, and remove the cover. Remove the wing nut from the paper filter element. Remove the paper filter element and foam filter element from the air cleaner case. - Page 47 BEFORE OPERATION 4. Clean the filter elements if they are to be reused. Paper filter element: Tap the filter element several times on a hard surface to remove dirt, or blow compressed air [not exceeding 30 psi (207 kPa, 2.1 kgf/ )] through the filter element from the air cleaner case side.
-
Page 48: Safe Operating Precautions
BEFORE OPERATION SAFE OPERATING PRECAUTIONS Before operating the generator, review chapters "GENERATOR SAFETY" (see page 7). For your safety, do not operate the generator in an enclosed, or partly enclosed area such as a garage (even if the door is open) or near structures or vehicles. Your generator's exhaust contains poisonous carbon monoxide gas that can collect rapidly in such areas, structures, vehicles, trailers, or boats. -
Page 49: Operation
OPERATION STARTING THE ENGINE To prevent a possible fire, keep the generator at least 3 feet (1 meter) away from building or trailer walls, vehicles, trailers, boats, and other equipment during operation. Do not place flammable objects close to the engine. •... - Page 50 OPERATION 3. Turn the fuel valve lever to the ON position. FUEL VALVE LEVER 4. Pull the choke knob to the CLOSED position to start a cold engine. OPEN Leave the choke knob in the OPEN CLOSED position to start a warm engine. CHOKE KNOB...
- Page 51 OPERATION 5. Make sure the Auto Throttle switch AUTO THROTTLE SWITCH is in the OFF position, or more time will be required for warm up. 6. Start the engine. Turn the engine switch to the START position, and hold it there START until the engine starts.
- Page 52 OPERATION 7. If the choke knob was pulled to the CLOSED position to start the engine, gradually move it to the OPEN OPEN position as the engine warms CHOKE KNOB 8. If you wish to use the Auto Throttle AUTO THROTTLE SWITCH system, turn the Auto Throttle switch to the ON position after the engine has warmed up for 2 or 3...
-
Page 53: Stopping The Engine
OPERATION STOPPING THE ENGINE To stop the engine in an emergency, simply turn the engine switch to the OFF position. Under normal conditions, use the following procedure. 1. Turn off or disconnect all appliances AC CIRCUIT BREAKER that are connected to the generator. 2. -
Page 54: How To Restart When Stopped By Co-Minder (Co Shut-Off System)
OPERATION HOW TO RESTART WHEN STOPPED BY CO-MINDER (CO SHUT-OFF SYSTEM) When the engine is automatically stopped by the CO-MINDER, move the generator to an area with fresh air and away from any device that may be emitting carbon monoxide, such as another generator. Press the CO-MINDER reset button and then follow the standard procedure for starting the engine. -
Page 55: Gfci Operation Check
Always perform the GFCI system inspection before using the generator. If the GFCI system fails the test, the generator must be repaired by an authorized Honda servicing dealer before use. GFCI SYSTEM ① (120V-30A, 120V/240V-30A, 120V/240 V-37.5 A RECEPTACLES) GFCI SYSTEM ②... -
Page 56: Gfci System ①
OPERATION GFCI System ① (120V-30A, 120V/240V-30A, 120V/240V-37.5A Receptacles) 1. Unplug all tools and appliances from the generator. 2. Start the engine (see page 47). 3. Turn the AC circuit breaker to the ON position. 4. Press the GFCI TEST button. The LED comes on, and the AC circuit breaker switches to the OFF position. - Page 57 5. When you switch the AC circuit breaker to the ON position, LED will turn off. If the GFCI and AC circuit breaker do not function as described, take the generator to an authorized Honda Power Equipment dealer for repair. AC CIRCUIT BREAKER During generator use, if the AC circuit breaker trips, this usually indicates a faulty power tool, appliance, or cord.
-
Page 58: Gfci System ② (120V-20A Duplex Receptacle)
(red) Blink once (green) Light once (red) Blink once (green) Lights continuously • If the green GFCI indicator does not light on, press the GFCI RESET button. • If the red GFCI indicator starts to blink continuously, contact an authorized Honda Power Equipment dealer. - Page 59 5. Press the GFCI TEST button: • The GFCI RESET button will pop out and the green GFCI indicator will go off. • If the GFCI does not function as described, contact an authorized Honda Power Equipment dealer. AC CIRCUIT BREAKER...
- Page 60 6. Press the GFCI RESET button: • The green GFCI indicator will light continuously. • If the red GFCI indicator starts to blink continuously, contact an authorized Honda Power Equipment dealer. GFCI INDICATOR GFCI RESET BUTTON When the GFCI RESET button pops out or the green GFCI indicator does not lit during operation: •...
-
Page 61: Ac Operation
OPERATION AC OPERATION If an appliance begins to operate abnormally, becomes sluggish, or stops suddenly, turn it off immediately. Disconnect the appliance, and determine whether the problem is in the appliance or the rated load capacity of the generator has been exceeded. Substantial overloading may damage the generator. -
Page 62: Ac Applications
OPERATION Before connecting an appliance to the generator, make sure that it is in good order and that its electrical rating does not exceed that of the generator. Then start the generator and connect the appliance power cord. AC Applications Before connecting an appliance or power cord to the generator: •... -
Page 63: Auto Throttle® System
OPERATION AUTO THROTTLE® SYSTEM With the switch in the ON position, engine speed is automatically reduced when ALL loads are turned OFF or disconnected. When appliances are turned ON or reconnected, the engine returns to rated speed. In the OFF position, the Auto Throttle®... -
Page 64: Standby Power
OPERATION STANDBY POWER Connections to a Building’s Electrical System Connections for standby power to a building’s electrical system must be made by a qualified electrician. The connection must isolate the generator power from utility power, and must comply with all applicable laws and electrical codes. -
Page 65: Special Requirements
OPERATION Special Requirements There may be Federal or State Occupational Safety and Health Administration (OSHA) regulations, local codes, or ordinances that apply to the intended use of the generator. Please consult a qualified electrician, electrical inspector, or the local agency having jurisdiction. •... -
Page 66: Servicing Your Generator
Remember that an authorized Honda Power Equipment dealer knows your generator best and is fully equipped to maintain and repair it. To ensure the best quality and reliability, use only new, Honda Genuine parts or their equivalents for repair and replacement. -
Page 67: Maintenance Safety
SERVICING YOUR GENERATOR MAINTENANCE SAFETY Some of the most important safety precautions follow. However, we cannot warn you of every conceivable hazard that can arise in performing maintenance. Only you can decide whether or not you should perform a given task. -
Page 68: Maintenance Schedule
(1) Service more frequently when used in dusty areas. (2) These items should be serviced by your servicing dealer, unless you have the proper tools and are mechanically proficient. Refer to the Honda shop manual for service procedures. See "Honda PUBLICATIONS" on page 100 for ordering information. -
Page 69: Engine Oil Change
SERVICING YOUR GENERATOR ENGINE OIL CHANGE Drain the oil while the engine is warm to assure rapid and complete draining. 1. Place a suitable container below the engine to catch the used oil. 2. Open the maintenance cover to access the oil filler cap. 3. -
Page 70: Air Cleaner Service
SERVICING YOUR GENERATOR 6. Tighten the oil filler cap securely. Close the maintenance cover. Wash your hands with soap and water after handling used oil. SEALING WASHER (Replace) OIL FILLER CAP FUNNEL OIL DRAIN BOLT AIR CLEANER SERVICE Foam Air Filter Cleaning A dirty foam air filter will restrict air flow to the carburetor, reducing engine performance. -
Page 71: Sediment Cup Cleaning
SERVICING YOUR GENERATOR SEDIMENT CUP CLEANING The sediment cup prevents water that may be in the fuel tank from entering the carburetor. If the engine has not been run for a long time, the sediment cup should be cleaned. Gasoline is highly flammable and explosive. - Page 72 SERVICING YOUR GENERATOR 2. Turn the fuel valve lever to the OFF position. FUEL VALVE LEVER 3. Unscrew the sediment cup. 4. Clean the sediment cup in non-flammable or high flash point solvent. 5. Install the sediment cup and a new O-ring. 6.
-
Page 73: Spark Plug Service
SERVICING YOUR GENERATOR SPARK PLUG SERVICE In order to service the spark plug, you will need a spark plug wrench (commercially available). Required spark plug: ZFR5F (NGK) To ensure proper engine operation, the spark plug must be properly gapped and free of deposits. An incorrect spark plug can cause engine damage. - Page 74 SERVICING YOUR GENERATOR 4. Inspect the spark plug. Replace it if the electrodes are worn or fouled, or if the insulator is cracked or chipped. Clean the spark plug with a wire brush if it is to be reused. 5. Measure the spark plug electrode gap with a wire-type feeler gauge. Correct the gap, if necessary, by carefully bending the side electrode.
-
Page 75: Spark Arrester Service
SERVICING YOUR GENERATOR SPARK ARRESTER SERVICE The spark arrester must be serviced every 100 hours to keep it functioning as designed. If the engine has been running, the muffler will be very hot. Allow the muffler to cool before servicing the spark arrester. 1. - Page 76 SERVICING YOUR GENERATOR 2. Remove the 4 mm self-tapping screw, and remove the spark arrester. SPARK ARRESTER 4 mm SELF-TAPPING SCREW 3. Use a brush to remove carbon deposits from the spark arrester screen. Be careful to avoid damaging the screen. The spark arrester must be free of breaks and tears.
-
Page 77: Battery Service
SERVICING YOUR GENERATOR BATTERY SERVICE Your generator’s engine charging system charges the battery while the engine is running. However, if the generator is only used periodically, the battery must be charged monthly to maintain the battery service life. The battery contains sulfuric acid (electrolyte), which is highly corrosive and poisonous. - Page 78 SERVICING YOUR GENERATOR The battery gives off explosive hydrogen gas during normal operation. A spark or flame can cause the battery to explode with enough force to kill or seriously hurt you. Wear protective clothing and a face shield, or have a skilled mechanic perform the battery maintenance.
-
Page 79: Battery Inspection
If rapid loss of electrolyte is experienced, or if your battery seems to be weak causing slow operation of the starter motor, see your authorized Honda Power Equipment dealer. 1. Locate the battery. Check the electrolyte level with the generator on a level surface. -
Page 80: Battery Removal
SERVICING YOUR GENERATOR Battery Removal WARNING: Battery posts, terminals, and related accessories contain lead and lead compounds. Wash your hands after handling. 1. Remove the four 6 mm flange bolts, COVER and remove the cover. 6 mm FLANGE BOLT (4) 2. -
Page 81: Battery Charging
SERVICING YOUR GENERATOR Battery Charging The battery is rated at 28.0 Ah (ampere hours). Charging current should equal 10% of the battery’s ampere hour rating. Battery: 12 V 28.0 Ah (5 HR) 1. Connect the battery charger following the manufacturer’s instructions. 2. -
Page 82: Fuse
In the event of fuse failure, locate the cause of failure and repair it before you continue operation. If the fuse continues to fail, discontinue generator use and consult an authorized Honda Power Equipment dealer. 1. Turn the engine switch to the OFF position and remove the key before checking or replacing the fuse. -
Page 83: Storage
STORAGE STORAGE PREPARATION Proper storage preparation is essential for keeping your generator trouble-free and looking good. The following steps will help to keep rust and corrosion from impairing your generator’s function and appearance, and will make the engine easier to start when you use the generator again. Cleaning Wipe the generator with a moist cloth. - Page 84 After removal from storage, drain the stored gasoline into a suitable container, and fill with fresh gasoline before starting. * Use gasoline stabilizers that are formulated to extend storage life. Follow the manufacturer’s instructions for use. Contact your authorized Honda Power Equipment dealer for stabilizer recommendations.
- Page 85 STORAGE DRAINING THE FUEL TANK AND CARBURETOR Gasoline is highly flammable and explosive. You can be burned or seriously injured when handling fuel. • Stop the engine and let it cool before handling fuel. • Keep heat, sparks, and flame away. •...
- Page 86 STORAGE 2. Pull out the carburetor drain tube end under the fan cover of the engine, and place it in a suitable container. 3. Remove the air cleaner cover (see page 44). 4. Loosen the carburetor drain screw. If the drain screw is difficult to loosen, wrap duct tape around the screwdriver stem until the diameter becomes 8 mm as illustrated.
-
Page 87: Engine Oil
STORAGE Engine Oil Change the engine oil (see page 67). Engine Cylinder 1. Remove the spark plugs (see page 71). 2. Pour a teaspoon (5 cc) of clean engine oil into each cylinder. 3. Turn the engine for a few seconds by turning the engine switch to the START position to distribute the oil in the cylinders. -
Page 88: Storage Precautions
STORAGE STORAGE PRECAUTIONS If your generator will be stored with gasoline in the fuel tank and carburetor, it is important to reduce the hazard of gasoline vapor ignition. Select a well ventilated storage area away from any appliance that operates with a flame, such as a furnace, water heater, or clothes dryer. -
Page 89: Transporting
TRANSPORTING An engine that has been running will remain very hot for a period of time. A hot engine and exhaust system can burn you and ignite some material. If the generator has been used, allow it to cool for at least 15 minutes before loading the generator on the transport vehicle. - Page 90 TRANSPORTING To lift the generator Lift the generator by the lifting hanger. Do not try to lift the generator by and other part.
-
Page 91: Taking Care Of Unexpected Problems
Dry and reinstall spark plug. (flooded engine). Fuel strainer restricted, carburetor Take the generator to an authorized malfunction, ignition malfunction, Honda Power Equipment dealer, or valves stuck, etc. refer to the shop manual. CO-MINDER (CO Shut-off System) is Review the location of the generator,... -
Page 92: Engine Lacks Power
Refuel with fresh gasoline (see page 19). Fuel strainer restricted, carburetor Take the generator to an authorized malfunction, ignition malfunction, Honda Power Equipment dealer, or valves stuck, etc. refer to the shop manual. NO POWER AT THE AC RECEPTACLES Possible Cause... -
Page 93: Engine Automatically Stop And The Co Alarm Indicator Flashing
CO-MINDER malfunction. Consult an authorized Honda Power Equipment dealer. CO sensor may have reached the end Consult an authorized Honda Power of its useful lifespan (see page 26). Equipment dealer. FAULT/CO SENSOR LIFE INDICATOR FLASHING WHEN RUNNING THE... -
Page 94: Technical Information
TECHNICAL INFORMATION SERIAL NUMBER LOCATION ENGINE SERIAL NUMBER FRAME SERIAL NUMBER Record the engine and frame serial numbers and date purchased in the spaces below. You will need this serial number when ordering parts, and when making technical or warranty inquiries. Engine serial number: Frame serial number: Date purchased:... -
Page 95: Carburetor Modification For High Altitude Operation
High altitude performance can be improved by specific modifications to the carburetor. If you always operate your generator at altitudes above 2,000 feet (610 meters), have your authorized Honda servicing dealer perform this carburetor modification. This engine, when operated at high altitude with the carburetor modifications for high altitude use, will meet each emission standard throughout its useful life. -
Page 96: Emission Control System Information
Carbon monoxide does not react in the same way, but it is toxic. Honda utilizes appropriate air/fuel ratios and other emissions control systems to reduce the emissions of carbon monoxide, oxides of nitrogen, and hydrocarbons. - Page 97 Honda recommends that you retain all receipts covering maintenance on your power equipment engine, but Honda cannot deny warranty coverage solely for the lack of receipts or for your failure to ensure that all scheduled maintenance has been completed.
-
Page 98: Air Index
TECHNICAL INFORMATION AIR INDEX (Models sold in California) An Air Index Information label is applied to engines certified to an emission durability time period in accordance with the requirements of the California Air Resources Board. The bar graph is intended to provide you, our customer, the ability to compare the emissions performance of available engines. -
Page 99: Specifications
TECHNICAL INFORMATION SPECIFICATIONS Dimensions Model EB10000 Type AG type Description code EBVC Length 41.0 in (1,041 mm) [Handle in up position] [55.9 in (1,420 mm)] Width 27.7 in (703 mm) Height 35.1 in (891 mm) Dry mass [weight] 402.8 lbs (182.7 kg) - Page 100 TECHNICAL INFORMATION Tuneup Specifications ITEM SPECIFICATION MAINTENANCE Spark plug gap 0.028–0.031 in Refer to page: 72 (0.7–0.8 mm) Valve clearance (cold) IN: 0.08±0.02 mm See your authorized EX: 0.10±0.02 mm Honda dealer Other specifications No other adjustments needed.
-
Page 101: Wiring Diagram
TECHNICAL INFORMATION WIRING DIAGRAM... -
Page 102: Consumer Information
Parts Catalog This manual provides complete, illustrated parts lists for your generator. Visit peparts.honda.com for free online access to the parts catalog. It is also available for purchase in paper form through your Honda dealer. Accessories Catalog Your authorized Honda Power Equipment dealer offers a wide selection of accessories (optional equipment) to make your generator even more useful. -
Page 103: Customer Service Information
The Service Manager or General Manager can help. Almost all problems are solved in this way. If you are dissatisfied with the decision made by the dealership’s management, contact the Honda Power Equipment Customer Relations Office. You can write American Honda Motor Co., Inc. Power Equipment Division... -
Page 104: Distributor's Limited Warranty
To Qualify for this Warranty: The product must be purchased in the United States, Puerto Rico, or the U.S. Virgin Islands from American Honda or a dealer authorized by American Honda to sell those products. This warranty applies to the first retail purchaser and... - Page 105 CONSUMER INFORMATION What American Honda will Repair or Replace Under Warranty: American Honda will repair or replace, at its option, any part that is proven to be defective in material or workmanship under normal use during the applicable warranty time period. Warranty repairs and replacements will be made without charge for parts or labor.
- Page 106 Disclaimer of Consequential Damage and Limitation of Implied Warranties: American Honda disclaims any responsibility for loss of time or use of the product, transportation, commercial loss, or any other incidental or consequential damage.
- Page 107 1. The accessories, replacement parts, or apparel must be purchased from American Honda, or a dealer, distributor, or distributor’s dealer authorized by American Honda to sell those products in the United States, Puerto Rico, and the U.S. Virgin Islands. Parts and Accessories must be purchased for installation on original Honda equipment or engines to be eligible for warranty coverage.
- Page 108 You must, at your expense, take the Honda Power Equipment accessory, replacement part, apparel, or the Honda Power Equipment on which the accessory or replacement part is installed, and proof of purchase to any Honda Power Equipment dealer, distributor, or distributor’s dealer in the United States, Puerto Rico, or the U.S.
-
Page 109: Emission Control System Warranty
MANUFACTURER'S WARRANTY COVERAGE: The exhaust and evaporative emissions control system on your Honda power equipment engine is warranted for two years. If any emissions-related part on your Honda power equipment engine is defective, the part will be repaired or replaced by Honda. - Page 110 • As the power equipment engine owner, you should however be aware that Honda may deny you warranty coverage if your power equipment engine or a part has failed due to abuse, neglect, improper maintenance, or unapproved modifications.
- Page 111 (including durability) could result in denial of coverage. If such a non-Honda replacement part is used in the repair or maintenance of your engine, and an authorized Honda dealer determines it is defective or causes a failure of a warranted part, your claim for repair of your engine may be denied.
- Page 112 Honda Power Equipment dealer who is authorized by Honda to sell and service that Honda product during their normal business hours. Claims for repair or adjustment found to be caused solely by defects in material or workmanship will not be denied because the engine was not properly maintained and used.
- Page 113 DISCLAIMER OF CONSEQUENTIAL DAMAGE AND LIMITATION OF IMPLIED WARRANTIES: American Honda Motor Co., Inc. and Honda Canada Inc. disclaim any responsibility for incidental or consequential damages such as loss of time or the use of the power equipment, or any commercial loss due to the failure of the equipment;...
-
Page 114: Registration
Please Register Your Generator If your dealer did not collect registration information from you, please take a few minutes and register your purchase with Honda. This allows us to contact you with any important updates regarding your generator. Please note registration is not required to obtain warranty service. -
Page 115: Index
INDEX AC Appliance and Power Cord..................42 AC Applications ........................60 AC Circuit Breaker........................ 28 AC Circuit Protectors ......................27 AC OPERATION ........................59 AIR CLEANER SERVICE ......................68 AIR FILTER CHECK ........................ 44 AIR INDEX..........................96 ARE YOU READY TO GET STARTED? ................40 ASSEMBLY........................ - Page 116 INDEX Electric Shock Hazards ......................9 Emergency Procedures...................... 75 EMISSION CONTROL SYSTEM INFORMATION............94 Emission Control System Warranty ................107 ENGINE AUTOMATICALLY STOP AND THE CO ALARM INDICATOR FLASHING .......................... 91 ENGINE AUTOMATICALLY STOP AND THE FAULT/CO SENSOR LIFE INDICATOR FLASHING....................91 Engine Cylinder ........................
- Page 117 INDEX Handle Installation ......................14 Hanger Kit Installation ....................... 16 Honda PUBLICATIONS..................... 100 HOW TO RESTART WHEN STOPPED BY CO-MINDER (CO SHUT-OFF SYSTEM) ............................... 52 i-Monitor ..........................34 IMPORTANT SAFETY INFORMATION................7 INITIAL USE INSTRUCTIONS....................17 INTRODUCTION ........................1 IS YOUR GENERATOR READY TO GO?................40 Knowledge ..........................
- Page 118 INDEX SAFETY............................. 12 SEDIMENT CUP CLEANING ....................69 SERIAL NUMBER LOCATION ..................... 92 SERVICING YOUR GENERATOR..................64 SPARK ARRESTER SERVICE ....................73 SPARK PLUG SERVICE ......................71 Special Requirements......................63 SPECIFICATIONS ........................97 STANDBY POWER......................... 62 STARTING THE ENGINE ...................... 47 STOPPING THE ENGINE ......................
-
Page 119: Quick Reference Information
QUICK REFERENCE INFORMATION Fuel Type Regular unleaded gasoline with an ethanol content of no more than 10% and a pump octane rating of 86 or higher (see page 21) Engine Oil Type SAE 10W-30, API SJ or later (or equivalent), for general use (see page 18) Maximum oil capacity: Without oil filter replacement:... - Page 120 31Z26620 英 00X31-Z26-6200 Printed in China...
Need help?
Do you have a question about the EB10000 and is the answer not in the manual?
Questions and answers