Advertisement
Advertisement

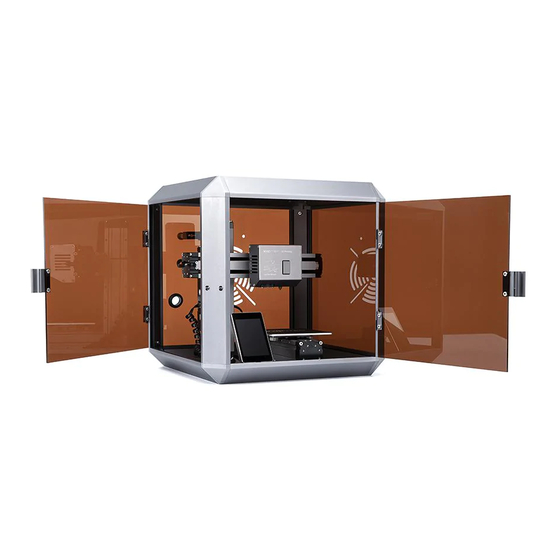
Related Manuals for Snapmaker Enclosure


Summary of Contents for Snapmaker Enclosure
- Page 1 | Enclosure Installation Guide...
-
Page 2: Table Of Contents
Content Parts List Before You Start Assemble the Enclosure Put the 3D Printer into the Enclosure Before You Start Get Started Support... -
Page 3: Parts List
Parts List Corner Bracket Door Handle Hinge A Hinge B Frame Piece with Bulges Frame Piece with Magnets Frame Piece Front Back Left Right Base Left Side Plate Top Plate Right Side Plate Front Plate Base Plate Back Plate M4 Locknut 2.5mm Hex Key Wrench for M4 Screws M3 x 6 Screw... -
Page 4: Before You Start
Guide for Enclosure Before You Start Get the Tools Ready Useful tips for assembling You don’t need to tighten all the screws until the last step, so that you can adjust every interface to be perfectly matched. 2.5mm Hex Key Wrench... - Page 5 Guide for Enclosure Assemble the Enclosure Get the front plate and the left side plate ready M3 x 6 Screw x 12 Hinge A Hinge B Door Handle Left Left Side Plate Front Front Plate...
- Page 6 Guide for Enclosure Assemble the Enclosure Assemble the Bottom M4 x 4 Screw Corner Bracket Build three sides of the bottom with three frame pieces and two corner brackets Slide the Base Plate into the U shape framework Frame Piece...
- Page 7 Guide for Enclosure Assemble the Enclosure Assemble the Bottom Attach two corner brackets to a frame M4 x 4 Screw piece to build the fourth side of the bottom Corner Bracket Frame Piece Attach the fourth side to the part set up in step B...
- Page 8 Guide for Enclosure Assemble the Enclosure Assemble the Top M4 x 4 Screw Corner Bracket Build three sides of the top with three frame pieces and two corner brackets Slide the Top Plate into the U shape framework Frame Piece...
- Page 9 Guide for Enclosure Assemble the Enclosure Assemble the Top Attach two corner brackets to a frame M4 x 4 Screw piece to build the fourth side of the top Corner Bracket Frame Piece Attach the fourth side to the part set up in step B...
- Page 10 Guide for Enclosure Connect the four frame pieces to the corner Assemble the Enclosure brackets of the bottom as illustrated M4 x 4 Screw Notice Take 2 frame pieces with bulges and attach them to corners 1 and 3. Attach the frame piece with magnets to corner 4 and the last piece to corner 2.
- Page 11 Guide for Enclosure Attach the filament holder and the protective ring Assemble the Enclosure to the Back Plate as illustrated. Tips M4 x 32 Screw M4x15x1 Nylon Spacer M4 Locknut You need to detach the filament holder from the Z Axis of your 3D printer Protective Ring before this step.
- Page 12 Guide for Enclosure Slide the Back Plate and Right Side Plate into Assemble the Enclosure slots of the frame as illustrated. Notice Right Back Right Side Plate Right Make sure the plates are slid into the correct position.
- Page 13 Guide for Enclosure Assemble the Enclosure Install the Top to the framework M4 x 4 Screw Please mind the direction.
- Page 14 Guide for Enclosure Assemble the Enclosure Install the front door and left side door. Tips M3 x 20 Screw You can position the enclosure on its side to tighten the screws more easily.
- Page 15 Guide for Enclosure Tighten all screws. Make sure they are all good Assemble the Enclosure and tight.
-
Page 16: Put The 3D Printer Into The Enclosure
Guide for Enclosure Put the 3D Printer into the Enclosure... -
Page 17: Before You Start
Guide for Enclosure If you used the 3D printer before, pull out the filament according to the User Manual Before You Start manual.snapmaker.com/3d_printing/change_filament.html. - Page 18 Guide for Enclosure Before You Start Power off the Machine and Unplug the Power Adapter. Caution Notice CAUTION High Temperature DO NOT TOUCH If you just finished heating, wait about 5 minutes for the 3D Printing Module and Heated Bed to cool off after the...
- Page 19 Guide for Enclosure Get Started Keep two doors opened. Put the 3D printer into the Enclosure with a slight tilt.
-
Page 20: Get Started
Guide for Enclosure Insert the power cable into the enclosure through the hole. Connect Get Started the power adapter to the controller and power on the machine. - Page 21 Guide for Enclosure Hang the filament over the Filament Holder. Insert the filament into the Get Started Teflon Tube.
- Page 22 Guide for Enclosure Insert the filament with the Teflon Tube into the hole next to the filament Get Started holder and load filament as illustrated in the Quick Start Guide.
-
Page 23: Support
Find the answers in our FAQ page if you run into any problem during assembly: faq.snapmaker.com Share anything you want with other Snapmaker users at our forum: forum.snapmaker.com Any news from you is good news for us. If you have any questions, don’t hesitate to contact us. We are here for you whenever you need general information, technical support or have any sales inquiries. - Page 24 The people who are crazy enough to think they can change the world are the ones who do. --- Steve Jobs Part No.: FA010 V1.0.0...
Need help?
Do you have a question about the Enclosure and is the answer not in the manual?
Questions and answers