Table of Contents
Advertisement
Advertisement
Table of Contents

Subscribe to Our Youtube Channel
Related Manuals for Snapmaker 3-in-1 3D Printer


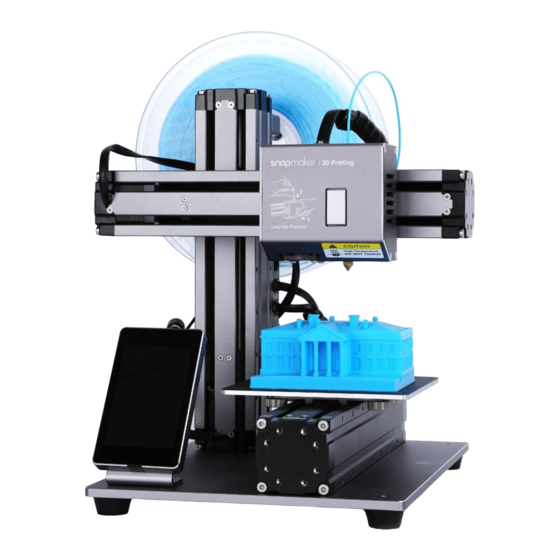
Summary of Contents for Snapmaker 3-in-1 3D Printer
- Page 1 | Quick Start Guide...
- Page 2 3-in-1 3D Printer Quick Start Guide Content Before You Start Assemble the 3D Printer Use the 3D Printer Load Filament Level the Heated Bed Start Printing Support Page 3...
- Page 3 3-in-1 3D Printer Quick Start Guide Before You Start Get the Screwdriver Ready The screwdriver is dual-purpose. Change the blade as you need. Used Symbols Caution Notice Tips Ignoring this type of message might Details you should be aware of through-...
- Page 4 3-in-1 3D Printer Quick Start Guide Attach the Feet to the Base Plate Assemble the 3D Printer Place the Base Plate so that you can read M4 x 8 Screw the sentence on the label. Foot Base Plate Page 5...
- Page 5 3-in-1 3D Printer Quick Start Guide Attach the Heated Bed to One of the Linear Assemble the 3D Printer Modules (Y Axis) Notice Screw for Platform Heated Bed Don’t screw too tight; otherwise, the leveling will be influenced. Linear Module The screws’...
- Page 6 3-in-1 3D Printer Quick Start Guide Assemble the 3D Printer Attach the Y Axis to the Base Plate M4 x 8 Screw Page 7...
- Page 7 3-in-1 3D Printer Quick Start Guide Assemble the 3D Printer Attach the Z Axis to the Base Plate M4 x 8 Screw Please place the Linear Module as illustrated. Linear Module Page 8...
- Page 8 3-in-1 3D Printer Quick Start Guide Assemble the 3D Printer Attach the X Axis to the Base Plate M4 x 8 Screw Linear Module Notice The screws’ installing position must be the same as illustrated. Page 9...
- Page 9 3-in-1 3D Printer Quick Start Guide Assemble the 3D Printer Use the Bubble Level Vials to Level Bubble Level Vial Put one of the vials (A) to the top of the Z axis and the other (B) to the X axis.
- Page 10 3-in-1 3D Printer Quick Start Guide Assemble the 3D Printer Attach the 3D Printing Module to the X Axis M4 x 8 Screw 3D Printing Module Notice The screws’ installing position must be the same as illustrated. Page 11...
- Page 11 3-in-1 3D Printer Quick Start Guide Assemble the Screen Holder and then Assemble the 3D Printer Slide the Touch Screen into the Screen Holder M4 x 8 Screw Screen Holder Touch Screen Page 12...
- Page 12 3-in-1 3D Printer Quick Start Guide Assemble the 3D Printer Attach the Controller to the Z Axis Caution M4 x 28 Screw Make sure the On/Off button is switched to Off (away from the Power Jack). Controller Page 13...
- Page 13 3-in-1 3D Printer Quick Start Guide Assemble the 3D Printer Attach Filament Holder to the Z Axis M4 x 28 Screw Filament Holder Page 14...
- Page 14 3-in-1 3D Printer Quick Start Guide Assemble the 3D Printer Connect the Modules to the Controller and Power On RJ45 Cable 1(RJ 45) RJ25 Cable Power Caution Make sure all the cables are Power Adapter correctly and properly connected before you power on the machine.
- Page 15 3-in-1 3D Printer Quick Start Guide Use the 3D Printer Level the Heated Bed Start Printing >> Load Filament >> Page 16...
- Page 16 3-in-1 3D Printer Quick Start Guide Level the Heated Bed Go Through this Section Every 10 to 20 Prints To ensure the best quality of your print, it’s recommended to go through this section every 10 to 20 prints. Page 17...
- Page 17 3-in-1 3D Printer Quick Start Guide Level the Heated Bed Level the Four Corners in Order Notice The sequence must be strictly followed, or the leveling will fail. If there is maloperation during this process, please level the heated bed again starting from the first corner.
- Page 18 3-in-1 3D Printer Quick Start Guide Level the Heated Bed Level the First Corner On the Touch Screen, go to Settings > Z Offset. It may take a few seconds after you tap Offset. and the 3D Printing Module will move to the first corner.
- Page 19 3-in-1 3D Printer Quick Start Guide Level the Heated Bed Get an A4 Paper Put one half of an A4 paper between the Heated Bed and the nozzle. Page 20...
- Page 20 3-in-1 3D Printer Quick Start Guide Adjust the Distance Between the Heated Bed Level the Heated Bed and the Nozzle 0.1mm Adjust the distance between the Heated Bed and the nozzle using the Down button. Keep adjusting until there is slight resistance on the paper from the nozzle.
- Page 21 3-in-1 3D Printer Quick Start Guide Level the Heated Bed Use the Paper to Adjust the Distance Pull the paper and feel the resistance while you adjust the distance. Page 22...
- Page 22 3-in-1 3D Printer Quick Start Guide Level the Heated Bed Level the Second to Fourth Corner and follow Step 5-7 to level the second corner. Use the same method to level the third and fourth corners. Page 23...
- Page 23 3-in-1 3D Printer Quick Start Guide Level the Heated Bed Done Tips If you have any question, find your answers at www.snapmaker.com/support When all the corners are leveled, tap Save. Remember to pull out the paper when you finish leveling.
- Page 24 3-in-1 3D Printer Quick Start Guide Load Filament Get the Heated Bed Ready On the Touch Screen, go to Controls > Change Filament > Confirm. Page 25...
- Page 25 3-in-1 3D Printer Quick Start Guide Load Filament Hang the Filament Next is not clickable Hang the filament over the Filament Holder. Wait until the nozzle is heated before the nozzle is For smoother printing, the end of the to 200°C and tap Next.
- Page 26 3-in-1 3D Printer Quick Start Guide Load Filament Insert the Filament Tips Use a pair of scissors or diagonal cutter to cut the end of the filament at a 45° angle. Try to straighten the filament as much as you can.
- Page 27 3-in-1 3D Printer Quick Start Guide Load Filament Keep Inserting the Filament Keep inserting the filament until you see some filament coming out of the nozzle. Page 28...
- Page 28 3-in-1 3D Printer Quick Start Guide Load Filament Filament Loaded When you finish loading the filament, tap Loaded/Unloaded on the Touch Screen. Page 29...
- Page 29 3-in-1 3D Printer Quick Start Guide Load Filament Clean the Filament Use the provided Tweezer to clean the filament on the nozzle. Page 30...
- Page 30 3-in-1 3D Printer Quick Start Guide Start Printing Download the Software Download Snapmaker3D from our official website: snapmaker.com/download Page 31...
- Page 31 3-in-1 3D Printer Quick Start Guide Start Printing Generate G-code Tips Other compatible software includes: Cura, Simplify 3D, Slic3r. Tips For the detailed instructions, please see the software guides or tutorials on our official website: snapmaker.com/support Generate the G-code of the file you want to print using the software.
- Page 32 3-in-1 3D Printer Quick Start Guide Start Printing Choose a Way to Print Option 1 Option 2 Using the Computer Using the microSD Card (The computer must be connected to the (No need to connect your computer to machine throughout the process.) the machine.)
- Page 33 3-in-1 3D Printer Quick Start Guide Start Printing Using the Computer Connect the computer to the machine using the provided USB Cable. Page 34...
- Page 34 3-in-1 3D Printer Quick Start Guide Start Printing Using the Computer After the settings are configured on the software, click Connect > Preview > Print. The printer will finish the printing automatically. Tips If you cannot find any port to connect to, please download and install the driver at snapmaker.com/download...
- Page 35 3-in-1 3D Printer Quick Start Guide Start Printing Using the microSD Card Tips On Snapmaker3D, click Preview > Export to save the G-code file. For the detailed instructions, please see the software guides or tutorials on our official website: snapmaker.com/support...
- Page 36 3-in-1 3D Printer Quick Start Guide Start Printing Using the microSD Card On the Touch Screen, go to Files, find and select the G-code file. Then tap Start to start printing. Page 37...
- Page 37 3-in-1 3D Printer Quick Start Guide If the print cannot stick to the heated bed or there is warping at the bottom of the print, level the heated bed again or select Brim Raft the Adhesion type in the software.
- Page 38 Find the answers in our FAQ page if you run into any problem during assembly: faq.snapmaker.com Share anything you want with other Snapmaker users at our forum: forum.snapmaker.com Any news from you is good news for us. If you have any question, don’t hesitate to contact us. We are here for you whenever you need general information, technical support or sales inquiries.
- Page 39 Thomas Edison once said, “A minor invention every ten days, and a big one every six months or so.” What is your first invention with the Snapmaker? To use the laser engraver and CNC carver, please read the corresponding guide.
Need help?
Do you have a question about the 3-in-1 3D Printer and is the answer not in the manual?
Questions and answers