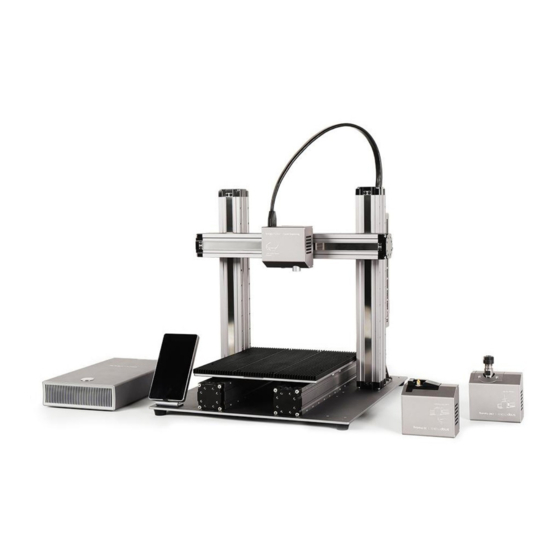

Related Manuals for Snapmaker 2.0


Summary of Contents for Snapmaker 2.0
- Page 1 DISTRIBUTOR TECHNICAL SUPPORT V2.0 Troubleshooting Guide for Snapmaker 2.0 3-in-1 3D Printers...
-
Page 2: Table Of Contents
CONTENTS 01 Hardware 02 Touchscreen 02 Touchscreen Shows "not responding" 03 Touchscreen Shows "Fabscreen has stopped" 03 Touchscreen Flashes 03 Touchscreen Is Black 04 Linear Module 04 Clunk Sound While the Y-axis Linear Modules are Moving 06 Linear Module Won’t Move Anymore 06 Linear Module Only Moves in One Direction 09 The Slider of Linear Module Comes Loose 12 Stainless Steel Strip of Linear Module Comes Loose 13 3D Printing... - Page 3 35 Laser Module Doesn't Emit Laser 38 Camera Sign Is Yellow on Touchscreen 40 Laser Won't Turn off 41 Rotary Module 41 Working with Cuboid Materials 41 Built-in Sample Models 42 Compatibility with Third-party Chucks 42 Using A350 Rotary Module on A250 43 Enclosure 43 Enclosure Isn't Detected or Recognized 45 Others 45 Power Module Doesn't Work 45 G-code File Wi-Fi Transfer Is Unsuccessful...
- Page 4 Please contact support@snapmaker.com with a detailed description of the problem and a video of your troubleshooting process, and send a carbon copy (cc.) to your sales representative ( @snapmaker. com) at Snapmaker. To ensure all the glossaries are consistent with each other, a parts list is included in Appendix.
-
Page 5: Hardware
Hardware This chapter covers problems with the modules and addons of the Snapmaker 2.0, which include the Enclosure, the Touchscreen, the 3D Printing Module, the Laser Module, the Rotary Module, and the Controller. For problems regarding the Snapmaker Luban, go to the next... -
Page 6: Touchscreen
3. If it breathes as expected, launch Snapmaker Luban and connect your computer with the machine using the USB cable. If Luban has no problem connecting with and controlling the machine, then the Controller is fine. -
Page 7: Touchscreen Shows "Fabscreen Has Stopped
Possible Causes • The firmware is outdated. • The G-code file is too large. This usually happens when you transfer the file from Snapmaker Luban to the machine via Wi-Fi. • The G-code file can't be parsed by the Touchscreen. This may happen if the G-code file is generated by third-party software that Snapmaker isn't compatible with. -
Page 8: Linear Module
Hardware Linear Module Clunk Sound While the Y-axis Linear Modules are Moving The Y-axis Linear Modules make a clunk sound when moving back and forth. Possible Cause • The travel distances of the two Y-axis Linear Modules are not matched. Actions You can follow the steps below or refer to this... - Page 9 8. Swap one of the Y-axis Linear Modules with the X-axis one. Then run the same test. 9. Choose those two that have the closest travel distance as the Y-axis Linear Modules. If the problem persists, please contact us at support@snapmaker.com for further assistance.
-
Page 10: Linear Module Won't Move Anymore
• The end-stop switch is stuck or broken. Actions 1. Connect the machine to your computer with a USB cable. 2. Launch the Snapmaker Luban. Go to Workspace, input M119 in the Console panel, and then check the status of the end-stop switch. - Page 11 - If X_min or X_max is displayed as “TRIGGERED” (as opposed to “open”), then the end-stop switch of the X-axis Linear Module might be stuck. - Similarly, if Y_min, Y_max, Z_min, or Z_max is displayed as “TRIGGERED” (as opposed to “open”), then the end-stop switch of the Y-axis or Z-axis Linear Modules might be stuck.
- Page 12 3.3 Press the metal piece circled in the picture below with your hand, see if the end-stop switch can make a click sound. 3.4 Assemble the Linear Module. 4. Check if the Linear Module works. If not, replacing the Linear Module might solve the problem. If the problem persists, please contact us at support@snapmaker.com for further assistance.
-
Page 13: The Slider Of Linear Module Comes Loose
The slider of Linear Module Comes Loose The slider of the Linear Module comes loose. Actions 1. Take the cover (the one without cable) off from the Linear Module. You will need the H2.5 & H2.0 screwdriver. √ × 2. Pull out the stainless steel strip from the Linear Module. Pull out the stainless steel strip... - Page 14 Hardware 3. Slide the slider off from the Linear Module. One side of the bearings is adjustable.
- Page 15 4. Loosen the fastening screw circled in the picture below. 5. Twist the bearing screw with an H3 hex screwdriver to adjust the distance between the bearings of the two sides to 34.29 mm. 34.29 mm 6. Tighten the fastening screw first and then tighten the bearing screw. 7.
-
Page 16: Stainless Steel Strip Of Linear Module Comes Loose
Hardware Stainless Steel Strip of Linear Module Comes Loose When the stainless steel strip of the Linear Module breaks or bends, it needs to be replaced and reinstalled. Action Please refer to this video to install the stainless steel strip of the Linear Module. -
Page 17: 3D Printing
3D Printing 3D Printing Module Pushes into Print Sheet The 3D Printing Module clashes against the Print Sheet during calibration or printing. Possible Causes • The firmware is outdated. • The Y-axis Linear Modules are assembled inappropriately. • The cables of the Y-axis and the Z-axis Linear Modules are plugged into the wrong port on the Controller. •... - Page 18 Hardware 4. Check the cable connection of the Y- and the Z-axis Linear Modules, make sure they are plugged into the right port of the Controller as illustrated.
- Page 19 See if the LED is on when the toolhead approaches the palette knife or the Print Sheet. - If not, then the probe sensor itself is malfunctioning. Please contact us at support@snapmaker.com replacement. - If yes, go to step 6.
- Page 20 6.5 Make sure the probe sensor touches the credit card so that the nozzle is about 1 mm lower than the sensor. 6.6 Tighten the screw of the probe sensor. 6.7 Redo calibration and see if the problem is solved. If the problem persists, please contact us at support@snapmaker.com for further assistance.
-
Page 21: 3D Printing Module Isn't Detected
3D Printing Module Isn't Detected The machine can not detect the 3D Printing Module and the Touchscreen displays as shown in the picture below. Possible Causes • The Toolhead Cable is broken. • The port of the Controller is broken. •... - Page 22 - If not, turn off the machine and plug in another toolhead. Repeat step 3 till you have tested all of the toolheads. - If yes, the problem might be with the Linear Modules. Please contact us at support@snapmaker.com with your test results for further troubleshooting.
-
Page 23: First Layer Doesn't Stick To Print Sheet
Tap Up or Down to adjust the nozzle height. 3. Lower the printing speed. In Snapmaker Luban, go to Printing Settings > Speed to set the Initial Layer Print Speed to under 20 mm/s. Regenerate the G-code and try again. - Page 24 Hardware 4. Try another filament. If the problem persists, please contact us at support@snapmaker.com for further assistance.
-
Page 25: Touchscreen Keeps Showing Filament Runout
Adjust the filament switch. If the problem persists, please contact us at support@snapmaker.com for further assistance. If you want to start a print directly, follow the steps below to turn off filament runout detection. 1. Connect your machine to your computer via the USB cable. -
Page 26: Filament Won't Load
Hardware Filament Won't Load When printing, the filament does not come out of the nozzle. Possible Causes • The nozzle is jammed. • The filament is not inserted properly. • The 3D Printing Module is malfunctioning. • The port of the Controller is broken. •... - Page 27 - If not, please refer to this article to test other toolheads and contact us at support@snapmaker.com with your test results. We will help you with further troubleshooting. - If yes, then the 3D Printing Module, the Controller, and the Toolhead Cable are intact. Make sure the filament is inserted properly and then close the latch.
- Page 28 4. Heat the nozzle up to 200℃ and use a metal stick to clean the filament inside the module by pushing them out. 5. Refer to this video to replace the nozzle. If the problem persists, please contact us at support@snapmaker.com for further assistance.
-
Page 29: Blobs Of Filament On Nozzle
For replacement of the parts needed, please contact us at support@snapmaker.com 2. Try the following methods to prevent this from happening again. - Lower the printing speed in Snapmaker Luban. - Recalibrate. For detailed instruction on calibration, refer to the Quick Start Guide. -
Page 30: Touchscreen Shows A -30 ℃ Or Abnormally High Nozzle Temp
2. While replacing the hot end, check the quick-release cable (the one that is connected to the hot end) to see if all the pins are intact in the meantime. If the pins of the quick-release cable are not intact or the problem persists after replacing the hot end, please contact us at support@snapmaker.com for further assistance. -
Page 31: Heated Bed Won't Heat Up
- The resistance between Pin 4 and Pin 1 should be around 2.5Ω. - The resistance between Pin 3 and Pin 2 should be around 110KΩ. After that, please contact us at support@snapmaker.com with your test results. We will help you with further troubleshooting... -
Page 32: Laser
2. If some of the lines engraved during the Auto Focus are discontinuous as shown in the picture below, please contact us at support@snapmaker.com for further assistance. If not, go to step 3. × √... - Page 33 3. Redo Auto Focus manually. 3.1 Tap Failed on the Touchscreen. 3.2 Swipe the scale to your right and select the -5.0 mm line, and tap Save. The screen is expected to go back to the APP List Screen. 3.3 Tap Calibration to redo Auto Focus. If the problem persists, repeat the steps until Auto Focus succeeds. 4.
- Page 34 4.3 Go back to the APP List Screen, tap Calibration to redo Auto Focus. If the Touchscreen keeps showing Failed, and several lines fail to be burnt out, lower the laser height (to 19 mm, for example), and try again. If the problem persists, please contact us at support@snapmaker.com for further assistance.
-
Page 35: Laser Module Emits Weak Laser
• The Laser Module is malfunctioning. Actions 1. If some of the lines that are engraved during Auto Focus are discontinuous as shown in the picture below, please contact us at support@snapmaker.com for further assistance. If not, go to step 2. × √... - Page 36 3.1 On the Touchscreen, go to Settings > Laser > Adjust Laser Height. Set the Laser Height to 21.0mm and tap Save. 3.3 Go back to the APP List Screen, tap Calibration to redo Auto Focus. If the problem persists, please contact us at support@snapmaker.com for further assistance.
-
Page 37: Stuck In "Processing" During Auto Focus
Stuck in “Processing” during Auto Focus During Auto Focus, the machine is stuck in the Processing screen as shown below. Possible Cause • The connection between the Touchscreen and the Laser Module is unstable. Action Please contact us at support@snapmaker.com for further assistance. -
Page 38: Camera Capture Doesn't Work
If the image isn't fully processed, it indicates that camera capture isn't working properly. Possible Causes • You’re running an old version of Snapmaker Luban. • Camera calibration hasn’t been implemented properly. • There’s something wrong with the camera of the Laser Module. -
Page 39: Laser Module Doesn't Emit Laser
Laser Module Doesn't Emit Laser The Laser Module does not emit blue laser. Possible Causes • The Laser Module is malfunctioning. • The toolhead cable is broken. • The Controller is malfunctioning. Actions 1. On the Touchscreen, go to Control > Laser Power. Toggle on Laser Status to see if the blue laser light comes out. - Page 40 Hardware 3. Follow the steps below to check the Laser Module. 3.1 Turn off the machine. Disassemble the Laser Module and assemble the 3D Printing Module. 3.2 Turn on the machine and open the latch of the 3D Printing Module. 3.3 On the Touchscreen, go to Control >...
- Page 41 3.5 In the meantime, check if the gear inside the 3D Printing Module rotates. - If it does, then the Laser Module is malfunctioning. - If it doesn't, then the Controller is malfunctioning. In either case, please contact us at support@snapmaker.com for replacement.
-
Page 42: Camera Sign Is Yellow On Touchscreen
Hardware Camera Sign Is Yellow on Touchscreen When the camera sign on the Touchscreen is yellow, it means that the camera is disconnected. Possible Causes • The camera of the Laser Module is malfunctioning. • There’s something wrong with the Bluetooth of the Touchscreen. •... - Page 43 1.3 Under Developer Mode, tap Experiment > Preference > Reset All. See if this solves the problem. If not, go to step 2. 2. Replace the current Toolhead Cable with one of the interchangeable cables (see picture below) Toolhead Cable Y-axis Conversion Cable Z-axis Conversion Cable If the problem persists, please contact us at support@snapmaker.com for further assistance.
-
Page 44: Laser Won't Turn Off
• The port of the Controller is broken. Actions Replace the current Toolhead Cable with one of the interchangeable cables (see picture below). See if this solves the problem. Toolhead Cable Y-axis Conversion Cable Z-axis Conversion Cable If not, please contact us at support@snapmaker.com for further assistance. -
Page 45: Rotary Module
The Rotary Module can work with both cylinder and cuboid materials. By default, Snapmaker Luban processes the material being used as a cylinder and generates the G-code file accordingly. Therefore, you need to pay attention to the following aspects when carving cuboid materials with the Rotary Module: 1. -
Page 46: Compatibility With Third-Party Chucks
Here is a compatible 4-jaw chuck. Snapmaker’s limited warranty does not apply to and therefore does not cover any defect or damage caused by the use of third-party materials, accessories or software, etc. For more details, you can refer to the warranty policy. -
Page 47: Enclosure
Enclosure Enclosure Isn't Detected or Recognized There is no Enclosure icon on the Touchscreen when the Enclosure is plugged in. Possible Causes • The Toolhead Cable is broken. • The Laser Module is malfunctioning. • The port of the Controller is broken. Actions 1. - Page 48 Pay attention to avoid connecting Pin 4 and Pin 2 (or Pin 3). Otherwise, the Controller will be damaged due to short-circuit. After that, please contact us at support@snapmaker.com with your test results. We will help you with further troubleshooting.
-
Page 49: Others
G-code File Wi-Fi Transfer Is Unsuccessful The G-code file cannot be transferred to the machine from Snapmaker Luban via Wi-Fi. Possible Causes • The communication between the machine and Snapmaker Luban is interrupted. • The Wi-Fi signal is unstable. -
Page 50: Machine Can't Read The File Of Usb Flash Drive
Hardware Machine Can't Read the File of USB Flash Drive The Touchscreen shows that the file is empty when selecting the file from the USB flash drive. Possible Causes • There’s something wrong with the USB flash drive. • The file system of the USB flash drive is not FAT32. Actions 1. - Page 51 c. On the Windows PowerShell panel, type in the command below and then hit the Enter key. Replace the 'X' at the end of the command with the drive letter of your USB flash drive. For a USB flash drive with a capacity bigger than 32GB: a.
- Page 52 Enter key. Note that this step requires your computer password. sudo diskutil eraseDisk FAT32 USB MBRFormat /dev/diskX Replace the 'X' at the end of the command with the number of your USB flash drive. If the problem persists, please contact us at support@snapmaker.com for further assistance.
-
Page 53: None Of The Toolheads Can Be Detected
If the machine still cannot detect any of the toolheads, then the Controller is out of action and needs to be replaced. - If yes, then the problem might be with the Linear Modules. In either case, please contact us at support@snapmaker.com with your test results for further assistance. -
Page 54: Software
Software Software The Snapmaker Luban is still a young software, compared with many of its counterparts. And as with every software, Snapmaker Luban isn't perfect. The troubleshooting in this chapter helps solve preliminary issues, and you should follow them first. If the problem persists, please contact us at support@snapmaker.com. -
Page 55: Luban Shows "The Machine Is Not Ready
Luban Shows "The machine is not ready" When trying to connect the machine to the Snapmaker Luban, it shows “The machine is not ready” or “Cannot open this port”. Possible Causes • You haven't installed the CH340 driver. • You have selected the wrong COM port. -
Page 56: No Camera Capture Button In Luban
No Camera Capture Button in Luban Possible Cause • You are using the USB cable to connect the machine to Snapmaker Luban (Camera Capture can only be accessed via Wi-Fi connection). Action Connect the machine with Luban via Wi-Fi instead, and you will be able to use Camera Capture. -
Page 57: Luban Is Blank Upon Launching
Luban Is Blank upon Launching The Snapmaker Luban only shows a blank panel after you open it. Possible Causes • Snapmaker Luban failed to load the necessary sources. • The configuration files are damaged. Actions 1. On the menu bar, click Window > Force Reload. Or, press Ctrl + Shift + R keys at the same time. - Page 58 Software macOS: - Uninstall Snapmaker Luban. - Open the Terminal. - Input the commands below to delete the configuration files. cd ~/Library/Application\ Support/snapmaker-luban rm -rf Config/ - Reinstall Snapmaker Luban. If the problem persists, please contact us at support@snapmaker.com for further assistance.
-
Page 59: Appendix
Appendix... -
Page 60: Parts List
Appendix Parts List 3D Printing Module Laser Module CNC Module Touchscreen Heated Bed Controller Linear Module Print Sheet | A350 QUICK START GUIDE MAKE SOMETHING WONDERFUL Power Module Quick Start Guide Filament Material Bag CNC Carving Platform Fixture Accessory Touchscreen Holder Converter Z-Axis Holder Laser Engraving/Cutting... - Page 61 Tool Box M4 x 30 Screw M4 x 10 Hex Socket M4 x 8 Screw M4 x 10 Hex Flat Head Screw Head Screw M4 x 70 Screw Wing Nut ER11 Collet (Only for 3.175 mm Foot + M4 x 10 Hex Socket CNC Bits) + ER11 Nut Head Screw Divider...
-
Page 62: Specs Sheet
Appendix Specs Sheet Snapmaker 2.0 General When the support platform is moved to the maximum length, the length of the A150 is 360mm. When the support platform is moved to the maximum length, the length of the A250 is 580mm. - Page 63 Aluminum Alloys Connectivity Wi-Fi, USB Cable, USB Flash Drive Touchscreen 5”, Android OS, Quad Core A7 CPU @ 1.1GHz Software Snapmaker Luban. You can also use 3rd party software to generate G-code files. Supported OS macOS, Windows, Linux Rated Power 320W...
- Page 64 Appendix Laser A150 A250 A350 Camera Built-in Camera Laser Power 1600mW 450nm Laser Diode Wavelength 450nm Safety Class Class 4 Supported Materials Wood, leather, plastic, fabric, paper, non-transparent acrylic, more being tested Design File Formats SVG, JPEG, PNG, JPG, BMP, DXF, SNAPLZR Processable Format...
- Page 65 A150 A250 A350 Shank Diameter 0.5mm - 6.35mm (0.02 - 0.25 inches) Spindle Speed 6,000 - 12,000 RPM Supported Materials Wood, acrylic, PCB, carbon fiber sheet, jade, more being tested Design File Formats SVG, JPEG, PNG, JPG, BMP, DXF, SNAPCNC Processable Format Notice: The specifications listed might be slightly changed in any meaningful way when we refine these products.
- Page 66 Appendix Snapmaker 2.0 Enclosure General A150 Net Weight 9.6 kg Package Dimensions (W × D × H) 600 × 510 × 260 mm Package Weight 11 kg Frame Material Aluminum alloy Panel Material Acrylic Functional Units LED strips, Exhaust Fan, Hose...
- Page 67 A350 Net Weight 19.3 kg Package Dimensions (W × D × H) 900 × 690 × 180 mm Package Weight 22.8 kg Frame Material Aluminum alloy Panel Material Acrylic Functional Units LED strips, Exhaust Fan, Hose...
- Page 68 Range Outward-clamping 10 - 50 radius (mm) Range Supported Softward Snapmaker Luban, Autodesk Fusion 360, Vectric Aspire Supported Materials Wood, tooling and modeling board, plastic, bamboo, wax, more being tested for CNC Supported Materials Wood, leather, plastic, fabric, paper, non-transparent acrylic...
- Page 69 Publication Date: December, 2021...
Need help?
Do you have a question about the 2.0 and is the answer not in the manual?
Questions and answers
i have a propel snap 2.0 has new batteries in controller and a charged drone battery drone red light does not flash and propellers will not respond ive started over several times and still nothing