Advertisement
Quick Links
screen
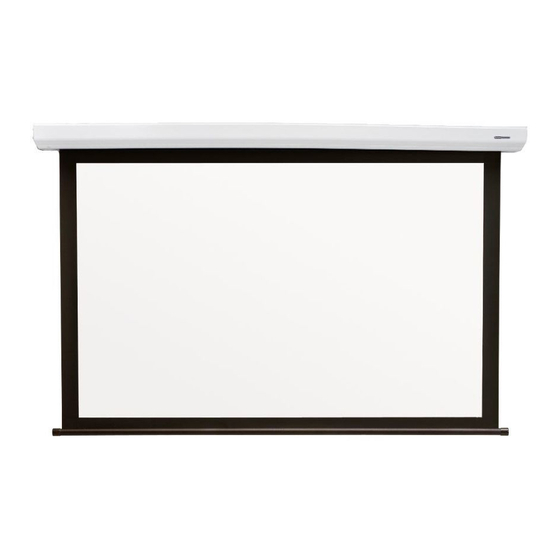
NEMAPRO Hanging Type Projection Screen
INSTRUCTIONS - ELECTRICINEMA
you for purchasing a Screen Technics Projection Screen, please ensure that you read the following
tions fully before attempting to install this product.
NEMAPRO Hanging Type Projection Screen
Thank you for purchasing a Screen Technics Projection Screen, please
ensure that you read the following instructions fully before attempting to
you for purchasing a Screen Technics Projection Screen, please ensure that you read the following
install this product.
tions fully before attempting to install this product.
l.
Measure the wall where the screen is to be installed and mark with a pencil the desired height to
top of screen case and also the centre of the screen.
WALL MOUNTING INSTRUCTIONS
l.
Measure the wall where the screen is to be installed and mark with a pencil the desired height to
STEP 1.
Measure the wall where the screen is to be installed and mark with a pencil the desired
top of screen case and also the centre of the screen.
height to top of screen case and also the centre of the screen.
2.
Measure the length of screen canister along the top surface and mark the centre of the canister
with a pencil, to assist in lining up the screen when mounting.
STEP 2.
Measure the length of screen canister along the top surface and mark the centre of the
2.
Measure the length of screen canister along the top surface and mark the centre of the canister
canister with a pencil, to assist in lining up the screen when mounting.
with a pencil, to assist in lining up the screen when mounting.
3.
Determine the best positions for the wall brackets, allowing that in Gyprock or in low strength walls
the brackets will be screwed into a timber stud. In more solid walls, such as masonry, position the
brackets approx 150mm in from the canister end. The brackets should be no more than 450mm in
..
,.
-
�
Type A, B & C. Connect IP Projection Screen including IP Protocol
Wall Mounting Instructions
Wall Mounting Instructions
AUSTRALIA
22-24 Suttor Road, Moss Vale NSW 2577
+61 2 4869 2100
TECHnlCS
STEP 3.
Determine the best positions for the wall brackets, allowing that in Gyprock or in low
strength walls the brackets will be screwed into a timber stud. In more solid walls, such as
masonry, position the brackets approx 150mm in from the canister end. The brackets should
be no more than 450mm in from each end. You must use a minimum of 3 off wood screws per
bracket or 2 off Dyna-bolts, for masonry walls and you must be satisfied that the attachment is
strong enough for the a safe installation.
Brackets supplied as follows, all brackets must be used in installation:
Up to and including 100" = 2 brackets
Over 100" and up to 150" = 3 brackets
150" and up to 200" = 4 brackets
200" = 5 brackets
NB: Top of bracket equals top of screen canister.
STEP 4.
You may need to remove the bottom clip in order to screw brackets to wall, please
ensure to replace them afterwards.
NEW ZEALAND
44 Mahana Road, Te Rapa, Hamilton
info@screentechnics.com.au
0800 022 821
screentechnics.com.au
1
Continued Over.../
Advertisement

Related Manuals for Screen Technics ELECTRICINEMA A

Summary of Contents for Screen Technics ELECTRICINEMA A
- Page 1 INSTRUCTIONS - ELECTRICINEMA Type A, B & C. Connect IP Projection Screen including IP Protocol you for purchasing a Screen Technics Projection Screen, please ensure that you read the following tions fully before attempting to install this product. NEMAPRO Hanging Type Projection Screen Thank you for purchasing a Screen Technics Projection Screen, please STEP 3.
-
Page 2: Ceiling Mount Instructions
INSTRUCTIONS - ELECTRICINEMA Type A, B & C. Connect IP Projection Screen including IP Protocol CEILING MOUNT INSTRUCTIONS STEP 5. Using two people install the screen by placing the screen canister into the bottom of the bracket clips and pivoting back the canister to slot the top pins into the T channels running along the top of the canister (you may have to remove any tape that is in the way). - Page 3 INSTRUCTIONS - ELECTRICINEMA Type A, B & C. Connect IP Projection Screen including IP Protocol CONNECT IP MODULES 1 & 2 All inputs on module 1 are accessed by removing right hand end cap of screen canister 2. DC TRIGGER INPUT 1.
- Page 4 INSTRUCTIONS - ELECTRICINEMA Type A, B & C. Connect IP Projection Screen including IP Protocol 3. CONNECT NETWORK • Screen shot below of module connected • Connect Network uses a RJ11 6P6C Plug 6 core wired straight through • Allows operation of module via simple control •...
- Page 5 Connect Login screen will be shown • Mac address set up (If replacing on c. Connect Login screen will be shown • Screen Technics Beacon e. AMX Discoverable enable • Input User Name : Admin network) d. Input User Name : Admin •...
-
Page 6: Switch Mode
INSTRUCTIONS - ELECTRICINEMA Type A, B & C. Connect IP Projection Screen including IP Protocol 11. REGISTER SETTINGS • Access this menu by selecting System then Module Settings • Select MAF address or Module ID and select load • Change value and select update •... - Page 7 INSTRUCTIONS - ELECTRICINEMA Type A, B & C. Connect IP Projection Screen including IP Protocol Group Value 12. INFRA-RED GROUP BITMAP CALCULATOR 14. IP CONNECT SERIAL PROTOCOL • Add the value of IR groups • This serial command protocol is essentially the same for all console channels •...
- Page 8 INSTRUCTIONS - ELECTRICINEMA Type A, B & C. Connect IP Projection Screen including IP Protocol 15. CONTROL COMMANDS SWITCH GROUP COMMANDS • These commands are used to control the operation of screens. • Switch group control can be used to control screens directly if connected via Connect •...
- Page 9 INSTRUCTIONS - ELECTRICINEMA Type A, B & C. Connect IP Projection Screen including IP Protocol RESPONSE TYPE NO CONNECT IP MODULE SETTING THE PARTIAL POSITIONS Moving top Note: Partial positions are set using internal timers, position can vary due to mains voltage Moving bot fluctuations, motor load changes and temperature.
-
Page 10: Factory Reset Switch
INSTRUCTIONS - ELECTRICINEMA Type A, B & C. Connect IP Projection Screen including IP Protocol 18. AMX Device Discovery • Double short press for 2 seconds approximately per button press • This feature allows the IP CONNECT module to be identified by AMX AV Control Systems. Screen Up command. - Page 11 INSTRUCTIONS - ELECTRICINEMA Type A, B & C. Connect IP Projection Screen including IP Protocol 21. LIMIT SETTING FOR CONNECT ELECTRICINEMA IP SCREENS The following instructions are for the adjustment of the limit switches that alter the upper and lower stop positions on “Connect” ElectriCinema IP Screens only WHERE ARE THE LIMIT SWITCHES? (On the Left Hand Side).
Need help?
Do you have a question about the ELECTRICINEMA A and is the answer not in the manual?
Questions and answers