Table of Contents
Advertisement
Advertisement
Table of Contents

Related Manuals for Ganz AI BOX 4CH


Summary of Contents for Ganz AI BOX 4CH
- Page 1 USER MANUAL AI BOX 4CH / 8CH / 16CH...
- Page 2 Copyright This manual without the manufacturer's approved copy and reprinted partially or in full, or translated into another language is prohibited. Limitation of Liability This product is designed to prevent fire and theft is not the main means. We shall not be liable for accidents or damage by using this product can result in liability for accidents or damage.
-
Page 3: Table Of Contents
Contents 1 Overview 06 1. Safety Instruction 06 2. WARNING 08 3. Key features 09 2 Components 09 1. Components 09 2. Names and functions of front panel 09 3. Name and functions of rear panel 10 3 Installation 11 1. - Page 4 Contents 2. AI algorithm 26 3. False detection filter setting 27 4. Face Recognition 28 5. Annotated Live Video 28 6 Action Rules 30 1. Action Rule Overview 30 2. AI Trigger setting 31 3. System Trigger setting 54 4. Schedule setting 55 5.
- Page 5 Contents 3. System 87 10 Face Recognition 89 11 License Plate Recognition 95...
-
Page 6: Overview
1 Overview 1. Safety Instruction The Company shall not have any responsibility for any accident or damage that may incur during the use of the product. For your safety, we provide a few instructions about installation, manipulation, cleaning, assembly/disassembly of the product as below. - Page 7 1 Overview ● Do not apply excessive force to unplug the power cord Disassembly & Cleaning ● When cleaning on the surface, use a dry cloth ● Do not wipe the product using water, paint thinner or organic solvents ● Do never dismantle, repair or modify the product. Without a consulting trained technician During installation To prevent an accident or physical injury and to operate Product...
-
Page 8: Warning
1 Overview 2. WARNING To reduce the risk of fire or electric shock, do not expose this product to rain or moisture. To avoid injury, this product must be mounted securely to the floor / wall in accordance with the installation instructions. ●... -
Page 9: Key Features
1 Overview apparatus has been exposed to rain or moisture, does not operate normally, or has been dropped 3. Key features This device is based on the latest deep learning technology of intelligent video analysis which has up to 16 channels network camera video inputs. The features include object identification, object counts and object tracking by AI technology. -
Page 10: Components
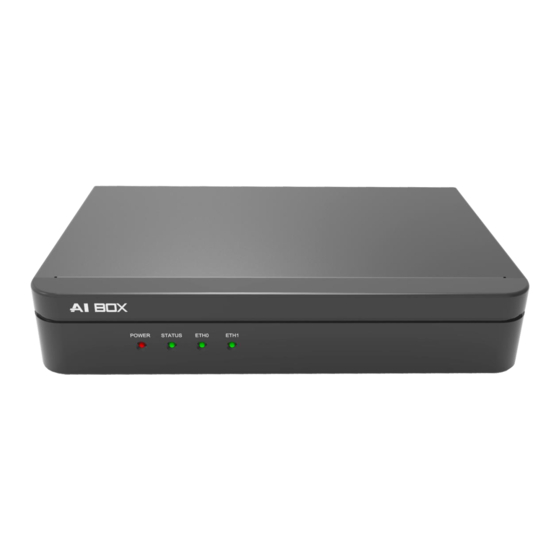
2 Components 1. Components Cable clamp Adapter Screw 2. Names and functions of front panel Status sign List Description Red light blinks during the boot phase and green light during POWER operation. Status light blinks when an event occurs after passing the set STATUS condition. -
Page 11: Name And Functions Of Rear Panel
2 Components place. 3. Name and functions of rear panel ● 4CH ● 8CH / 16CH Names Description Universal Serial Bus (USB) ports for additional devices such as USB Mouse. ① For connecting a monitor to view connected cameras. Note, AI Box cannot HD MONITOR ②... - Page 12 2 Components Network port for connecting camera and other through a separate ETHERNET 2 ④ network disconnected from the outside. ALARM IN Alarm input signal line terminal. ⑤ REPLAY Relay connection terminal. ⑥ RS485 RS485 communication device connection terminal. ⑦ DC12V 12V adapter plug ⑧...
-
Page 13: Installation
3 Installation 1. Basic connection configuration 2. Network setting ● Basic requirements of Web Name Description Recommended Browser Google Chrome, FireFox, MS Edge Window / Mac / Linux ≥1GB... - Page 14 3 Installation ● Way to access the Web setting page 1. The factory default network setting is DHCP. Therefore, it is possible to access the IP assigned through the router supported by DHCP (IP can be checked by accessing the Web of the router). IP address: https://<AI Box IP>:8443 (e.g.: https://10.10.10.10:8443) ID: ADMIN...
- Page 15 3 Installation 2. ‘Admin_Tool.exe’ allows discover and configure AI BOX in the network. The tool also discovers and configures other devices such as IP cameras, NVR and DVR. 1) Click the 'Search' button to search the AI BOX connection to the network.
- Page 16 3 Installation 2) The search results are displayed on the screen when search function is completed. You can determine the AI BOX from the model information and click on the product you want to set up in the list.
- Page 17 3 Installation 3) Select one of ‘DHCP’ or STATIC’ for <Network Type> at the bottom left. Please input the IP Address, Subnet Mask, Gateway, DNS information and click 'APPLY' button. 4) After a short period of time, the list will be updated automatically and the network configuration is completed by confirming that the settings are correct.
- Page 18 3 Installation 5) Double click the device information in the list to open the device setting page. ※ Please click ‘Advanced’ button at the bottom and click ‘Go to(unsafe)’ button if you see a security warning as shown below. (Unlike a portal site that uses a public certificate, you may get a warning by using a private certificate) Note: This is a completely safe procedure as the user is only connecting to AI...
- Page 19 3 Installation 6) Input username and password in the login window Primary username: ADMIN Password: 1234 * It is recommended to change password for safety purposes. To increase security of the device, it is recommended to change to a strong password and reset regularly.
-
Page 20: System Setting
4 System setting 1. Network setting Check and change the network-related settings of the device Ethernet1, Ethernet2 means Ethernet port on the back of the device to which a network cable is connected ● Automatic IP address allocation Enable or disable the Dynamic Host Configuration Protocol (DHCP) server. DHCP automatically assigns an IP address to the device if there is a DHCP server on the network. - Page 21 4 System setting ● Static IP address allocation Disabling the DHCP settings allows users to manually configure the device’s network settings for the network environment. If DHCP is set to Off, these settings must be manually changed IP address: Input your device’s IP address. Subnet mask: Input the subnet mask value of the device.
-
Page 22: Change User Password
4 System setting ● Link local address It is an IP address automatically assigned to communicate with other devices in the broadcast domain and cannot be changed. NOTE: Link Local Addresses are not supported for DNS. 2. Change user password Use the Users &... - Page 23 4 System setting User accounts are created to limit the permissions of individuals who are logged onto the camera. The User Management page also includes four predefined access level settings that include Administrators, Managers, Operators, and Viewers permissions. Edit window of use information will pop-up if you press the ‘Edit’ button. Input your current password and new password then press the 'APPLY' button.
-
Page 24: Language Setting
4 System setting Press the 'APPLY' button to change your password. You need to log in again with your new password if you change the password. 3. Language setting Set the language which will be displayed on the system. 4. Date and Time setting Set the system date and time. - Page 25 4 System setting ● Date / Time The date and time set on the device are displayed. Change the date and time by pressing the button with the date and time displayed ● Network Time server setting Time server: Input the address of NTP server. Pressing the ‘SYNC’ button will communicate with the NTP server information provided to automatically synchronized to change the system date and time.
-
Page 26: Firmware Upgrade
4 System setting ● Time zone / DST Time zone: Select your timezone. DST: Choose whether to use daylight saving time. 5. Firmware upgrade Upgrade device’s firmware. - Page 27 4 System setting Users can update system firmware if available. All AI BOX functions will shut down during firmware update. Please close any other screens before firmware update. Never disconnect power or LAN cable during the firmware update process. It takes approximately 3-10 minutes for the unit to reboot after firmware update process.
-
Page 28: Factory Default
4 System setting 6. Factory default Reset your device’s settings to factory default settings. Press the ‘OK’ button to bring up the factory reset popup. The network-related settings will not be reset if you select the ‘Network settings remain current’ option. Click 'OK' button to start factory default. -
Page 29: Ai Source & Annotated Live Video
5 AI Source & Annotated Live Video 1. Video Source setting Connect video from a server or device that supports IP cameras or RTSP streaming and configure the default AI algorithm to assign to each video channel [CAUTION] Video resolution can be connected up to a maximum channel of 2M pixels 30 fps. - Page 30 5 AI Source & Annotated Live Video ● IP camera / DVR / NVR connection using ONVIF discovery protocol Video stream address can be configure by searching ONVIF devices connected to the local network. Press the 'Discovery' button and the ONVIF Discovery popup will appear. Press the 'Discovery' button to search ONVIF devices connected to the local network.
-
Page 31: Ai Algorithm
5 AI Source & Annotated Live Video Connection can be made by directly entering the RTSP address of a device or server that supports standard TCP based RTSP. ● DVR / NVR auto connection through Plug & Play By using a dedicated DVR / NVR supports AI Box Plug & Play, you can connect AI Box automatically through the menu of DVR / NVR without device setting through AI Box’s Web UI. -
Page 32: False Detection Filter Setting
5 AI Source & Annotated Live Video The minimum object recognition size compared to the input screen for each algorithm is as follows: ✓ Minimum detectable object size of Intrusion and Occupancy. Person Vehicle width height width height Human/Vehicle Far 1.00% 3.00% 2.00%... -
Page 33: Face Recognition
5 AI Source & Annotated Live Video [Caution] The judgment of whether the object to be detected is within the static object exclusion area is based on the object's center coordinate. Therefore, specifying only the smallest size of the excluded area (as much as it covers the center of the object you want to exclude) can reduce the error that excludes even the actual object to be detected. - Page 34 5 AI Source & Annotated Live Video ※ What is Annotated video stream? Video stream with tracked object detection box, set zone and AI trigger widget on OSD. ● Show object bounding box Grey: Objects in a static state. White: Objects in dynamic state. Purple: The object where the event occurred.
-
Page 35: Action Rule Overview
6 Action Rules 1. Action Rule Overview Action Rule is composed of Trigger, Condition and Action. After Action Rule is set, it operates by checking Condition when Trigger occurs and performing Action if satisfied. Trigger Condition Action Drop < Action Rule composition > There are 2 types of trigger, AI Trigger and System Trigger. -
Page 36: Ai Trigger Setting
6 Action Rules Schedule Alarm Out Alarm In 1 (Weekend) Email Drop < Action Rule example > 2. AI Trigger setting ● Intrusion Intrusion is a function that is triggered when a new target appears in the area from the ROI set zone on the screen ([Caution] The determination of whether an object is inside a section is based on the center coordinates of the object.) - Page 37 6 Action Rules 1) In the SETUP application tab, enter the AI Trigger menu under the 'Action Rules' menu. 2) Click the Intrusion tab. 3) Click the ‘Add’ button at the bottom. 4) Input a Trigger preset name. 5) Select ‘Video Source’. 6) Select the discovery target class.
- Page 38 6 Action Rules 7) Ignore Duplicate Events is an option to ignore event occurrences when an intrusion of another object following an intrusion state occurs. When the ‘check’ is enabled, only the first object that breaks into the zone will raise an event. (Intrusion must occur again when all objects are disappeared in a zone before new events occur.) 8) The reminder alarm interval is an event frequency setting to remind the user again if the intrusion continues.
- Page 39 6 Action Rules 11) Counter Reset lets you set the time to reset the widget's counter. You can also reset manually by pressing the Reset button. 12) It will ignore objects that are not moving if the Ignore Static Object is enabled. (An event may occur if there is no movement and then you move again.) 13) Set ROI zone Move the entire ROI by dragging its zone.
- Page 40 6 Action Rules 15) Click the 'APPLY' button at the bottom to save. 16) The Widget will display properly if the trigger is added. 17) After confirming the settings, click the ‘CLOSE’ button at the bottom to check the list. ●...
- Page 41 6 Action Rules 1) In the ‘SETUP’ application tab, enter the AI Trigger menu under the 'Action Rules' menu. 2) Click the ‘Occupancy’ tab. 3) Click the ‘Add’ button at the bottom. 4) Input a Trigger preset name. 5) Select ‘Video Source’. 6) Select the discovery target class.
- Page 42 6 Action Rules The detection target may vary depending on the algorithm setting of the selected ‘Video Source’. 7) Set the ‘More than’. It will trigger when the number of detection targets exceeds the set number. 8) After the ‘Fewer than’ is set, it will trigger if the number of targets to be detected is less than the set number.
- Page 43 6 Action Rules 10) ‘Count Reset’ allows you to set the time to reset the widget’s count. You can also reset manually by pressing the ‘RESET’ button. 11) It will ignore objects that are not moving if the ‘Ignore Static Object’ is enabled.
- Page 44 6 Action Rules 14) Click the ‘APPLY’ button at the bottom to save. 15) The Widget will display properly if the trigger is added. 16) After confirming the settings, click the ‘CLOSE’ button at the bottom to check the list. ●...
- Page 45 6 Action Rules 1) In the ‘SETUP’ application tab, enter the AI Triger menu under the 'Action Rules' menu. 2) Click Loitering tab. 3) Click the ‘Add’ button at the bottom.
- Page 46 6 Action Rules 4) Input a Trigger preset name. 5) Select ‘Video Source’. 6) Select the discovery target class. It is possible to select multiple objects for detection. The detection target may vary depending on the algorithm setting of the selected ‘Video Source’.
- Page 47 6 Action Rules 9) ‘Loitering Label’ allows you to set the count name of the widget. 10) ‘Count Reset’ allows you to set the time to reset the widget's count. You can also reset manually by pressing the ‘RESET’ button. 11) It will ignore objects that are not moving if the ‘Ignore Static Object’...
- Page 48 6 Action Rules 12) Set ROI zone. Move the entire ROI by dragging its zone. Move the edge by dragging the edge of the ROI. Click on the line of the ROI to create a new edge. Right click the edge of ROI to delete the edge. 13) Drag the Widget rectangle in the upper right corner to set where the widget will appear.
- Page 49 6 Action Rules 14) Click the ‘APPLY’ button at the bottom to save 15) The Widget will display properly if the trigger is added 16) After confirming the settings, click the ‘CLOSE’ button at the bottom to check the list. ●...
- Page 50 6 Action Rules 4) Input a Trigger preset name. 5) Select ‘Video Source’. 6) Select the discovery target class It is possible to select multiple objects for detection. The detection target may vary depending on the algorithm setting of the selected ‘Video Source’.
- Page 51 6 Action Rules 9) ‘Stop Label’ allows you to set the count name of the widget. 10) ‘Count Reset’ allows you to set the time to reset the widget's count. You can also reset manually by pressing the ‘RESET’ button.
- Page 52 6 Action Rules 11) It will ignore objects that are not moving if the ‘Ignore Static Object’ is enabled. 12) Set ROI zone Move the entire ROI by dragging its zone. Move the edge by dragging the edge of the ROI. Click on the line of the ROI to create a new edge.
- Page 53 6 Action Rules 14) Click the ‘APPLY’ button at the bottom to save. 15) The Widget will display properly if the trigger is added. 16) After confirming the settings, click the ‘CLOSE’ button at the bottom to check the list. ●...
- Page 54 6 Action Rules 1) In the ‘SETUP’ application tab, enter the ‘AI Trigger’ menu under the 'Action Rules' menu. 2) Click ‘Enter/Exit’ tab. 3) Click the ‘Add’ button at the bottom.
- Page 55 6 Action Rules 4) Input a Trigger preset name. 5) Select ‘Video Source’. 6) Select the discovery target class. It is possible to select multiple objects for detection. The detection target may vary depending on the algorithm setting of the selected ‘Video Source’.
- Page 56 6 Action Rules 9) Crossing count function sets how many times an event will occur when an object crossing the area boundary is detected. 10) ‘Enter/Exit’ Direction Label set the label name of the widget count. 11) ‘Count Reset’ allows you to set the time to reset the widget's count. You can also reset manually by pressing the ‘RESET’...
- Page 57 6 Action Rules 12) Set ROI zone. Move the entire ROI by dragging its zone. Move the edge by dragging the edge of the ROI. Click on the line of the ROI to create a new edge. Right click the edge of ROI to delete the edge. 13) Drag the Widget rectangle in the upper right corner to set where the widget will appear.
- Page 58 6 Action Rules 14) Click the ‘APPLY’ button at the bottom to save. 15) The Widget will display properly if the trigger is added. ● Line Crossing Line Crossing is a function set polyline on the screen and it triggered when the detected object crosses the line.
- Page 59 6 Action Rules 1) In the ‘SETUP’ application tab, enter the AI Trigger menu under the 'Action Rules' menu. 2) Click Line ‘Crossing tab’. 3) Click the ‘Add’ button at the bottom.
- Page 60 6 Action Rules 4) Input a Trigger preset name. 5) Select ‘Video Source’. 6) Select the discovery target class. It is possible to select multiple objects for detection. The detection target may vary depending on the algorithm setting of the selected ‘Video Source’.
- Page 61 6 Action Rules 9) ‘Crossing count’ function sets how many times an event will occur when an object crossing the area boundary is detected. 10) ‘Forward/Reverse Direction Label’ sets the label name of the widget counter. 11) ‘Count Reset’ allows you to set the time to reset the widget's count. You can also reset manually by pressing the ‘RESET’...
- Page 62 6 Action Rules 12) Set ‘Polyline’. Move the edge by dragging the edge of the ‘Polyline’. Click on the line of the ‘Polyline’ to create a new edge. Right click the edge of ‘Polyline’ to delete the edge. 13) Drag the Widget rectangle in the upper right corner to set where the widget will appear.
-
Page 63: System Trigger Setting
6 Action Rules 14) Click the ‘APPLY’ button at the bottom to save. 15) The Widget will display properly if the trigger is added. 16) After confirming the settings, click the ‘CLOSE’ button at the bottom to check the list. 3. -
Page 64: Schedule Setting
6 Action Rules ● Recurrence Create a Recurrence preset. It is possible to add the Preset name and pattern(time). 4. Schedule setting 1) In the ‘SETUP’ application tab, enter the Schedule menu under the 'Action Rules' menu. 2) Click the ‘Add’ button at the bottom. - Page 65 6 Action Rules 3) Input the schedule preset name. 4) Select the day. 5) Select the start time and end time of the schedule. 6) Click the ‘APPLY’ button at the bottom to save.
- Page 66 6 Action Rules 7) Check the schedule preset added from the list. ※ All 24 hours will be included in the schedule if you set the same start and end time. <Weekend 24 hours setup example> ※ Please set it up like as follows if you need a schedule beyond midnight.
-
Page 67: Event Action Setting
6 Action Rules <Weekday non-working time settings example> It will be included in the schedule until the end time of the next day of the set day if the Time Range set pass the midnight, In the example above, Monday and Friday are set so the actual schedule is valid until 9:00 AM on Saturday. - Page 68 6 Action Rules ■ Email Set Email preset in the Email menu. In the Email preset, set the necessary value for sending email such as SMTP server information. You can also send a test email to confirm that your settings are correct. 1) In the ‘SETUP’...
- Page 69 6 Action Rules 3) Input a name for the Email preset in Name tab 4) Input the email address you want to receive in ‘TO’ 5) Check the ‘Attach Snapshot’ to display the Snapshot transfer sub-settings. 6) Snapshots occur approximately once every second. Set the time range for the snapshots you want to receive by email.
- Page 70 6 Action Rules 7) Select a service provider in the Provider tab. Please select the ‘Custom’ if the service provider you want to use is not listed. 8) Input a user name and password that can authenticate with the Email service provider.
- Page 71 6 Action Rules 12) Edit the Email action message. You can configure the message by using a template or by including an event attribute token. 13) Check the Message Example for an example of the actual message being sent. 14) Click the ‘TEST’ button to confirm that the receiving test Email’s settings are correct.
- Page 72 6 Action Rules ■ HTTP You can set the HTTP callback preset in the HTTP tab. In the HTTP preset, set server address and authentication information for receiving the message. In addition, the data format to be transmitted when an event occurs can be set using the event property value token.
- Page 73 6 Action Rules 1) In the ‘SETUP’ tab, enter the ‘Event Action’ menu under the 'Action Rules' menu. 2) Click the HTTP Tab to enter the list of HTTP callback presets and click the ‘Add’ button.
- Page 74 6 Action Rules 3) Type the name of the HTTP callback preset in the Name section. 4) Select HTTP/HTTPS protocol. 5) Input the URL of the server. 6) Check the Attach Snapshot to display the Snapshot transfer sub-settings.
- Page 75 6 Action Rules 7) Snapshots occur approximately once every second. Set the time range for the snapshot to attach. 8) Edit the HTTP action message. You can configure the message by using a template or by including an event attribute token.
- Page 76 6 Action Rules 9) Check the Message Example for an example of the actual message being sent 10) Click the ‘TEST’ button to confirm that the receiving test Email’s settings are correct 11) Click the ‘APPLY’ button at the bottom to save 12) Check the HTTP preset section you added in the list.
- Page 77 6 Action Rules ■ TCP You can set the TCP callback preset in the TCP section. The TCP preset sets the server address and port information for receiving messages. In addition, the message format to be sent when an event occurs can be set using the event property value token. You can also send a test message to confirm that the settings are correct.
- Page 78 6 Action Rules 3) Input a name for the TCP preset in Name section. 4) Input the host IP address or domain name where the TCP receiving server is running. 5) Input the Host port number of the TCP receiving server.
- Page 79 6 Action Rules 6) Edit the TCP action message. You can configure the message by using a template or by including an event attribute token. 7) Check the ‘Message Example’ for an example of the actual message being sent. 8) Click the ‘TEST’ button to send the example message to the server and check whether it is received.
- Page 80 6 Action Rules ■ FTP You can set the FTP callback preset in the FTP section. The FTP preset sets the server address and port information for receiving messages. In addition, the message format to be sent when an event occurs can be set using the event property value token. You can also send a test message to confirm that the settings are correct.
- Page 81 6 Action Rules 3) Input a name for the FTP preset in Name section. 4) Input the host IP address or domain name where the FTP receiving server is running. 5) Input the Host port number of the FTP receiving server. 6) Edit the Snapshot Time Range (From secs before, To secs after)
- Page 82 6 Action Rules 7) Edit the the Directory Name Format and File Name Format. You can configure the Directory Name Format and File Name Format by using a template or by including an event attribute token. 8) Click the ‘TEST’ button to send the example Name to the server and check whether it is received.
- Page 83 6 Action Rules 9) Click the ‘APPLY’ button at the bottom to save. 10) Check the FTP preset section that you added in the list. ■ ONVIF ONVIF RTSP Metadata Stream is available in the product, so do not need separate preset settings.
- Page 84 6 Action Rules 1) In the ‘SETUP’ application tab, enter the ‘Event Action’ menu below the 'Action Rules' menu. 2) Click ‘ONVIF’ Tab. ● System event action ■ DISARM AI BOX is an ARM state that can generate an alarm action event at any time. However, the connected controller can be changed to DISARM state to prevent alarm action...
- Page 85 6 Action Rules event. For example, alarm events are not important during system checks, so you can create and work with the DISARM state as shown above. ■ Alarm Out It is possible to set how long it will activate from the Alarm Out Duration when the Alarm Out action is activated.
- Page 86 6 Action Rules 1) In the ‘SETUP’ application tab, enter the ‘Event Action’ menu under the 'Action Rules' menu. 2) Input the value for the ‘Alarm Out Duration’. You can use the UP/DOWN buttons or input a number directly. It is possible to set a value from 1 to 60. 3) Click the ‘APPLY’...
- Page 87 6 Action Rules ■ RS485 RS485 exports action messages sequentially without using a separate protocol. This can be used by setting the default baud rate and editing the action message.
- Page 88 6 Action Rules 1) Select RS485's Baud Rate. 2) Edit the Event action message. You can configure the message by using a template or by including an event attribute token. 3) Check the Message Example for an example of the actual message being sent. 4) Click the 'TEST' button to send the example message to the server and check whether it is received.
- Page 89 6 Action Rules ■ Control See video tutorial ( https://youtu.be/yDxTFfNnvmY ) ■ GenetecTM See video tutorial ( https://youtu.be/ewjL8QHgR-w ) ■ Nx See video tutorial ( https://youtu.be/QRpj3BiHfiM ) ● Action Rules Setting...
- Page 90 6 Action Rules 1) In the SETUP application tab, enter the Action Rule menu under the 'Action Rules'. 2) Click the 'APPLY' button at the bottom to save. 3) At the top of the UI, you will see a step indicator indicating the current progress step.Edit the HTTP action message.
- Page 91 6 Action Rules 5) Create a name for the action rule and click the 'NEXT' button to move on to the next step. 6) The settings will be updated each time steps in the Action Rule Summary proceed. 7) Set the trigger type and its type in the Trigger Setup step. Then select Trigger Preset and click the 'NEXT' button to move to the next step.
- Page 92 6 Action Rules 8) Select the desired item from the schedule preset. It is set to 'Always' if you do not select a Schedule preset. The condition is 'True' if any of the selected items are met when you select multiple schedules.
- Page 93 6 Action Rules - In case of + t seconds, it is true when condition trigger occurs within t seconds after trigger occurrence - In case of - t seconds, it is true if condition trigger occurred before trigger occurred. - In case of +/- t seconds, it is true when condition trigger occurs before or after trigger occurs within t seconds.
- Page 94 6 Action Rules 15) ONVIF RTSP Metadata Stream is the default in Action All events with rules set are sent to the RTSP Metadata Stream. 16) To add another Action, select the Action type and preset in the Add Actions item and click the <Add>...
- Page 95 6 Action Rules 19) Check the settings in Summary. 20) After completing the review, click the 'APPLY' button to create the rule.
-
Page 96: Statistics
7 Statistics 1. Counting This item can be viewed by processing the number of triggers of AI security items. 1) In the Settings tab, enter the Statistics menu under the AI Security menu. 2) Select the desired channel and trigger type. 3) Choose whether to process statistics by day or by time. -
Page 97: Report
7 Statistics 2. Reporting It is a function to periodically send the statistics data to a specific administrator or automatically upload the data by FTP. 1) Set the report name and select a frequency. 2) Select the trigger to receive the report. 3) Select the recipient by e-mail: Settings->... -
Page 98: Ai Marketing
8 AI Marketing This setting corresponds to the Retail solution item of AI BOX. Usage: In case of CCTV security, the event occurrence count is mainly managed as a cumulative count. However, if you apply an acceleration count instead of a cumulative count, you can find out the status of the customers who visited the store every predetermined time. - Page 99 8 AI Marketing 1) Name the counter. 2) Add the area where you want to use counter. 3) Add a schedule to specify when to reset the counter during the day. 4) Press the Apply button to create the counter. ●...
- Page 100 8 AI Marketing 1) Select the video source. 2) Select the detection target. 3) Enter the name of the area. 4) Select whether to make a counter cross line or line in / out area. 5) It sets the increase and decrease of count. 6) Click the Apply button to save the above.
- Page 101 8 AI Marketing ● This is the screen when the counter statistics button is pressed. 1) Types of counters to output or respond to statistics. Multiple selection is also possible. 2) Select the unit. 3) Select the period you want to send statistics. 4) Possible to filter only business hours.
-
Page 102: Other Menu
9 Other Menu 1. Search ● Event Log You can search or download the action events that occurred in 'Action Rules' of the 'AI Security' menu in CSV format. ● System Log... -
Page 103: Display
9 Other Menu You can search and download the necessary system logs such as user login or system startup etc. in CSV format. 2. Display ● OSD... - Page 104 9 Other Menu This is the setup for OSD information displayed in Annotated Video’s video of AI BOX. 1) Object bounding box: Determining whether or not the box is displayed on the object border. 2) Object Trajectory: Determines whether or not the screen is displayed on the moving object.
- Page 105 9 Other Menu ● Streaming Quality...
- Page 106 9 Other Menu AI BOX supports not only video streaming for each RTSP channel but also multi-view streaming showing all channels as one channel. It is possible to make settings for that streaming quality. 3. System ● License key...
- Page 107 9 Other Menu Enter a license key to activate additional features that require a license. If the license is successfully registered, the corresponding item is displayed on the right. ● System information You can find the model name, firmware version, MAC address and etc. ●...
- Page 108 10 Face Recognition 1. Face recognition license required To use the face recognition function, you need to purchase FR chip separately.
- Page 109 10 Face Recognition 2. Note of installing the camera for Face Recognition 1) It should be installed in front of the person's direction. (The left and right angles at which the camera faces the face is around 30 degrees) 2) Horizontal, Install the camera at an angle of 15 degrees to the human face. <Camera installation example to increase accuracy>...
- Page 110 10 Face Recognition Set the AI algorithm to Face Recognition in the Video Source menu under AI Source. AI source -> Set AI Algorithm to Face Recognition in the Video source menu. 4. AI Trigger setting...
- Page 111 10 Face Recognition Set up the trigger in the Face Detection tab of the AI Trigger menu under AI Security. AI security -> AI trigger -> Set the trigger in the face detection menu. 1) Set the Preset name. 2) Select the Video source. 3) Select the Recognition mode.
- Page 112 10 Face Recognition 5) Advanced Settings / Counter Reset It is possible to reset every day at the designated time. Click the Reset button to reset the current counter. 5. Create a face recognition database You can create a group of face recognition databases in the ‘Groups’ tab of the ‘Face Detection’...
- Page 113 10 Face Recognition Face data can be added individually in the 'Face' tab of the 'Face Detection' menu under 'AI Source'. AI source -> Face recognition -> It is possible to create a group of face recognition databases from the Group menu. Click the photo button to upload a picture.
- Page 114 10 Face Recognition The folder in the selected folder is the group name and the file name is the user name of the face.
- Page 115 11 License Plate Recognition 1. License plate recognition license required License plate recognition requires a separate license. The license plate recognition algorithm is activated when you purchase the license. You can find the license key in the ‘License Keys’ menu under ‘System’. Setting –...
- Page 116 11 License Plate Recognition 2) Camera installation and camera lens should be selected properly according to vehicle speed. Example 1: Example of improving accuracy when installing a license plate recognition camera a. Fast vehicle speed (less than 60 km/sec) b. Same as license plate height / 10.3mm lens c.
- Page 117 11 License Plate Recognition Example 2: Example of improving accuracy when installing a license plate recognition camera a. Slow vehicle speed (less than 10 km/sec) b. Same as license plate height / 2.4mm lens c. Analysis completion point / Analysis start point / Unanalyzed interval d.
- Page 118 11 License Plate Recognition AI source -> Video source -> Set AI Algorithm to LPR in the Video source menu. 4. Create License Plate Recognition Trigger...
- Page 119 11 License Plate Recognition Create a license plate recognition trigger from the ‘AI Triggers’ menu under ‘AI Security’. Setting – AI SECURITY -> AI Trigger -> Create a license plate recognition trigger. 1) Name the preset 2) Select the Video source 3) Draw the AREA BOX where the license plate is the largest (the closer the camera is, the larger the license plate).
- Page 120 11 License Plate Recognition THE END -...
Need help?
Do you have a question about the AI BOX 4CH and is the answer not in the manual?
Questions and answers