Table of Contents
Advertisement
Advertisement
Table of Contents

Subscribe to Our Youtube Channel
Related Manuals for Philco PH2313IC


Summary of Contents for Philco PH2313IC
- Page 1 Induction Hob Instruction Manual / Installation Manual MODEL: PH2313IC...
-
Page 2: Table Of Contents
Content 1. Foreword ..................4 1.1 Safety Warnings ................. 4 1.2 Installation ................4 1.2.1 Electrical Shock Hazard ..........4 1.2.2 Cut Hazard ..............4 1.2.3 Important safety instructions .......... 4 1.3 Operation and maintenance ............5 1.3.1 Electrical Shock Hazard ..........5 1.3.2 Health Hazard .............. -
Page 3: Foreword
1. Foreword 1.1 Safety Warnings Your safety is important to us. Please read this information before using your induction hob. 1.2 Installation 1.2.1 Electrical Shock Hazard Disconnect the appliance from the main electricity supply before carrying out any work or maintenance on it. ... -
Page 4: Operation And Maintenance
1.3 Operation and maintenance 1.3.1 Electrical Shock Hazard Do not cook on a broken or cracked cooktop. If the cooktop surface should break or crack, switch the appliance off immediately at the main power supply (wall switch) and contact a qualified technician or call customer service. - Page 5 Never use your appliance as a work or storage surface. Never leave any objects or utensils on the appliance. Do not place or leave any magnetisable objects (e.g. credit cards, memory cards) or electronic devices (e.g. computers, MP3 players) near the appliance, as they may be affected by its electromagnetic field.
- Page 6 This appliance can be used by children aged from 8 years or above and persons with reduced physical, sensory or mental capabilities or lack of experience and knowledge if they have been given supervision or instruction concerning use of the appliance in a safe way and understand the hazards involved.
-
Page 7: Product Induction
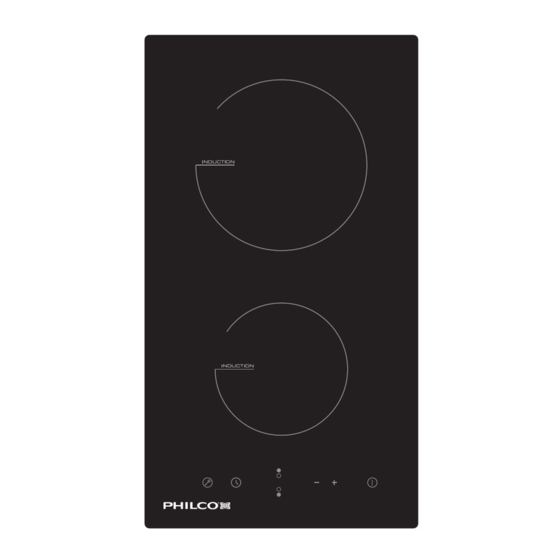
2. Product Introduction 2.1 Top View 2.2 Control Panel 1. ON/OFF control 2. Power / Timer regulating controls 3. Heating zone selection controls 4. Timer control 5. Keylock control 2.3 Working Theory Induction cooking is a safe, advanced, efficient, and economical cooking technology. It works by electromagnetic vibrations generating heat directly in the pan, rather than... -
Page 8: Before Using Your New Induction Hob
Read this guide, taking special note of the ‘Safety Warnings’ section. Remove any protective film that may still be on your Induction hob. 2.5 Technical Specification Cooking Hob PH2313IC Cooking Zones 2 Zones Supply Voltage 220-240V~ 50 or 60Hz... -
Page 9: Choosing The Right Cookware
3.2 Choosing the right Cookware Only use cookware with a base suitable for induction cooking. • Look for the induction symbol on the packaging or on the bottom of the pan. • You can check whether your cookware is suitable by carrying out a magnet test. Move a magnet towards the base of the pan. -
Page 10: Finish Cooking
Touch the ON/OFF control for three seconds. After power on, the buzzer beeps once, all displays show “–” or “– –”, indicating that the induction hob has entered the state of standby mode. Place a suitable pan on the cooking zone that you wish to use. -
Page 11: Locking The Controls
Turn the cooking zone off by scrolling down to “0” or touching “-” and “+” control together. Make sure the display shows “0”. Turn the whole cooktop off by touching the ON/OFF control. Beware of hot surfaces “H” will show which cooking zone is hot to touch. - Page 12 Touch the controls of the timer. The minder indicator will start flashing and “10” will show in the timer display. Set the time by touching the “-” or “+” control of the timer Hint: Touch the “-” or “+” control of the timer to decrease or increase by 1 minute once.
-
Page 13: Default Working Times
Touching the “-” and “+” together, the timer is cancelled, and the “00” will show in the minute display. When the time is set, it will begin to count down immediately. The display will show the remaining time and the timer indicator flash for 5 seconds. NOTE: The red dot next to power level indicator will illuminate indicating that zone is selected. -
Page 14: Detection Of Small Articles
4.2 Detection of Small Articles When an unsuitable size or non-magnetic pan (e.g. aluminium), or some other small item (e.g. knife, fork, key) has been left on the hob, the hob automatically go on to standby in 1 minute. The fan will keep cooling down the induction hob for a further 1 minute. -
Page 15: Hints And Tips
Everyday soiling 1. Switch off the power • When the power is switched off, on glass 2. Apply a cooktop cleaner there will be no ‘hot surface’ (fingerprints, while the glass is still indication but the cooking zone marks, stains left warm (but not hot!) may still be hot! Take extreme by food or... - Page 16 The induction hob No power. Make sure the induction hob is cannot be turned connected to the power supply and that it is switched on. Check whether there is a power supply in your home or area. If you’ve checked everything and the problem persists, please call Customer Service Hotline.
-
Page 17: Failure Display And Inspection
The induction hob Technical fault. Please note down the error or a cooking zone letters and numbers, switch has turned itself off the main power off and contact unexpectedly, customer service. tone sounds and an error code displayed (typically alternating with one or two digits in the cooking timer... - Page 18 Ceramic plate temperature F4/F7 sensor failure--open circuit. (F4 for 1#,F7 for2#) Ceramic plate temperature F5/F8 sensor failure—invalid. (F5 for 1#,F8 for2#) Temperature sensor of the IGBT failure.(short circuit/open F9/FA Stop using the induction hob, circuit for 1#) switch off the main power and Temperature sensor of the IGBT contact Customer Service.
- Page 19 unit. Heating zones of the The power board same side (Such as and the display the first and the board connected second zone ) would failure; display “u” . Stop using the induction hob, switch The display board off the main power and contact of communicate Customer Service.
-
Page 20: Installation
9. Installation 9.1 Selection of installation equipment Cut out the work surface according to the sizes shown in the drawing. For the purpose of installation and use, a minimum of 5 cm clearance around the cutout should be provided. Be sure the thickness of the work surface is at least 30mm. Please select heat-resistant work surface material to avoid larger deformation caused by the heat radiation from the induction hob. -
Page 21: Before Installing The Hob, Make Sure That
9.2 Before installing the hob, make sure that The work surface is square and level, and no structural members interfere • with space requirements. • The work surface is made of a heat-resistant material. • If the hob is installed above an oven, the oven should have an internal cooling fan. -
Page 22: Cautions
9.6 Cautions 1. The induction hob must be installed by qualified personnel or technicians. Please never conduct the operation by yourself. 2. The hob must not be installed directly above a dishwasher, fridge, freezer, washing machine or clothes dryer, as the humidity may damage the hob electronics 3. - Page 23 • If the cable is damaged or to be replaced, the operation must be carried out the by qualified person or technician with dedicated tools to avoid any accidents. • If the appliance is being connected directly to the mains an omnipolar circuit-breaker must be installed with a minimum opening of 3mm between contacts.
Need help?
Do you have a question about the PH2313IC and is the answer not in the manual?
Questions and answers