Advertisement
R5VBHS 5MP 100 ft IR 4-in-1 HD Bullet
Camera Quick Installation Guide
This 5.0 MP HD-TVI bullet security camera captures sharp high definition video images with its high-
performance CMOS sensor and 2.8 ~ 12 mm varifocal lens.
Features
2592 (H) × 1944 (V) (5 MP) progressive scan CMOS sensor
•
2.8 mm ~ 12 mm varifocal lens providing a 81.04° ~ 28.78° horizontal field of view
•
Full-frame IR up to 100 feet
•
Flip, Rotation and Corridor modes image adjustments
•
D-WDR, IR cut filter
•
IP66 weatherproof rating
•
Drop cable and cable channel
Adjustable
mounting
bracket
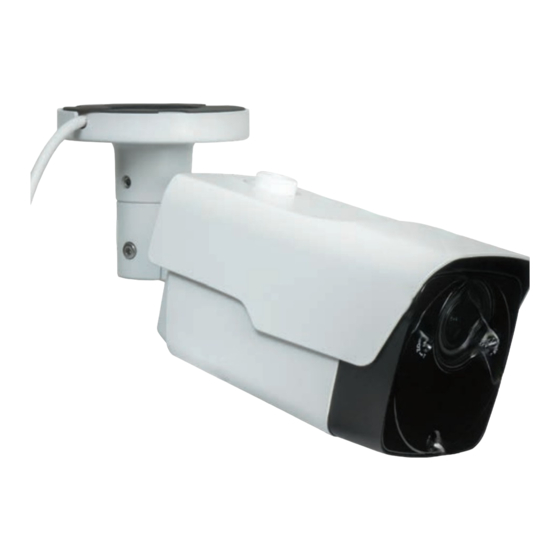
Camera body
R5VBHS camera assembly
12 Vdc Power
connector
* To reset the camera, press and hold down the Reset button for ten seconds while the camera is powering on.
What's in the box
Camera assembly
•
Mounting hardware
•
L-wrench
•
Drill template
•
Quick Installation Guide
•
Tools you need
To install the camera, you will need:
12 Vdc power source. See Specifications for wattage requirement.
•
Tools and additional fasteners (may be required) for mounting the camera
•
Phillips #2 screwdriver
•
Video and 12 Vdc power extension cables
•
www.observint.com
1
Sun shield
Zoom adjust
Focus adjust
Light sensor
HD format
select switches
HD Video BNC
connector
Camera drop cables
Installation
Before installation:
Make sure that the device is in good condition and all the assembly parts are included.
•
Check the specification of the products for the installation environment.
•
Make sure that the wall or the ceiling is strong enough to withstand 3 times the weight of the camera.
•
To avoid fire or shock hazard, use only UL listed power supplies. Verify that the power supply will
•
provide the rated voltage and wattage for the camera. See the Specifications section.
Step 1. Mounting the camera
A R5VBHS camera can be mounted directly to a wall or ceiling. The surface should support at least three
times the weight of the camera. The drop cables of this camera are normally routed through mounting
surface, but can be routed through the cable channel.
If mounting the camera on a wall, ensure that the cable channel in the mounting base is down.
NOTE
If mounting the camera on a ceiling, orient the mounting base so that the cable channel is pointing
away from any source of water, dust, and other contaminates.
1.
Acquire the kind of fasteners that will work best for mounting the camera to the ceiling or wall. The
mounting hardware provided with the camera will work well withe many types of surfaces.
2.
Using the camera or the template provided, mark the locations of the mounting screw holes. If
routing the drop cables through the surface behind the mounting bracket, also mark a 3/4" hole for
the drop cables.
3.
Drill holes in the surface of the mounting location to accommodate the camera fasteners and the
drop cables.
4.
Route the video and 12 Vdc power extension cables from recorder and power source to the camera
mounting location and out through the hole drilled for the camera drop cables.
5.
Connect the video and power extension cables to the camera drop cables. Verify that the power
cable connector polarity matches the polarity of the power drop cable.
Lens
Drop cable connectors are not waterproof. Failure of the power or video
!
drop cable connector due to moisture or another contaminant is considered an
WARNING
installation error, which voids the warranty. Seal all connectors adequately.
6.
Set the HD format select switches on the drop cable for the video encoding you prefer to use. See
the drop cables photo to the left.
7.
Route the drop cable through the hole in the mounting surface, then attach the camera assembly to
the surface using the appropriate fasteners.
8.
Apply power to the camera through the 12 Vdc power cable.
9.
Verify that you can see video from the camera at the recorder.
Step 2. Camera adjustments
1.
While observing video from the camera, loosen the mounting bracket pan, tilt and rotation
adjustment lock screws.
2.
Point the camera at your surveillance target, and then tighten mounting bracket adjustment screws
to hold the camera in position.
RS_R5VBHS_CQ
190429
Advertisement
Table of Contents

Related Manuals for Observint R5VBHS


Summary of Contents for Observint R5VBHS
- Page 1 • Flip, Rotation and Corridor modes image adjustments • A R5VBHS camera can be mounted directly to a wall or ceiling. The surface should support at least three D-WDR, IR cut filter • times the weight of the camera. The drop cables of this camera are normally routed through mounting IP66 weatherproof rating •...
- Page 2 4 W max. IR range Up to 100 ft (30 m) Communication Up the coax, Protocol Dimensions Ø9.43 in × 3.41 mm (Ø239.5 × 86.6 mm) Weight 1.74 lb (790 g) approx. www.observint.com © 2019 Observint Technologies. All rights reserved.
Need help?
Do you have a question about the R5VBHS and is the answer not in the manual?
Questions and answers