Table of Contents
Advertisement
Quick Links
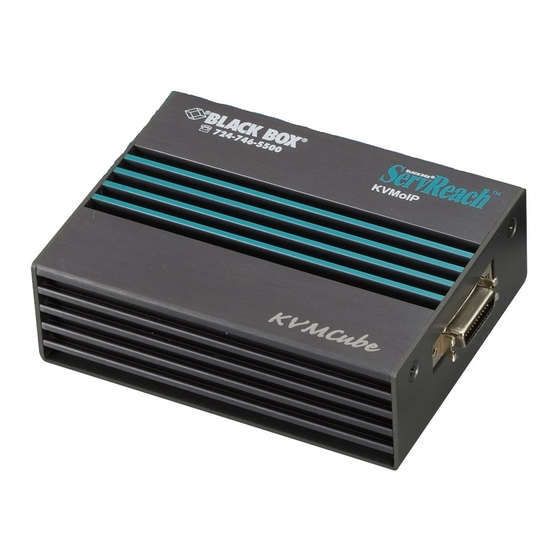
ServReach
Extend your keyboard, video, and mouse (KVM)
from any computer or server over TCP/IP
via a LAN, a WAN, or an Internet connection.
Provides secure remote KVM access and control from the BIOS level—
independent of the operating system.
Connects to a single computer over TCP/IP.
Customer
Support
Information
KVIP1001A
KVMCube
™
Order toll-free in the U.S.: Call 877-877-BBOX (outside U.S. call 724-746-5500)
FREE technical support 24 hours a day, 7 days a week: Call 724-746-5500 or fax 724-746-0746
Mailing address: Black Box Corporation, 1000 Park Drive, Lawrence, PA 15055-1018
Web site: www.blackbox.com • E-mail: info@blackbox.com
BLACK BOX
KVIP1001A
®
Advertisement
Table of Contents

Related Manuals for Black Box ServReach KVMCube


Summary of Contents for Black Box ServReach KVMCube
- Page 1 Order toll-free in the U.S.: Call 877-877-BBOX (outside U.S. call 724-746-5500) Customer FREE technical support 24 hours a day, 7 days a week: Call 724-746-5500 or fax 724-746-0746 Support Mailing address: Black Box Corporation, 1000 Park Drive, Lawrence, PA 15055-1018 Information Web site: www.blackbox.com • E-mail: info@blackbox.com KVIP1001A...
- Page 2 FCC and IC RFI Statements Federal Communications Commission and Industry Canada Radio Frequency Interference Statements This equipment generates, uses, and can radiate radio-frequency energy, and if not installed and used properly, that is, in strict accordance with the manufacturer’s instructions, may cause inter ference to radio communication. It has been tested and found to comply with the limits for a Class A computing device in accordance with the specifications in Subpart B of Part 15 of FCC rules, which are designed to provide reasonable protection against such interference when the equipment is operated in a commercial environment.
- Page 3 NOM Statement Instrucciones de Seguridad (Normas Oficiales Mexicanas Electrical Safety Statement) 1. Todas las instrucciones de seguridad y operación deberán ser leídas antes de que el aparato eléctrico sea operado. 2. Las instrucciones de seguridad y operación deberán ser guardadas para referencia futura. 3.
- Page 4 Trademarks Used in this Manual Trademarks Used in this Manual Black Box and the Double Diamond logo are registered trademarks, and ServReach is a trademark, of BB Technologies, Inc. UNIX is a registered trademark of American Telephone & Telegraph Company.
-
Page 5: Table Of Contents
Table of Contents Table of Contents Chapter Page 1. Specifications ..................................7 2. Overview ..................................8 2.1 Introduction ................................8 2.2 Features ...................................8 2.3 Terminology ................................8 2.4 What’s Included ................................8 2.5 Hardware Description ...............................9 2.5.1 Side 1 Panel ..............................9 2.5.2 Side 2 Panel ..............................9 2.6 Client Computer Operating System .........................10 3. - Page 6 Page 7.6 Keyboard Key Sequences ............................26 7.7 Synchronizing Mouse Pointers ..........................27 7.8 Power Cycle ................................29 7.9 Black Box Logo Menu Features ..........................29 7.10 Full Screen Mode ..............................31 7.11 Disconnecting the Remote Session .........................31 8. Troubleshooting ................................32 8.1 Safe Mode ................................32 8.2 Restoring Factory Defaults............................33...
-
Page 7: Specifications
Chapter 1: Specifications 1. Specifications Operating Systems: Host computer: Windows 98, Me, and higher; Novell ; Linux ; Mac ; and Sun Solaris ® ™ ® ® ® ® Client computer: Windows 2000, XP, or 2003 Server; Windows Vista , with Internet Explorer 6.0 or higher, Firefox 3, ®... -
Page 8: Overview
Chapter 2: Overview 2. Overview 2.1 Introduction The ServReach KVMCube (KVIP1001A) extends your keyboard, video, and mouse (KVM) from any computer or server over ™ TCP/IP via a LAN, a WAN, or an Internet connection. Control, monitor, and manage your servers from wherever you are, inside or outside the organization. -
Page 9: Hardware Description
Chapter 2: Overview 2.5 Hardware Description 2.5.1 Side 1 Panel Figure 2-1 illustrates the side panel of the KVMCube. Table 2-1 describes its components. Figure 2-1. KVMCube side 1 panel. Table 2-1. Side-panel components. Number Component Function 26-pin connector Links to the target server via a USB/video cable (included) 2.5.2 Side 2 Panel Figure 2-2 illustrates the other side panel of the KVMCube. -
Page 10: Client Computer Operating System
Chapter 2: Overview Table 2-2. Side-panel components. Number Component Function RJ-45 connector Links to the PoE-enabled network switch via a network cable (not included) LED indicator Lights green when the KVMCube is connected to a PoE network switch LED indicator Lights green when the KVM Cube target server connected to this KVMCube is being accessed 4-prong receptacle... -
Page 11: Installation
Chapter 3: Installation 3. Installation 3.1 Connecting the KVMCube to a Rack The KVMCube comes with a versatile bracket in two sections (see Figure 3-1). The bracket can be connected to the KVMCube and then mounted on a rack in many different ways. •... - Page 12 Chapter 3: Installation Screw the bracket sections together with the three longer round-headed screws Figure 3-2. Connecting the bracket sections together. The figure below illustrates a possible application of the bracket. Connect to rack here This section can be rotated Screw the two shorter flat- to a convenient angle.
-
Page 13: Connecting The Kvmcube To The Network
Chapter 3: Installation 3.2 Connecting the KVMCube to the Network If your network switch supports PoE (Power over Ethernet), KVMCubes can receive power via the network cable. Alternatively KVMCubes can receive power from the optional power adapter. To connect the KVMCube: 1. -
Page 14: Configuration
Chapter 4: Configuration 4. Configuration 4.1 Initial Settings—Default IP Address This section provides instructions for setting the IP address for the KVMCube. By default, the KVMCube boots with an automatically assigned IP address from a Dynamic Host Configuration Protocol (DHCP) server on the network. -
Page 15: Logging Into The Web Interface
When first connecting to the KVMCube’s https configuration page, two browser security warnings appear. Click “Yes” to pro- ceed. The first warning disappears upon the first KVMCube client installation, when Black Box’s root certificate is installed. 724-746-5500 | blackbox.com Page 15... -
Page 16: System Configuration
Enable Centralized Management—Check this option to allow the KVMCube unit to be remotely managed by Black Box’s KVManager system. When managed by the KVManager, only Network Configuration and Restore Factory Settings are available from the KVMCube configuration page. -
Page 17: Network > Snmp Settings
Chapter 6: System Configuration 6.2 Network > SNMP settings From the menu click SNMP settings. The following appears: Figure 6-1. SNMP settings. From this page, you can activate or deactivate SNMP logging. Enable traps—Check to enable SNMP traps of KVMCube events and operation. Community—Type the SNMP community. -
Page 18: Adding A User
Chapter 6: System Configuration On this page, an administrator creates and edits users. There are three levels of user access: • Administrator • User Administrator An administrator has unrestricted access to all windows and settings and can “take over” any active session (explained in Section 7.1). -
Page 19: Blocking A User
Chapter 6: System Configuration 6.3.4 Blocking a User An alternative to deleting a user is blocking a user. This means that the user’s name and password are stored, but the user is unable to access the system. Check Block to block a user. Uncheck Block to allow the user access. 6.4 Security >... -
Page 20: Security > Ssl Certificate
6.6 Maintenance > Firmware Upgrade Upgrade the KVMCube firmware to take advantage of new features. Download the firmware from Black Box’s FTP site, ftp.blackbox.com. Save the firmware file on the client computer. From the menu select “Firmware Upgrade.” The Firmware Upgrade screen appears (see Figure 6-5). -
Page 21: Restore Factory Settings
Chapter 6: System Configuration 1. Locate and upload the firmware file. 2. Verify the current and uploaded version of the firmware. 3. Click “Start Upgrade.” The upgrade starts. On completion, click “Reboot.” The unit reboots. After about 30 seconds, the Login page appears. -
Page 22: Starting A Remote Session
(both lower case). On first connection, install the Black Box certificate and ActiveX control. You must log in as an administrator to your computer to install the ActiveX control. Once the ActiveX control is installed, all types of users can log in. -
Page 23: Taking Over A Busy Remote Session
Chapter 7: Starting a Remote Session 7.1 Taking Over a Busy Remote Session When connecting to a busy target server, you will get a popup window stating that you are connected to a share session. Figure 7-2. Busy remote session options. Choose “OK”... -
Page 24: Adjusting The Video Settings
Chapter 7: Starting a Remote Session Bandwidth Choose from the following options: •Adaptive—Automatically adapts to the best compression and colors according to the network conditions. • Fixed: - Low—Select low for high compression and 16 colors. - Medium—Select medium for medium compression and 256 colors. Medium is recommended when using a standard Internet connection. -
Page 25: Performance
Chapter 7: Starting a Remote Session Figure 7-4. Video Adjustment screen. Brightness /Contrast—Use the scales to adjust the brightness and contrast of the displayed image. Move the sliders to change the displayed image. Click in the area of the sliders for fine tuning. For the following controls, choose the appropriate measurement. -
Page 26: Keyboard Key Sequences
Chapter 7: Starting a Remote Session 7.6 Keyboard Key Sequences Click . A list of defined keyboard sequences appears. When clicked, these transmit directly to the target server, and will not affect the client computer. For example, select Ctrl-Alt-Del to send this three-key sequence to the target server to initiate its shutdown/login process. To add a keyboard sequence: Click “Add/Remove.”... -
Page 27: Synchronizing Mouse Pointers
Chapter 7: Starting a Remote Session Figure 7-6. Add Special Key box. 2. Give the key sequence a name in the Label box. 3. Click “Start Recording.” 4. Press the desired keys. The keys appear in the area provided. 5. Click “Stop Recording.” 6. - Page 28 Chapter 7: Starting a Remote Session Relative Mouse position—If the operating system on the target server is Windows 98, Linux, Novell, UNIX , or Sun, then select ® Relative Mouse position. The Operating System menu appears (see Figure 7-7). Figure 7-7. Mouse Settings (USB) box. 1.
-
Page 29: Power Cycle
Chapter 7: Starting a Remote Session 7.8 Power Cycle Where a Black Box Power Reboot Pod is connected to the Serial port of the ServReach Cube via an optional serial cable, you can power manage the Target server as follows: From the Toolbar, click . - Page 30 Chapter 7: Starting a Remote Session Virtual Media With Virtual Media, you can mount virtually onto the target server removable mass storage devices connected to the client computer. This includes: • Floppy drive • CD-ROM • DVD-ROM • ISO image of CD/DVD •...
-
Page 31: Full Screen Mode
Chapter 7: Starting a Remote Session Mounting an ISO file An ISO image (.iso) is a disk image of an ISO 9660 file system, and refers to any optical disc image, even a UDF image. In addition to the data files in the ISO image, it also contains all the file system metadata, including boot code, structures, and attributes. All this information is contained in a single file. -
Page 32: Troubleshooting
Chapter 8: Troubleshooting 8. Troubleshooting 8.1 Safe Mode From the Safe mode you can: Restore factory defaults—When you cannot access the system for example, if you have forgotten the username or password, restore factory defaults from the Safe mode. (Section 6.7 explains how to restore factory settings from the Web interface). Restore the device firmware—... -
Page 33: Restoring Factory Defaults
Chapter 8: Troubleshooting Figure 8-2. Safe mode menu. 8.2 Restoring Factory Defaults To restore factory defaults: 1. From the menu, choose “Restore Factory Settings.” A warning appears (see Figure 8-3). Figure 8-3. First warning. 2. Click . A further warning appears (see Figure 8-4). Figure 8-4. -
Page 34: Restoring The Device Firmware
4. Click “Reboot” to restart the unit. 8.3 Restoring the Device Firmware Contact Black Box Technical Support at info@blackbox.com to receive the Upgrade firmware required to restore the device firm- ware. Save the Upgrade firmware on the hard disk of a computer connected to the network. -
Page 35: Shipping And Packaging
• Package it carefully. We recommend that you use the original container. • If you are returning the unit, include everything you received with it. Before you ship a unit back to Black Box for repair or return, contact us to get a Return Authorization (RA) number. - Page 36 About Black Box Black Box Network Services is your source for more than 118,000 networking and infrastructure products. You’ll find everything from cabinets and racks and power and surge protection products to media converters and Ethernet switches all supported by free, live 24/7 Tech support available in 30 seconds or less.
Need help?
Do you have a question about the ServReach KVMCube and is the answer not in the manual?
Questions and answers