Table of Contents
Advertisement
Quick Links
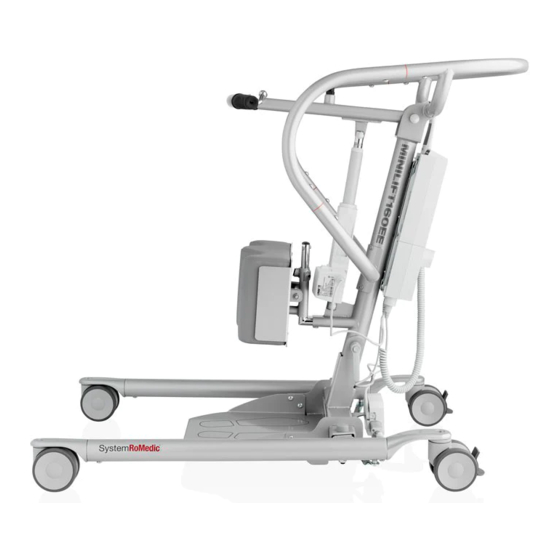
MiniLift160EE/MiniLift160EM
SystemRoMedic
TM
3
Manual nr: 450 ver. 10 151210
4
SWL: 160 kg/350 lbs
REV.
DESCRIPTION
CREATED
STATUS
SCALE
1:20
This drawing and any information or descriptive matter set out hereon are the confidential a
and must not be disclosed, loaned, copied or used for manufacturing, tendering or any oth
DATE
60300010
60300011
60300012
60300013
NAME
DATE
TITLE
MiniLift 1
2015-03-13
Released
PROJECTION
SIZE
DWG. NO.
9000341
A3
MATERIAL:
Material <no
MATERIAL SPECIFICATIO
38130.55
WEIGHT:
Advertisement
Table of Contents

Related Manuals for Handicare SystemRoMedic MiniLift160EE


Summary of Contents for Handicare SystemRoMedic MiniLift160EE
- Page 1 REV. DESCRIPTION DATE MiniLift160EE/MiniLift160EM SystemRoMedic 60300010 60300011 60300012 60300013 NAME DATE TITLE MiniLift 1 2015-03-13 CREATED Released STATUS SCALE PROJECTION SIZE DWG. NO. 9000341 1:20 MATERIAL: Material <no MATERIAL SPECIFICATIO 38130.55 WEIGHT: This drawing and any information or descriptive matter set out hereon are the confidential a and must not be disclosed, loaned, copied or used for manufacturing, tendering or any oth SWL: 160 kg/350 lbs Manual nr: 450 ver.
-
Page 2: Safety Information
SHEET 1 OF 1 This drawing and any information or descriptive matter set out hereon are the confidential and copyright property of Handicare and must not be disclosed, loaned, copied or used for manufacturing, tendering or any other purpose without their written permission. - Page 3 Assembly Check to ensure that all components are included: Lift unit, control box and battery pack, undercarriage, footplate, leg support, hand control and cord, user manual and charger. The lift is collapsed when delivered. Set up the lift, according to the following instructions (no tools required): 1.
-
Page 4: Final Inspection
Final inspection Inspect the lift for signs of wear and damage. Check all castors and castor brakes. Check all connections and fixtures including screws and bolts. Check the packaging to ensure that there are no loose parts. Check the emergency stop function by activating the emergency stop button, and then pressing either the up or down button. -
Page 5: Using The Product
• Warranty applies only if repairs or alterations are done by an authorized technician. • Using lifting accessories other than those approved by Handicare can entail a risk. • Note the risk of pinching between base and mast when collapsing the lift. -
Page 6: Charging Batteries
The control box and battery have the following features Emergency stop Charging lamps Display showing battery charge level Connection for charger cable Connection for base-width adjustment motor Connection for lift arm actuator Connection for hand control Electrical emergency lowering Handle for lifting battery Charging batteries A tone sounding when using the lift indicates that the battery need recharging. - Page 7 Battery information on the display The battery discharging will be shown in four stages: Battery state 1: The battery is ok, no need for charging (100 - 50 %). Battery state 2: Battery needs charging. (50 - 25 %) Battery state 3: Battery needs charging. (Less than 25 %) A tone sounds when a button is pressed in this battery state.
- Page 8 Hand control Raising/lowering the lift arm Symbol indicate direction of travel. Motion stops as soon as the button is released. Electrical base-width adjustment (EE) Markings on the buttons of the hand control indicate function. Motion stops as soon as the buttons are released. Eva450EML Eva450EEL Manual base-width adjustment (EM)
- Page 9 Instructions for use These instructions must be followed for correct use of MiniLift160. Caution The actuator does not lower the lift arm when the lift is being lowered. This reduces the risk of the user being pinched by the lift arm. To prevent the lift arm from at first catching, and then suddenly fal the lift arm must be loaded throughout the entire lowering procedure, so that it is always supported by the actuator.
- Page 10 Using MiniLift160 Place an appropriately sized ThoraxSling behind and below the user’s hips, (see user manual for ThoraxSling). (1) When the user has placed his/her feet on the footplate, move the lift forward towards the user. Place the lift as close as possible to the user. Take care to ensure that the user’s shins are resting securely against the leg support, and then adjust (2) the leg support so that it does not press against the user’s kneecaps (about 2 cm lower).
- Page 11 Raise the locking handle and draw the boom back, so that the lift straps on the sling are stretched, and then lower the locking handle back into position. (6) Instruct the user to lean back and allow himself/herself to be supported behind the back during raising.
-
Page 12: Troubleshooting
Trouble-shooting If the lift adjustment cannot be activated, check the following: - That the emergency stop button is not activated. - That all cables are properly and securely connected. Pull out the contact and plug it in again firmly. - That battery charging is not in progress. - That the battery is charged. -
Page 13: Maintenance
1060 hPa +50 °C -10 °C 700 hPa Service agreements Handicare offers the possibility of service agreements for maintenance and regular testing of your mobile lift. Contact your local Handicare representative. SystemRoMedic M A N U A L... - Page 14 Symbols Read user manual May not be discarded in domestic waste The product fulfills the demands stated in the MDD 93/42/EEC Type B, according to the degree of protection against electric shock. The device is intended for indoor use. Class lI equipment Always Read The User Manual This equipment/system is intended for use by healthcare professionals only.
-
Page 15: Technical Information
Technical Information Lifting speed: 1.4“ /s, 35 mm/s without load. Batteries: Two 12V, 2.9 Ah valve-regulated, sealed, lead accumulator (gel-type batteries) Charger: 400 m A Motor: DC 24V, 5,5 Amp. IP X4. Operationtime: 10% at maximum continous operation of 2 minutes, maximum 5 cycles per minute.
Need help?
Do you have a question about the SystemRoMedic MiniLift160EE and is the answer not in the manual?
Questions and answers
We have an electronic minilift for my grandmother. we have been using it for about a week. on the digital screen on the bottom of the machine there is a picture of a wrench and right underneath it it says service. We do not know what this means or what we can do about it. We cannot have this machine stop working as my grandmother needs it to move everyday. Please help me understand how we can handle this and what it means.
The wrench icon and "service" message on the digital screen of the Handicare MiniLift160EE indicate that the lift requires maintenance or service.
This answer is automatically generated